 Skip to content
How to Make Leak-Proof Water & Food Bags
Leak-proof water and food bags look simple on the surface. A bag holds liquid. It should not leak. But in real manufacturing, that result is rarely created by one “good material” or one “good zipper.” It comes from a chain of decisions that all need to match: use scenario, material behavior, seam method, closure type, pattern shape, operator settings, and QC test standards. If even one part is weak, the bag may pass a visual check and still fail in real life—inside a travel suitcase, in a delivery rider’s box, or in a customer’s lunch bag after repeated folding and washing.
This is why often get confused during sourcing. One supplier says “waterproof.” Another says “leak-proof.” A third sends a nice sample that performs well in the first week but starts leaking at the seam corners after repeated use. The problem is not always bad intent. In many cases, it is a mismatch between what the expects and what the factory actually engineered the bag to do.
To make leak-proof water and food bags, manufacturers must build a complete leak-control system—not just choose a water-resistant material. The bag must match the use case (food storage, cooler transport, wet-item travel, hydration), then use compatible liner materials, seam sealing methods (heat sealing, RF welding, or sewn-and-taped), and closure structures that work together. Reliable production also requires food-contact compliance checks, sample-stage leak testing, and mass-production QC standards under filled conditions. The best results come from factories that can explain their process, define test methods clearly, and control sample-to-bulk consistency.
For B2B , this topic matters far beyond product performance. Leak-proof failures create returns, complaints, replacement costs, and brand trust damage. A low unit price can become expensive very quickly if the product leaks after launch. That is why this guide is written from a practical sourcing angle. It is not just about “what works in theory.” It is about what helps you make better decisions when you are comparing factories, reviewing samples, planning testing, or developing a custom OEM / ODM / private label bag project.
In this guide, we will break down how leak-proof water and food bags are made, what usually goes wrong, how to choose the right material-function combination, when sealing methods matter more than fabric, which closure designs are worth the cost, and what testing/QC standards should be agreed before bulk production starts.
What Is a Leak-Proof Water & Food Bag, and What Types of Bags Need It Most?
A leak-proof water & food bag is a bag engineered to prevent liquid or greasy contents from escaping during expected use conditions, not just to resist splashes. It is different from water-resistant and waterproof claims. The highest-need categories include lunch coolers, food delivery bags, reusable food storage bags, hydration pouches, and wet/dry travel bags, where leakage causes hygiene issues, contamination, and customer complaints.
The easiest mistake in this category is treating “leak-proof,” “water-resistant,” and “waterproof” as the same thing. They are not. In sourcing conversations, these words are often used loosely, and that creates problems later.
A water-resistant bag usually means it can handle light splashes or short exposure to moisture. The outer shell may repel water, but that says nothing about whether the seams, liner, or closure can contain liquid from the inside.
A waterproof bag often refers to resistance against external water entry under defined conditions. This is common in outdoor gear marketing. But even a bag marketed as waterproof for rain may still leak internally if soup, melted ice, or oily sauce sits against a stitched seam for hours.
A leak-proof bag, in practical B2B terms, is a bag designed so that internal liquid (or semi-liquid) does not escape through seams, corners, liner weak points, or closures during the expected use scenario. That expected use scenario must be defined. A reusable food pouch used flat in a refrigerator is different from an insulated food delivery bag bouncing on a motorbike. A travel wet bag packed under compression in luggage is different from a hydration reservoir used during running.
This is why the first real question is not “What material do you use?” It is: What exactly must the bag survive?
Why leak-proof bags are essential in outdoor, travel, and food markets
In outdoor markets, leak-proof performance matters because the bag is not used gently. It is carried, dropped, squeezed, tilted, and exposed to temperature swings. If the bag stores water, ice, melted ice, or wet gear, even a small seam weakness can become a constant complaint. Outdoor users also tend to forgive cosmetic wear but not functional failure. A scratched bag can still be “rugged.” A leaking bag feels defective.
In travel markets, leakage has a second consequence: contamination of other packed items. A leaking toiletry pouch or wet-item bag can damage clothing, electronics accessories, cosmetics, or documents. In other words, the product failure spreads to the customer’s other belongings. That makes complaints more emotional and often more severe. The same is true for baby-care bags and wet/dry compartments in family travel products.
In food markets, the risk is even more direct. Leakage from soup, sauce, oil, or condensation creates hygiene concerns, cleaning inconvenience, odor, and visible mess. For food delivery brands or private label retailers, customers often judge the brand, not the bag. So a leak-proof claim is not a small technical feature. It is a brand-protection feature.
What types of bags need leak-proof performance most?
The demand shows up in multiple product categories:
- Lunch cooler bags (melted ice, condensation, spills)
- Insulated food delivery bags (movement, heat/cold exposure, loaded conditions)
- Reusable food storage bags (direct food contact, repeated opening/closing, washing)
- Hydration pouches / water carry bags (pressure/squeeze behavior)
- Wet/dry bags for travel, baby products, swim gear, gym use
- Picnic and outdoor coolers with liner containment requirements
- Meal prep bags and portable food containers with liner systems
These categories also differ in what “leak-proof” means. A cooler bag liner may only need to contain melted ice and minor spills. A reusable food storage pouch may need repeated seal integrity under food oils and freezer cycles. A hydration bag may need pressure resistance and valve/port sealing.
Define failure modes before quoting
A very practical step for : define the failure mode before asking for a quote. If you simply ask for “leak-proof bag,” different factories will imagine different performance levels.
Useful failure modes to define include:
- seam leakage under static fill
- corner leakage after folding
- zipper/closure seepage when tilted
- grease seepage
- liner puncture
- leakage after repeated use/wash cycles
This helps the factory propose a real structure instead of guessing. It also makes your sample evaluation much faster because both sides know what “pass” and “fail” mean.
If your team is developing a custom leak-proof product line and wants a practical review of bag type, use scenario, and likely risk points before sampling, you can send your target use details to info@jundongfactory.com for a feasibility discussion.
Why Do Water & Food Bags Leak? What Are the Most Common Failure Points in Factory Production?
Water and food bags usually leak because of system mismatch, not one single defect. Common failure points include stitched needle holes, unstable welded seams, corner stress concentration, liner puncture, and closure leakage. Many products pass visual inspection but fail in real use because the bag was not tested under filled, tilted, or repeated-use conditions. Sample-to-bulk drift is also a major risk if process settings are not controlled.
When sees leakage in a finished bag, the first reaction is often: “The material is bad.” Sometimes that is true. But in many projects, leakage happens even when the base material is acceptable. The bigger problem is usually that one part of the bag system was not matched to the rest.
A leak-proof bag can fail through at least five different paths:
- Seam leakage
- Closure leakage
- Corner stress leakage
- Liner damage (puncture / crack / delamination)
- Assembly inconsistency (sample vs bulk)
Understanding which path caused failure is what separates useful factory communication from endless back-and-forth.
1) Seam leakage: the most common hidden cause
This is the classic problem. If a bag is sewn, every needle penetration creates a potential leak path. That does not automatically mean sewn bags are bad. It means the seam must be engineered for the liquid exposure level. In some applications, a sewn structure with a liner may be enough. In others, it needs tape sealing, welding, or a separate containment liner system.
Even in welded constructions, seams can leak if the process is inconsistent. A seam that looks acceptable may have:
- incomplete fusion
- uneven pressure
- too little overlap
- overheat damage (brittle seam)
- poor corner transitions
This is why visual checking alone is not enough.
2) Closure leakage: the “good seam, bad opening” problem
Some projects focus heavily on liner and seam sealing, but the actual leak path is the opening. A bag may have a strong sealed body but a closure that cannot contain liquid under tilt, squeeze, or movement. This is common when request a convenient zipper style that is not designed for liquid containment, then expect true leak-proof performance.
The solution is not “always use a more expensive closure.” The solution is to define:
- what liquid is inside (water, oil, soup, melted ice, sauce)
- whether the bag is laid flat or upright
- whether it is squeezed/compressed
- how long the liquid remains inside
- whether repeated opening is required
Closure performance is a use-case decision.
3) Corner stress concentration: where many samples fail later
Corners are often the weakest area in leak-proof bag construction. Why? Because corners combine:
- geometry change
- fold memory
- seam overlap transitions
- repeated stress from filling and handling
A sample may survive simple testing, but after repeated use the corners can become the first leakage point. This is especially true in bags with sharp geometry, stiff materials, or inconsistent seam width at the turn.
This is why good leak-proof design often uses:
- smoother corner radii
- stress relief design
- controlled overlap and trimming
- reinforcement layout around high-stress zones
4) Liner damage: leakage caused by puncture or cracking, not the seam
sometimes assume leakage means a seam problem, but the liner itself may be the issue. Food and water bags can fail because the liner:
- was too thin for the use case
- cracked after low-temperature folding
- was punctured by hard contents or internal accessories
- delaminated in multi-layer construction
- degraded under repeated cleaning or exposure to oils
This is why material-function matching matters more than choosing the cheapest “waterproof-looking” film. A liner that works for occasional dry storage may fail quickly in a reusable food application.
5) Sample-to-bulk drift: why the bulk order leaks even though the sample passed
This is one of the most painful sourcing problems because it damages trust fast. The sample was good. The PO was placed. Bulk arrives. Leakage starts. Why?
Common reasons include:
- changed material batch or thickness
- changed supplier for liner or closure
- different machine settings in bulk
- inexperienced operators on production line
- weak process control at corners and seam overlap
- no in-line leak testing plan during production
This is not always fraud. Sometimes the factory simply lacks a stable process window for leak-proof products.
A more useful way to investigate leakage
Instead of asking “Why is it leaking?” ask a sequence of process questions:
- Where is the leak path? (seam / corner / closure / liner)
- When does it happen? (static / tilt / squeeze / after cycles / after temperature change)
- What was inside? (water / oil / hot food / cold condensation)
- How long was the test?
- Was it sample or bulk?
- Did material, closure, or production settings change?
This approach saves time and helps both and factory fix the right problem faster.
For B2B projects, the goal is not just to “repair a leaking sample.” It is to build a structure and process that remains stable in bulk production. That requires clear specs, repeatable process control, and agreed testing before shipment.
Which Materials Are Best for Leak-Proof Water & Food Bags? (TPU vs PEVA vs EVA vs PVC vs Silicone)
There is no single “best” material for all leak-proof water and food bags. The right choice depends on function, use conditions, sealing method, compliance needs, and price target. should evaluate materials by sealability, flexibility, puncture resistance, grease resistance, low-temperature behavior, odor retention, and cleanability, then match those properties to the actual product use scenario.
This is one of the most searched questions and one of the most misunderstood ones. often ask: “Which material is best for leak-proof bags?” The honest answer is: best for what?
A material can be excellent in one project and a poor choice in another. For example, a film that seals well for a cost-sensitive liner may not hold up well to repeated folding in a premium reusable food pouch. A soft material that feels nice in hand may be more vulnerable to puncture in a travel or outdoor application. A material with good liquid barrier behavior may still create production issues if it does not match the chosen seam process.
So instead of choosing materials by trend or by a single claim, use a material vs function framework.
How materials influence leak-proof performance (Material vs Function)
Leak-proof performance is not created by “waterproof material” alone. It is created by how the material behaves in the full bag system. The key properties to evaluate include:
1) Sealability / weldability
Can the material be reliably joined using the process your factory will use (heat sealing, RF welding, etc.)? A material may have good barrier performance but poor process compatibility, which leads to inconsistent seams.
2) Flexibility and fold behavior
If the bag is repeatedly folded, squeezed, or packed under compression, the material must tolerate flex cycles without cracking or stress-whitening at critical areas.
3) Puncture and abrasion resistance
Food and travel applications often involve utensils, sharp edges, zippers, hard containers, or rough handling. Liner puncture is a common real-life leak cause.
4) Low-temperature performance
Cooler and frozen-food use can change how a material behaves. Some films become stiffer and more fragile in cold conditions.
5) Grease resistance and stain/odor behavior
For food bags, water is not the only challenge. Oily foods and sauces can expose weaknesses in cleanability, smell retention, and long-term appearance.
6) Cleanability and user maintenance
A technically leak-proof material that is hard to clean may still fail commercially because customers stop using it or leave negative reviews.
7) Compliance pathway
For food-contact applications, the material decision is linked to documentation and market access. In the U.S., food contact substances are regulated under FDA frameworks and applicable regulations/notifications; in the EU, food contact materials are governed by a harmonized framework including Regulation (EC) No 1935/2004.
TPU vs PEVA vs EVA vs PVC vs Silicone (practical sourcing view)
Below is a practical, -oriented view. Exact suitability depends on formulation, thickness, and construction.
TPU (Thermoplastic Polyurethane)
Often chosen for projects needing a more premium feel, flexibility, and durability in repeated-use applications. TPU is commonly discussed in welded flexible products and can be a strong option when the factory has experience with it. It may cost more than entry-level liner materials, so should use it where performance needs justify the spend.
Best fit examples:
- premium reusable leak-proof pouches
- outdoor/travel wet containment products
- applications needing better flexibility and durability
Watch-outs:
- cost
- processing consistency
- need for factory experience with the chosen sealing method
PEVA
Common in many cooler liners and cost-sensitive projects. It can be a practical choice for many insulated bags where the main requirement is containing condensation or melted ice under normal use. But PEVA is not a shortcut to guaranteed leak-proof performance. If seam design and construction are weak, the bag will still leak.
Best fit examples:
- lunch cooler liners
- mid/entry-level insulated food bags
- projects with tighter cost targets
Watch-outs:
- thickness selection
- puncture risk in rough use
- process quality in seam sealing or assembly
EVA
Used in a wide range of soft goods and can be relevant depending on product structure. should confirm whether EVA is being used as a liner film, foam-related component, or structural material in the bag system. “EVA bag” can mean different things in the market, so RFQ language should be specific.
Best fit examples:
- certain soft structured or foam-based bag components
- applications where softness or cushioning matters
Watch-outs:
- unclear terminology in quotes
- mismatch between expected leak-proof level and actual construction method
PVC
PVC has historically been widely used in many welded flexible products because of process compatibility in some welding methods. Technical suitability and cost can make it attractive for certain projects, but decisions increasingly involve market restrictions, brand policy, and compliance expectations. Use-case, destination market, and customer requirements matter a lot here.
Best fit examples:
- some industrial or non-direct-food-contact leak containment products (depending on market requirements)
- projects where process capability is strong and market acceptance is clear
Watch-outs:
- market-specific restrictions or brand policies
- odor perception and user acceptance in some categories
- compliance/documentation expectations
Silicone
Often used in reusable food storage bag categories, especially where repeated opening, washing, and food contact are key user expectations. Silicone products are usually positioned differently from sewn bag categories and may require different tooling and manufacturing pathways.
Best fit examples:
- reusable food storage pouches
- kitchen-focused direct food-contact products
Watch-outs:
- cost and tooling considerations
- manufacturing route may differ from traditional bag factory capability
- project economics at low MOQ
Which material is best for outdoor, travel, and food use cases?
Instead of asking “What is best overall,” ask:
- Which material best matches my liquid type?
- Which material best matches my seam process?
- Which material best matches my target price and market compliance?
- Which material best matches expected reuse cycles?
That is how experienced reduce sampling loops.
If you are comparing multiple material options and want a structured recommendation (material + seam process + closure direction) for your target market, Jundong can review your use scenario before sampling. Contact: info@jundongfactory.com.
What Food-Safe Standards Do Manufacturers Need to Check? (FDA, EU, and -Specific Requirements)
For leak-proof food bags, “food-safe” is not just a marketing word. Manufacturers and need to define the food-contact scope, destination market, and required documentation. In the U.S., food-contact materials are regulated through FDA frameworks and applicable authorizations; in the EU, food contact materials must comply with the framework regulation and general safety/inertness principles. Documentation and testing scope should be confirmed before mass production.
This is where many sourcing conversations become vague very quickly. A supplier says “food grade.” asks for “FDA.” Another asks for “EU test report.” Then both sides assume they are discussing the same thing. They often are not.
The phrase “food-safe” sounds simple, but in B2B manufacturing it usually includes several separate questions:
- Is the material intended for direct food contact or only indirect contact?
- What food types are involved (aqueous, acidic, fatty/oily, dry)?
- What use conditions apply (cold storage, room temperature, hot fill, repeated use)?
- What market is the product sold in (U.S., EU, other)?
- What documentation does the actually require before shipment?
If these questions are not defined early, factories may quote based on assumptions that do not match the final compliance needs.
U.S. framework (FDA): what should understand in practical terms
For U.S.-bound food-contact products, often say “We need FDA material.” In practice, this needs to be converted into a clear compliance scope. FDA maintains food-contact substance and food-packaging related frameworks, including information on food contact substances (FCS), notifications, and applicable inventories/regulatory pathways. FDA also explains that food contact substances used as food additives generally require authorization before marketing for that use.
From a sourcing standpoint, the key lesson is not to rely only on a generic phrase like “FDA compliant.” Instead, ask:
- Which material/component is claimed for food contact?
- Is the claim for direct food contact or a limited use condition?
- What supporting documents are available?
- Are there restrictions tied to food type, temperature, or duration?
- Is the documentation tied to a specific supplier/source?
This is especially important for multi-component bags, where the outer fabric, inner liner, zipper, printing, and bonding materials may not all share the same compliance status for the same use conditions.
EU framework: general safety and inertness principles matter
For products entering EU markets, food contact materials are governed by a harmonized legal framework under Regulation (EC) No 1935/2004, which sets general principles of safety and inertness for food contact materials. The European Commission’s food contact materials pages also emphasize that constituents transferring from materials into food may affect safety and food quality (taste, smell, appearance).
For B2B , this means a practical shift in mindset: compliance is not just “pass one test once.” It is a combination of:
- material selection
- intended use
- manufacturing consistency
- documentation quality
- supplier traceability (where relevant)
What documents are commonly requested?
Different request different sets, but common items include:
- material declaration
- compliance statement / declaration of conformity (where applicable)
- test reports from third-party labs (based on requested scope)
- migration testing results (when required by product/use scenario)
- component-level information for liners, closures, prints, or accessories
should also specify whether the request is for:
- initial sample approval
- pre-production approval
- shipment approval
- annual/periodic compliance file updates
This avoids conflict later when the factory provides one report but the expected a broader documentation package.
Who should confirm the compliance scope?
A very common sourcing mistake is expecting the factory alone to define the legal compliance strategy. Factories play a major role, but they are not the only party responsible. The final compliance scope is usually shared across:
- factory (materials/process and available documentation)
- third-party lab (test execution and report scope)
- importer / distributor (market-entry responsibilities)
- brand compliance / legal team (claim language and internal standards)
For example, a factory may provide material-level documents for a liner, but the brand may still require finished-product testing under specific food simulants or conditions. If this is not defined before sampling or PP approval, lead time and cost can increase late in the project.
Best practice for (simple but powerful)
Before placing a bulk order for a food-contact leak-proof bag, define these five items in writing:
- Destination market(s)
- Direct or indirect food contact scope
- Use conditions (temperature, duration, repeated use)
- Required documentation list
- When documents are due (sample, PP, pre-shipment)
This one step can prevent a lot of confusion, especially in custom OEM/ODM projects with multiple components.
How Do You Make Leak-Proof Seams? Heat Sealing vs RF Welding vs Stitching + Tape
Leak-proof seams are made by matching the material with the right joining process and controlling process parameters consistently. Common methods include heat sealing, RF (high-frequency) welding, and stitching plus seam tape. Each method has different strengths, costs, and material compatibility. Seam performance depends heavily on overlap width, heat/pressure/time settings, corner design, and production consistency—not just the machine type.
If leak-proof bag performance had one “center of gravity,” it would be the seam. often spend a lot of time comparing outer fabrics and closures, but the seam is where many products win or fail.
A bag body can use a good liner and still leak if the seam is weak. That is why the question is not “Which seam method is best?” The better question is: Which seam method is best for this material, this bag type, this leak risk level, and this cost target?
Method 1: Heat sealing (common and effective when matched correctly)
Heat sealing is widely used to join thermoplastic films in packaging and bag-making contexts. In practical manufacturing terms, heat and pressure are applied to compatible material layers so they fuse and form a seal. It is a very common method in flexible packaging applications.
For leak-proof bag applications, heat sealing can be a strong option when:
- the selected liner material is compatible
- seal width and overlap are designed properly
- machine settings are controlled
- corners and transitions are handled carefully
Common mistake: assuming any “heat-sealed” seam is automatically leak-proof. In reality, heat sealing quality depends on process control. A narrow, overheated, under-pressed, or unevenly cooled seal may fail even if the material itself is suitable.
Method 2: RF welding (high-frequency welding)
RF welding (also called high-frequency welding or dielectric sealing in many contexts) is used to join certain thermoplastic materials by generating heat within the material under high-frequency electromagnetic energy. Industry guides and technical references note that RF/HF welding suitability depends on material properties; not all thermoplastics respond equally well to the process.
Why consider RF welding:
- consistent seam appearance (when process is mature)
- strong sealed joints for suitable materials
- good fit for some watertight/airtight flexible products
- no needle holes (compared with stitching)
But RF welding is not a universal answer. It can involve:
- higher setup/tooling complexity
- material compatibility limits
- process expertise requirements
- cost implications at smaller order volumes
This is why asking a factory “Do you have RF welding?” is not enough. Ask instead:
- Which materials do you RF weld in-house regularly?
- What bag categories are you producing with this method?
- How do you control corners and overlap consistency?
- What leak test do you run after welding?
Method 3: Stitching + seam tape (or layered containment design)
In some bag categories, the product may use stitched construction and then add seam tape or an internal containment liner. This approach can work depending on the leak-proof level required and the product design. It can also help preserve certain bag shapes or styling that are harder to achieve with fully welded construction.
However, stitched-and-taped solutions need honest positioning. If the use case involves heavy liquid exposure, repeated pressure, or aggressive movement, a partially sealed construction may not perform like a fully welded containment system.
The key is matching construction to real use, not to a catalog claim.
Process parameters matter more than many realize
Even with the right machine and right material, seams fail when process parameters are poorly controlled. The most common variables include:
- Overlap width: too narrow can weaken seal integrity
- Temperature (for heat sealing)
- Pressure
- Dwell time (how long energy/heat is applied)
- Cooling time (seals can be weak if moved too early)
- Edge/corner geometry
- Operator consistency
- Material thickness variation
This is where experienced factories differ from trial-and-error factories. A reliable leak-proof bag factory usually has a process window and repeatable setup method, not just “machine on, test, and adjust by feel.”
When is welded seam construction worth the extra cost?
Not every project needs welded seams. But the cost is often justified when:
- the bag must contain free liquid
- the bag is used under movement / tilt / compression
- leakage creates high complaint risk (food delivery, travel contamination)
- the brand claim explicitly says leak-proof
- the project expects repeated use and stable performance
In those situations, spending more on seam engineering may save much more in returns and replacement cost after launch.
If you are comparing seam methods for a custom project and want a practical recommendation based on your material, bag type, and target budget, send your concept details to info@jundongfactory.com and ask for a seam-construction feasibility review.
Which Closures Are Best for Leak-Proof Food and Water Bags? (Zipper, Roll-Top, Press Seal, Slide Seal, Cap/Valve)
The best closure depends on how the bag is used, not just on price or convenience. A closure must match the liquid type, fill volume, pressure risk, opening frequency, and seam design. Common options include zippers, roll-tops, press seals, slide seals, and cap/valve systems. Even a strong “leak-proof closure” can fail if the bag structure and seams are not designed to support it.
Closures are where user experience and leak-proof engineering collide. want a closure that is easy to open, easy to clean, looks good, and costs less. Users want convenience. Factories want manufacturability. The bag still needs to hold liquid. These goals do not always align.
That is why closure selection should be treated as a product engineering decision, not a trimming decision.
The first question: what is the closure trying to do?
Different leak-proof bag categories ask very different things from the closure.
Lunch cooler bags / insulated food bags
In many cases, the closure is not the main liquid containment barrier. The inner liner and construction may contain melted ice or spills, while the outer zipper is mainly for access and insulation retention. But if the design expects the closure area itself to prevent leakage during tilt or compression, the structure must be upgraded accordingly.
Reusable food storage bags
The closure often becomes a primary sealing element. Here, repeated opening/closing, wash cycles, food residue, and user handling become major factors. A closure that seals well in one controlled test may perform poorly after residue buildup or imperfect user alignment.
Hydration or water-carry systems
Caps, valves, and specialized closure systems are common because the bag may be squeezed or used under motion. These are more sensitive to pressure and assembly accuracy than a simple storage pouch.
Travel wet bags
The closure may need to contain damp clothing, partial liquid, or accidental spills. User behavior matters a lot: overfilling, compressing in luggage, and mixing hard items around the bag can stress the opening area.
Why closure performance must match seam and structure design
A common sourcing mistake is asking for a “leak-proof zipper” and assuming the job is done. In reality, closure performance depends on the full opening zone design:
- how the closure is attached
- seam transitions at closure ends
- stress concentration near zipper end points
- liner anchoring and reinforcement
- opening width and bending behavior
- how full the bag will be during use
This is why some products leak at the zipper ends even when the zipper itself is not defective. The failure is in the integration, not the component.
Practical closure options (and how to choose)
1) Zipper closures
Widely used for convenience and user familiarity. Good for many bag categories, but not all zippers are suitable for the same leak expectations. should define whether the closure needs to resist:
- splash only
- occasional spill
- tilt leakage
- compression leakage
That performance level changes the design and cost.
2) Roll-top closures
Often used in outdoor and wet-bag contexts. They can provide strong containment when the construction and user operation are correct. But they depend on user behavior—if the user does not roll and secure it properly, leakage risk increases.
Good for:
- outdoor/travel wet containment
- larger openings
- applications where closure simplicity and robustness are preferred over quick access
3) Press seal / pinch seal
Common in reusable food pouches and some storage bags. User-friendly and familiar, but actual leak-proof reliability depends on material stiffness, seal profile design, contamination from food residue, and user closing habits.
4) Slide seal
Adds convenience and can improve closure consistency for some users. It may support private label branding opportunities through customized sliders or pull parts.
5) Cap / valve systems
Used where controlled pouring, dispensing, or hydration functionality is required. These systems can perform well but increase component complexity, assembly control needs, and testing requirements.
How to select the right closure ( checklist)
Before locking a closure, ask:
- What liquid/food is inside?
- Is the bag stored upright, laid flat, or compressed?
- How often is it opened?
- Must users clean residue from the closure?
- Is speed of access more important than maximum containment?
- What is the expected fill level?
- Is the bag reusable, and if so, how many cycles are expected?
These questions often narrow the closure decision faster than comparing parts by catalog photo.
OEM / private label note: custom branding is possible, but function comes first
Custom sliders, zipper pulls, molded logo pieces, and branded closure details can add value. But in leak-proof categories, branding should be added only after the closure system is functionally stable. Otherwise, you risk spending development time on appearance before solving leakage.
A good factory partner will usually guide the project in this order:
- leak-proof function
- usability
- manufacturability
- branding details
That order protects launch quality.
How to Design a Leak-Proof Bag Structure for Real Use (Not Just Lab Samples)?
A leak-proof bag that works in real life must be designed around actual user behavior, not only lab testing. Structure matters as much as material: corner geometry, liner anchoring, stress relief, bottom reinforcement, fill shape, and opening layout all affect leakage risk. The best designs reduce stress concentration, support repeat use, and stay easy to clean, fill, and carry.
A surprising number of leak-proof bags “pass” because the sample test is too simple. The bag is filled carefully, placed upright, checked briefly, and approved. Then real customers use it in ways that the lab never simulated: overfilling, squeezing into a backpack, tossing into a car, storing at an angle, leaving oily food residue near the closure, or folding the bag while still damp. That is when structure design becomes the real difference between a good sample and a durable product.
Start with real use, not ideal use
Designing for real use means asking a few uncomfortable questions early:
- What will users do wrong?
- What part of the bag will be stressed repeatedly?
- Will the bag be overfilled?
- Will it be squeezed in luggage or delivery boxes?
- Will users clean it carefully, or quickly rinse and fold it?
- Will it be used with soup, oil, melted ice, or only dry food with condensation?
These questions matter because a leak-proof structure is not only about containment. It is also about stress management. If the bag shape forces stress into corners or closure ends, the leak path may appear later even when materials and seams were acceptable at the start.
Corner geometry: small detail, big impact
Sharp corners look neat in drawings, but they often create trouble in leak-proof construction. Corners are where material bends, seam overlaps stack up, and stress accumulates during filling and compression.
A more stable leak-proof design often uses:
- rounded internal corners
- smoother seam path transitions
- controlled overlap at turning points
- localized reinforcement where the structure changes direction
This is especially useful in lunch cooler liners, wet bags, and reusable pouches that are frequently folded. In many failure cases, the seam itself is not weak overall; the weakness is concentrated at a corner transition that was not designed for repeated flexing.
Bottom support and panel layout
The bottom area is another common problem zone. Users place weight there, liquid settles there, and shape distortion starts there. A bag that looks fine empty may sag or twist when filled, which changes stress on the seams and closure.
Useful structural design choices include:
- reinforced bottom panel layout
- a liner shape that supports the filled load rather than hanging loosely
- better panel balance so the bag stands more naturally
- internal geometry that limits liquid slosh in larger bags (when relevant)
For food delivery bags and cooler applications, the structure may also need to consider how containers sit inside. If hard food containers press into liner corners or closure zones, leakage risk increases over time.
Liner anchoring and seam integration
Some leak-proof failures are caused by movement between the liner and outer shell. If the inner containment layer shifts too much, stress can concentrate at attachment points or near closure transitions. This is why liner anchoring should be intentional, not just “stitched where convenient.”
Strong structure design looks at:
- where the liner is fixed
- how much movement is allowed
- how the opening edge is supported
- how closure ends are reinforced
- whether the liner is forced into sharp folds during use
The goal is simple: let the bag flex where it should, and protect the leak-control zones from unnecessary deformation.
Design for usability, not only leak resistance
This part is often ignored. A bag can be technically leak-proof and still perform poorly in the market if it is annoying to use. Then customers misuse it, and complaints rise.
Usability details that reduce leak complaints:
- wider opening angle (easier filling, less spill during use)
- cleanable corners (less residue buildup near seams)
- stable standing shape (less tipping and accidental leakage)
- smoother closure alignment (users can close it correctly faster)
- clear fill line or volume guidance (reduces overfill pressure)
This is where good B2B product development becomes more than material selection. It becomes customer behavior design.
Practical design review questions before sampling
Before approving a custom leak-proof bag sample, ask the factory:
- Where are the top 3 expected stress zones?
- Which corners or closure ends need reinforcement?
- How does the bag behave when filled to maximum intended volume?
- What happens when the bag is folded after use?
- Is the liner supported or hanging under load?
- How will users clean residue from the closure area?
Factories that answer these questions clearly are usually thinking like product engineers, not just sample makers.
If you are planning a custom leak-proof bag and want a practical structure review (especially for travel, cooler, food delivery, or wet/dry designs), you can send your dimensions and use case to info@jundongfactory.com for design feasibility feedback.
How Long Does It Take to Develop a Leak-Proof Custom Bag Sample, and What Is the Typical Process?
Leak-proof custom bag development usually takes longer than ordinary sewn bags because it requires material validation, seam/closure testing, and revision rounds. A typical process includes RFQ brief, material selection, structure plan, first sample, leak testing, revisions, PP sample, and bulk production prep. The fastest projects happen when provide complete use-case and compliance requirements at the start.
often ask, “How long will sampling take?” The honest answer is: it depends less on the drawing itself and more on how clearly the leak-proof requirement is defined.
A leak-proof bag is not just a cosmetic development project. It is a performance project. That means the sample stage is not only for shape and logo approval. It is where the team must verify:
- material behavior
- seam method suitability
- closure integration
- leak testing method
- usability under the intended scenario
If these items are left until later, the project may look fast at the beginning and then slow down sharply after the first failures.
Typical OEM / ODM custom sample process (leak-proof category)
Below is a practical B2B flow. Different factories may name stages differently, but the logic is usually similar.
1) Requirement brief (RFQ stage)
The shares the target product concept and requirements. For leak-proof projects, this brief should include:
- use scenario (food storage, cooler transport, wet bag, hydration, etc.)
- liquid/food type (water, soup, oil, sauces, melted ice)
- dimensions and target capacity
- expected filling behavior (upright only vs tilt/compression risk)
- reuse expectations
- target market(s) and food-contact documentation scope (if applicable)
- target price range and MOQ
Weak RFQ briefs create the most sample delays. Factories fill in the gaps with assumptions, then the sample fails against expectations that were never documented.
2) Material and process selection
The factory proposes material options, seam method direction, and closure options. This is where the project can save time if the is open to function-first recommendations instead of locking appearance details too early.
For example, if the original closure idea is high-risk for leakage, it is usually better to fix that now than after logo tooling or packaging design starts.
3) Pattern and structure plan
The team converts the concept into a manufacturable structure. This includes panel layout, seam path, closure integration, and reinforcement decisions. For leak-proof bags, this step is more important than many realize because structure choices heavily influence corner leakage and closure-end stress.
4) First sample (appearance + basic function)
This sample may be used to check:
- size and shape
- basic closure function
- construction method direction
- early leak behavior
A first sample is often not the final performance sample, and that is normal. Treat it as a decision point, not a shipment-ready approval.
5) Leak test and revision round
This is where real progress happens. The bag should be tested under agreed conditions (fill, hold time, tilt, maybe repeated closure cycles). Then revisions are made based on actual failure modes.
The most efficient teams document:
- exact leak location
- test condition
- fill level
- test duration
- revision change made
Without this record, the same problems come back in later rounds.
6) PP sample (pre-production sample)
The PP sample should reflect the agreed bulk materials, process, and construction details as closely as possible. This is where many projects go wrong if the sample uses one setup and bulk uses another. The PP stage should verify both appearance and repeatable leak-proof performance.
7) Bulk production prep and QC alignment
Before mass production, the and factory should align on:
- in-line checks
- lot sampling
- leak-test method
- pass/fail criteria
- record format
- corrective action for failures
This step reduces the “sample passed, bulk failed” risk significantly.
How long does each stage take?
It varies by project complexity, factory load, and component sourcing. Instead of fixed promises, use time ranges and milestone approvals. What usually extends lead time:
- incomplete RFQ information
- changing leak-proof performance targets mid-project
- changing materials after sample testing
- late compliance/document requests
- custom closure parts or branded molded components
- repeated revisions without clear test records
What can do to speed up development (without increasing risk)
The best way to speed up a leak-proof project is not to push harder. It is to provide better inputs:
- real use case
- real failure concerns
- realistic price target
- target market compliance needs
- clear test expectations
That helps the factory propose a structure that is more likely to pass early.
If your team is preparing a custom leak-proof RFQ and wants a checklist before sending it to factories, Jundong can help you structure the brief for faster sampling and fewer revision rounds. Contact: info@jundongfactory.com.
What Tests Should You Run to Prove a Water & Food Bag Is Leak-Proof?
To prove a bag is leak-proof, testing must match real use conditions, not only visual inspection. Useful tests include static fill, upside-down hold, tilt/compression checks, closure cycling, temperature conditioning, and drop testing (filled condition). and factories should define test method, fill level, duration, and pass/fail criteria before sample approval and repeat key checks during mass production QC.
One of the biggest mistakes in leak-proof bag development is using a vague phrase like “Please test leakage” without defining the method. Different people will run different tests. Some will fill lightly and inspect quickly. Others will tilt, squeeze, and wait. Both may honestly report results, but the results are not comparable.
If you want repeatable decisions, you need a repeatable test plan.
Why test method definition matters
Leak-proof performance is highly sensitive to test conditions:
- fill level
- liquid type
- temperature
- bag position
- hold time
- whether the bag is compressed
- whether the closure is opened/closed multiple times first
- whether the bag is new or after cycle conditioning
A bag that passes a 10-minute upright water hold test may fail a 2-hour tilted test. A closure that performs with clean water may struggle with oily residue. This does not mean the product is “bad” by default. It means the test and use case were not aligned.
Sample-stage tests: what to check before PP approval
At sample stage, focus on identifying failure modes, not proving perfection.
Useful sample-stage checks include:
1) Static fill test
Fill the bag (or liner area) to a defined level and hold upright for a defined time. This is a baseline test. It helps detect obvious seam or material defects.
2) Upside-down hold / inversion test
If the intended use could expose the closure or upper seam zone to liquid, inversion testing is useful. Define the duration and whether the bag is fully filled or partially filled.
3) Tilt test
Some bags are rarely upside down but often tilted. A tilt test can be more realistic for cooler bags, travel bags, or carry pouches.
4) Closure function and cycle test (basic)
Open/close the closure multiple times before leak checking. This simulates early use and reveals alignment or sealing inconsistency.
5) Seam inspection after test
Do not just look for visible dripping. Check dampness at seams, corners, and closure ends. Early seepage often appears before obvious leakage.
Mass-production QC tests: what must be repeated
A sample passed once is not proof of bulk consistency. Production QC should repeat selected tests using lot-based sampling.
Practical mass-production leak-proof QC may include:
- filled-condition leak checks on sampled units
- closure cycle checks (especially for reusable products)
- temperature conditioning before leak testing (for cooler/freezer-related use)
- drop test under filled condition for relevant categories
- random lot sampling plan with records
The exact plan depends on product type and risk level. A reusable food pouch for direct consumer use may need a different QC approach than a wet-item travel bag.
Set acceptance criteria that both sides understand
This is where many disputes can be prevented. Before sampling approval or mass production, define:
- Test method (step-by-step)
- Liquid type (water only? simulate oil? both?)
- Fill level
- Hold time
- Bag position (upright, tilt angle, inverted)
- Cycle count before test (if any)
- Pass/fail definition (no droplets? no visible seepage? no wet trace on tissue?)
- Sample size / lot sampling rule
- How results are recorded and signed off
When skip this step, factories may still test—but not the same way the expected.
Think beyond “pass/fail” — think risk tier
Not every leak-proof project needs the same testing depth. A useful approach is to classify projects by risk:
- Low risk: occasional moisture containment
- Medium risk: regular liquid exposure without pressure
- High risk: free liquid + movement/compression + strong leak-proof claims
The higher the risk, the more defined and repeatable the testing should be.
A practical reminder for B2B teams
Testing is not only a quality tool. It is also a communication tool. Good test records make revisions faster, PP approvals smoother, and supplier comparisons more meaningful.
If your current samples are failing inconsistently, the issue may be the test method itself—not only the bag. Start by standardizing the test, then compare results.
How Much Does It Cost to Make Leak-Proof Water & Food Bags? What Affects Price Most?
Leak-proof bag cost is driven by the full system: material type/thickness, sealing method, closure type, structure complexity, testing/compliance requirements, MOQ, and packaging. The cheapest quote often increases long-term cost through returns and complaints. B2B should compare suppliers using total cost, including quality risk, not unit price alone.
This is where many good projects get into trouble. asks for a leak-proof bag, receives multiple quotes, and naturally compares unit price first. That is normal. But in leak-proof categories, a low unit price can hide expensive risks:
- high defect rate
- inconsistent seam quality
- poor closure performance
- weak QC records
- repeat returns after launch
- replacement cost and reputation damage
So yes, price matters. But price without risk context is not a complete sourcing decision.
The main cost drivers in leak-proof bag manufacturing
1) Material type and thickness
Different materials carry different costs, but thickness and grade selection also matter. A quote based on “same material name” may still differ if the thickness, formulation, or supplier source is different. In leak-proof applications, thinner is not automatically better value if it increases puncture or cracking risk.
2) Sealing/joining method
Seam construction often changes cost significantly:
- sewn-only structures may be cheaper initially
- taped/sealed or welded constructions add process cost
- specialized welding setup/tooling may increase development or production cost
But if the project makes strong leak-proof claims, under-spending on seam method can become expensive later.
3) Closure type and quality level
Closures can range from basic convenience parts to high-performance sealing systems. Price differences may reflect:
- component cost
- assembly complexity
- attachment method
- failure tolerance expectations
- cycle durability
In leak-proof bags, closure cost should be reviewed together with the opening-zone structure, not as an isolated accessory line item.
4) Structure complexity
A simple flat pouch is different from a shaped insulated bag with reinforced bottom, liner anchoring, and multiple panels. The more complex the structure, the more labor/process control is required. Complexity may be necessary—but it should be tied to clear performance value.
5) Compliance and testing requirements
Food-contact documentation, third-party testing, migration tests (if required), and pre-shipment quality checks all affect cost and lead time. should clarify early whether these costs are included in the quote or treated as separate charges.
6) MOQ and order mix
Leak-proof projects with mixed SKUs, colors, or sizes can increase setup complexity and reduce efficiency. A low MOQ is possible in many cases, but the price per unit may rise if production needs frequent changeovers.
7) Packaging requirements
Retail-ready packaging, multilingual labels, inserts, and e-commerce protection all affect final cost. In food-related products, claim wording on packaging may also trigger documentation expectations, which indirectly impacts cost.
Which market requirements usually increase cost the most?
Three items commonly increase cost beyond expectations:
- Higher leak-proof claim level (especially under movement/compression)
- Reusable durability targets (cycle life, washability, repeat opening/closing)
- Stronger compliance/documentation demands (food contact + market-specific files)
These are not “extra costs” in a negative sense. They are part of making a reliable product. The mistake is when they are added late after the quote was built around a simpler assumption.
Why the cheapest quote can become the most expensive
A simple example:
- Supplier A offers a low price but weak seam control.
- Supplier B costs more but has stable QC and better test records.
If Supplier A’s product causes returns, replacements, customer support burden, and bad reviews, the project’s real cost can exceed Supplier B quickly. This is especially true for private label and online retail channels where ratings directly affect sales.
How to compare suppliers by total cost (practical checklist)
Ask each supplier to clarify:
- material spec (not just material name)
- seam construction method
- closure spec
- leak test method used in sampling
- PP sample process
- bulk QC checks and records
- defect handling policy
- what is included vs excluded in quote (testing, packaging, tooling, etc.)
This makes quotes more comparable and reduces surprises.
If you want stronger pricing analysis, you can ask a supplier to provide two versions:
- cost-optimized option
- performance-priority option
That helps your team choose based on market strategy instead of guessing.
Who Is the Right Manufacturer for Leak-Proof Water & Food Bags, and What Questions Should Ask Before Ordering?
The right manufacturer depends on your product type, leak-risk level, and market requirements. should assess not only sewing capability but also sealing/welding experience, material familiarity, test methods, food-contact documentation support, and sample-to-bulk control. Ask process-specific questions before ordering, and watch for vague claims or inconsistent sample records.
Choosing a factory for leak-proof water and food bags is not the same as choosing a factory for ordinary promotional bags. A factory may be excellent at shape, stitching, and packaging but still struggle with leak-proof consistency if the project depends on welded seams, specialized closures, or food-contact documentation workflows.
The first step is to identify what kind of you are, because different types usually need different factory strengths.
Who buys leak-proof water & food bags (and what they usually care about)
Leak-proof bags are purchased by many B2B groups, including:
- Food delivery brands
- Focus: spill control, repeat use, easy cleaning, operational reliability
- Retail/private label grocery and home brands
- Focus: consumer convenience, compliance files, packaging claims, price tier
- Outdoor and travel brands
- Focus: rugged use, closure reliability, field conditions, brand reputation
- Baby-care and wet/dry product brands
- Focus: hygiene, containment, easy maintenance, material feel
- Promotional product importers
- Focus: cost target, lead time, acceptable performance level, simple customization
These groups may all ask for “leak-proof,” but the real requirement is very different. That is why a supplier that works well for one segment may be a poor fit for another.
Which factory type is the best fit?
1) Sewn-bag factory only
Good for many standard bags and soft goods. May be suitable for projects where leak-proof needs are limited or where containment is achieved mainly through simple liner design without aggressive liquid exposure. Risk increases if the product needs repeatable sealed seams or high leak-proof claims.
2) Welded-bag specialist
More suitable for projects where seam sealing performance is the core requirement. Often stronger in process control for compatible materials and leak-testing workflows. May be less flexible in styling or broader bag category development depending on the factory.
3) Hybrid OEM/ODM factory (sewing + sealing capability)
Often a strong fit for custom projects that need both bag design flexibility and leak-control engineering. This can be useful for cooler bags, food transport bags, travel wet bags, and private label programs where appearance, function, and customization all matter.
The “best” choice depends on the project, not on a general label.
What should ask before placing an order
Ask specific, process-based questions. Avoid broad questions like “Can you make leak-proof bags?” Almost every factory will say yes.
Better questions:
- Do you make sealed/welded leak-proof constructions in-house or outsource them?
- Which materials do you process regularly for leak-proof products?
- Which bag categories have you produced with similar leak requirements?
- What test methods do you use at sample stage?
- Can you define pass/fail criteria in writing?
- Do you support PP sample approval before bulk?
- How do you control sample-to-bulk consistency?
- What records do you keep for production QC?
- Can you support food-contact documentation for the target market (if needed)?
These questions reveal process maturity quickly.
What red flags look like during sampling and communication
You do not need to wait for bulk failure to identify risk. Common warning signs appear early:
- Vague claims (“no problem,” “100% leak-proof”) without test method details
- No clear material spec beyond a generic name
- No revision tracking between sample rounds
- Changing components without disclosure
- No PP sample process
- No QC documentation format
- Pushing price first, process later
A reliable supplier may still say “we need to test” or “this closure has risk.” That is not weakness. That is usually a sign of honesty.
Fit matters more than promises
The best leak-proof bag supplier is not always the biggest factory or the cheapest quote. It is the factory whose capability matches your project’s actual requirements and can communicate clearly through the full cycle: RFQ → sample → revision → PP → bulk QC.
If your team is comparing multiple suppliers and wants help building a factory evaluation checklist for leak-proof bag projects (OEM / private label / ODM), Jundong can help structure the questions and technical review points. Contact: info@jundongfactory.com.
FAQ 1. What information should I send a manufacturer before asking for a quote on a leak-proof food or water bag?
To get a useful quote for a leak-proof bag, you should provide more than size and logo. The most helpful RFQ includes use case, liquid/food type, leak-proof level, filling behavior, target market, material preference (if any), MOQ, and packaging requirements. A better RFQ leads to a better quote, fewer sample revisions, and fewer misunderstandings later.
A lot of send a message like: “Please quote this leak-proof bag, custom logo, what’s your price?” Factories can still quote, but the quote is often based on assumptions. That is where problems start. One factory assumes “leak-proof” means light spill containment. Another assumes it means full liquid containment under tilt. You receive different prices and think one factory is cheaper, but they may not be quoting the same product performance at all.
If you want a quote that is actually useful for decision-making, send a performance-based RFQ, not just a picture. At minimum, include these items:
Recommended RFQ Checklist for Leak-Proof Bag Projects
| RFQ Item | Why It Matters |
|---|---|
| Product type (cooler bag, wet bag, food pouch, etc.) | Changes structure and closure direction |
| What it holds (water, soup, sauce, oil, meltwater) | Affects material, seam, and closure decisions |
| Leak-proof expectation | “No drip upright” vs “tilt/compression resistant” is a big difference |
| Size / capacity | Affects load stress and construction method |
| Use scenario (travel, delivery, lunch, outdoor) | Determines risk level and durability needs |
| Reusable or disposable | Changes material and cost strategy |
| Target market (US/EU/etc.) | May affect compliance and documentation requirements |
| MOQ and target price range | Helps the factory propose realistic options |
| Logo/customization details | Impacts tooling, printing, and sample path |
| Packaging requirements | Retail packaging may affect labeling/testing scope |
A very practical tip: tell the factory what failure you are most worried about. For example:
- corner leakage after folding
- zipper area seepage
- meltwater leakage in cooler use
- oil seepage from food residue
- leaks after repeated opening/closing
This tells the development team where to focus during sampling.
Also, if you already tested a similar product and had complaints, share that history. sometimes hide old problems because they think it makes the project look difficult. In reality, that information helps the factory avoid the same mistakes faster.
If your team wants more accurate pricing and fewer sample loops, start with a stronger RFQ. It saves time for both sides and makes supplier comparison much more fair.
FAQ 2. How can I tell whether a factory really understands leak-proof bags, not just regular bag sewing?
The fastest way is to ask process-specific questions, not “Can you make this?” A factory that truly understands leak-proof bags can explain materials, seam methods, closure integration, leak testing, and sample-to-bulk QC control in clear terms. A factory that only understands standard bag sewing usually gives broad answers but lacks test logic and failure analysis.
This is one of the most practical questions in sourcing, because many factories can make a nice-looking sample, but fewer factories can make a repeatable leak-proof product in bulk.
A factory that is strong in standard bag sewing may still be the right partner for some projects. But if your product has a real leak-proof claim, you need to confirm whether the factory understands leak-control engineering, not just shape and stitching.
What strong factories usually do well
A capable leak-proof bag supplier usually can:
- discuss material compatibility with seam methods
- explain where leaks commonly happen (corners, closures, seam transitions)
- propose different closure options based on use conditions
- define a test method (not just say “we test it”)
- explain how they manage PP sample and bulk QC
- talk honestly about risks and trade-offs (instead of saying yes to everything)
What weak answers sound like
Watch out for answers like:
- “No problem, 100% leak-proof” (without conditions)
- “We can use any material”
- “Sample first, then we see” (with no method)
- “We make many bags, so this is easy”
- “No need testing, our quality is good”
Those responses may sound confident, but they don’t help you evaluate technical fit.
Questions you should ask (and why)
Here are good screening questions:
Which leak-proof bag types have you made recently?
(Shows category familiarity)
Which seam methods do you use for leak-proof constructions?
(Shows process capability)
How do you test leakage at sample stage?
(Shows engineering discipline)
What are common leak points in this design?
(Shows problem awareness)
How do you prevent sample-to-bulk differences?
(Shows production control maturity)
Can you support PP sample confirmation before mass production?
(Shows quality workflow)
What records do you keep during production QC?
(Shows traceability mindset)
A good supplier does not need to answer in perfect technical English. What matters is whether the answers are specific, consistent, and grounded in real process logic.
If a factory tells you “this design may leak under compression unless we change the closure,” that is often a good sign. They are protecting your project, not just chasing the order.
FAQ 3. What is the difference between “leak-proof in normal use” and “leak-proof under pressure or compression”?
This difference is very important in sourcing. A bag that is leak-proof in normal upright use may still leak when it is squeezed, overfilled, tilted for a long time, or compressed in a backpack/luggage. should define the leak-proof level clearly, because normal-use containment and compression-resistant containment often require different structures, seam methods, and closures.
Many product complaints happen because the and factory used the same phrase—“leak-proof”—but meant different things.
For example, a lunch bag liner may perform well when carrying containers upright. But if the customer puts loose ice inside, lays the bag on its side, and places heavy items on top, the stress on corners and closure transitions becomes much higher. If your product listing still says “leak-proof,” users will judge it by real-life use, not by the factory’s internal assumption.
Practical leak-proof levels (useful for RFQ and spec sheets)
You do not need to use these exact terms, but this kind of classification helps a lot:
| Leak-Proof Level | Typical Meaning | Example Use |
|---|---|---|
| Level A: Spill-resistant / splash control | Handles minor spills or moisture, not full liquid containment | Some lunch/carry bags |
| Level B: Normal-use leak-proof | Contains liquid in upright use and short tilting | Cooler liner, wet bag |
| Level C: Enhanced leak-proof | Handles longer tilt, movement, moderate compression | Travel wet bag, active use cooler |
| Level D: Pressure/compression-resistant leak-proof | Designed for stronger squeeze/load conditions | Specialized water/food containment systems |
Why this matters for price and development time
If you ask for “leak-proof” but later test the product under compression and expect no leakage, you may need:
- stronger seam construction
- better closure system
- reinforcement in corners and closure ends
- thicker or more stable liner
- more testing rounds
That means higher cost and usually longer development. This is not a pricing trick. It is a change in engineering target.
How to define your target clearly
A better RFQ statement sounds like this:
- “Bag should contain meltwater without leaking during upright carrying and short tilt.”
- “Bag will be used for wet clothing and may be compressed in luggage.”
- “Bag should hold liquid food with repeated opening/closing and no visible seepage in defined testing.”
This type of wording gives factories a real target and improves quote accuracy.
If you are not sure which leak-proof level fits your product category, ask the factory to quote two versions:
- cost-optimized normal-use version
- higher-performance version for tilt/compression risk
That comparison helps make smarter decisions earlier.
FAQ 4. How many sample rounds are normal for a custom leak-proof bag, and how can I reduce revisions?
For a real custom leak-proof bag, multiple sample rounds are normal—especially when the project includes new structure, new closure, or specific leak-proof claims. The goal is not to force “one sample pass,” but to make each round productive using clear test records, failure analysis, and controlled revisions. can reduce sample loops by providing a strong RFQ and realistic performance expectations from day one.
Many feel nervous when the first sample leaks. In leak-proof product development, that is not automatically a sign of a bad factory. It often means the factory is still tuning the material + seam + structure + closure system.
The real question is not “Did the first sample pass?”
The better question is: “Did the factory identify the leak path and revise the correct thing?”
When one sample round may be enough
A single round is more realistic when:
- the design is based on an existing proven structure
- leak-proof requirement is moderate
- materials and closure are already standard for the factory
- customization is mostly logo/printing/packaging
- provides clear requirements early
When multiple rounds are common (and reasonable)
More rounds are common when:
- the bag uses a new shape
- the closure is customized
- the leak-proof claim is high (tilt/compression/reuse)
- the product must meet food-contact documentation requirements
- the changes target performance during development
- the first RFQ was incomplete
What productive sample development looks like
A good sample workflow includes:
- Test condition defined
- Leak point identified
- Failure mode recorded
- Revision change documented
- Retest done under same method
This sounds basic, but many projects skip it. Then teams “change many things at once” and do not know what actually fixed the problem.
How can reduce sample loops
Here are high-impact ways to reduce revisions without lowering quality:
1) Provide a better requirement brief
Include:
- use case
- liquid type
- leak-proof level
- size/capacity
- reuse expectation
- target market
- target price range
2) Separate cosmetic changes from performance changes
If possible, confirm function first, then finalize logo and packaging. Many teams slow the project by changing artwork, size, and leak-proof target at the same time.
3) Ask for a simple test report with each sample round
Even a basic report helps:
- fill volume
- test duration
- position (upright/tilt)
- leak result
- revised points
4) Freeze key inputs before PP sample
Changing material or closure after functional approval is one of the biggest causes of delays and bulk risk.
A project with two or three well-documented sample rounds is often healthier than a project with one “fast” sample and unclear performance.
FAQ 5. Which parts of a leak-proof bag usually fail first in real customer use, and how can we design against that?
In real use, leak-proof bags most often fail at corners, closure ends, seam transitions, and unsupported opening zones—not always in the large flat panels. These areas take repeated stress from filling, folding, squeezing, and carrying. Strong product development focuses on these high-risk zones early through geometry design, reinforcement, and realistic testing.
This FAQ is very useful for product teams because it shifts the conversation from “Which material is best?” to “Where will this product fail first?” That mindset leads to better custom designs.
The most common early failure zones
1) Corner areas
Corners are a classic weak point because they combine:
- seam turns
- overlap transitions
- repeated flexing
- pressure concentration when the bag is filled
Sharp corners can look good in drawings but become a leak risk in repeated use.
2) Closure ends
Many closure systems do not fail in the middle—they fail at the ends, where the closure connects to the seam or liner. This is a high-stress zone, especially in overfilled or compressed bags.
3) Seam transitions
Any place where seam width changes, layers stack up, or materials change direction can become unstable if process control is weak.
4) Unsupported opening zones
If the opening area bends too much during use, the closure may misalign or the liner may crease sharply, creating leakage paths over time.
Why flat-panel lab checks can miss real problems
A bag can pass an upright static fill test and still fail later because real users introduce:
- repeated folding
- uneven loads
- corner compression
- contamination near the closure (food residue, oil)
- fast opening/closing habits
That is why design reviews should focus on stress zones, not only “does it leak today?”
How to design against early failures
Here are practical design strategies:
- use rounded internal corners instead of very sharp turns
- add local reinforcement in closure-end areas
- stabilize the opening edge to reduce deformation
- improve liner anchoring so stress does not collect in one point
- design for easy cleaning near closure zones to reduce residue buildup
- include cycle + tilt testing in sample validation, not only static tests
A useful internal review question for
Before approving a sample, ask the factory:
“What are the top 3 stress zones in this bag, and how are they protected?”
Factories that answer this well are usually thinking like product engineers.
FAQ 6. Do I need food-contact compliance testing for a leak-proof bag if food is inside another container?
It depends on the actual contact situation, target market, and your brand’s internal policy. If the leak-proof bag only carries sealed containers and has no intended direct food contact, the compliance scope may differ from a direct-contact reusable food pouch. However, many still request documentation because real use may involve spills, leaks, or temporary contact with food residue.
This is a very common question, and it is where many projects get delayed because teams discuss “FDA” or “EU food-safe” too late.
Start with the real use condition
Ask these questions:
- Is food intended to touch the bag’s inner material directly?
- What if a container leaks—does food or liquid then contact the liner?
- Is the product marketed as a food storage bag or a food transport bag?
- Will users put loose ice, fruit, or unpackaged items inside?
- What market is the product sold in?
If your product is a direct-contact reusable food pouch, the compliance planning is usually more demanding than a food delivery bag carrying sealed boxes. But if spills are likely and your brand claims easy-clean food use, many still prefer to prepare documentation in advance.
Why this matters beyond regulation
Even when legal requirements are not the same, customer expectations can be. If your product is sold in a food-related category, and end users may assume a certain material safety standard. This affects:
- brand trust
- product listing claims
- retailer acceptance
- private label approval
Practical approach for
A smart approach is to define compliance in levels:
- Basic material declarations / supplier statements
- Component-level test reports (as needed)
- Finished-product testing (for higher-risk or stricter programs)
- Market-specific documentation package (retailer/brand-driven)
The key is to align this before PP sample or bulk production, not after packaging is already printed.
What to send the factory
When discussing compliance, give the factory:
- target market
- product category
- direct vs indirect contact scope
- expected use conditions (hot/cold, wet/oily, reusable)
- your required document list and timing
This reduces misunderstandings and helps the factory quote and develop correctly.
FAQ 7. Can a leak-proof bag still leak after repeated use even if the first sample passed? Why does that happen?
Yes, this happens often. A first sample may pass a short test, but repeated use introduces folding stress, closure wear, residue buildup, temperature changes, and user misuse, which can create leaks later. This is why reusable leak-proof products should be validated with cycle-based testing, not only one-time static fill tests.
This is one of the most frustrating situations for brands: the sample looked fine, initial quality checks looked fine, and then customer complaints appear weeks later.
Usually, the issue is not that the factory “lied.” The issue is that the product was tested only in new condition, while the real customer is using it in aged condition.
What changes after repeated use
Leak-proof bags change in performance over time because:
- seams flex repeatedly
- closure alignment can drift
- corner folds become stress memory points
- food/oil residue affects closure sealing
- low/high temperature cycles affect material flexibility
- users overfill or force-close the bag
A product that performs in “Day 1 condition” may not perform the same in “Week 4 condition.”
Why static sample tests are not enough for reusable products
Static tests are useful as a starting point, but they rarely simulate:
- opening/closing cycles
- fold/unfold cycles
- cleaning/washing exposure
- packing pressure
- temperature changes
- contaminated closure surfaces
This is especially true for reusable food pouches, travel wet bags, and active-use cooler bags.
How can reduce post-launch leakage risk
Add a simple durability validation plan during sampling or PP stage:
- perform closure cycling before leak test
- perform folding cycles (where applicable)
- run leak tests after temperature conditioning
- inspect corners and closure ends for seepage (not just drips)
- compare “new sample” vs “cycled sample” performance
Ask for honest durability claims, not perfect claims
Avoid vague claims like “lifetime leak-proof.” Ask for defined statements:
- leak-proof under X test condition
- after Y closure cycles
- with Z fill level and liquid type
The more clearly the claim is defined, the easier it is to source a product that actually meets it.
If your project is a reusable leak-proof bag and you want help building a simple sample durability test plan before mass production, you can contact Jundong at info@jundongfactory.com.
FAQ 8. How should I compare supplier quotes for leak-proof bags without choosing the wrong “cheap” option?
Do not compare leak-proof bag quotes by unit price alone. Compare them by defined specs, seam/closure method, testing method, QC process, PP sample workflow, and documentation support. The “lowest price” may be based on a lower leak-proof target, thinner material, weaker closure, or no real QC testing—leading to higher costs later through returns and complaints.
This is a classic sourcing trap. often receive three quotes and think one factory is “too expensive” or another is “best value” before checking whether they are quoting the same thing.
In leak-proof products, quote quality matters as much as quote price.
Why quotes are often not directly comparable
Two suppliers may both write:
- “Leak-proof food bag”
- “Custom logo”
- “Same size”
But hidden differences may include:
- different liner thickness
- different seam method
- different closure quality
- no durability testing
- different assumptions about use (upright only vs tilted/compressed)
- no PP sample control step
- no food-related documentation support
So you are not comparing the same product, even if the quote table looks similar.
Use a quote comparison sheet (highly recommended)
Ask every supplier to confirm these items in writing:
| Item to Compare | Supplier A | Supplier B | Supplier C |
|---|---|---|---|
| Use condition assumed | |||
| Material spec (grade/thickness) | |||
| Seam method | |||
| Closure type/spec | |||
| Leak test method at sample stage | |||
| PP sample before bulk | |||
| Bulk QC leak checks | |||
| Compliance/doc support | |||
| Packaging included? | |||
| Tooling / test fees included? |
This immediately reveals which quote is truly complete.
What “cheap” usually cuts first
In leak-proof projects, low prices often come from cutting:
- material spec
- seam process time/control
- closure quality
- QC testing steps
- documentation support
- revision support during sampling
Some cuts are acceptable if your project is low-risk. But if your brand makes a strong leak-proof claim, cutting these areas can become very expensive after launch.
Best practice
Ask for two quote options from each supplier:
- Value version (cost-optimized)
- Performance version (stronger leak-proof target / durability)
This helps your team make a strategic choice instead of guessing.
FAQ 9. What should be included in a leak-proof bag spec sheet to reduce miscommunication and sample-to-bulk drift?
A good leak-proof bag spec sheet should define not only size and logo, but also use scenario, leak-proof target, material specs, seam method, closure type, testing conditions, pass/fail criteria, compliance needs, and approval checkpoints. A strong spec sheet is one of the best tools to prevent RFQ confusion, sample delays, and bulk inconsistency.
Many sourcing problems are not “factory problems” or “ problems.” They are specification problems. The team assumed too much, documented too little, and moved too fast into sampling.
A strong spec sheet does not need to be beautiful. It needs to be clear and complete.
Core sections your spec sheet should include
1) Product definition
- Product name / project code
- Product category (cooler liner, food pouch, wet bag, etc.)
- Intended use scenario
2) Dimensions & capacity
- Finished dimensions
- Tolerance (if applicable)
- Capacity / fill guidance
3) Material system
- Outer material
- Liner material (spec + thickness, not just material name)
- Reinforcement materials
- Accessories (webbing, zipper, sliders, valves, etc.)
4) Construction method
- Seam method (welded / heat-sealed / stitched + liner / taped, etc.)
- High-risk zone reinforcement (corners, closure ends)
- Liner anchoring details (if relevant)
5) Closure system
- Closure type
- Closure spec/version
- Opening zone reinforcement / integration requirements
6) Leak-proof performance target
This is one of the most missed sections. Define:
- liquid type for testing
- fill level
- test duration
- bag position (upright / tilt / inverted)
- whether compression applies
- whether cycle conditioning applies
7) Pass/fail criteria
Examples:
- No visible dripping
- No seepage at seam/corner/closure
- No wet trace on tissue under test method
- Closure remains functional after cycle test
8) Compliance / documentation
- market destination
- direct vs indirect food contact scope
- required reports/declarations
- submission timing
9) Sample and approval flow
- sample round targets
- PP sample requirement
- change control process (what must be reconfirmed)
10) Bulk QC requirements
- lot sampling method
- leak test frequency
- record format
- defect handling / corrective action
Why this matters for conversion too
A strong spec sheet helps the factory make a better product, but it also helps your internal team:
- compare suppliers more fairly
- align sales and product teams
- reduce launch delays
- support retailer/customer documentation requests later
It is one of the highest-ROI documents in custom leak-proof bag development.
FAQ 10. If I want a custom leak-proof bag with my logo (private label / OEM / ODM), what is the best way to start without wasting time?
The best starting point is a function-first briefing process: define your use case, leak-proof target, target market, and price level first, then choose material/closure/structure with the factory. who start with logo and appearance only usually spend more time in revisions. A strong OEM/ODM launch starts with performance requirements + realistic sampling plan.
This is a very common question from growing brands and importers. Many teams are experienced with normal bags but new to leak-proof products. They naturally begin with what they know: shape references, color, logo placement, packaging style. Those items matter—but for leak-proof products, they should not be the first decision.
Why function-first saves time
Leak-proof bags are performance products. If the structure, seam, and closure are wrong, changing the logo or packaging does not help. Starting with function-first gives the factory a real development path and reduces rework.
A practical 5-step way to start
Step 1: Define the product use case clearly
Tell the factory:
- what the bag holds
- where it is used
- how users carry/store it
- whether reuse is expected
- what failures you want to avoid most
Step 2: Define your leak-proof target (normal use vs higher stress)
This avoids the biggest source of quote mismatch and sample disputes.
Step 3: Share your commercial targets
Include:
- MOQ
- target price range
- target launch timeline
- target market(s)
- packaging expectations
Factories make better suggestions when they understand your commercial reality.
Step 4: Ask for a recommended construction path
Instead of only asking “Can you copy this bag?”, ask:
- What material + seam + closure system do you recommend?
- What are the risk points in this design?
- Which part may require sample revision?
This helps you identify suppliers who can think beyond simple imitation.
Step 5: Run sampling with documented test conditions
Treat the first sample as a development stage, not final approval. Ask for:
- leak test method used
- result summary
- revision notes (if needed)
When to focus on branding and packaging
Branding and packaging should absolutely be included—but after the core function path is stable (or at least clearly defined). That reduces costly changes later.
What to send in your first email to a factory
A strong first message usually includes:
- reference photos/sketches
- use case
- size/capacity
- leak-proof target
- market destination
- MOQ target
- logo artwork (if ready)
- packaging idea (if ready)
- expected timeline
If you want, you can also ask the factory to propose 2 development routes:
- faster / lower-cost route
- higher-performance route
That gives your team options and helps you move faster with fewer surprises.
If you are planning a private label, OEM, or ODM leak-proof water/food bag and want a structured starting checklist, you can contact Jundong atinfo@jundongfactory.com.
FAQ 11. How do I test a leak-proof cooler bag before shipment if I cannot visit the factory in person?
If you cannot inspect in person, you should use a remote pre-shipment leak-proof verification plan with clear test steps, sample quantity, video evidence, and pass/fail criteria. The key is to require testing under realistic filled conditions (not empty visual checks only), and to make the factory record which units were tested, how they were tested, and what the results were.
This is a very common situation for international . Many brands and importers cannot travel for every order, especially when they manage multiple suppliers. The mistake is assuming that “final inspection” always covers leak-proof performance. In many cases, general inspections focus on appearance, quantity, packaging, and basic function—but not deep leak-proof validation unless you ask for it clearly.
If your product’s reputation depends on leak resistance, you need a specific remote test protocol, not just “please check quality carefully.”
What remote leak-proof verification should include
At minimum, your pre-shipment plan should define:
- Sample size (how many units tested per lot)
- Test method (upright / tilt / inversion / compression, depending on product)
- Fill level
- Liquid type (water is common, but note if oil/sauce behavior matters)
- Test duration
- Pass/fail criteria
- Evidence format (video + photos + records)
What to ask the factory to send
A useful remote verification package usually includes:
Video of random unit selection
So you can see tested units were not pre-picked “best pieces.”
Video of the actual test process
Include filling, closing, positioning, timing, and final inspection.
Close-up photos of high-risk zones after testing
Especially corners, closure ends, seam transitions, and bottom seam area.
Test record sheet
Including date, operator, lot number, tested quantity, failed quantity, and notes.
Corrective action record (if any failure occurs)
This is very useful and often overlooked.
Important: match the test to the real use
A cooler bag used for melted ice and short transport may not need the same test as a reusable liquid food pouch. Remote testing is only useful when the method reflects how the product is actually used.
For example:
- Cooler bag liner → upright + tilt + short carry simulation
- Travel wet bag → compression + tilt after closure cycling
- Reusable food pouch → closure cycles + leak test + seepage inspection
A simple remote pre-shipment checklist
| Item | Confirmed? |
|---|---|
| Lot number and quantity shared | ✅ / ❌ |
| Random selection shown on video | ✅ / ❌ |
| Test method matches use case | ✅ / ❌ |
| Fill level and duration shown | ✅ / ❌ |
| Close-up of corners/closure after test | ✅ / ❌ |
| Pass/fail criteria documented | ✅ / ❌ |
| Failure handling record provided (if needed) | ✅ / ❌ |
If you cannot be on-site, clarity + evidence + records is the best replacement. It also creates better accountability and helps your team track performance across repeat orders.
FAQ 12. Which closure is better for a travel wet bag: zipper or roll-top?
There is no universal winner. A zipper closure is usually more convenient and faster for daily use, while a roll-top closure often performs better in some higher-moisture or rough-use scenarios when closed correctly. The right choice depends on user behavior, compression risk, access speed, cleaning needs, and your leak-proof claim level.
This is a classic product decision where brands often choose based on appearance first, then face complaints later because user behavior was not considered.
A travel wet bag is a tricky product because customers use it in many unpredictable ways:
- putting in wet swimwear
- mixing damp towels with toiletries
- compressing it inside luggage
- leaving it closed for hours
- overfilling it
- opening and closing quickly during travel
That means the “best” closure is the one that matches your user and use case—not just the one that looks more premium in photos.
Zipper closure: where it works well
Strengths
- familiar and fast to use
- easy access
- compact and consumer-friendly
- often preferred for travel convenience
- supports many style directions (fashion, minimalist, sport, family)
Watch-outs
- leakage often happens at zipper ends or integration zones
- residue or moisture buildup can affect performance over time
- overfilling may stress the opening area
- not all zipper systems provide the same leak resistance
A zipper-based wet bag can work very well, but it usually needs good opening-zone engineering, not just a “better zipper.”
Roll-top closure: where it makes sense
Strengths
- often stronger in moisture containment for some use conditions
- fewer “end-point” leak paths compared with some zipper layouts
- suitable for outdoor/travel styling
- can tolerate some rough handling if designed correctly
Watch-outs
- depends on user closing it correctly every time
- slower access than zipper
- may feel less convenient for quick-use daily travel
- can be bulky depending on structure
Roll-top designs often perform better in reality when the user follows the closure instructions. But if your customer expects one-hand quick access, convenience complaints may appear even if leak control is strong.
How to choose: ask these 5 product questions
Is convenience and fast access the top priority?
→ Zipper may fit better.
Will users compress the bag in luggage often?
→ Roll-top may deserve stronger consideration.
Will the bag hold wet clothes only, or free liquid exposure too?
→ Higher moisture risk may favor stronger containment design.
What is the expected customer type?
(family travel / gym / outdoor / premium fashion travel)
How strong is your leak-proof marketing claim?
Stronger claims usually require more conservative closure decisions.
Best practice for private label
If budget allows, sample both closure versions using the same bag body concept:
- zipper version (convenience-first)
- roll-top version (containment-first)
Then test them under your real use conditions. This often gives much better product decisions than debating closures in meetings.
FAQ 13. What material thickness should I choose for a reusable leak-proof food or water bag?
There is no single “correct” thickness for all reusable leak-proof bags. The right thickness depends on material type, bag size, liquid/food type, seam method, closure design, expected reuse cycles, and pressure risk. should avoid choosing thickness by feel alone and instead evaluate thickness as part of the full performance system.
This is one of the most common sourcing questions, and also one of the most misunderstood. often compare samples by hand feel and assume “thicker = better.” Sometimes thicker helps. Sometimes it creates new problems, such as poor flexibility, difficult sealing, or closure misalignment.
Why thickness is not a standalone decision
Thickness affects many things at the same time:
- puncture resistance
- fold flexibility
- seam/weld behavior
- weight
- closure engagement
- cost
- user feel (soft vs stiff)
- packing/storage behavior
So the right question is not “What thickness is best?” but:
“What thickness works best for this material + this bag size + this leak-proof target?”
When a thicker material helps
Thicker material can be useful when:
- the bag is large and will carry heavier liquid load
- puncture risk is higher
- the bag may be compressed in luggage or transport
- the product is intended for repeated use with longer life expectations
- the closure/opening design is compatible with the added stiffness
When thicker can cause problems
Thicker is not always better. It can create:
- harder folding at corners (stress concentration)
- reduced closure alignment in some designs
- more difficult sealing/welding in certain process windows
- user complaints if the bag feels too stiff or bulky
- unnecessary cost increase without real performance gain
What should ask instead of “give me thicker”
A stronger question for the factory is:
- What thickness range do you recommend for this size and use case?
- What changes if we move one step thicker or thinner?
- How does thickness affect seam stability and closure performance?
- Can you test two thickness options under the same condition?
This shifts the conversation from price-only negotiation to engineering comparison.
Smart sampling strategy
If your product is reusable and performance-sensitive, ask for:
- Option A: cost-optimized thickness
- Option B: durability-focused thickness
Then test both under the same method (same fill, same cycles, same duration). You may find the extra thickness is worth it—or not worth it—based on real data instead of assumptions.
FAQ 14. What causes corner leakage in leak-proof bags, and how can a factory fix it during sampling?
Corner leakage is usually caused by stress concentration, seam overlap inconsistency, sharp geometry, poor sealing/welding control, or repeated folding fatigue. The fix is rarely just “change material.” Factories usually need to adjust corner shape, seam path, overlap width, reinforcement, and process settings, then retest under the same conditions.
Corner leakage is one of the most common and most frustrating problems in leak-proof bag development. It may appear only after tilting, only after folding, or only after repeated use—so teams sometimes miss it in early testing.
Why corners fail more often
Corners are difficult because they combine multiple risk factors:
- seam turns
- changing pressure direction
- layer stacking
- fold memory
- stress concentration under liquid load
If the design uses sharp corners, these risks increase. If the process control is weak, the corner becomes the first place to leak even when the rest of the seam looks perfect.
Common corner leakage causes
1) Sharp corner geometry
Very tight corner shapes can make sealing/welding less stable and create high stress during use.
2) Inconsistent seam overlap
If overlap width changes too much in the corner turning area, local weak points may appear.
3) Process setting mismatch
Heat/pressure/time settings that work on straight seams may not perform the same in corners.
4) Material fatigue from folding
Repeated folding often creates “memory lines” near corners, especially if the material is too stiff for the shape.
5) Structure load pushing directly into the corner
In some designs, liquid weight and bag shape push stress directly into the corner seam.
How factories usually fix corner leakage effectively
A good factory will not only patch the symptom. They will usually try one or more of these:
- Round the corner geometry
- Adjust seam route to reduce stress at the turning point
- Increase or stabilize overlap width
- Add local reinforcement in the corner zone
- Tune sealing/welding settings specifically for corner consistency
- Modify internal support / liner anchoring so load is distributed better
How should manage corner leakage during development
When corner leakage appears:
- Ask the factory to identify the exact leak point
- Keep the test method the same for comparison
- Ask what changed in the revision (geometry/process/material/reinforcement)
- Retest under the same condition
- Check corners again after cycle or fold conditioning, not only on a fresh sample
Important tip
Do not approve a sample just because the visible leak disappeared once. Corner issues should be retested, because they often return later if the root cause was not fixed.
FAQ 15. What is a PP sample, and why is it especially important for leak-proof bag production?
A PP sample (Pre-Production sample) is a confirmation sample made before mass production using the agreed materials, components, and process direction. For leak-proof bags, the PP sample is very important because it helps verify that the bulk production setup can still meet the leak-proof target—not just the earlier development sample made under ideal sample-room conditions.
Many understand samples in general, but they may not realize that leak-proof products have a higher risk of sample-to-bulk drift. A development sample can pass because it was carefully made by an experienced sample technician with extra attention. Bulk production is different: different operators, longer runs, production speed, and batch variation all affect results.
That is why PP sample control is so valuable.
What makes PP sample different from a normal development sample
A development sample answers:
- Does the concept work?
- Which structure/material/closure direction is better?
- What needs revision?
A PP sample answers:
- Can the factory make this in production conditions with the approved setup?
- Are the actual bulk materials/components aligned?
- Is the leak-proof performance still stable before production starts?
What a good PP sample confirmation should include
For leak-proof bag projects, PP sample approval should not be only visual. It should include:
- Material confirmation (actual approved spec)
- Closure/component confirmation
- Construction/seam method confirmation
- Leak test under agreed method
- Inspection of high-risk zones (corners, closure ends, seam transitions)
- Packaging confirmation (if relevant)
- Documentation alignment (if compliance files are required)
Why skipping PP sample is risky
Skipping PP sample may save a few days now, but it can create much bigger problems:
- material batch/spec mismatch
- component substitution
- process changes not communicated
- bulk leakage complaints
- delayed claims and rework after shipment
For leak-proof products, the PP sample often acts like a final technical checkpoint before the cost of mistakes becomes much higher.
A practical PP sample approval checklist
| PP Item | Confirmed? |
|---|---|
| Material spec matches approval | ✅ / ❌ |
| Closure/component matches approval | ✅ / ❌ |
| Seam method and structure match approved version | ✅ / ❌ |
| Leak test passed under agreed method | ✅ / ❌ |
| High-risk zones checked after test | ✅ / ❌ |
| Packaging and labeling confirmed | ✅ / ❌ |
| Any changes documented and approved | ✅ / ❌ |
For repeat orders, PP discipline is still useful—especially when materials, closures, or production timing changes.
FAQ 16. What should a leak-proof bag QC checklist include during mass production?
A leak-proof bag QC checklist should go beyond appearance and include material confirmation, seam consistency checks, closure function checks, leak testing on sampled units, high-risk zone inspection, and recordkeeping for traceability. The best QC systems combine in-line process checks and final random inspection, not just end-of-line visual checks.
Many factories say they have QC. The real question is: What exactly are they checking, and how often? For leak-proof products, a general “AQL appearance inspection” alone is not enough if your product claim includes liquid containment.
Why leak-proof QC needs a different mindset
Leak-proof defects are often:
- hidden at first
- process-related (not just visual)
- localized (corner/closure-end issues)
- inconsistent across a lot if process settings drift
This means QC has to catch both:
- Visible defects
- Functional leakage risk
Key sections of a practical leak-proof QC checklist
1) Incoming material and component check
- material spec/label verification
- thickness/grade checks (if applicable)
- closure component confirmation
- accessory consistency (sliders, valves, etc.)
2) In-line construction checks
- seam width/overlap consistency
- sealing/welding quality (or stitch + liner alignment)
- corner formation quality
- closure-end reinforcement consistency
- opening-zone alignment
These checks matter because many leak-proof failures start with process drift during production—not after production.
3) Functional checks (sampled units)
- closure open/close function
- leak test under agreed condition (sampled by lot)
- seepage inspection at corners/seam transitions
- optional cycle checks for reusable products (depending on QC plan)
4) Final inspection
- appearance and logo
- dimensions/tolerances
- packaging and labels
- final random leak test (if part of agreed protocol)
5) Records and traceability
QC records should include:
- production date / line
- lot number
- inspector name
- tested quantity
- failures and defect type
- corrective action taken
Best practice: define QC checkpoints before bulk starts
Do not wait until inspection day to discuss leak-proof testing. Align before production on:
- which test is used
- how many pieces per lot
- pass/fail criteria
- what happens if failure occurs
This avoids arguments and protects lead time.
If your brand is building a reusable or higher-claim leak-proof product, a stronger QC checklist is one of the best ways to reduce complaint rates.
FAQ 17. How can I reduce customer complaints for reusable leak-proof bags after launch?
To reduce complaints, you need a full approach: clear product positioning, realistic leak-proof claims, stronger validation tests, better closure/cleaning design, and user instructions that match real behavior. Many post-launch complaints happen because the product was tested in ideal conditions but used in messy real-world conditions.
This FAQ matters because complaint reduction is not only a factory issue. It is a product + communication + usage issue. Even a well-made bag can generate complaints if customers use it outside the intended scenario and the listing or packaging does not guide them.
Why reusable leak-proof bags get complaints
Common reasons include:
- customers overfill the bag
- closure not fully engaged
- food residue/oil affects sealing
- bag is compressed in a way not covered by the test claim
- repeated use changes performance
- customer expectations are stronger than the actual product design target
If your product page simply says “100% leak-proof,” customers may test it in ways your development team never intended.
How to reduce complaint risk before launch
1) Define a realistic leak-proof claim
Use specific language when possible (internally and externally), such as:
designed for normal upright use
suitable for wet item containment
tested under defined conditions
This helps align expectations.
2) Validate durability, not only first-use performance
For reusable products, add:
- closure cycle testing
- fold cycle testing
- test-after-cleaning checks (if applicable)
- temperature-conditioned leak checks
3) Improve closure usability
A technically good closure that is hard to align or hard to clean can create user-caused leakage complaints.
4) Add simple usage guidance
Small instructions can reduce complaints a lot:
- do not overfill
- close fully before carrying
- avoid sharp objects
- clean closure area after oily foods
- check closure alignment before packing
5) Track complaint patterns by failure zone
When complaints happen, classify them:
corner leak
closure leak
seam seepage
puncture damage
misuse / overfill
This turns customer service data into product improvement data.
A smart brand habit
Keep a simple “complaint-to-fix” log after launch. If 70% of complaints are closure-end leakage after oily food use, your next production run can improve the exact weak point instead of making random changes.
This is how mature brands improve faster than competitors.
FAQ 18. Should I choose OEM or ODM for a leak-proof water/food bag project?
Choose OEM when you already have a clear product concept, specs, and performance target and need a factory to manufacture it under your brand. Choose ODM when you want to move faster using the factory’s existing product base and then customize branding/features. For leak-proof products, the best choice depends on speed, risk tolerance, budget, and how unique your leak-proof claim needs to be.
This is a very important decision, especially for brands entering the leak-proof category for the first time.
OEM vs ODM in practical terms
OEM (Original Equipment Manufacturing)
You (the /brand) define the product direction more deeply:
- structure
- specs
- performance target
- branding
- packaging
The factory manufactures according to your requirements.
Best when:
- you need a differentiated product
- you have clear performance requirements
- you can manage sample development
- you want tighter brand control
ODM (Original Design Manufacturing)
The factory provides an existing base design (or a close starting point), and you customize selected elements:
- logo
- color
- packaging
- some features
- some dimensions/material options
Best when:
- speed matters
- budget is tighter
- you want lower development risk
- you are testing market demand first
Why this matters more for leak-proof products
Leak-proof performance depends on the whole construction system, so “small design changes” can create bigger technical consequences than in ordinary bags. If you choose OEM, you gain more control, but you also take on more development responsibility and sample iteration risk.
If you choose ODM, you may get faster and more stable results if the factory’s base design is already proven—but your product may be less unique.
A smart hybrid strategy (often best for new brands)
Many do well with a phased approach:
- Start with ODM-based leak-proof structure (proven function)
- Add private label customization
- Improve to semi-OEM (closure/structure upgrades)
- Move to full OEM after sales validation
This reduces launch risk while still building brand differentiation over time.
How to decide quickly
Ask yourself:
- Do we need a unique structure now, or can we start from a proven base?
- Is speed more important than uniqueness in this launch?
- Can we afford more sample rounds?
- How strong is our leak-proof marketing claim?
- Are we testing demand or scaling an established line?
There is no “always better” choice—only the right choice for your stage.
If you are unsure, ask the factory to propose both OEM and ODM routes with timeline, MOQ, and risk notes.
FAQ 19. What packaging and labeling mistakes can create risk for leak-proof bag brands?
Common packaging and labeling mistakes include overstating leak-proof claims, unclear use instructions, missing care guidance, and mismatch between product performance and marketing wording. These issues can increase returns, complaints, and marketplace disputes even when the physical product is acceptable for its intended use.
Many teams treat packaging and labeling as a final design task. For leak-proof bags, packaging is also a risk-control tool. It shapes customer expectations, explains correct use, and can reduce preventable complaints.
Common packaging/labeling mistakes
1) Using broad claims without conditions
Examples of risky wording:
- “100% leak-proof” (without defined use condition)
- “Never leaks”
- “For all liquids” (if not tested broadly)
- “Heavy-duty waterproof” when the product is designed for wet-item containment only
These claims may attract customers, but they also invite complaint disputes when users test the product beyond its design target.
2) Missing user instructions
Even simple guidance can reduce complaints:
- how to close properly
- recommended fill level
- not for sharp objects
- clean closure area after oily foods
- storage/drying advice after use
Without guidance, customers fill the gap with assumptions.
3) No distinction between product types
A wet/dry travel bag, cooler liner bag, and reusable food pouch may all involve moisture, but they are not used the same way. Packaging that uses generic messaging can confuse and increase misuse.
4) Missing care and maintenance information
Reusable leak-proof products may need specific cleaning and drying steps to keep closure performance stable. If you omit this, users may create their own cleaning habits that reduce product life.
Why packaging wording affects marketplace performance
On e-commerce platforms, complaint decisions are often based on:
- product title and description claims
- packaging wording
- instruction clarity
- whether customer expectation was “reasonable”
In other words, the wording on your product can become part of your quality outcome.
Best practice for safer packaging copy
Use clear, customer-friendly wording:
- designed for [specific use]
- tested under [basic conditions, if appropriate]
- close fully before transport
- not intended for [misuse scenarios, if needed]
- clean and dry after use (for reusable products)
This protects both your brand and your customer experience.
FAQ 20. What should I ask a factory in the first meeting to start a custom leak-proof bag project the right way?
In your first meeting, ask questions that reveal the factory’s technical thinking, testing discipline, and production control, not just price and lead time. The best opening conversation covers use case fit, leak-risk zones, material/seam/closure recommendations, sample plan, PP sample process, QC checkpoints, and documentation support.
A strong first meeting saves weeks later. Many spend the first call discussing logo, MOQ, and price only, then discover technical gaps during sampling. For leak-proof products, that sequence is backwards.
You do not need to sound like an engineer. You just need to ask the right practical questions.
What a high-quality first meeting should achieve
By the end of the first meeting, you should know:
- whether the factory understands your use case
- whether they can explain leak-proof risks clearly
- what construction path they recommend
- how they test samples
- how they protect sample-to-bulk consistency
- whether they can support your market/document needs
If you still only know “price depends on quantity,” the meeting was too shallow.
Recommended first-meeting questions
A. Product use and risk understanding
- Based on our use case, what are the top leak risks in this project?
- Do you recommend this structure for our claim level, or a different one?
- Which part is most likely to need revision during sampling?
B. Material / seam / closure decision logic
- Which material options do you suggest and why?
- Which seam method fits this design best?
- Which closure option fits our use case better (and what are the trade-offs)?
C. Testing and sample plan
- How will you test leakage in the sample stage?
- Can you share a simple sample test record format?
- How many sample rounds are usually needed for similar projects?
D. Production and QC control
- Do you use PP samples before bulk?
- What leak-proof checks do you do in production QC?
- How do you handle failures during production?
E. Documentation and project management
- Can you support food-related material/document requests for our market?
- What information do you need from us to quote accurately?
- Can you propose a timeline with key checkpoints?
A good sign vs a warning sign
Good sign: The factory gives specific recommendations and explains trade-offs.
Warning sign: The factory answers every question with “No problem” but gives no testing or process details.
Best way to end the first meeting
Before closing the call, align on the next step:
- who sends RFQ details
- what the factory will propose (materials, closure, quote options)
- sample timeline target
- what will be tested in first sample
That turns a conversation into a real development path.
If you want to start a custom leak-proof bag project with a more structured first-step checklist, Jundong can support a practical RFQ and sampling discussion at info@jundongfactory.com.
Let's work together
With over 10 years of OEM/ODM bag industry experience, I would be happy to share with you the valuable knowledge related to leather products from the perspective of a leading supplier in China.

Factory catalogue
Latest blogs
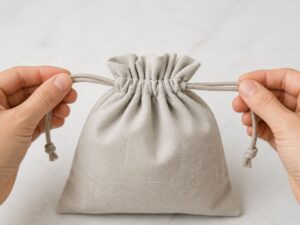

Make A Sample First?
If you have your own artwork, logo design files, or just an idea, please provide details about your project requirements, including preferred fabric, color, and customization options, we’re excited to assist you in bringing your custom bag designs to life through our sample production process.