 Skip to content

How to Choose Soft-Shell Fabric, Lining, Frame, and Reinforcement for Luggage?
A soft-shell suitcase is only as strong as the way its layers transfer force. A thick outer textile may resist abrasion but still sag around an unsupported base. A rigid board may keep the case upright but add weight, restrict expansion, or push impact into the zipper seam. Even a premium wheel set can tilt when its mounting area is too small or the backing beneath it bends under load.
The right construction begins with the suitcase size, expected packed weight, travel use, empty-weight target, shape-retention requirement, and moisture exposure. The outer textile handles abrasion and appearance; the lining protects the interior; foam, EVA, boards, and frame parts control shape; local reinforcement spreads force around handles, trolley mounts, wheels, corners, the base, and expansion seams. These elements must be reviewed as one connected load-bearing system.
The difference often appears after the sample is filled. A case may stand neatly when empty, yet twist when pulled, bow outward after expansion, or lean when loaded. Those problems are rarely caused by one visible material. They usually begin where flexible textile, rigid hardware, and concentrated force meet.
What Should a Soft-Shell Luggage Structure Achieve?
A soft-shell luggage structure should carry the intended packed load, remain stable on its wheels, support repeated lifting and pulling, keep the zipper opening aligned, and recover after compression. It should protect the contents without adding unnecessary weight or stiffness. These results depend on the outer textile, lining, frame, boards, foam, trolley, wheels, handles, stitching, and reinforcement working as one connected structure.
Structural Objectives
A soft case needs controlled flexibility rather than hard-shell rigidity. It should move enough to support expansion, exterior pockets, nesting, and easier storage, but not so much that it twists or collapses during use.
A well-balanced structure should:
- Stand upright when partially packed.
- Maintain contact across all wheels on a level floor.
- Keep the trolley aligned with the back panel.
- Hold the top opening in a usable shape.
- Avoid deep permanent folds after carton compression.
- Support lifting from both top and side handles.
- Keep the main zipper operating smoothly under load.
- Recover after the expansion section is closed.
- Protect the lining from boards, brackets, screws, and frame ends.
- Remain within the planned empty-weight limit.
These functions are connected. Increasing panel stiffness may improve display shape but reduce expansion flexibility. Reducing boards may lower weight but allow wheel or trolley movement. The structure should be reviewed as a whole rather than one component at a time.
Load Path
Every force entering the luggage needs a route through a larger part of the body.
When the top handle is lifted, the packed weight moves through the handle, webbing, stitching, backing layers, side panels, base, and contents. When the case is pulled, force travels through the trolley grip, tubes, brackets, backing panel, lower mount, and wheel base.
Weak cases often have strong visible parts attached to small internal areas. A substantial handle can still tear away when its webbing ends directly beneath the decorative patch. A premium wheel can tilt when its housing is fixed to a narrow or flexible base section.
A construction drawing should show:
- Where each load enters the body
- The direction of force
- The size of each backing layer
- How far webbing extends from the attachment
- Where boards overlap reinforcement
- How the trolley base connects to the wheel structure
- Where hard and flexible layers meet
Structure affects load-bearing, capacity, function, cost, and production stability; handles, zippers, lining, bottom sections, and reinforced areas should therefore be reviewed before the sample is locked.
Size and Packed Load
The structure should be designed around actual dimensions and intended loading, not simply described as carry-on, medium, or large.
As the case becomes taller, wider, or deeper:
- Side panels have more area to bow.
- The top handle sits farther from the wheel base.
- The trolley creates greater leverage at its lower brackets.
- A loaded side handle twists the body more strongly.
- Expansion places more outward pressure on the zipper band.
- The base must support a broader load.
- Corner impact can deform a larger section of the case.
The development record should state a reference packed load for each size. This load is then used when checking the handles, wheels, trolley, upright stability, zipper operation, expansion, and body recovery.
Using one internal structure for every size can make the smallest case unnecessarily heavy while leaving the largest one unstable. The outer appearance may remain consistent across a luggage set, but board thickness, backing area, webbing length, wheel support, and upper-frame control may need to change.
Shape Retention
Shape retention does not mean that an empty soft case must feel rigid. It means the body remains controlled enough for packing, rolling, display, zipper operation, and transport.
Support can come from several parts:
| Structural part | Main role |
|---|---|
| Upper wire or rod | Holds the opening and top outline |
| Side board | Reduces bowing across broad panels |
| Trolley backing board | Keeps tubes close to the back body |
| Base board | Supports packed weight and wheel installation |
| EVA layer | Adds flexible form and recovery |
| Foam | Gives fullness and smooths the outer appearance |
| Piping | Defines edges and supports panel transitions |
| Corner insert | Reduces permanent folds after impact |
| Compression straps | Restrict internal load movement |
| Structured pocket panel | Supports the front without stiffening the whole body |
A good sample should be checked when empty, partly packed, fully packed, and expanded. A case that looks clean only when completely full may be difficult to display or use on shorter trips. A body that remains upright when empty may still twist after the packed weight shifts toward the front pocket.
Frame and Panel Balance
A full internal frame gives stronger outline control, but it can increase weight, restrict nesting, reduce expansion flexibility, and transfer impact into seams. Partial support uses boards, EVA, piping, and local frame sections only where they are needed.
| Design condition | More suitable structural direction |
|---|---|
| Lightweight cabin case | Partial panels and focused reinforcement |
| Large checked case | Stronger base, back, and upper-opening control |
| Deep front pockets | Supported front panel and pocket opening |
| Wide expansion band | Stable sections above and below the band |
| Rolling duffel | Reinforced bottom and end panels |
| Retail display while empty | Improved front, side, and opening support |
| Nested packing | Flexible panels with controlled recovery |
Hard transitions should be avoided. If a rigid board ends directly beside a soft zipper seam, bending force may concentrate along that edge. Rounded board corners, covered edges, gradual overlaps, and softer transition layers reduce this risk.
The file identifies soft luggage, carry-on luggage, rolling travel bags, and luggage sets as relevant product types, with body structure, wheels, trolley, lining, zippers, handles, weight, dimensions, packing, and transport checks treated as connected development items.
Trolley Integration
The trolley system is not an accessory added after the body has been designed. It is part of the main structure.
It normally includes:
- Grip
- Telescopic tubes
- Locking mechanism
- Upper brackets
- Lower brackets
- Backing panel
- Base connection
- Fasteners
- Interior protective cover
The tubes should remain parallel and retract without binding. Excess movement at the upper bracket can distort the back panel, while weak lower support can allow the complete trolley to shift when the case is pulled.
The loaded sample should be checked for:
- Extension and retraction
- Lock engagement at each position
- Side-to-side movement
- Rattling
- Tube alignment
- Back-panel curvature
- Movement around lower mounts
- Contact between trolley parts and lining
- Interaction with the wheel base
- Handle comfort at the intended case height
A trolley that feels stable on an empty case may move noticeably once the packed weight increases pulling resistance.
Wheel and Base Stability
Wheel performance depends on the complete mounting structure, not only the wheel unit.
A spinner wheel places vertical load on the base while also receiving side force during turning and impact. A two-wheel system experiences dragging, tilting, curb contact, and stair impact.
The base needs to connect:
- Outer bottom textile
- Internal base board
- Wheel housing
- Reinforcement plate
- Fasteners
- Trolley lower structure
- Side-wall support
- Interior cover
The reinforcement should extend beyond the fastener holes. If the backing ends too close to the screws or rivets, stress remains concentrated in a small section.
All wheels should contact a flat surface evenly when the case is loaded. A wheel that lifts slightly may indicate body twist, unequal housing height, base deformation, or incorrect assembly.
| Failure sign | Likely structural issue |
|---|---|
| Wheel tilts inward | Weak housing support or bending base |
| One wheel loses contact | Twisted body or uneven installation |
| Wheel rubs the textile | Insufficient clearance or panel movement |
| Housing moves under load | Loose fasteners or small backing area |
| Case pulls to one side | Wheel alignment or body distortion |
| Base sags between wheels | Inadequate board support |
Handle Reinforcement
Top and side handles carry similar weight but place force into the body in different directions.
The top handle mainly lifts vertically. The side handle lifts vertically while also twisting the case. On a large checked case, side-handle reinforcement may need to extend farther because the lifting force acts across a wider body.
A handle attachment may include:
- Handle grip and core
- Webbing connection
- Outer textile
- Backing textile
- Reinforcement sheet or board
- Extended internal webbing
- Box, crossed, or repeated stitching
- Local bartacks where suitable
- Lining cover
The visible patch should not be treated as the main structural layer. Strength normally comes from hidden webbing and backing that spread the force beyond the handle base.
During sample review, lift the loaded case repeatedly from both handles and inspect:
- Stitch movement
- Fabric whitening
- Elongated needle holes
- Panel distortion
- Loose rivets
- Webbing movement
- Handle alignment
- Lining tension behind the attachment
Heavy-duty performance depends on suitable stitching, webbing, hardware, and reinforcement rather than thick outer material alone.
Zipper and Opening Control
The main zipper is affected by the shape of the opening around it. If the upper body twists or bows, the zipper path becomes wavy and the sliders may feel tight even when the zipper itself is suitable.
Opening control depends on:
- Upper-frame stability
- Piping
- Panel dimensions
- Seam allowance
- Zipper-tape tension
- Corner construction
- Pocket placement
- Expansion structure
- Packed-load distribution
The ends of the main zipper receive high stress during overpacking. Reinforcement may include wider seam allowance, backing patches, webbing tabs, stronger end stops, binding, or controlled bartacks.
The opening should be checked:
- Empty
- Partly packed
- Fully packed
- With compression straps tightened
- With expansion opened
- After the body has been tilted and rolled
If zipper operation changes sharply between these conditions, the issue may come from the surrounding structure rather than the slider or chain.
Expansion Stability
Expansion introduces a flexible band into the side wall. It increases useful volume but can reduce body control and shift the center of gravity away from the wheels and trolley.
The expansion section needs:
- Tear-resistant band material
- Suitable zipper size
- Adequate seam allowance
- Reinforced zipper ends
- Stable panels above and below
- Controlled expansion depth
- Strong corner transitions
- Testing at the intended packed load
A deep expansion may cause the front body to move outward. This can make the suitcase lean, create uneven wheel contact, or increase stress along the main zipper.
The expanded sample should remain usable, not merely close successfully. It should stand, roll, turn, and retract the trolley without severe distortion.
Interior Protection
The lining protects packed items from structural parts and keeps internal movement from damaging boards, tubes, screws, and fasteners.
Areas requiring extra attention include:
- Trolley channels
- Wheel-housing covers
- Board edges
- Frame ends
- Screw and rivet heads
- Zipper-end structures
- Compression-strap anchors
- Bottom corners
Boards should have rounded or covered edges. Frame ends should be secured and isolated. Hard fasteners should not rub directly against thin lining.
The interior also needs enough allowance to move with the outer body. A lining cut too tightly can pull against corners when the case is filled. Excess material can sag into zipper paths or bunch around the trolley.
Lining is part of product protection, appearance, cleaning, and function, while assembly control should confirm that the correct lining, padding, pockets, handles, zippers, and reinforced sections follow the approved sample.
Weight and Capacity
Every structural part adds weight and occupies internal space. Boards, EVA, foam, frame pieces, reinforcement plates, trolley tubes, wheels, handles, and hardware all reduce the amount of weight available for packed belongings.
Weight control should focus on efficiency:
- Use strong local backing instead of thickening every panel.
- Use heavier textile only at abrasion-prone areas.
- Reduce board coverage where shape support is unnecessary.
- Match EVA density to the actual cushioning need.
- Extend webbing strategically rather than adding several unrelated patches.
- Share structural support between the trolley back and side panels where practical.
- Avoid decorative layers that add weight without improving protection or appearance.
- Adjust construction by luggage size.
Weight should not be reduced by weakening the wheels, trolley base, handles, or bottom. These areas control rolling, lifting, and structural safety.
The final sample record should state the measured empty weight for each size so later production can be compared against an agreed reference.
Failure Signals
Small changes often appear before a complete structural failure.
| Early sign | Possible cause |
|---|---|
| White marks around handle stitches | Yarn tension or coating stretch |
| Trolley begins to rattle | Fastener movement or weak backing |
| Main zipper develops a wave | Body twist or unstable opening |
| One corner remains crushed | Weak insert or board recovery |
| Lining tears beside the trolley | Rough hardware or concentrated rubbing |
| Expansion seam stretches | Excess outward load or narrow reinforcement |
| Bottom fabric begins sagging | Weak base support |
| Wheel angle changes | Housing plate or base deformation |
| Front panel remains dented | Foam compression or unsupported surface |
| Case leans when packed | Load imbalance, wheel height, or body twist |
These conditions should be inspected while the sample is loaded. An empty visual review may not reveal them.
Sample Conditions
A useful sample review should include several real handling states.
| Sample condition | What it reveals |
|---|---|
| Empty and upright | Retail shape and basic balance |
| Partly packed | Shape control without full internal support |
| Fully packed | Load distribution and body deformation |
| Expanded and packed | Expansion stability |
| Lifted from top handle | Vertical load transfer |
| Lifted from side handle | Body twisting and backing strength |
| Rolled in several directions | Wheel alignment and trolley control |
| Tilted over edges | Base and wheel-housing response |
| Compressed for packing | Foam, board, and frame recovery |
| Reopened after compression | Zipper alignment and permanent creasing |
The test load, repetitions, surface, duration, and acceptance conditions should be agreed for the project. Soft luggage should not be described as passing every transport test without a confirmed test plan; the source specifically requires wheels, trolley parts, packing, and transportation risks to be evaluated according to the actual product.
Production Control
The approved sample should be converted into measurable records before the full quantity begins.
Records should include:
- Dimensions
- Empty-weight reference
- Outer textile
- Lining
- Board material and location
- EVA and foam
- Frame layout
- Trolley model
- Wheel model
- Handle construction
- Reinforcement dimensions
- Stitching method
- Zippers
- Expansion depth
- Packing method
Early output should be checked before the main run continues. Further inspection should confirm correct materials, cutting dimensions, stitch quality, handle security, zipper operation, pocket layout, lining, padding, bottom reinforcement, load areas, labels, and packing.
The uploaded Jundong facts describe in-process inspection as a way to find material, sewing, handle, zipper, lining, padding, and reinforcement errors before all pieces are completed.
A soft-shell luggage structure has achieved its purpose when it remains balanced, usable, and visually controlled after loading, rolling, lifting, expanding, compressing, and packing—not only when it stands empty on a table.
Which Outer Fabric Is Best for Soft-Shell Luggage?
The best outer fabric is the one that meets the suitcase’s packed-load, abrasion, weight, appearance, moisture, branding, and cost requirements without making the body unnecessarily heavy. Polyester works well for many cost-controlled collections, nylon suits lighter and more abrasion-demanding designs, and Oxford constructions provide stronger body and texture. The final choice must also include weave, finished weight, coating, backing, color, and reinforcement placement.
Selection Priorities
Outer fabric should be selected after the luggage size, use, and structural direction are clear. A textile that performs well on a compact cabin case may be too light for a large checked case. A thick material that looks durable on a swatch may create excessive weight, bulky seams, and difficult corner sewing.
Start with these details:
- Cabin or checked use
- Finished dimensions
- Intended packed load
- Empty-weight target
- Two-wheel or spinner structure
- Expansion depth
- Exterior-pocket layout
- Base and corner exposure
- Required moisture resistance
- Surface appearance
- Logo method
- Color quantity
- Packing method
- Repeat-order plans
The outer layer should not be evaluated separately from the frame, foam, board, lining, trolley, wheels, and reinforcement. Jundong’s luggage facts identify polyester, Oxford, nylon, EVA, lining, wheels, trolley handles, zippers, and hardware as connected parts of soft-luggage development.
A useful decision is not “Which fabric is strongest?” but “Where does this suitcase need strength, and how much weight can be allocated to it?”
Polyester
Polyester is widely used for soft luggage because it offers controlled cost, broad color availability, practical sourcing, and compatibility with several decoration methods. It can work for lightweight cabin cases, mid-level travel collections, rolling bags, exterior pockets, and coordinated luggage sets.
Its suitability depends on construction. A dense coated polyester Oxford can feel firm and substantial, while a lighter polyester can feel flexible and less structured.
Polyester is often considered when the design needs:
- Several custom colors
- Printed logos or graphics
- Controlled material cost
- Coordinated fabric across several sizes
- Relatively straightforward repeated sourcing
- Lightweight or medium-duty construction
It should not automatically be described as waterproof. Moisture performance depends on the coating, lining, seam construction, zipper design, and complete case. Heavy checked luggage also needs the material thickness, weave, backing, and reinforcement to be reviewed rather than relying on the fiber name alone.
Nylon
Nylon is often selected when lower weight, smoother hand feel, abrasion resistance, and a more technical appearance are important. It suits travel products expected to receive frequent handling, especially where the material must remain flexible without feeling thin.
Compared with ordinary polyester constructions, nylon is commonly positioned as:
- Lighter for a comparable functional direction
- Smoother on the surface
- More resistant to abrasion
- More suitable for technical travel styling
- Higher in material cost
- More dependent on advance confirmation of color, coating, and thickness
It may fit premium carry-ons, higher-wear checked cases, professional travel lines, rolling duffels, or reinforced panels.
Nylon is not automatically the correct choice for every higher-priced suitcase. A very smooth surface can show marks differently from a textured Oxford, and uncommon colors may be less convenient to source. Its benefit should be visible in the product’s weight, hand feel, abrasion exposure, or visual position—not used only to make the specification sound more expensive.
Nylon vs Polyester
The comparison should use fabrics with similar denier, weave, coating, backing, finished weight, and color requirements. Comparing a light polyester with a dense nylon does not reveal the real fiber difference because several variables have changed at once.
| Factor | Polyester direction | Nylon direction |
|---|---|---|
| Material cost | Usually easier to control | Commonly higher |
| Color selection | Broad commercial availability | May require earlier confirmation |
| Surface feel | Soft, crisp, firm, or textured | Often smoother and more technical |
| Abrasion demand | Suitable for many travel products | Often selected for higher wear |
| Weight planning | Broad construction choices | Often useful for lightweight performance |
| Printing | Compatible with many methods | Process testing remains important |
| Moisture absorption | Generally lower | Generally higher |
| Repeated sourcing | Often convenient in common specifications | Depends more on selected grade and color |
There is no responsible fixed percentage for the price difference. Fiber grade, yarn size, weave, coating, order quantity, custom dyeing, usable width, and sourcing conditions all affect the result.
Oxford Fabric
Oxford refers to a woven construction rather than one single fiber. It can be made from polyester or nylon and is available in different deniers, weights, textures, and coatings.
Its visible weave and structural hand make it suitable for luggage that needs a stronger textile appearance. It is also commonly used on travel bags, backpacks, outdoor bags, tool bags, and other products where abrasion and body matter.
Oxford can be useful for:
- Main suitcase panels
- Trolley-back panels
- Reinforced bottoms
- Exterior pockets
- Expansion sections
- Rolling travel bags
- Coordinated travel sets
The weave texture can help disguise light surface marks, although coarse structures may reduce the clarity of very fine printed artwork. Dense Oxford can also become thick where piping, zippers, foam, backing, and several seam allowances meet.
The fiber still matters. Polyester Oxford and nylon Oxford may share a similar weave while differing in hand feel, cost, abrasion performance, color availability, and moisture behavior.
Denier
Common textile descriptions include 600D, 900D, 1000D, and 1680D. Denier describes yarn mass; it does not directly state the finished fabric’s abrasion resistance, tear strength, coating quality, density, or weight.
| Textile direction | Practical character | Possible luggage use |
|---|---|---|
| 600D Oxford | Lighter and easier to source | Cabin cases, pockets, secondary panels |
| 900D Oxford | More body with moderate weight | Main panels on medium cases |
| 1000D construction | Firm technical appearance | High-wear travel and equipment styles |
| 1680D construction | Dense and substantial | Bottoms, corners, large checked cases |
A higher number can improve perceived substance, but it may also create:
- Higher empty weight
- Thicker folded seams
- More difficult corner shaping
- Greater needle resistance
- Bulk around piping and zippers
- Reduced expansion flexibility
- Larger nesting volume
For many soft cases, medium-weight body fabric with heavier lower panels is more efficient than 1680D across the entire shell.
Finished Weight and Density
Two materials carrying the same denier can behave differently because their yarn quality, weave density, coating amount, and backing are not identical.
A denser construction may provide:
- Better surface stability
- Lower yarn movement around stitches
- Cleaner panel shape
- Greater resistance to snagging
- More consistent printing
- A firmer retail appearance
However, density also affects sewing and structure. Thick fabric folded around piping can create an uneven zipper line. Dense layers combined with foam and board may become difficult to turn through tight corners.
The material record should include more than a commercial name. Useful details include:
- Fiber
- Denier
- Weave
- Finished weight where available
- Coating
- Backing
- Color reference
- Surface texture
- Usable width
- Approved physical swatch
The sample should be assessed as a completed case. Flat swatches cannot reveal wrinkling, folded thickness, seam bulk, or how the surface behaves around curved edges.
Abrasion and Tear
Abrasion and tear resistance solve different problems.
Abrasion occurs when the suitcase rubs against floors, conveyor surfaces, walls, other luggage, or transport equipment. Tear failure often begins after a cut, puncture, snag, or overloaded seam creates an initial opening.
A textile can resist rubbing but still tear around concentrated stitch holes. Another material may have strong yarns but show visible scuffing early.
Review these areas separately:
| Performance area | What to inspect |
|---|---|
| Surface abrasion | Fuzzing, yarn wear, coating loss, gloss change |
| Edge abrasion | Piping, lower corners, bottom transitions |
| Tear growth | Behavior after a small cut or puncture |
| Stitch retention | Yarn movement around loaded seams |
| Snagging | Raised yarns after contact with rough objects |
| Fold durability | Whitening, cracking, or coating separation |
| Color retention | Appearance after rubbing and moisture |
| Panel recovery | Wrinkles and permanent creases |
Higher-wear materials can be placed only on the base, lower corners, and trolley side. This protects vulnerable areas without adding the same cost and weight to the front, top, and pocket panels.
Panel Mapping
Using one fabric across every panel simplifies sourcing and color matching, but it is not always the most efficient construction.
A panel-specific schedule can allocate performance according to actual exposure:
| Area | Suggested material direction |
|---|---|
| Front body | Balanced appearance, weight, and branding surface |
| Side walls | Stable weave with controlled flexibility |
| Trolley back | Strong material with internal board support |
| Bottom | Denser abrasion-resistant fabric |
| Lower corners | Heavy textile or additional protective layer |
| Exterior pockets | Compatible lighter or medium material |
| Expansion band | Flexible, stable, and tear-resistant material |
| Handle bases | Main fabric with hidden structural backing |
| Piping zones | Fabric that folds cleanly without excessive bulk |
This approach often performs better than simply selecting the heaviest available material.
The color and surface should still appear coordinated. When two textiles are used, confirm that they react similarly under lighting and that their black, navy, grey, or custom shades do not look mismatched.
PU Coating
PU coating is commonly applied to polyester or nylon to improve moisture resistance, add body, and stabilize the weave. The result depends on coating formulation, thickness, adhesion, flexibility, and the base textile.
Important checks include:
- Coating adhesion
- Flexibility after folding
- Whitening at creases
- Surface odor
- Bonding with foam
- Needle-hole appearance
- Aging behavior
- Hand feel
- Finished weight
- Color change
A heavier coating can improve barrier performance but may make the textile stiff. It may also create sharper folds and more visible needle holes.
The term “PU-coated” is therefore incomplete without a physical swatch and agreed performance direction. Two PU-coated Oxford fabrics can feel and behave very differently.
Polyester itself should not be treated as waterproof; the uploaded material rules state that water resistance depends on the coating, lining, seam structure, zipper, and complete design.
TPU Lamination
TPU lamination may be considered when a flexible film layer or stronger moisture barrier is required. It can provide a different feel and barrier structure from an ordinary coating, but it also affects cost, weight, lamination control, and sewing.
Possible advantages include:
- Flexible film performance
- Improved moisture barrier at the fabric level
- Smooth backing
- Stronger surface stability in selected structures
Possible concerns include:
- Higher material cost
- Greater folded thickness
- More difficult corner construction
- Heat sensitivity during processing
- Lamination separation if the bond is unsuitable
- Changes in hand feel
- Additional sourcing time
TPU should not be selected merely because it sounds more advanced. For standard soft luggage used in light rain, a suitable coated Oxford combined with controlled seams and protected openings may be more practical.
The intended water exposure should be defined before choosing between ordinary coating and film lamination.
Water Testing
Water performance should be evaluated at two levels: the textile and the completed suitcase.
| Review level | What it shows |
|---|---|
| Surface spray | Whether droplets bead or wet the face |
| Fabric penetration | Whether water moves through the coated textile |
| Folded-area review | Whether coating cracks or whitens |
| Wet-rub review | Whether color or surface finish changes |
| Seam exposure | Water entry through needle holes |
| Zipper exposure | Entry through zipper tape, teeth, and slider area |
| Full-case exposure | Combined performance of all openings and attachments |
A material can perform well during a fabric test while the complete case still admits moisture through:
- Main zipper
- Expansion zipper
- Handle stitching
- Trolley openings
- Wheel attachments
- Pocket seams
- Piping seams
- Rivet or screw locations
A meaningful record should identify the test method, exposure time, sample condition, and acceptance level. “Water-tested” or “waterproof fabric” does not describe the performance of the assembled luggage. The source facts require coating, lining, seams, zipper, and full structure to be considered together.
RPET
RPET can be used when recycled polyester supports the material direction. It may be developed in Oxford, plain weave, ripstop, or other luggage constructions.
Its review should include:
- Recycled-content documentation
- Fiber and yarn consistency
- Fabric weight
- Abrasion behavior
- Tear behavior
- Coating compatibility
- Color repeatability
- Hand feel
- Logo performance
- Material minimum
- Repeat availability
Recycled content does not automatically confirm a specific certification. When GRS or another document is required, availability should be verified for the exact material and project rather than assumed from the term RPET.
RPET should still satisfy the same practical criteria as virgin polyester: shape, abrasion, sewing, color, moisture, coating, and cost. Sustainability language cannot compensate for unstable color, weak surface performance, or uncertain repeat supply.
Color and Surface
Outer fabric strongly affects how a luggage collection looks after transport and use.
Dark smooth textiles can appear refined but may show dust, scratches, or pressure marks. Textured Oxford may hide light abrasion more effectively. Light colors reveal dirt and wheel-contact marks earlier, while very saturated shades can require careful color confirmation.
Check:
- Approved physical color
- Appearance under different lighting
- Color between main and reinforced panels
- Zipper-tape matching
- Piping and webbing coordination
- Coating influence on shade
- Color after rubbing
- Color after moisture exposure
- Dye-lot consistency
- Repeated-order availability
Color should be approved on the final construction, not only on a digital display. Foam, lamination, backing, heat, and sewing tension can change how the surface appears.
For luggage sets, place all sizes together during approval. A small difference between panels can become more visible when several products are displayed side by side.
Logo Compatibility
The chosen textile must support the intended branding method.
Screen printing can work well on stable, moderately smooth polyester or Oxford surfaces, but coarse weave may reduce fine detail. Heat transfer requires review of temperature, pressure, coating, color migration, and surface marking. Embroidery adds thread and backing, which may pull or pucker lightweight panels. Patches and metal plates add weight and need suitable internal support.
Confirm:
- Logo size
- Position
- Surface texture
- Color accuracy
- Heat tolerance
- Stitch distortion
- Adhesion
- Internal backing
- Interaction with foam or board
- Appearance after folding
The logo should be tested on the intended material rather than a visually similar substitute. A coating change can alter ink adhesion, heat-transfer behavior, and color appearance.
Cost Control
Outer-material cost includes more than the price per meter.
| Cost factor | Practical effect |
|---|---|
| Fiber | Nylon commonly costs more than ordinary polyester |
| Denier and density | Heavier structures use more material |
| Coating or lamination | Adds processing and finished weight |
| Custom color | May require dyeing minimums |
| Usable width | Changes cutting yield |
| Directional weave | Can increase cutting waste |
| Defect allowance | Affects material consumption |
| Sewing thickness | Changes handling time |
| Empty weight | Affects product and freight weight |
| Repeat availability | Influences later production stability |
The lowest textile quotation may not create the lowest finished-case cost. A weak material may require additional backing. A very heavy material can increase sewing difficulty, carton volume, and freight.
Price should be reviewed with size, structure, hardware, logo, packing, quantity, timing, testing, and shipping method rather than treated as one isolated fabric decision.
Sample Approval
The final decision should be made on a complete sample using the planned textile, coating, foam, support, lining, zippers, and hardware.
Inspect the outer surface in these conditions:
- Empty and upright
- Partly packed
- Fully packed
- Expanded and loaded
- Rolled on several surfaces
- Lifted by each handle
- Compressed for nesting
- Reopened after compression
- Exposed to the agreed moisture test
- Rubbed at the base and lower corners
Record:
- Material specification
- Color
- Hand feel
- Finished weight
- Coating
- Panel placement
- Logo result
- Seam appearance
- Wrinkling
- Abrasion behavior
- Moisture result
- Approved physical swatch
The best outer fabric is not simply nylon, polyester, Oxford, or RPET. It is the approved construction that protects the required areas, stays within the weight and cost limits, supports the desired appearance, and remains practical for stable repeated production.
How Should Lining and Interior Layers Be Chosen?
Luggage lining should protect packed items, conceal structural parts, support pockets and dividers, and remain stable around trolley tubes, boards, zippers, straps, and hardware. Polyester lining suits many travel collections, while denser nylon or ripstop constructions may be considered where tear and abrasion risks are higher. Material weight, weave, coating, seam design, pocket loading, cleaning needs, and internal reinforcement should be reviewed together.
Interior System
The interior is not a decorative cover placed inside a completed shell. It is a working system that connects storage, protection, structure, hardware isolation, and visual presentation.
A soft-shell case may contain:
- Main body lining
- Zipper divider
- Compression panel
- Mesh pockets
- Shoe compartment
- Toiletry section
- Trolley-tube cover
- Bottom lining
- Corner covers
- Foam or EVA layers
- PE board covers
- Reinforcement patches
- Binding
- Compression straps
- Care labels and woven labels
Each part experiences a different type of force. The main lining is pressed against clothing and packed goods. A shoe pocket carries concentrated weight and dirt. A mesh section stretches whenever it is filled. The trolley cover rubs against tubes, brackets, and fasteners. Strap anchors receive repeated pulling force.
Using one light lining for every internal area can reduce weight, but it may create weak pockets, worn trolley channels, or torn strap attachments. Using a heavy textile everywhere adds cost, sewing thickness, and empty weight where the extra strength may provide little value.
Jundong’s material records include polyester lining, PEVA lining, foil lining, water-resistant lining, velvet lining, mesh, foam, EPE, EVA, PE board, padding, zippers, webbing, handles, straps, and hardware. These components should be selected according to use, structure, appearance, quantity, cost direction, and delivery needs.
Material Comparison
No single lining is ideal for every compartment. The choice should reflect expected abrasion, tear risk, moisture exposure, hand feel, cleaning, and visual direction.
| Lining direction | Main strengths | Main cautions | Suitable areas |
|---|---|---|---|
| Polyester lining | Controlled cost, broad colors, low weight, practical sewing | Light grades may need local backing | Main body, dividers, general pockets |
| Nylon lining | Smooth feel, strong abrasion and tear potential | Often higher cost; color and finish require confirmation | Higher-wear interiors, premium travel pieces |
| Ripstop lining | Reinforcement yarns can slow tear growth | Technical appearance may not suit every design | Travel, outdoor, equipment-led cases |
| Water-resistant lining | Helps contain light moisture and supports easier wiping | Needle holes and zippers remain possible entry paths | Shoe and toiletry sections |
| PEVA lining | Wipe-clean surface and moisture barrier for selected uses | Stiffness, odor, fold behavior, and seam construction require review | Removable wet sections, selected easy-clean pockets |
| Velvet lining | Soft contact surface | Higher dust, lint, abrasion, and cleaning concerns | Delicate accessories or protected small sections |
| Mesh | Visibility, ventilation, low weight | Can snag, stretch, or pull from seams | Divider pockets and accessory storage |
| Brushed textile | Soft surface protection | May collect fibers and show wear | Electronics or delicate-item pockets |
A dense polyester may perform better than a loosely woven nylon. Fiber name alone does not establish tear strength, abrasion behavior, or service life.
The full specification should record:
- Fiber
- Weave
- Denier or yarn construction
- Finished weight where available
- Coating or backing
- Color
- Surface feel
- Usable width
- Approved physical swatch
- Intended compartment
- Cleaning expectation
Tear Resistance
The lining with the strongest tear performance is usually a dense construction with suitable yarn strength, stable weave, adequate seam allowance, and reinforcement at loaded areas. Nylon and ripstop constructions are often considered where tear risk is high, but the final result depends heavily on sewing and internal contact surfaces.
A tear rarely begins in the middle of an undamaged flat panel. It usually starts at:
- A needle hole
- A pocket corner
- A narrow seam allowance
- A zipper end
- A screw head
- A sharp board edge
- A frame end
- A strap anchor
- A cut or puncture
- A rough trolley bracket
Once the first opening appears, the weave determines how quickly the damage grows.
| Failure pattern | Likely cause | More effective correction |
|---|---|---|
| Pocket corner splits | Load concentrated at a sharp corner | Rounded shape, larger backing, longer sewing line |
| Divider tears beside zipper | Narrow allowance or excessive packed pressure | Wider allowance and reinforced zipper end |
| Lining wears over trolley tube | Repeated contact with a hard part | Stronger sleeve or separate wear layer |
| Bottom lining punctures | Exposed hardware or sharp board edge | Cover fasteners and bind board edges |
| Mesh pulls from binding | Excess stretch and narrow attachment | Wider binding and stronger base panel |
| Strap anchor tears | Force concentrated into one small patch | Extend webbing into a wider backing area |
| Fabric opens around stitches | Excess stitch density or unsuitable needle | Adjust stitch formation and backing |
A heavier lining does not automatically prevent these problems. If the construction directs all force into a short seam, the material can still tear around the stitch holes.
Weight and Weave
Lining weight affects more than perceived quality. It changes the empty weight, folded thickness, interior volume, sewing difficulty, and how neatly the case closes.
A lighter construction offers:
- Lower suitcase weight
- Easier folding around curves
- Less bulk around zipper seams
- Better nesting
- Lower material consumption
Its limitations may include:
- Lower puncture resistance
- Greater need for local reinforcement
- More visible outlines from boards and hardware
- Reduced body in large pockets
A heavier construction may offer:
- Fuller appearance
- Better abrasion resistance
- Stronger pocket body
- Improved coverage over internal structures
It can also create:
- Higher empty weight
- Thick seam intersections
- Reduced flexibility
- Greater difficulty around corners
- More pressure beneath zippers and binding
- Larger folded volume
The most efficient plan often uses a lighter main lining with stronger material only at the bottom, trolley channel, shoe pocket, strap anchors, and other loaded areas.
Layer Mapping
Interior materials should be mapped according to function rather than applied uniformly.
| Interior area | Main exposure | Recommended direction |
|---|---|---|
| Main walls | Clothing contact and light rubbing | Lightweight or medium lining |
| Bottom | Packed weight and compression | Stronger lining with protected board beneath |
| Trolley channel | Friction from tubes and brackets | Denser wear layer or sleeve |
| Zipper divider | Opening tension and packed pressure | Stable lining with reinforced zipper ends |
| Shoe pocket | Dirt, weight, moisture, and sole edges | Easy-clean textile with stronger base |
| Toiletry pocket | Small leaks and repeated wiping | Coated or removable section |
| Mesh pocket | Stretching and snagging | Mesh matched to load, with secure binding |
| Strap anchors | Repeated pulling | Hidden backing and extended webbing |
| Corners | Board contact and rubbing | Covered edges and sufficient allowance |
| Delicate-item pocket | Surface scratching | Soft-contact textile |
| Hardware covers | Screw and rivet contact | Durable cover with no exposed sharp edges |
This method keeps the interior lighter while strengthening the places most likely to fail.
Pocket Loading
Interior pockets should be sized and reinforced according to what they are expected to hold.
A small accessory pocket may carry cables, passports, keys, or adapters. A shoe section carries greater weight and may press against the zipper from several directions. A large mesh pocket can stretch heavily when filled with rolled clothing.
Pocket development should confirm:
- Finished width and depth
- Gusset size
- Intended contents
- Expected load
- Zipper opening
- Corner shape
- Seam allowance
- Backing
- Binding
- Interaction with the main compartment
Square pocket corners can concentrate force at one stitch intersection. Rounded corners or extended sewing lines distribute tension more gradually.
A deep pocket should not rely only on its face textile. The base and side gussets must carry the contents without pulling the surrounding lining inward.
The pocket should also remain usable after the main compartment is filled. A flat pocket that works on an empty sample may become difficult to open when packed goods push against it from behind.
Divider Construction
A full zipper divider helps separate the two sides of the case and control loose contents. It can also experience strong pressure when the suitcase is overfilled.
Its performance depends on:
- Lining stability
- Zipper size
- Zipper-tape attachment
- Seam allowance
- Mesh or fabric panel size
- Binding
- Corner construction
- Slider access
- Packed pressure
The divider should not be pulled so tightly that it bends the opening or causes the zipper to wave. It should have enough controlled allowance to close over normal packed contents.
The zipper ends deserve additional support because force concentrates there when the divider is full. A backing patch, reinforced fold, stronger end tab, or wider seam can reduce separation.
Mesh Selection
Mesh should be chosen by opening size, stretch, recovery, yarn thickness, snag resistance, and expected load.
| Mesh characteristic | Practical effect |
|---|---|
| Fine openings | Hold small items and create a cleaner appearance |
| Large openings | Improve ventilation but allow more snagging |
| High stretch | Accept bulky contents but may deform |
| Low stretch | Retains shape but offers less loading flexibility |
| Strong recovery | Returns closer to its original form after unloading |
| Soft hand | Reduces rubbing against clothing |
| Dense yarn | Improves coverage and durability but adds weight |
A large mesh panel should not be expected to carry heavy objects without support. It may need:
- A woven lower section
- Divider seams
- Wider binding
- A stronger zipper tape
- Local backing at corners
- Reduced pocket depth
Mesh should be checked after repeated filling and emptying. Permanent stretching, pulled binding, broken yarns, and zipper distortion are signs that the material or pocket size is unsuitable.
Shoe Compartments
A shoe compartment needs more than a wipe-clean surface. It must accommodate irregular shapes, concentrated weight, rough sole edges, and dirt.
Useful details include:
- Easy-clean face
- Reinforced lower panel
- Adequate gusset
- Smooth zipper path
- Covered raw edges
- Ventilation where required
- Separation from clean clothing
- Sufficient size for the intended footwear
- Controlled use of internal volume
A shoe section that is too deep can consume too much capacity in a cabin case. One that is too shallow becomes difficult to close and transfers pressure into the zipper ends.
When used in a larger case, the pocket base may need stronger textile or hidden backing so footwear weight does not pull against the main wall.
Toiletry Sections
Toiletry storage must consider bottles, caps, leakage, cleaning, and visibility.
Possible directions include:
- Coated lining
- PEVA section
- Removable pouch
- Transparent pocket
- Mesh sub-pocket
- Structured zipper opening
- Elastic bottle loops
- Reinforced pocket base
A coated textile can help contain a small spill, but it does not create a sealed compartment by itself. Stitch holes, zipper tape, corners, and openings remain possible leakage paths.
The source material specifically warns that moisture performance depends on material, coating, seams, zipper, and structure rather than one fabric alone.
For stronger containment, a removable pouch may be easier to clean and replace than a fixed compartment sewn directly into the suitcase.
Trolley Isolation
Trolley tubes and brackets create some of the highest interior wear risks.
The lining should not rub directly against:
- Tube edges
- Locking mechanisms
- Screw heads
- Brackets
- Rivets
- Board corners
- Metal frame ends
A trolley channel may include a stronger lining sleeve, foam separation, binding, shaped cover, or backing layer.
Check that:
- Tubes remain fully covered.
- No sharp fastener touches the lining.
- The cover does not interfere with trolley movement.
- The material does not bunch during retraction.
- Board edges remain hidden.
- The cover stays secure after repeated pulling.
- Packed items cannot press directly against the mechanism.
A lining that tears beside the trolley may not require a heavier material across the complete case. A local wear layer and better hardware isolation may solve the problem with less added weight.
Boards and Edge Protection
PE boards, EVA, foam, and other internal layers should be covered so their edges cannot cut or abrade the lining.
Important details include:
- Rounded board corners
- Bound or taped edges
- Stable board position
- Sufficient lining allowance
- No exposed adhesive
- Protected frame ends
- Smooth transition between thick and thin layers
A tightly fitted lining can be pulled against the board every time the suitcase is filled. Too much excess material can sag into zipper paths or gather around the trolley.
The lining should move with the body without remaining loose enough to catch on hardware.
Compression Straps
Compression straps restrict load movement and help control the packed shape. Their anchors receive repeated tension.
A strong anchor may include:
- Strap webbing
- Reinforced lining
- Backing patch
- Extended webbing
- Board overlap where suitable
- Repeated stitching
The strap should not be sewn only to the visible lining. The force needs to continue into a stronger internal section.
Review:
- Anchor position
- Strap length
- Buckle accessibility
- Adjustment
- Stitch pattern
- Backing size
- Interference with pockets
- Performance under a full load
When tightened, the straps should control contents without pulling the lining away from the body.
Color and Appearance
Interior color influences usability as much as appearance.
Light lining:
- Makes small items easier to find
- Creates a bright interior
- Shows dirt, shoe contact, and pen marks earlier
Dark lining:
- Hides wear and stains
- Coordinates easily with dark outer textiles
- Can make small items harder to locate
Mid-tone grey, blue, beige, or similar shades often balance visibility and cleaning.
Color approval should also consider:
- Mesh
- Binding
- Zipper tape
- Compression straps
- Woven labels
- Printed patterns
- Exterior material
- Repeat-order consistency
Printed lining can add identity, but pattern repeat, cutting direction, ink feel, color matching, and material minimums should be confirmed before sampling.
Cleaning and Odor
Interior materials should be checked for practical maintenance.
Review:
- Wipe-clean behavior
- Stain visibility
- Moisture absorption
- Drying
- Odor
- Surface tackiness
- Color transfer
- Coating whitening
- Adhesive smell
- Interaction with toiletries
Coated linings, PEVA sections, foam, and adhesives can affect odor. A material should be reviewed after the complete sample has been closed for a period, not only when the textile is first unpacked.
Sample Approval
Luggage sampling should confirm the lining, wheels, trolley, body, dimensions, weight, and transport protection—not only the exterior appearance.
The interior should be checked in several conditions:
| Sample condition | What it reveals |
|---|---|
| Empty | Fit, sewing, wrinkles, and presentation |
| Pockets loaded | Corner strength and zipper tension |
| Main compartment full | Lining allowance and board contact |
| Straps tightened | Anchor strength |
| Divider closed | Zipper alignment and packed pressure |
| Trolley operated | Cover movement and rubbing |
| Case rolled | Internal contact with hardware |
| Case compressed | Wrinkling and recovery |
| Moisture applied to selected pocket | Cleaning and containment behavior |
Record:
- Lining material
- Color
- Weight or construction
- Coating
- Pocket dimensions
- Mesh type
- Binding
- Reinforcement locations
- Trolley cover
- Strap anchors
- Board-edge protection
- Odor
- Cleaning result
- Approved physical sample
Production Consistency
During production, luggage checks should include the wheels, trolley, body, lining, dimensions, and transport protection. Early confirmation of materials is necessary before stable production begins.
Interior inspection should verify:
- Correct lining
- Correct color
- Pocket dimensions
- Zipper installation
- Mesh orientation
- Binding
- Strap positions
- Reinforcement patches
- Trolley cover
- Hardware protection
- Board placement
- Cleanliness
- Labels
- Loose threads
- SKU separation
The approved sample and written material record should remain the comparison basis. Changing a lining after approval can affect color, weight, sewing, hand feel, pocket strength, and delivery timing.
A suitable luggage interior feels clean and organized, but its real value appears after repeated packing. The lining should continue protecting contents, supporting loaded pockets, covering hard components, and moving with the suitcase without tearing, sagging, or interfering with zippers and trolley operation.
Which Frame and Support Structure Fits the Luggage?
The right support structure keeps soft-shell luggage upright, maintains wheel contact, stabilizes the trolley, protects the zipper path, and recovers after compression without adding excessive weight. Small cabin cases may need partial support, while larger checked cases often require stronger control around the base, back, upper opening, wheels, handles, and expansion section. The final arrangement should follow size, packed load, opening design, hardware, and transport conditions.
Structural Roles
A soft-shell case does not depend on one rigid skeleton. Shape and load control normally come from several materials working together.
| Structural part | Main purpose | Risk when unsuitable |
|---|---|---|
| Upper frame | Holds the opening and top outline | Collapsed opening or wavy zipper |
| Side support | Reduces bowing across broad panels | Side-wall deformation |
| Base board | Supports packed contents and wheels | Sagging base or tilted wheel housings |
| Trolley backing | Stabilizes telescopic tubes | Back-panel bending or internal movement |
| EVA layer | Adds flexible form and cushioning | Poor recovery or excessive stiffness |
| Foam | Improves fullness and surface appearance | Permanent creasing or flat panels |
| Piping | Defines edges and joins adjacent panels | Weak edge shape or distorted corners |
| Corner insert | Controls folding after impact | Crushed corners that do not recover |
| Reinforcement plate | Spreads hardware force | Local tearing or board deformation |
| Compression straps | Limits movement of packed contents | Unstable internal load |
Jundong’s fact library confirms EVA, foam, EPE, PE board, lining, wheels, trolley handles, zippers, and hardware as relevant materials and components for structured travel products. These elements affect protection, support, thickness, weight, appearance, and cost.
Size and Use
Support should change with the suitcase dimensions and intended travel use.
A compact cabin case has shorter panels and less leverage between the top handle and wheel base. It can often maintain shape with partial boards, an upper frame, stable piping, and local backing around the trolley and wheels.
A large checked case carries more contents and creates greater bending force across its height and width. Larger panels bow more easily, the side handle twists a broader body, and the trolley places greater force on the lower mounting area.
| Luggage direction | Structural priority |
|---|---|
| Compact cabin case | Low weight, stable opening, focused hardware backing |
| Medium checked case | Balanced side support, reinforced base, stable expansion |
| Large checked case | Wider load distribution, stronger back and wheel support |
| Rolling duffel | Firm bottom, reinforced ends, controlled body sag |
| Luggage set | Different support schedules for each size |
| Expandable case | Stable panels above and below the expansion band |
Using the same board thickness and reinforcement area across every size may make the smallest piece too heavy while leaving the largest one under-supported.
Partial Support
Partial support places structural materials only where shape, load, or hardware control is needed.
It may include:
- An upper frame around the main opening
- A base board beneath the main compartment
- A trolley backing panel
- Local wheel plates
- Side strips rather than full side boards
- EVA at the front or corners
- Foam behind visible outer panels
- Reinforced piping around critical edges
This direction is often suitable for lightweight cabin luggage, flexible travel bags, and designs where expansion or nesting matters.
Its main advantage is efficiency. Empty weight remains lower, the body compresses more easily for packing, and flexible areas can absorb impact.
The main risk is leaving broad panels or transition areas unsupported. A front pocket may pull the body forward, the side wall may bow after expansion, or the upper opening may fold when only the base is reinforced.
Partial support works well only when every structural layer connects into the next one.
Full-Body Support
A more complete support arrangement may use boards or frame elements across the back, sides, base, opening, and selected front sections.
It can improve:
- Empty display shape
- Upright stability
- Opening alignment
- Control of large side panels
- Trolley stability
- Protection around packed contents
- Appearance across several luggage sizes
It also introduces trade-offs:
- Higher empty weight
- Reduced flexibility
- More difficult nesting
- Greater folded thickness
- Added assembly work
- More pressure around rigid-to-soft transitions
- Possible interference with expansion
A fully supported body is not automatically stronger during impact. If a rigid panel ends beside a flexible seam, bending force can concentrate along the panel edge. Rounded corners, covered board edges, sufficient overlap, and gradual transitions reduce this risk.
Upper Frame
The upper opening needs enough control to keep the zipper path aligned during packing and use.
An upper frame may use a wire, rod, formed strip, piping structure, or another perimeter component. Its purpose is not to make the entire case rigid. It should prevent the opening from collapsing while still allowing the body to flex.
Check whether the frame:
- Follows the intended opening shape
- Remains secure at both ends
- Avoids pressure against the lining
- Recovers after compression
- Allows smooth zipper movement
- Works with corner curves
- Does not interfere with nesting
- Remains stable after expansion
If the upper support is too weak, the zipper may become wavy and difficult to operate. If it is too rigid, impact can move directly into the zipper seam or corner connection.
The frame ends require careful protection. An exposed or poorly secured end can rub through the lining or create a visible hard spot on the exterior.
Wire vs Support Board
Wire elements and support boards perform different jobs and often appear in the same case.
| Feature | Wire or rod | Support board |
|---|---|---|
| Main role | Controls edges and openings | Controls broad panels |
| Suitable location | Upper opening, perimeter, curved outline | Base, back, side wall, hardware backing |
| Flexibility | Can bend and recover depending on material | Depends on board type and thickness |
| Main risk | Bent outline, loose ends, local pressure | Permanent bend, cracking, edge abrasion |
| Shape influence | Defines perimeter | Reduces panel bowing |
| Packing effect | May affect nesting | Adds flat-layer thickness |
A wire frame cannot replace a base board beneath loaded contents. A board cannot follow a tight curved opening as effectively as a shaped perimeter element.
The design should establish which areas need edge control and which need surface control instead of selecting one material for every structural task.
PE and PP Board
PE and PP boards may be used for bases, trolley backs, side panels, hardware backing, and other structured sections.
| Consideration | PE direction | PP direction |
|---|---|---|
| Flexibility | Often more flexible | Often firmer |
| Panel feel | Softer movement | Stronger shape control |
| Recovery | Can bend without feeling excessively rigid | Depends on grade and thickness |
| Suitable direction | Flexible panels and local backing | Bases and firmer support areas |
| Main concern | May bow across a wide area | May create hard transitions |
The board type alone does not determine the result. Area, thickness, shape, edge treatment, and attachment matter equally.
A wide unsupported panel may still bow even when the material feels firm in a small hand sample. A board that is too thick can reduce internal capacity, increase weight, and make corner assembly difficult.
Board edges should be rounded, bound, taped, or otherwise isolated from the lining. Sharp corners can gradually wear through the interior after repeated movement and compression.
EVA Support
EVA can provide semi-rigid shape, cushioning, recovery, and impact control. It is useful where a flat board would feel too hard or where a shaped panel is required.
Possible applications include:
- Front-panel support
- Side-wall shaping
- Corner inserts
- Trolley-back cushioning
- Semi-rigid exterior pockets
- Base components
- Protective internal sections
- Molded luggage structures
EVA selection should consider hardness, thickness, density, forming method, zipper connection, edge binding, and size accuracy.
A soft grade may compress during carton packing and fail to recover. A hard grade may create a rigid feel, thick seams, or excessive pressure at corners.
Molded EVA requires closer review because forming, tooling, shell hardness, dimensions, zipper attachment, binding, and packaging all affect the result. The source describes EVA as a lightweight structural and moldable material, while also requiring tooling and sample confirmation for molded applications.
Foam and EPE
Foam and EPE can add cushioning, surface fullness, and light structural support. They are useful for smoothing the appearance above boards and reinforcement layers.
Their main roles include:
- Hiding hard backing outlines
- Adding panel fullness
- Reducing surface wrinkling
- Protecting packed items from rigid parts
- Supporting exterior pocket shape
- Filling transitions between layers
They should not carry primary loads from wheels, handles, or trolley mounts.
Important checks include:
- Thickness consistency
- Compression recovery
- Bonding
- Odor
- Wrinkling
- Water absorption
- Heat response
- Edge visibility
- Behavior after long carton compression
Different foam thicknesses meeting at one seam can create uneven piping or a distorted zipper path. The finished sample should therefore be reviewed after assembly and compression, not only while the foam lies flat.
Aluminum vs Fiberglass
The Jundong fact library does not identify aluminum or fiberglass as standard internal-frame materials for soft luggage. Where either is proposed, availability, joining, end protection, weight, repeat sourcing, and loaded performance need separate confirmation.
From a structural-use perspective, they behave differently:
| Factor | Aluminum | Fiberglass rod |
|---|---|---|
| Structural feel | More rigid | More flexible |
| Recovery after bending | May retain a severe bend | Often recovers after moderate flex |
| Weight | Relatively light | Also relatively light |
| Corrosion | Depends on grade and finish | Does not rust |
| End treatment | Cut edges require protection | Cut ends require sealing and covering |
| Joining | Needs suitable brackets or connectors | Needs stable end anchoring |
| Failure concern | Permanent deformation or sharp damaged edge | Splitting or exposed fibers |
| Suitable direction | Rigid rail or defined outline | Flexible perimeter support |
Neither option should be chosen by material name alone.
The sample should be checked for:
- Actual added weight
- Shape recovery
- Noise during handling
- Connection security
- End protection
- Lining contact
- Impact behavior
- Compression recovery
- Assembly consistency
- Repeat availability
A lightweight material can still be unsuitable if its connections create hard pressure areas or its damaged ends threaten the lining.
Trolley Backing
The trolley should be treated as part of the main load structure.
Pulling force travels from the grip through the tubes, brackets, backing panel, lower mount, base, and wheels. Weak support at any of these stages can create movement or body distortion.
A trolley section may include:
- Upper bracket backing
- Tube guides
- Main back panel
- Lower bracket support
- Reinforcement plate
- Base-board connection
- Fasteners
- Protective lining cover
Check the trolley while the case is loaded. An empty sample places much less resistance on the tubes and lower mount.
Review:
- Tube alignment
- Extension and retraction
- Lock engagement
- Side movement
- Rattling
- Back-panel curvature
- Lower mounting stability
- Fastener security
- Contact with the lining
- Relationship with the wheel base
A strong trolley attached to a weak back panel will still move. The backing needs enough area to spread pulling force beyond the brackets.
Base Support
The base carries packed contents and provides support for wheels, the lower trolley structure, bottom feet, and corner protection.
A suitable base may combine:
- Outer abrasion-resistant textile
- Internal board
- Reinforcement plate
- Wheel housings
- Trolley lower mount
- Side-wall overlap
- Corner support
- Interior covering
The board should remain stable between the wheels. If it sags, the case may lean, drag, or lose even wheel contact.
| Visible issue | Possible structural cause |
|---|---|
| Base bows downward | Insufficient board support |
| Wheel housing tilts | Small backing area or board deformation |
| Bottom fabric wrinkles | Internal movement or poor layer attachment |
| One wheel lifts | Twisted base or uneven installation |
| Trolley lower mount moves | Weak connection to base structure |
| Lower corners fold inward | Inadequate corner support |
The base should be reviewed at the intended packed load rather than judged by hand pressure alone.
Wheel Integration
Wheel quality and wheel support are separate concerns.
A well-made spinner can still tilt when installed on a small or flexible backing area. The wheel housing should connect into the base and adjacent side structure so vertical load and side impact are spread over a larger section.
Check:
- Housing alignment
- Backing area
- Fastener spacing
- Board overlap
- Clearance from outer textile
- Contact of all wheels on a level floor
- Rotation
- Noise
- Movement under load
- Base deformation
For a luggage set, one wheel design may be used across several sizes, but the supporting structure may need to increase with case dimensions and intended load.
Expansion Control
Expansion increases capacity by inserting a flexible zipper band into the body. This can reduce side-wall stability and shift the packed mass away from the trolley.
A stable expansion section needs:
- Strong but flexible band material
- Suitable zipper
- Reinforced zipper ends
- Adequate seam allowance
- Stable panels above and below
- Controlled depth
- Corner continuity
- Loaded rolling review
When opened, the case should still stand and roll without severe leaning or wheel misalignment.
A very deep expansion may provide attractive volume figures but create poor travel behavior. Increased capacity should be weighed against body control, zipper stress, and center-of-gravity movement.
Structural Transitions
Many failures begin where one stiff material ends and another flexible layer begins.
High-risk transitions include:
- Board edge beside zipper seam
- Wheel plate beside soft side wall
- Trolley bracket beside thin lining
- Frame end beneath a corner
- EVA panel beside unpadded textile
- Base board ending beneath the side handle
- Reinforcement patch ending near a stitch line
Safer transitions use:
- Rounded corners
- Covered edges
- Longer overlaps
- Gradual thickness changes
- Flexible intermediate layers
- Wider reinforcement
- Smooth internal covers
The goal is to distribute bending rather than allow it to concentrate along one hard edge.
Weight Control
Every board, frame element, EVA sheet, reinforcement plate, trolley part, wheel housing, and foam layer adds weight.
Efficient weight control may involve:
- Partial side panels instead of full coverage
- Stronger base support rather than heavier body fabric
- Local EVA at corners
- Lightweight foam on visible panels
- Wider but thinner reinforcement
- Shared support between trolley and back panel
- Different structures for each luggage size
- Removal of decorative layers that add little value
Weight should not be reduced by weakening the wheel base, trolley mount, handles, or bottom. These areas control lifting, pulling, rolling, and stability.
The empty weight should be measured on the approved sample for every size. A visual specification cannot show how much each hidden layer contributes.
Loaded Evaluation
A support structure should be checked in several conditions:
| Condition | What it reveals |
|---|---|
| Empty and upright | Display shape and basic balance |
| Partly packed | Shape without full internal support |
| Fully packed | Panel deformation and base behavior |
| Expanded and packed | Side stability and center-of-gravity movement |
| Lifted from top handle | Vertical load transfer |
| Lifted from side handle | Body twisting |
| Rolled in different directions | Wheel and trolley control |
| Tilted over an edge | Base and housing response |
| Compressed for nesting | Frame and foam recovery |
| Reopened after compression | Permanent folds and zipper alignment |
Record actual observations rather than relying on descriptions such as “strong” or “stable.”
Approval Record
Before full production, the accepted structure should be documented through:
- Physical sample
- Finished dimensions
- Empty-weight reference
- Intended packed load
- Board material and placement
- EVA and foam details
- Frame location
- Trolley model
- Wheel model
- Hardware backing
- Expansion depth
- Reinforcement drawings
- Lining protection
- Packing method
- Agreed structural checks
Luggage development in the source is required to consider body structure, wheels, trolley handles, lining, zippers, handles, weight, size, packaging, transport testing, and after-sales risk together.
The suitable support structure is not the heaviest or most rigid option. It is the arrangement that keeps the case aligned and usable under its intended load, protects the lining and hardware, recovers after compression, supports expansion where needed, and remains within the planned weight, cost, and packing limits.
How Should Reinforcement Be Designed and Approved?
Reinforcement should spread concentrated force from handles, trolley mounts, wheels, the base, corners, zipper ends, and expansion seams into a wider part of the luggage body. Thick outer cloth alone is not enough. Webbing direction, backing size, board overlap, stitch layout, fastener placement, and the transition between flexible and rigid materials determine whether the case remains stable after repeated lifting, rolling, impact, compression, and packing.
Stress Mapping
Reinforcement planning should begin with a stress map rather than a list of stronger materials. The map identifies where force enters the suitcase, the direction in which it travels, and which surrounding layers must carry it.
| Area | Main force | Common early damage |
|---|---|---|
| Top handle | Vertical lifting | Fabric whitening, elongated stitch holes |
| Side handle | Lifting plus body twist | Side-panel distortion, loose attachment |
| Upper trolley mount | Pulling and steering | Back-panel movement, rattling |
| Lower trolley mount | Leverage and impact | Base bending, loose fasteners |
| Spinner wheel housing | Vertical load and lateral impact | Wheel tilt, cracked or deformed backing |
| Two-wheel base | Dragging and curb contact | Base abrasion, housing movement |
| Bottom panel | Packed weight and floor contact | Sagging, scuffing, layer separation |
| Lower corners | Compression and impact | Permanent folding, fabric wear |
| Main zipper ends | Opening tension | Seam separation, tape distortion |
| Expansion band | Outward packed pressure | Stretching, body bowing |
| Exterior pocket corners | Local pocket load | Stitch tearing |
| Compression-strap anchors | Repeated pulling | Lining or backing failure |
The drawing should show reinforcement dimensions, direction, overlap, and connection to neighboring structures. A patch that looks large on the outside may still be ineffective if the hidden webbing or board ends directly beside the attachment.
Heavy-duty performance comes from the fabric, stitching, reinforcement, webbing, hardware, and complete structure working together—not from textile thickness alone.
Reinforcement Stack
High-load attachments usually need several coordinated layers. A top-handle connection, for example, may contain:
- Handle grip or molded handle
- Internal handle core
- Connecting webbing
- Outer textile
- Backing textile
- Structural sheet or board
- Extended internal webbing
- Box, crossed, or repeated stitching
- Local bartacks where suitable
- Interior protective cover
The purpose of the stack is to move force away from the visible attachment and spread it over a wider area.
Each layer should have a clear job:
| Layer | Structural role |
|---|---|
| Outer textile | Provides the visible surface |
| Backing textile | Stabilizes stitch holes and reduces local stretching |
| Webbing | Carries tensile load beyond the attachment |
| Board or plate | Spreads force across a broader area |
| Stitch pattern | Connects layers and controls load direction |
| Fastener | Secures rigid components where required |
| Interior cover | Prevents contact with packed items and lining |
Adding more layers without understanding their interaction can create stiffness, thick seams, and hard edges. The better solution is usually a continuous load path with sufficient overlap.
Handle Attachments
Top and side handles must be evaluated separately because they load the suitcase differently.
A top handle mainly lifts the case vertically. A side handle also twists the body because the packed mass rotates around the lifting position. This twisting effect becomes more noticeable as suitcase width and packed weight increase.
Important confirmation details include:
- Handle material and internal core
- Webbing width and thickness
- Webbing extension length
- Backing dimensions
- Board overlap
- Stitch layout
- Rivet or screw use
- Distance from nearby seams
- Position relative to the frame
- Interior cover
Webbing should normally continue beyond the visible handle base. If it ends inside a small decorative patch, force remains concentrated near the stitch holes.
A wider backing section is useful only when it is correctly connected to the body. A loose patch placed behind the textile may shift instead of spreading load.
Webbing, handles, and straps directly affect load-bearing and long-term use. Width, thickness, material, sewing method, hardware, and stress locations should all be confirmed before approval.
During sample review, load the case and lift it repeatedly from each handle. Inspect:
- Movement at both ends
- Changes in handle alignment
- Whitening around stitches
- Enlarged needle holes
- Panel puckering
- Loose rivets
- Webbing slippage
- Lining tension
- Board movement behind the attachment
The handle should return to its intended position without leaving permanent distortion in the body.
Trolley Mounts
The trolley transfers pulling force from the grip through the tubes, brackets, backing panel, lower mount, base, and wheel system. Reinforcement should connect these parts rather than treating the upper and lower brackets as isolated fittings.
A trolley support area may include:
- Upper bracket backing
- Tube guides
- Main back panel
- Lower bracket support
- Reinforcement plate
- Base-board connection
- Fasteners
- Protective lining cover
The upper mount controls tube alignment and back-panel movement. The lower mount receives stronger leverage, especially when the trolley is extended and the loaded case changes direction.
Check the trolley with the case loaded. An empty case places much less force on the lower mounting area and may hide movement that appears during real use.
Review:
- Extension and retraction
- Lock engagement
- Side movement
- Tube alignment
- Rattling
- Back-panel curvature
- Fastener security
- Lower-mount movement
- Contact with the lining
- Connection to the base and wheels
If the trolley and wheel structures are separated by a weak flexible area, the body may bend between them. A more continuous base-and-back connection can improve pulling stability without reinforcing the entire suitcase.
Wheel Housings
Wheel reinforcement should spread both vertical load and side impact. The wheel unit itself may remain intact while the surrounding base bends or tears.
For spinner luggage, each housing should connect into the base and adjacent side or corner structure. Reinforcement should extend beyond the fastener pattern rather than ending close to the screws or rivets.
Inspect:
- Housing alignment
- Plate dimensions
- Board thickness
- Board overlap
- Fastener type
- Fastener spacing
- Interior cover
- Clearance from outer cloth
- Contact of all wheels on a level floor
- Movement under load
| Visible issue | Likely reinforcement problem |
|---|---|
| Wheel tilts inward | Small backing area or flexible base |
| Housing moves | Loose fasteners or unstable plate |
| One wheel loses floor contact | Twisted base or uneven installation |
| Fabric wrinkles around housing | Local deformation beneath the textile |
| Wheel rubs against cloth | Insufficient clearance or panel movement |
| Case pulls to one side | Wheel alignment or body distortion |
A luggage set may use the same wheel appearance across several sizes, but the supporting area may need to increase for the larger cases.
Base Reinforcement
The base carries the packed contents while supporting the wheels, trolley mount, corner protection, and bottom hardware.
A suitable base may combine:
- Abrasion-resistant outer cloth
- Internal support board
- Reinforcement plate
- Wheel housings
- Lower trolley mount
- Side-wall overlap
- Corner inserts
- Interior covering
The base board should remain stable between the wheels. If it bends downward, the suitcase may lean, drag, or lose even wheel contact.
Base reinforcement should extend into adjacent structures. A strong flat board that stops before the lower corners may allow the case to fold beside the board edge.
The transition should use rounded corners, covered edges, sufficient overlap, and gradual changes in stiffness.
Corner Protection
Corners receive impact, compression, abrasion, and repeated folding. Lower corners are particularly vulnerable because they sit close to the wheels and floor.
Possible protection includes:
- A second textile layer
- Heavier local cloth
- EVA inserts
- Molded corner guards
- Board extensions
- Reinforced piping
- Coated wear panels
- Internal backing
Corner guards should match the actual contact area. Oversized molded parts add weight, increase packing volume, and may interfere with nesting.
The interior edge of a guard or board should not create a sharp pressure line. Repeated compression against a hard boundary can eventually mark or cut the textile beside it.
Corner recovery should be checked after carton compression and impact. A corner that looks acceptable immediately after assembly may remain permanently folded after being packed inside another case.
Zipper Ends
Main zipper ends receive strong tension during opening, closing, and overpacking. Damage often begins where the zipper tape, side panel, piping, and seam allowance meet.
Reinforcement options may include:
- Wider seam allowance
- Backing patches
- Webbing end tabs
- Folded textile ends
- Binding
- Local bartacks
- Stronger zipper tape
- Protected slider stops
The reinforcement should not make the corner so thick that the slider catches or the opening becomes distorted.
Check zipper-end behavior when the case is:
- Empty
- Partly packed
- Fully packed
- Compressed by internal straps
- Expanded
- Lifted and tilted
If zipper operation changes sharply under load, the problem may be surrounding body movement rather than the zipper itself.
Expansion Seams
Expansion adds a flexible band to the body and increases outward pressure on the side walls. The seam above and below the expansion zipper must control that pressure without becoming excessively rigid.
Important details include:
- Band textile
- Zipper size and tape
- Seam allowance
- Number and placement of stitch rows
- Reinforced zipper ends
- Connection to adjacent panels
- Corner construction
- Expansion depth
- Frame continuity
A deeper expansion creates more capacity but can shift the packed mass away from the trolley and wheels. This may cause leaning, body bowing, or uneven wheel contact.
The expanded case should be evaluated while loaded. It should still stand, roll, turn, and operate the trolley without severe distortion.
Stitch Layout
Stitching connects the load-bearing layers, but more stitches do not always produce greater strength. Excessive needle penetration can weaken coated or densely woven cloth.
Important variables include:
- Thread type and size
- Needle type and size
- Stitch length
- Seam allowance
- Number of rows
- Stitch direction
- Backtacking
- Bartacks
- Box-and-cross patterns
- Binding
- Layer thickness
Box-and-cross stitching is often useful for webbing attachments because it spreads tension across a larger area. Bartacks can strengthen selected ends, but their density and placement should match the textile and webbing.
A very short stitch may create a perforation line. A large needle can enlarge holes in coated material. A dense bartack placed too close to an edge may encourage tearing beside the reinforced section.
Sewing affects strength, function, structure, and durability. Handles, straps, zippers, lining, padding, and bottom sections should follow the approved construction rather than relying on appearance alone.
Hard-to-Soft Transitions
Many failures appear where a rigid component ends beside a flexible layer.
High-risk transitions include:
- Board edge beside a zipper seam
- Wheel plate beside a soft side wall
- Trolley bracket beneath thin lining
- Frame end near a corner
- EVA panel beside unpadded cloth
- Reinforcement patch ending near handle stitches
- Base board ending beneath a side handle
Safer transitions use:
- Rounded corners
- Covered board edges
- Longer overlaps
- Flexible intermediate layers
- Gradual thickness changes
- Wider backing
- Smooth internal covers
The aim is to distribute bending over a larger area. A strong plate that ends abruptly can move stress to the cloth immediately beside it.
Reinforcement Drawings
Descriptions such as “reinforce the handle” or “make the base stronger” are too vague for consistent execution.
The technical record should identify:
| Detail | What should be recorded |
|---|---|
| Location | Exact panel and orientation |
| Dimensions | Width, length, and shape |
| Material | Webbing, board, textile, EVA, or plate |
| Thickness | Confirmed specification where applicable |
| Overlap | Connection with surrounding structure |
| Stitch layout | Pattern, direction, and position |
| Fasteners | Type and placement |
| Edge treatment | Binding, tape, rounding, or cover |
| Interior protection | Lining sleeve or cover |
| Applicable sizes | Whether dimensions change by suitcase size |
A separate drawing may be needed for each suitcase size when load, dimensions, or hardware differ.
Sample Review
Reinforcement should be approved on a complete sample, not only on loose stitched panels.
Useful sample conditions include:
| Condition | What it reveals |
|---|---|
| Empty and upright | Basic shape and alignment |
| Partly packed | Support without full internal pressure |
| Fully packed | Loaded deformation |
| Lifted from top handle | Vertical load transfer |
| Lifted from side handle | Body twist |
| Pulled with trolley extended | Back and base connection |
| Rolled in several directions | Wheel and housing stability |
| Expanded and loaded | Seam and body control |
| Tilted over an edge | Wheel and corner response |
| Compressed for packing | Board, EVA, and corner recovery |
Record the test load, number of repetitions, test surface, impact condition, duration, and acceptance criteria before the review begins. Exact values should follow the intended use and agreed test plan rather than being assumed.
Inspect both the exterior and interior after testing. Hidden backing may move even when the outside still appears acceptable.
Approval Record
Sample approval should cover more than appearance. It should confirm size, materials, structure, capacity, zippers, webbing, hardware, lining, padding, packing direction, functional performance, and the standard to be followed during production.
The accepted reinforcement details should be recorded through:
- Approved physical sample
- Sample photographs
- Pattern version
- Size specifications
- Material list
- Board and EVA details
- Hardware list
- Reinforcement drawings
- Webbing specifications
- Stitching notes
- Handle construction
- Trolley and wheel installation
- Zipper-end details
- Expansion construction
- Lining protection
- Packing method
- Inspection locations
- Approval and change records
Production records help ensure that sewing, inspection, and packing follow the same version. They are also important for later repeat orders, where an old sample or outdated drawing may otherwise be used by mistake.
For complex structures, a pre-production sample can confirm the final materials, dimensions, construction, packing, labels, and inspection requirements before the main run begins. An approved sample does not remove the need for ongoing checks.
Production Checks
Reinforcement should be inspected before the lining or binding hides critical attachments.
Early checks should confirm:
- Correct reinforcement material
- Correct dimensions
- Correct orientation
- Board overlap
- Webbing extension
- Stitch position
- Stitch consistency
- Handle attachment
- Trolley support
- Wheel backing
- Base reinforcement
- Zipper ends
- Expansion seams
- Hardware security
- Interior edge protection
In-process inspection is intended to find incorrect materials, unstable cutting dimensions, irregular sewing, weak handles, unsuitable zipper operation, missing reinforcement, and incorrect lining before all units are completed.
Finished checks should then confirm function after the structure is fully assembled and packed. Luggage inspection should include wheels, trolley, body, lining, dimensions, and outer-carton transport protection.
Failure Diagnosis
| Failure | Likely cause | Correction direction |
|---|---|---|
| Handle pulls away | Short webbing or small backing area | Extend load path and backing |
| Stitch holes enlarge | High local tension or unsuitable stitch density | Adjust attachment and sewing |
| Wheel housing tilts | Weak plate or base deformation | Increase load-spreading support |
| Trolley rattles | Loose mount or insufficient backing | Improve brackets, fasteners, and panel support |
| Base sags | Inadequate board or poor connection | Strengthen base and adjacent overlap |
| Zipper end separates | Narrow allowance or weak end control | Add backing and improve seam construction |
| Expansion band stretches | Excess depth or weak surrounding support | Improve band, seams, and panel control |
| Lining tears over hardware | Exposed edge or repeated rubbing | Add cover and isolate hard parts |
| Corner remains folded | Weak insert or hard transition | Improve corner support and recovery |
| Reinforcement edge shows outside | Excess thickness or abrupt transition | Taper layers and improve placement |
Reinforcement is properly approved when the loaded suitcase remains stable after lifting, pulling, rolling, expansion, impact, and compression; when the attachment areas show no unacceptable movement; and when every hidden layer has been converted into measurable production and inspection records.
Let's work together
With over 10 years of OEM/ODM bag industry experience, I would be happy to share with you the valuable knowledge related to leather products from the perspective of a leading supplier in China.

Factory catalogue
Table of Contents
Latest blogs

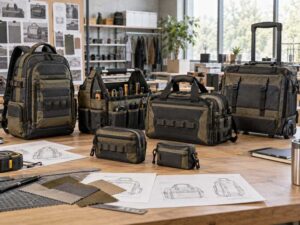

Make A Sample First?
If you have your own artwork, logo design files, or just an idea, please provide details about your project requirements, including preferred fabric, color, and customization options, we’re excited to assist you in bringing your custom bag designs to life through our sample production process.