 Skip to content
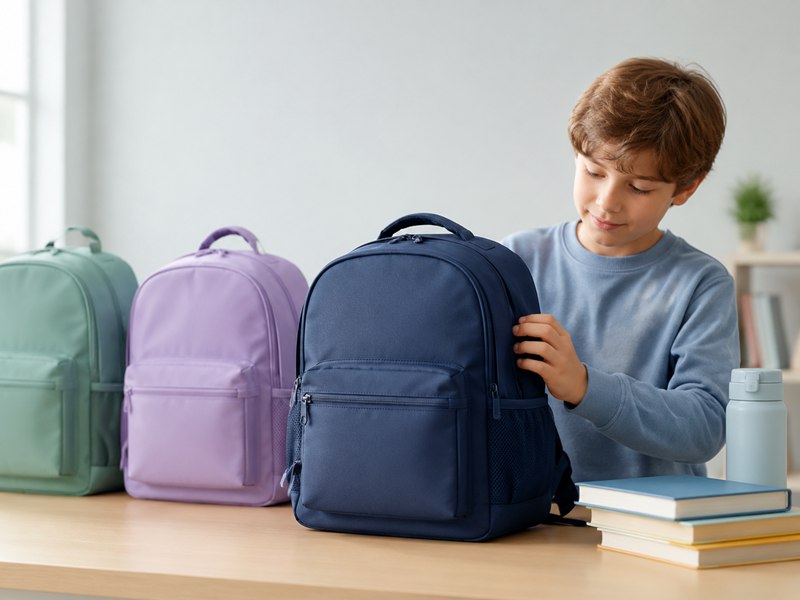
Choosing a school bag by age sounds easy until the real packing list arrives. A backpack that looks ideal in a photograph may be too short for an A4 folder, too narrow for the lunch box or so deep that books fall away from the back. Even the liter label can mislead: two 20L bags may carry very different loads because curved panels, padding, dividers and zipper openings all change the usable interior.
The best school bag size rises gradually with age, but the label should never be chosen by age alone. As a working reference, use 6–12L for ages 3–5, 10–17L for ages 6–8, 15–22L for ages 9–12, 20–28L for ages 13–15 and 22–32L for ages 16–18. Confirm the fit with the actual folder, lunch box, device and fully packed weight before approving the size.
Picture two seven-year-olds carrying the same 17L model. One takes a reading book and snack; the other carries an A4 folder, rigid lunch box, bottle and spare sweater. The backpack has not changed, but its fit, balance and comfort have. That is why a dependable school bag starts with the contents and body dimensions, not the age label printed on a hangtag.
What Capacity Fits Each Age?

A practical starting capacity is 6–12L for ages 3–5, 10–17L for ages 6–8, 15–22L for ages 9–12, 20–28L for ages 13–15, and 22–32L for ages 16–18. Age alone is not enough: torso length, folder size, lunch storage, device use, spare clothing, and the expected filled weight should confirm the final size.
The table below provides development references rather than fixed product standards. Children of the same age can differ considerably in height, body shape, school schedule, and daily carrying needs.
| Age Group | Suggested Capacity | Approximate Bag Dimensions | Common Daily Use |
|---|---|---|---|
| 3–5 years | 6–12L | 30–36 × 22–27 × 10–14 cm | Snack, bottle, spare clothes, small folder |
| 6–8 years | 10–17L | 36–41 × 26–30 × 12–16 cm | A4 folder, reading books, lunch, bottle |
| 9–12 years | 15–22L | 40–46 × 28–32 × 13–18 cm | Workbooks, binder, lunch, jacket, tablet |
| 13–15 years | 20–28L | 44–49 × 30–34 × 15–20 cm | Textbooks, binders, device, sportswear |
| 16–18 years | 22–32L | 45–50 × 31–35 × 15–21 cm | Laptop, several books, lunch, clothing |
Dimensions and liters must be reviewed together. A deep 20-liter bag may project too far behind a small child, while a taller model with the same stated capacity may distribute the load closer to the back. Rounded corners, thick padding, internal dividers, and narrow openings also reduce usable space.
What Capacity Fits Ages 3–5?
A 6–12L backpack usually suits children aged three to five. A 6–8L model works for short preschool sessions, while 9–12L is more useful when the bag must hold a lunch container, bottle, spare clothes, and a communication folder. The bag should remain light, easy to open, and proportionate to a short torso.
Preschool backpacks should not be enlarged simply to provide “growing room.” An oversized body can hang below the waist, strike the back of the legs, catch on furniture, and encourage adults to pack unnecessary items. The child may also struggle to place a wide or heavily structured bag inside a small classroom cubby.
A useful preschool capacity plan can be based on the daily contents:
| Preschool Routine | Suggested Capacity | Likely Contents |
|---|---|---|
| Short class or nursery session | 6–8L | Snack box, small bottle, tissues, compact clothing item |
| Half-day preschool | 8–10L | Snack, bottle, light jacket, small folder |
| Full-day preschool | 10–12L | Lunch box, bottle, spare clothing set, folder, comfort item |
| Outdoor or activity day | 11–13L | Standard contents plus hat or lightweight outerwear |
The internal shape matters more than adding another liter. A wide clamshell or U-shaped opening helps an adult see and retrieve spare clothes without unloading the entire bag. A narrow top opening may leave usable space trapped in the bottom corners.
For this age group, useful construction details include:
- A clear internal name label.
- Large zipper pulls that small hands can grasp.
- Lightweight buckles without sharp edges.
- A bottle pocket deep enough to retain a short bottle.
- A smooth lining that can be wiped clean.
- A light-colored interior that makes small items easier to find.
- Short shoulder straps that do not leave excessive loose webbing.
- A top handle sized for an adult hand without becoming oversized.
Capacity should be checked with the actual folder used by the preschool. Some programs send home an A4 communication folder even though the children carry very few other items. In that case, the bag may need greater height and width without needing a much deeper body.
What Is a Good Size Backpack for a 7-Year-Old?
A 12–17L backpack is a useful starting size for many seven-year-olds. A 12–14L bag can support a lighter school day, while 15–17L offers more room for an A4 folder, reading books, lunch, bottle, and light jacket. The correct choice depends on whether lunch is carried inside and whether books travel home every day.
At seven, the child may be moving from a preschool-style bag to a more structured primary school backpack. The design must fit full-size folders without looking or feeling like an adult daypack.
| Daily Carrying Pattern | Suggested Capacity | Design Priority |
|---|---|---|
| Folder and light reading materials | 12–14L | Slim body and easy opening |
| Full school day with separate lunch bag | 13–15L | A4 fit and organized front pocket |
| Lunch stored in the main compartment | 15–17L | Wider base and washable lining |
| Books, lunch, and light clothing | 16–18L | Better load control and stronger base |
A practical external size may sit near 36–41 cm high, 26–30 cm wide, and 12–16 cm deep. These figures must be checked against the child’s torso. The top should not press into the neck, and the base should not hang far below the waist.
A4 compatibility needs more than a 29.7 cm internal height. The folder may measure closer to 32 × 25 cm once its cover, tabs, and contents are included. The zipper opening also needs enough clearance for the folder to pass through without bending its corners.
Bottle and lunch placement can change the required capacity by several liters. If a rigid lunch box occupies the lower main compartment, books may tilt or sit above it. A divided arrangement can improve organization, but each divider also consumes space. Before approving 15L or 17L, the intended contents should be packed into a physical sample.
At this age, avoid a laptop-style back panel that is excessively rigid. Moderate padding, well-shaped shoulder straps, and a stable base are usually more useful than thick foam layers that add empty weight.
What Size Bag Fits a 12-Year-Old?
A 20–25L backpack fits many twelve-year-olds, although a lighter timetable may work with 18–20L and school-plus-sports use may require 24–28L. The bag should accommodate the largest binder or device while remaining proportionate to the torso. Greater capacity is justified only when the extra contents are carried regularly.
Twelve is a transition age. Some students still carry a primary-school packing list, while others begin moving between classrooms with several textbooks, binders, and a device. Selecting capacity by age alone can therefore produce a poor result.
| School Routine | Suggested Capacity | Likely Contents |
|---|---|---|
| Digital learning with few books | 18–20L | Tablet or compact device, folder, lunch, bottle |
| Standard book-based day | 20–22L | Workbooks, binder, stationery, lunch |
| Several binders and a device | 22–25L | Books, protected device, charger, bottle |
| School and sports in one bag | 24–28L | School materials, clothing, small towel, personal items |
The largest rigid item should set the minimum internal dimensions. A 32 × 29 × 6 cm ring binder may require more practical space than several thin textbooks. If the zipper curves strongly across the top corners, the binder may fit inside the body but remain difficult to insert.
A device sleeve also changes the internal structure. Padding, a suspended base, and a retaining strap reduce main-compartment space. A bag promoted as 22L may therefore hold less loose cargo than an unpadded model with the same external measurements.
Depth requires particular care. Adding depth increases volume quickly, but it also moves the load farther from the body. A slightly taller and wider shape may carry school materials more steadily than a short, deep body. Heavy books should remain in the section closest to the back, while lunch and softer items can sit farther outward.
For a twelve-year-old, useful features may include:
- A suspended tablet or laptop sleeve.
- A document section that keeps folders upright.
- Two bottle pockets when a bottle and umbrella are both carried.
- A front organizer for stationery, transit cards, and keys.
- A chest strap when walking or cycling conditions justify it.
- Compression straps when daily contents vary considerably.
- A reinforced top handle that does not pull the upper panel out of shape.
The sample should be checked on more than one child or suitable fit form. A bag that works for a tall twelve-year-old may be too long for a shorter child of the same age.
What Capacity Fits Ages 13–15?
A 20–28L school backpack generally covers ages thirteen to fifteen. A 20–23L model suits lighter digital schedules, 23–26L supports books and binders, and 26–28L may be needed for clothing or activity equipment. The bag should organize the load close to the back instead of creating one large, deep compartment.
Secondary-school students often carry denser items rather than simply more items. Textbooks, binders, laptops, chargers, and full bottles can make a 24L bag much heavier than a larger sports backpack filled with clothing. Capacity must therefore be paired with a planned filled-weight check.
| Carrying Need | Suggested Capacity | Structural Need |
|---|---|---|
| Device-led school day | 20–23L | Padded sleeve and cable organization |
| Books and one large binder | 23–25L | Wide opening and structured document area |
| Books, lunch, and outerwear | 24–27L | Stable base and balanced compartments |
| School plus light sportswear | 26–28L | Expandable or separated clothing section |
At this age, style also influences actual use. A highly juvenile shape may be rejected even if its fit is excellent. Cleaner panels, restrained colors, discreet reflective details, and less bulky padding often feel more appropriate while still supporting everyday safety and comfort.
The back length should be confirmed before increasing capacity. If a 28L model becomes too tall for the intended torso, controlled depth or a modest increase in width may be considered. However, a very deep bag can pull backward, especially when heavy books are stored in the front section.
Laptop protection deserves careful measurement. Device names such as “13-inch” or “15-inch” describe the screen class rather than the complete body size. The device should be measured inside its protective case, and the sleeve should prevent the lower corners from hitting the ground when the bag is set down.
When activity clothing is carried only once or twice a week, an expandable section may be more practical than giving the entire collection a permanently large body. This keeps ordinary school days compact while providing extra room when genuinely needed.
What Capacity Fits Ages 15–18?
A 22–32L backpack usually suits students aged fifteen to eighteen. A 22–25L design works for a streamlined academic day, 25–28L supports textbooks and a laptop, and 28–32L is better suited to long days that include food, clothing, or activity equipment. Capacity above 30L requires careful control of empty weight, body length, and depth.
Older students may carry adult-sized devices and books, but this does not mean an adult travel backpack is automatically suitable. Travel designs often prioritize clothing volume and deep packing space. School use benefits more from upright document storage, fast device access, stable bottle pockets, and a shape that works in crowded corridors or public transport.
| Daily Use | Suggested Capacity | Important Details |
|---|---|---|
| Laptop and light coursework | 22–25L | Slim profile and protected device sleeve |
| Several books and lunch | 25–28L | Strong shoulder anchors and organized main body |
| Long academic day | 27–30L | Additional food, clothing, and personal storage |
| School and activity equipment | 28–32L | Separate wet or clothing section where needed |
A 30–32L model should not be chosen merely because it appears more versatile. If the normal contents use only 20L, the remaining space can allow books to move, place small items beyond easy reach, and tempt overpacking. Internal compression, dividers, or an expandable gusset can manage changing loads more effectively.
The device sleeve should be suspended above the base. A dense foam block alone is not enough if the device can strike the floor when the bag is dropped or set down firmly. The base panel, sleeve bottom, and back panel should work as one protective structure.
Older students may also travel farther and carry the bag for longer periods. Strap contour, back-panel ventilation, handle strength, zipper access, and water resistance become more important. If cycling is common, restrained reflective material and a secure chest strap may be useful without making the design resemble outdoor equipment.
Age fifteen appears in both the 13–15 and 15–18 groups because it is often a transition year. The final capacity should follow body fit and actual school contents rather than the age label printed on a size chart.
Age vs Grade: Which Guide Is Better?
Grade usually gives better information about school supplies, while age gives a better first indication of body size and handling ability. The strongest size decision uses both, then confirms the result with torso fit and a real packing list. Neither grade nor age can independently determine the correct capacity.
Age helps estimate:
- Torso length and shoulder width.
- Ability to operate zippers and buckles.
- Suitable hardware and zipper-pull size.
- Appropriate visual proportions.
- The likely need for adult assistance.
Grade helps estimate:
- Folder and binder formats.
- Number and size of textbooks.
- Device requirements.
- Locker availability.
- Lunch arrangements.
- Sports or club activities.
- Movement between classrooms.
A seven-year-old in a digital-learning program may need less volume than another seven-year-old carrying several workbooks and lunch. Likewise, a twelve-year-old with locker access may use a smaller backpack than a student of the same age who carries every subject throughout the day.
For a custom collection, use age and grade as labels only after physical validation. A practical specification might state “Primary Medium, 15–17L, intended for ages 6–8,” followed by the tested folder size, maximum device dimensions, intended contents, and bag measurements. This provides more useful information than an age label alone.
Regional differences also matter. School starting ages, stationery formats, lunch habits, uniforms, seasonal clothing, and transport routines vary. A size developed for one school system should be checked before being assigned to another.
Why Is There No One-Size Capacity?
There is no universal school bag capacity because children of the same age do not share identical bodies, school supplies, timetables, or travel routines. Capacity labels also describe volume, not torso fit, opening clearance, empty weight, or load balance. A successful size must satisfy all of these conditions together.
A one-size design often creates one of two problems:
- It is compact enough for younger children but lacks space for older students.
- It holds older students’ materials but becomes long, deep, and heavy on smaller bodies.
Even liter labels are not fully comparable. Consider two backpacks both described as 20L. One may use a simple open cavity, while the other contains a thick device sleeve, padded back panel, several dividers, and curved side walls. The second model may provide less usable storage despite having similar external dimensions.
External box volume illustrates the issue:
| External Dimensions | Calculated Box Volume | Practical Interpretation |
|---|---|---|
| 34 × 24 × 12 cm | 9.8L | Compact preschool or light day bag |
| 38 × 27 × 14 cm | 14.4L | Primary-size starting shape |
| 42 × 30 × 16 cm | 20.2L | General school-day body |
| 46 × 32 × 18 cm | 26.5L | Older student or heavier schedule |
| 48 × 34 × 20 cm | 32.6L | Long-day or school-plus-activity use |
The calculation is:
Height × width × depth ÷ 1,000 = external box volume in liters
This is not the same as verified usable capacity. Seam allowances, curved panels, padding, compartments, and restricted openings change what actually fits.
A more dependable selection method uses five checks:
- Identify the largest rigid item.
- Pack the full daily contents into a physical sample.
- Confirm the bag length against the intended torso.
- Weigh the complete packed bag.
- Observe whether the load stays stable during walking, bending, and stair use.
A coordinated two- or three-size collection generally works better than a single oversized model. Each size can share colors, materials, artwork, and overall styling while using different proportions, strap lengths, access details, and internal structures. This preserves a consistent collection identity without sacrificing everyday fit.
What Must a School Bag Carry?
A school bag should carry the supplies required for one school day: folders, books, stationery, lunch, water, a device when needed, light clothing, and personal items. Capacity should be based on the largest rigid object, the total filled weight, and how often each item is carried. Space for occasional equipment should not make the everyday bag unnecessarily large or deep.
Before selecting liters, record the dimensions and placement of each item. A rigid lunch box and a thick binder affect usable space more than soft clothing because they cannot bend or compress.
| Item | Approximate Size | Geometric Volume | Packing Effect |
|---|---|---|---|
| A4 paper | 29.7 × 21 cm | Not applicable | Sets the minimum document height and width |
| A4 folder | 32 × 25 × 3 cm | 2.4L | Needs a straight compartment and sufficient zipper clearance |
| Ring binder | 32 × 29 × 6 cm | 5.6L | Uses substantial width and depth |
| Small lunch box | 20 × 14 × 7 cm | 2.0L | Creates a rigid block at the base |
| Medium lunch box | 22 × 16 × 8 cm | 2.8L | May force books to tilt or sit higher |
| 500ml bottle | About 7.5 × 7.5 × 23 cm | 1.3L | Works best in an external pocket |
| 750ml bottle | About 8.5 × 8.5 × 27 cm | 2.0L | Needs a taller and deeper pocket |
| Pencil case | 22 × 8 × 6 cm | 1.1L | Can fill narrow space above lunch or books |
| Light jacket | About 28 × 22 × 8 cm folded | 4.9L | Compressible but irregular in shape |
| 13–14-inch device | About 34 × 24 × 3 cm | 2.4L | Requires additional padding and base clearance |
| Sportswear set | About 30 × 24 × 10 cm folded | 7.2L | Compressible but can crowd books and food |
These figures cannot simply be added together to calculate the required capacity. Flexible items can fit around rigid objects, while padded dividers and curved panels consume internal space. Physical packing with the intended contents provides a more dependable result.
What Fits in a 10L School Bag?
A 10L school bag can hold a slim A4 folder, one or two light books, a pencil case, a snack, and a compact clothing item. A bottle is best stored in an external pocket. This capacity suits preschool, short primary-school days, or programs where textbooks and lunch remain at school.
A 10L model needs an efficient shape. Rounded novelty panels, thick foam, multiple internal dividers, and a narrow zipper opening can leave far less usable space than the stated capacity suggests. A simple rectangular main compartment usually accommodates folders more effectively.
A practical 10L packing plan may look like this:
| Position | Item | Approximate Space Used |
|---|---|---|
| Back panel | Slim A4 folder | 2–3L envelope |
| Main body | One reading book and one workbook | 1.5–2.5L |
| Base | Snack container | 1–1.5L |
| Upper area | Folded cardigan or spare T-shirt | 1.5–2.5L |
| Front pocket | Pencil case, tissues, name card | 1–1.5L |
| Side pocket | 350–500ml bottle | Stored outside the main body |
This arrangement works only when the folder passes comfortably through the opening. A 10L body can be tall enough for A4 paper yet still fail if the zipper stops several centimeters below the top corners.
For preschool use, the same volume may carry:
- A compact lunch or snack container.
- A small drinking bottle.
- One complete change of lightweight clothing.
- A communication folder.
- Tissues or wipes.
- A small comfort item.
Winter clothing can quickly exceed the available space. A padded jacket that looks compact when folded may occupy three to five liters. If cold-weather clothing is carried frequently, a 12L model or a controlled expansion panel is more practical than forcing it into a tightly packed 10L bag.
Avoid filling every corner during development. A child should be able to remove the snack box or folder without emptying the entire bag. If daily contents already occupy the full main compartment, the design is too small for comfortable use.
What Fits in a 15–20L School Bag?
A 15–20L school bag can carry A4 folders, several workbooks, stationery, lunch, water, and a light jacket. A 15L model suits a lighter primary-school schedule, while 18–20L provides better space for a binder, larger lunch box, tablet, or clothing. Internal organization determines whether the added liters remain useful.
The difference between 15L and 20L is substantial. Five additional liters can equal the space occupied by a folded jacket or a medium lunch box. However, placing all extra volume in the front of the bag can move the load away from the back and reduce stability.
| Capacity | Suitable Contents | Important Limitation |
|---|---|---|
| 15L | Slim folder, two or three books, pencil case, small lunch | Limited room for bulky clothing |
| 16–17L | Folder, workbooks, lunch, bottle, cardigan | Thick binders may use most of the depth |
| 18L | Larger folder set, lunch, bottle, clothing, tablet | Device padding reduces open storage |
| 19–20L | Binder, several books, lunch, bottle, jacket, small device | Can become heavy if filled with dense books |
A well-organized 18–20L school bag often uses three functional zones:
- The back zone carries folders, binders, and a tablet close to the body.
- The lower or central zone holds lunch and less flexible objects.
- The front zone stores stationery, cards, tissues, keys, and small accessories.
The main compartment should be wide enough for folders to sit flat. When the body is too narrow, paper corners bend and binders press against the zipper. Increasing depth does not correct insufficient width.
Lunch placement needs careful thought. A rigid container at the bottom can create a stable base, but it may also push books upward. If lunch sits in front of the books, the bag becomes thicker. A separate lower lunch section can improve organization, although its divider, insulation, and zipper consume internal volume and add weight.
A 20L model with a tablet sleeve should be tested twice: once with the device inserted and once without it. The empty sleeve should not collapse into the main compartment or catch book corners. With the device installed, the remaining space should still accept the stated school supplies without pressing directly against the screen.
What Fits in a 25–35L School Bag?
A 25–35L school bag can hold several textbooks, large binders, a laptop, lunch, water, clothing, and activity equipment. A 25L model is often sufficient for an older student’s academic day. Capacities near 30–35L are more suitable when school supplies and sportswear must share one bag.
Large capacity does not guarantee better daily use. Textbooks are dense, so a half-filled 30L bag may already be heavy. The main concern is not whether more items fit, but whether the structure keeps the heaviest objects close to the back.
| Capacity | Practical Loadout | Best Use |
|---|---|---|
| 25L | Laptop, two or three books, binder, lunch, bottle | Standard secondary-school day |
| 28L | Academic contents plus jacket or light activity clothing | Long school day |
| 30L | Several books, device, lunch, clothing, personal items | School and after-class activities |
| 32L | Full academic load plus larger clothing set | Limited locker access |
| 35L | School materials, sportswear, towel, shoes where suitable | Combined school and activity use |
A 25–28L layout can remain relatively slim when the bag uses a tall document compartment, suspended device sleeve, structured base, and front organizer. A 30–35L design needs stronger control over depth. Without compression or internal separation, books may fall backward into clothing and pull the bag away from the body.
Useful large-bag organization may include:
- A padded device compartment against the back.
- A broad document section for binders and textbooks.
- A central section for lunch or clothing.
- A front organizer for chargers and small items.
- Two stable side pockets for water and an umbrella.
- An internal key clip or zipped security pocket.
- Compression straps for days when the bag is not full.
- A separated clothing section when sportswear is carried frequently.
Shoes require more space than their apparent size because they do not form a clean rectangular block. A pair of school or sports shoes may occupy six to ten liters, depending on size and how they are positioned. A dedicated shoe compartment also needs ventilation, lining, and a zipper, all of which add weight and reduce the neighboring space.
Wet clothing should not rest directly against books or a laptop. When the bag is intended for swimming, sports, or rainy-weather equipment, a water-resistant removable pouch may be more efficient than permanently lining an entire compartment with heavy waterproof material.
A 35L bag should be reserved for a genuine carrying need. If most school days require only 22–25L, an expandable 28L design can provide occasional extra space without creating a permanently bulky body.
Do A4 Folders and Lunch Boxes Fit?
A4 folders and lunch boxes can fit in the same school bag when the main body provides sufficient height, width, opening clearance, and base depth. An A4 folder often measures 31–33 cm high and 24–27 cm wide, while a medium lunch box may measure 22 × 16 × 8 cm. Both items should be tested together, not separately.
A4 paper measures exactly 210 × 297 mm, but the item carried to school is larger than the paper itself.
| Document Type | Approximate External Dimensions |
|---|---|
| A4 plastic folder | 31–32 × 23–25 cm |
| A4 expanding folder | 32–33 × 25–27 × 3–5 cm |
| A4 display book | 31–32 × 24–26 × 2–4 cm |
| A4 ring binder | 32–33 × 27–30 × 4–7 cm |
| Large workbook | 30–33 × 22–25 × 1–3 cm |
A bag intended for ordinary A4 folders may need a clear internal area near 33 cm high and 26–27 cm wide. A thick ring binder can require approximately 34–36 cm of usable height and close to 30 cm of width, depending on the binder construction.
The opening must be larger than the document’s diagonal insertion path. A zipper that curves inward can reduce entry width even when the internal body is large enough. The folder should slide in without folding its corners or forcing the zipper teeth apart.
Lunch containers also vary:
| Lunch Container | Approximate Dimensions | Space Requirement |
|---|---|---|
| Compact snack box | 16 × 11 × 6 cm | About 1.1L |
| Small lunch box | 20 × 14 × 7 cm | About 2.0L |
| Medium lunch box | 22 × 16 × 8 cm | About 2.8L |
| Large bento box | 24 × 18 × 9 cm | About 3.9L |
| Insulated lunch pouch | 25 × 19 × 11 cm | About 5.2L external envelope |
If lunch is stored inside the main compartment, the bag should keep food upright and separated from documents where possible. A wipe-clean pocket, removable lunch pouch, or washable base liner can help contain crumbs and minor leaks.
A bottle should be checked with the lunch box installed. A full 500ml or 750ml bottle can press inward from a tight side pocket and reduce internal width. A pocket gusset, elastic opening, and suitable bottom depth allow the bottle to sit outside the document area.
The final sample should be tested with the intended folder, lunch container, and bottle at the same time. Passing three separate fit checks does not prove that all three will work together.
How Much Spare Space Is Useful?
Approximately 10–15% spare capacity is useful for daily variation, easy access, and occasional clothing. This allowance should not become a large empty cavity. If the normal packing list repeatedly uses more than 90% of the bag, the next size or a controlled expansion feature may provide better everyday function.
Spare space serves several practical purposes:
- It allows a jacket or art project to be carried occasionally.
- It prevents the zipper from being placed under constant tension.
- It makes folders and lunch containers easier to remove.
- It provides room for small changes in the timetable.
- It reduces the need to hang extra items from the outside.
- It helps the bag keep its intended shape.
A useful capacity decision can be based on peak use:
| Normal Daily Contents | Occasional Peak | Suitable Design Direction |
|---|---|---|
| 12–13L | 14–15L | Use a structured 15L body |
| 15–16L | 17–18L | Use an 18L model |
| 17–18L | 20–21L | Consider 20L with controlled expansion |
| 21–22L | 24–25L | Use 24–25L if the peak occurs weekly |
| 23–25L | 30L or more | Consider a separate activity bag |
The peak frequency matters. If sportswear is carried every weekday, it belongs in the core specification. If it is carried twice per term, building permanent extra capacity into every bag may not be worthwhile.
Expansion should be controlled rather than loose. A zipped gusset can add several liters while keeping the normal profile slim. Compression straps can stop partly filled contents from moving. A removable pouch can handle occasional art, sports, or wet items without changing the main school bag.
Too much unused space can create its own problems. Books may move during walking, small items become difficult to locate, and the bag appears collapsed when lightly packed. Excess depth may also tempt users to carry items that could remain at home or in a locker.
How Do School Rules Change Capacity?
School rules can reduce or increase the required capacity by changing what may be carried, where lunch is stored, whether lockers are available, and which bag styles are permitted. Device programs, clear-bag policies, uniform requirements, classroom cubbies, and sports schedules should be reviewed before final dimensions are approved.
| School Condition | Effect on Capacity or Structure |
|---|---|
| Lockers available all day | Less need to carry every subject simultaneously |
| No lockers | More space for books, clothing, and personal items |
| Lunch stored separately | Main school bag can remain smaller |
| Lunch carried inside | Additional 2–5L may be needed |
| Tablet-based teaching | Less book volume but greater need for device protection |
| Several paper textbooks | Stronger back structure and load organization required |
| A4 communication folder | Minimum body height and opening clearance become essential |
| Classroom cubbies | External width and depth may be restricted |
| Clear-bag policy | Material, reinforcement, privacy, and pocket design change |
| Rolling bags prohibited | The backpack must manage the full carried load |
| Sportswear carried daily | Additional section or removable clothing pouch may be needed |
| Public transport use | A slimmer profile helps in crowded spaces |
| Cycling to school | Stable fit, bottle retention, and reflective details gain importance |
A cubby may impose a stricter size limit than the child’s torso. A backpack that measures 48 × 34 × 20 cm may fit the student but not the assigned storage space. Measurements should include filled depth, because a soft bag can expand beyond its stated empty dimensions.
Clear-bag policies create another design challenge. Transparent PVC or TPU panels show contents easily, but books, devices, and personal items may require reinforced seams and carefully placed privacy sections where permitted. The material’s weight, flexibility, odor control, cold-weather behavior, and care instructions also require review.
Device-led teaching does not always mean the bag should be smaller. A tablet may replace several books, but its padded sleeve, charger pocket, headphones, and protective case occupy structured space. The design may become slimmer while retaining a similar height and width.
The most dependable carrying list comes from an actual timetable:
- Record what travels to and from school each day.
- Identify the largest folder, binder, device, lunch box, and bottle.
- Separate daily items from weekly activity equipment.
- Note which supplies remain in the classroom or locker.
- Check storage restrictions and prohibited bag styles.
- Pack the intended contents into a sample and measure the filled depth.
- Weigh the complete load before approving the capacity.
A school bag should support the real school routine, not every object a child might carry during the year. Designing around the normal day, with modest flexibility for occasional needs, produces a bag that is easier to organize, more comfortable to carry, and less likely to become oversized.
How Do Fit and Weight Limit Capacity?
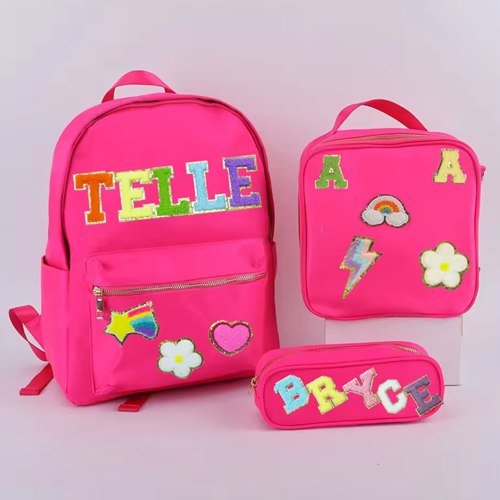
Fit and weight limit capacity because a school bag can hold more than a child can comfortably carry. The body should remain proportional to the torso, sit close to the back, and support the planned contents without causing forward lean. AOTA recommends no more than 10% of body weight, while AAP advises no more than 15%; individual needs may require a lighter load.
Capacity is therefore a three-part decision:
- The contents must fit without damaging folders, food, or devices.
- The backpack must fit the intended torso when loaded.
- The complete carrying weight must remain suitable for the child.
A 25L bag may fit a twelve-year-old well but become unsuitable when packed with dense textbooks. A 15L model may remain light yet be too short for an A4 binder. Liters, dimensions, and weight must be checked together.
Capacity vs Dimensions: What Changes?
Capacity describes internal volume, while dimensions control how that volume sits on the body. Adding depth increases liters quickly but moves the load farther from the back. Adding height may improve folder fit but make the body too long for a shorter child. Adding width can improve binder clearance but interfere with arm movement.
The basic volume calculation is:
Height × width × depth ÷ 1,000 = external box volume in liters
For a body measuring 42 × 30 cm, changing only the depth creates the following result:
| External Dimensions | Calculated Box Volume | Change in Use |
|---|---|---|
| 42 × 30 × 12 cm | 15.1L | Slim profile for folders and light books |
| 42 × 30 × 14 cm | 17.6L | Additional lunch or clothing space |
| 42 × 30 × 16 cm | 20.2L | General school-day capacity |
| 42 × 30 × 18 cm | 22.7L | More room, but greater rearward projection |
Increasing depth from 12 to 18 cm adds approximately 7.6L without changing the height or width. That extra space appears useful, yet it also allows books, lunch, and clothing to sit farther away from the body.
External box volume is not the same as usable capacity. The following parts reduce or redistribute the interior:
- Rounded upper corners.
- Thick back padding.
- A suspended laptop sleeve.
- Internal dividers.
- Curved zipper paths.
- Seam allowances and bindings.
- Bottle pockets that press inward.
- Foam-reinforced front panels.
- A raised or padded base.
Two bags described as 20L may therefore carry different packing sets. One may use a simple rectangular cavity, while the other devotes several liters to device protection and organization.
The shape should follow the contents:
| Main Contents | Better Dimension Direction | Reason |
|---|---|---|
| A4 folders and slim books | Moderate height and width, limited depth | Keeps documents upright and close |
| Thick ring binders | More internal width and controlled depth | Prevents bent corners and zipper strain |
| Lunch and clothing | Stable base with moderate depth | Creates room for rigid and soft objects |
| Laptop and books | Taller back section with limited front depth | Keeps dense contents near the body |
| Sportswear | Expandable or separated soft-goods section | Avoids making every school day bulky |
The intended torso should set the maximum body height before additional liters are created. When more capacity is required, moderate changes across width, depth, and internal organization are usually better than adding all the volume in one direction.
How Should the Bag Fit the Torso?
A school backpack should sit in the middle of the back, remain close to the body, and extend from approximately waist level to about 1–2 inches below the shoulders. The American Academy of Pediatrics states that it should not hang more than four inches below the waistline. Both shoulder straps should be used and adjusted evenly. HealthyChildren.org
Age can guide the first size selection, but torso length gives a more useful physical check. A practical measurement runs from the prominent bone near the base of the neck to the waist or upper-hip line. The backpack body should fit inside this usable area without pressing into the neck or hanging against the back of the legs.
Fit should be checked with the planned contents inside. An empty bag may sit correctly, yet a loaded one can sag several centimeters when:
- The base fabric is too soft.
- Shoulder anchors rotate downward.
- Webbing slips through the adjusters.
- Heavy books move toward the front panel.
- The back panel lacks enough structure.
- The shoulder straps are too long for the intended age.
A useful loaded-fit check includes the following observations:
| Fit Observation | Likely Cause | Development Direction |
|---|---|---|
| Top edge touches the neck | Body too tall or straps too short | Reduce height or revise the upper shape |
| Base hangs below the waist | Body too long or straps too loose | Shorten the body and improve adjustment |
| Lower section pulls away | Excessive depth or weak lower structure | Reduce depth and stabilize the base |
| Straps slide outward | Poor strap angle or wide anchor spacing | Revise strap shape and attachment position |
| Arm movement feels restricted | Body or straps are too wide | Narrow the upper body or reshape straps |
| Bag tilts to one side | Uneven packing or strap adjustment | Improve organization and balance |
| Child leans forward | Load too heavy or positioned too far back | Reduce weight and move dense items inward |
The upper strap anchors should align naturally with the shoulder area. If they begin too far apart, the straps may pull outward. If they are too close together, they may press near the neck. Junior and senior models therefore need separate strap geometry rather than proportionally scaled attachments.
Seasonal clothing also changes fit. A bag adjusted over a thin shirt may need several additional centimeters of webbing over a winter coat. The adjustment should accommodate clothing changes without leaving excessively long loose ends during warm weather.
How Heavy Should a Filled Bag Be?
A conservative planning goal is to keep the filled backpack at or below 10% of the child’s body weight. The American Occupational Therapy Association uses the 10% guideline, while the American Academy of Pediatrics states that backpacks should not exceed 15%. These are general references, not individual medical limits. AOTA, HealthyChildren.org
| Body Weight | 10% Load | 15% Load |
|---|---|---|
| 15 kg | 1.5 kg | 2.25 kg |
| 20 kg | 2.0 kg | 3.0 kg |
| 25 kg | 2.5 kg | 3.75 kg |
| 30 kg | 3.0 kg | 4.5 kg |
| 40 kg | 4.0 kg | 6.0 kg |
| 50 kg | 5.0 kg | 7.5 kg |
| 60 kg | 6.0 kg | 9.0 kg |
These figures include the backpack itself. A 600g empty bag leaves only 1.4 kg for contents when the child weighs 20 kg and the 10% guideline is used.
Capacity must therefore be limited by the weight of the contents, not only their volume. Different items have very different densities:
| Item | Approximate Weight |
|---|---|
| Slim workbook | 200–400g |
| Thick textbook | 700g–1.5 kg |
| Filled 500ml bottle | About 550g |
| Filled 750ml bottle | About 800g |
| Compact lunch and container | 500g–1.0 kg |
| Tablet with case | 500g–1.0 kg |
| Laptop with charger | 1.3–2.5 kg |
| Light jacket | 250–600g |
A 20L bag containing clothing can be lighter than a 12L bag filled with dense books and water. Liter capacity should never be used as a substitute for a filled-weight check.
Signs that the load or fit needs attention include:
- Leaning forward while walking.
- Raising the shoulders to support the straps.
- Difficulty putting on or removing the bag.
- Red marks around the shoulders.
- Numbness or tingling.
- Persistent shoulder, neck, or back discomfort.
- The bag striking the legs while walking.
- Frequent use of only one shoulder strap.
Pain, numbness, an existing injury, or a medical condition should be discussed with an appropriate health professional. A smaller bag cannot correct an unsuitable school carrying routine if too many heavy materials must travel every day.
Is a Larger School Bag Always Better?
A larger school bag is not always better. Additional room encourages extra packing, allows heavy items to move, increases depth, and can make the body too long for the intended torso. The correct size should fit the normal school-day contents with approximately 10–15% additional space for easy access and occasional items.
Oversizing often creates hidden problems:
- Books fall away from the back panel.
- Small items collect at the bottom.
- The filled bag becomes difficult to organize.
- The front section pulls the body rearward.
- A deep body catches on desks and seats.
- The backpack exceeds classroom cubby dimensions.
- The user fills unused space simply because it is available.
- More fabric, lining, foam, and zippers increase empty weight.
Capacity decisions should use frequency:
| Additional Item | Carrying Frequency | Better Design Direction |
|---|---|---|
| Light jacket | Most days | Include it in the main capacity |
| Sportswear | Every weekday | Add a separated clothing section |
| Sportswear | Once weekly | Consider expansion or a second bag |
| Art project | Occasionally | Keep modest spare space |
| Large winter coat | Seasonal and irregular | Avoid permanent oversized depth |
| Extra textbooks | Only on certain days | Use locker or timetable planning where possible |
An expansion gusset can provide occasional extra space while maintaining a slimmer profile on normal days. Compression straps can stabilize a partly filled main body. A removable wet-item or activity pouch can handle sports and swimming equipment without adding permanent weight to every bag.
The normal packing list should occupy the body comfortably, not tightly. If the zipper must be forced closed, the design is too small. If the contents move freely through a large empty cavity, it is too large or lacks suitable organization.
Why Does Empty Bag Weight Matter?
Empty weight uses part of the total carrying allowance before books, lunch, water, or devices are added. It is particularly important for younger children because their total weight allowance is smaller. Heavy foam, several zippers, thick lining, decorative panels, metal details, and trolley parts can make a modest-capacity bag unexpectedly heavy.
The following empty-weight figures can be used as development references, not universal safety limits:
| Capacity | Suggested Empty-Weight Goal |
|---|---|
| 6–12L | Approximately 300–450g |
| 10–17L | Approximately 350–550g |
| 15–22L | Approximately 450–700g |
| 20–28L | Approximately 550–850g |
| 22–32L | Approximately 650g–1.0 kg |
A 500g bag used by a 20 kg child consumes 25% of a 2 kg carrying allowance. An 800g model consumes 40%. This difference may represent one textbook, a filled bottle, or most of a lunch.
Weight should be controlled through material placement:
- Use stronger fabric on the base and wear areas instead of everywhere.
- Keep foam where it supports the back, straps, device, and base.
- Remove dividers that do not serve defined items.
- Use lightweight lining in low-stress sections.
- Share one zipper opening where two are unnecessary.
- Keep decorative accessories proportionate to the age group.
- Avoid adding a laptop sleeve to junior sizes that do not need one.
- Review whether metal fittings can be replaced with suitable lightweight hardware.
Reducing empty weight should not weaken the strap anchors, top handle, zipper ends, or base. The goal is efficient construction, not indiscriminate material removal.
Every sample should be weighed in its finished state with the actual logo, lining, foam, accessories, labels, and hardware. A partially completed sample cannot provide an accurate empty-weight figure.
Which Straps Improve Load Control?
Two broad, adjustable, padded shoulder straps provide the main load control for a school backpack. They should follow the shoulder shape, remain even in length, and hold the bag close to the body. The AAP notes that broad straps help distribute weight, but additional padding alone does not necessarily reduce discomfort. HealthyChildren.org
Approximate finished contact widths can guide early samples:
| Intended Group | Shoulder-Strap Width Reference |
|---|---|
| Preschool | 45–55 mm |
| Early primary | 50–60 mm |
| Upper primary | 55–65 mm |
| Secondary school | 60–75 mm |
These measurements must be confirmed through physical fitting. A wide strap can still feel uncomfortable if it is too stiff, begins too close to the neck, or curves in the wrong direction.
Effective shoulder straps combine several details:
- A shape that follows the neck and shoulder line.
- Foam that compresses without becoming flat immediately.
- A soft inner surface that does not feel abrasive.
- Reinforced upper anchors that spread the load.
- Webbing that holds securely in the adjuster.
- Adjustment hardware that can be operated easily.
- Enough length for seasonal clothing.
- Secured webbing ends that do not pull through.
- Balanced left and right attachment positions.
S-shaped straps often fit older students well because they can curve away from the neck and around the upper torso. Junior models may need a simpler curve and closer attention to narrow shoulders.
Load-lifter straps, commonly seen on outdoor packs, are rarely necessary for ordinary junior school bags. When included on larger secondary-school models, they must connect to a sufficiently structured upper body; otherwise, they add parts without improving control.
A waist belt can transfer some load toward the hips when a large backpack is carried for longer distances. A thin decorative waist strap provides little benefit. The belt must align with the intended body position and should not be added merely for appearance.
When Is a Chest Strap Useful?
A chest strap is useful when shoulder straps tend to slide outward, the child walks a long distance, cycles to school, wears slippery outerwear, or carries a load that changes during the day. It stabilizes the shoulder straps and helps keep the backpack close, but it does not replace correct dimensions, suitable weight, or proper strap geometry.
| Situation | Chest Strap Value |
|---|---|
| Short walk with a light bag | Optional |
| Narrow or sloping shoulders | Helps retain shoulder-strap position |
| Cycling or fast movement | Reduces side-to-side movement |
| Long walk to school | Improves stability |
| Slippery rain jacket | Helps prevent outward strap movement |
| Deep or partly filled bag | Can reduce bouncing when correctly adjusted |
| Oversized backpack | Cannot correct the wrong body size |
| Excessively heavy load | Does not make the weight appropriate |
The strap should sit across the upper-to-middle chest without pressing against the neck or dropping onto the abdomen. A sliding attachment allows the height to be adjusted as the child grows or clothing changes.
Important construction details include:
- An easy-to-release buckle.
- Smooth edges around the buckle and webbing.
- Enough adjustment without long dangling ends.
- Secure attachment to both shoulder straps.
- A position that does not interfere with the main strap adjusters.
- Age-appropriate buckle size and operating force.
- Symmetrical placement on the finished backpack.
A chest strap should be tested while walking, bending, climbing stairs, and wearing seasonal clothing. It should stabilize the bag without pulling the shoulder straps inward against the neck.
The strongest capacity decision is reached only after the backpack passes four checks: the required contents fit, the body matches the torso, the empty weight remains controlled, and the complete packed load stays within an appropriate limit. Liters describe space; they do not prove comfort.
Which School Bag Design Works Best?

A two-strap backpack with a stable back panel, age-appropriate dimensions, broad adjustable shoulder straps, an A4-compatible opening, and organized storage works well for most students. Rolling bags suit long, level routes with heavy books, while satchels and single-strap bags are better for lighter loads. The strongest design matches the child’s torso, school routine, contents, climate, and transport conditions.
Which Type of School Bag Is Best?
A two-strap backpack is the most versatile choice for everyday school use because it can keep books close to the back while distributing the load across both shoulders. Its effectiveness still depends on the body dimensions, strap geometry, internal layout, empty weight, and how it is worn.
| Bag Type | Strongest Use | Main Advantages | Main Limitations |
|---|---|---|---|
| Two-strap backpack | Everyday school use | Balanced carrying, hands remain free, works on stairs | Can become uncomfortable if too long, deep, or heavy |
| Rolling school bag | Heavy books on smooth routes | Reduces time carrying weight on the shoulders | Heavier body, difficult on stairs and uneven ground |
| Backpack-trolley hybrid | Mixed walking and rolling | Offers two carrying methods | Added frame and wheels increase weight |
| Satchel | Light books and short routes | Wide access and structured document storage | One-sided carrying can become uncomfortable |
| Messenger bag | Older students with light contents | Fast access and clean appearance | Load remains on one shoulder |
| Drawstring bag | Sportswear or temporary use | Lightweight, compact, inexpensive structure | Limited support, organization, and device protection |
| Wheeled hard-shell bag | Level indoor routes or travel-style use | Strong shape and easy cleaning | Bulky in classrooms and difficult to store |
The two-strap format should not be treated as automatically ergonomic. A poorly designed backpack may still place the load too low or too far from the body. The following details make a greater difference than decorative padding:
- A body length that matches the intended torso.
- Shoulder straps that begin near the upper back rather than far apart.
- Enough strap length for seasonal clothing without excessive loose webbing.
- Heavy-item storage against the back panel.
- A stable base that prevents the bag from sagging.
- A top handle reinforced independently from the zipper seam.
- A main opening wide enough for the largest folder or binder.
- Side pockets that hold bottles without pushing deeply into the main body.
Preschool bags benefit from lightweight construction and simple access. Primary-school models need better folder protection and load organization. Secondary-school bags often require stronger shoulder anchors, device storage, and a less bulky visual shape.
A novelty silhouette can work well for younger children, but ears, fins, tails, plush panels, or molded decorations should not obstruct the zipper, reduce bottle-pocket access, or create snagging areas. Decorative shapes also consume carton space and may distort after compression.
Backpack vs Rolling Bag: Which Is Better?
A backpack is usually better for stairs, buses, crowded corridors, uneven sidewalks, and frequent classroom movement. A rolling bag becomes useful when the route is mostly flat, books are unusually heavy, and school rules allow wheeled styles. A hybrid offers flexibility but adds wheel, frame, and handle weight even when carried on the shoulders.
| Daily Condition | Backpack | Rolling Bag |
|---|---|---|
| Several flights of stairs | Easier to manage | Must be lifted repeatedly |
| Smooth indoor corridors | Works well | Rolls efficiently |
| Uneven pavement | Easier to carry | Wheels may catch or vibrate |
| Crowded bus or train | Slim designs work well | Handle and wheel base take more space |
| Long, flat walk | Load remains on the shoulders | Can reduce carrying time |
| Small classroom cubby | Soft body can compress slightly | Rigid frame may not fit |
| Rainy or muddy route | Body can remain above the ground | Wheels and base collect water and dirt |
| Frequent room changes | Fast to move and set down | Extendable handle can slow movement |
| Very heavy book schedule | Requires careful weight control | Useful on suitable surfaces |
| Sports activity included | Flexible body handles clothing well | Rigid trolley structure reduces flexibility |
A rolling design needs more than two wheels and a telescopic handle. The bag should remain stable when standing, roll without the lower fabric touching the ground, and resist tipping when the front pocket is loaded. The wheel housing must be protected from direct impacts, while the handle should extend to a suitable height without twisting excessively.
Wheel diameter affects use. Small wheels keep the body compact but struggle on joints, thresholds, and rough pavement. Larger wheels roll more smoothly but add depth and occupy more carton volume. Exposed wheels may also transfer dirt to clothing when the bag is carried.
A hybrid should include a method for protecting or covering the shoulder straps while rolling. Loose straps can drag near the wheels. When the bag is carried, the wheel housing should not press against the lower back or clothing.
Rolling models also need a safe lifting method. Students will still lift them over curbs, onto buses, into vehicles, and up stairs. A reinforced side or top handle is therefore essential. The lifting handle should connect to structural reinforcement rather than only to the outer fabric.
The route should decide the format. A wheeled model may appear easier because it rolls, yet it can become more demanding when half of the journey includes stairs and lifting.
What Materials Suit Each Age?
School bag materials should balance empty weight, abrasion resistance, cleaning, structure, water resistance, color performance, and feel. Lightweight polyester or nylon works well for younger children, while older students may need stronger Oxford, polyester, or nylon constructions. Fabric denier alone does not determine durability; weave density, coating, backing, seams, and reinforcement are equally important.
| Age or Use | Practical Outer Material | Useful Characteristics | Watch Areas |
|---|---|---|---|
| Ages 3–5 | Lightweight polyester or nylon | Soft hand feel, easy cleaning, low empty weight | Avoid overly stiff coatings and heavy decorations |
| Ages 6–8 | 300D–600D polyester or suitable nylon | Good color options and everyday abrasion resistance | Confirm base strength and zipper-corner wear |
| Ages 9–12 | 420D–600D polyester, nylon, or Oxford | Better structure for books and folders | Control foam and lining weight |
| Ages 13–15 | 600D polyester, durable Oxford, or nylon | Supports binders, devices, and longer daily use | Heavy fabric should not replace proper reinforcement |
| Ages 16–18 | Durable polyester, nylon, or mixed constructions | Clean appearance, device support, higher load capability | Balance durability with a slim profile |
| Sports and wet items | Coated polyester, tarpaulin detail, or removable water-resistant pouch | Easier cleaning and moisture separation | Waterproof sections can add weight and stiffness |
Denier describes yarn thickness, not finished fabric strength. Two fabrics labeled 600D can behave differently because of weave density, fiber quality, coating weight, backing, and finishing. The material should be evaluated as a finished construction rather than selected by the denier number alone.
Polyester offers good color consistency, print compatibility, and practical cost control. Nylon can provide high strength at a relatively low weight, although its surface appearance and cost depend on the specific construction. Oxford describes a weave style and may be produced in different fibers and weights.
Recycled polyester can support a material story when its origin and documentation are clear. The recycled claim should match the material actually ordered. A certificate connected to an unrelated fabric does not confirm the content of the finished bag.
A water-resistant fabric does not create a waterproof backpack. Water can still enter through zippers, needle holes, seams, and openings. For ordinary school use, a coated outer fabric, protected zipper construction, and raised base may provide suitable rain protection. Full waterproof construction is heavier and may be unnecessary unless the intended use genuinely requires it.
A practical school bag may combine several materials:
- Abrasion-resistant fabric on the base.
- Lighter fabric on upper panels.
- Smooth polyester lining inside the main body.
- Mesh or elastic fabric for bottle pockets.
- PE or EVA foam for selected padding areas.
- Webbing reinforcement at handles and strap anchors.
- Wipe-clean material inside a lunch or wet-item section.
Preschool materials should be easy to wipe because food, paint, and outdoor dirt are common. Older-student fabrics should resist abrasion from books, desks, floors, and public transport. In both cases, a well-placed reinforcement patch is often more effective than making the entire bag from a heavier fabric.
Which Compartments Matter Most?
The most useful school bag compartments are a main document section, a small organizer, secure bottle storage, and age-appropriate lunch or device space. Every pocket should support a real item. Too many dividers reduce usable volume, add zippers and seams, increase empty weight, and make small belongings harder to find.
| School Stage | Essential Storage | Optional Storage |
|---|---|---|
| Preschool | Wide main section, name label, bottle pocket | Spare-clothes pouch, snack section |
| Early primary | A4 main section, front stationery pocket, bottle pocket | Separate lunch space |
| Upper primary | Folder section, book area, organizer, two side pockets | Tablet sleeve, key clip |
| Middle school | Binder area, device sleeve, front organizer, bottle pocket | Compression straps, clothing section |
| High school | Laptop sleeve, document section, accessory pocket, bottle storage | Charger pocket, security pocket, expansion gusset |
The main compartment should accept the largest document without bending. A U-shaped or wide two-way zipper provides better access than a short straight zipper across the top. The opening should remain usable when side pockets and the front compartment are full.
The heaviest section belongs closest to the back. Textbooks, binders, and devices placed in a front compartment can make the bag pull backward. Soft items such as clothing can occupy the outer area because they are lighter and can cushion smaller objects.
Bottle pockets require physical testing. A good side pocket should:
- Fit the intended bottle diameter.
- Cover enough bottle height to prevent tipping.
- Stretch without tearing the upper binding.
- Avoid pressing too far into the document compartment.
- Drain minor moisture where suitable.
- Hold the bottle during bending and walking.
- Remain usable when the main body is full.
A front organizer should match the intended age. Preschool children rarely need many narrow card slots. Older students may benefit from space for pens, transit cards, earphones, charging cables, and keys. The pockets should be deep enough to retain these items without creating a confusing maze.
Lunch storage can be integrated, separated, or handled with a removable pouch. A permanent insulated section adds lining, foam, and zipper weight. It is worthwhile when lunch is carried daily, but unnecessary when the school provides meals or requires a separate lunch bag.
Small hidden pockets should not be placed where their contents press into the child’s back. Keys, chargers, and rigid accessories belong in padded or outward-facing areas.
Do Older Students Need Laptop Storage?
Older students need laptop storage when a device travels to school regularly. The sleeve should be sized from the device’s complete external dimensions, including its protective case, rather than its advertised screen size. It should sit close to the back, hold the device securely, and remain suspended above the bottom of the bag.
Approximate device envelopes can guide early development:
| Device Class | Approximate Device Envelope | Suggested Sample Check |
|---|---|---|
| Tablet | 27 × 19 × 2 cm | Check with protective cover installed |
| 11–12-inch device | 31 × 22 × 2.5 cm | Confirm corner and zipper clearance |
| 13–14-inch laptop | 34 × 24 × 3 cm | Test with charger and case |
| 15–16-inch laptop | 38 × 27 × 3.5 cm | Confirm bag height and torso fit |
These dimensions are planning references only. Devices with the same screen class may have different body shapes, protective shells, and charger sizes.
A useful device sleeve includes:
- Foam on the front and back faces.
- A suspended base approximately 20–30 mm above the bag bottom as a development reference.
- A closure that prevents the device from sliding out when the bag opens.
- Smooth lining that does not scratch the device.
- Enough width for the case without excessive looseness.
- Upper-corner clearance below the main zipper.
- A back panel firm enough to limit bending.
- Separation from water bottles and food.
Padding thickness should be tested as part of the complete structure. Very thick foam can reduce internal capacity, add heat, and make a small bag feel rigid. Protection depends on the sleeve position, base suspension, back panel, and surrounding contents—not foam thickness alone.
The charger should not sit directly against the screen. A separate zipped or elastic pocket can keep the adapter and cable away from the device. If headphones, a mouse, or a power bank are included, their combined volume should appear in the packing test.
A laptop sleeve should not be added to every size merely to increase perceived value. In a junior school bag, it may consume space needed for folders and lunch. Device storage belongs in the sizes and school stages where it serves a regular purpose.
Which Safety Details Matter?
Important school bag safety details include secure shoulder anchors, smooth internal edges, controlled cords, stable bottle pockets, visible details for low-light travel, age-suitable hardware, and materials selected for the intended destination. The bag should also remain proportionate and stable when packed with the planned contents.
Practical details include:
- Shoulder straps attached with reinforcement that spreads the load.
- A top handle supported independently from the zipper seam.
- Zipper pulls large enough to grip but short enough to avoid snagging.
- Webbing ends secured so adjusters do not release during use.
- No long decorative cords or loose loops.
- Smooth zipper ends and covered internal seam edges.
- Bottle pockets that retain filled bottles.
- Reflective details positioned where vehicles can see them.
- Stable base construction that prevents tipping.
- Foam and stiffeners kept away from sharp exposed edges.
- Small decorative parts reviewed carefully for younger age groups.
- Labels placed where they do not irritate the back or neck.
- Clean internal construction without loose threads or trapped sharp objects.
Reflective material works best on more than one visible surface. A small front logo may be hidden when the student turns sideways. Front, side, and shoulder-strap placement can improve visibility from different directions. Reflective performance depends on the material, exposed area, placement, and viewing angle.
A chest strap can improve stability during walking or cycling, but it must sit at a suitable height and adjust easily. It should not become the only feature preventing poorly shaped shoulder straps from sliding outward.
Chemical, labeling, and performance requirements depend on the destination, intended age, materials, decorations, and sales claims. A school bag should be evaluated under the requirements that actually apply to the finished design. Adding a character accessory, light, battery component, or removable toy can change the required review.
Safety is not confirmed by appearance or one logo on a document. The approved materials, finished sample, production construction, and relevant reports must correspond with one another.
What Is the History of School Bag Sizing?
School bag sizing has changed with education habits. Early satchels were shaped mainly around books and paper. Two-strap backpacks became more common as students carried supplies over longer distances. Later designs added lunch storage, bottle pockets, organizers, padded back panels, reflective details, and device sleeves.
The progression can be viewed through four practical stages:
| Period of Use | Main Carried Items | Design Direction |
|---|---|---|
| Book-and-paper era | Textbooks, notebooks, pens | Flat satchels and simple rectangular bags |
| Wider backpack adoption | More books and personal supplies | Two shoulder straps and larger main sections |
| Organized school-day use | Lunch, bottles, stationery, activities | Multiple pockets and stronger carrying systems |
| Device-integrated use | Tablets, laptops, chargers, fewer paper books in some schools | Slimmer profiles with padded sleeves |
This history explains why capacity alone cannot describe a modern school bag. An older 20L design might contain one open cavity, while a current model may use part of that volume for device padding, bottle storage, lunch separation, and organization.
The addition of more features has also increased empty weight. Thick back panels, molded components, several zippers, trolley systems, and heavy decorations can consume a significant part of the comfortable carrying load before books are added.
The strongest current direction is not simply “larger.” It is better use of space:
- Junior sizes with wide, simple access.
- Primary sizes built around A4 folders and lunch routines.
- Secondary sizes organized around binders and devices.
- Expandable storage for occasional activity days.
- Shared styling across several age-appropriate body sizes.
- Materials placed according to wear rather than using heavy fabric everywhere.
School bag development has moved from carrying as much as possible toward carrying daily essentials in a more controlled shape. That shift produces bags that fit school routines more naturally and remain useful beyond their first impression.
How Does a Factory Develop a Custom Size Series?

A custom school bag size series is developed by connecting age groups, body proportions, daily contents, capacity, materials, and filled weight. Each size needs its own pattern, sample, packing test, fit check, and approved specification. Simply enlarging or shrinking one bag can distort the straps, opening, pockets, artwork, and load position, so every model must be validated separately.
A useful development sequence follows this order:
- Define the intended age or grade groups.
- Record the contents carried during a normal school day.
- Establish target capacities and external dimensions.
- Set empty-weight and planned filled-weight goals.
- Develop independent patterns for each size.
- Produce and pack physical samples.
- Check torso fit, access, stability, and durability.
- Revise the dimensions and construction.
- Approve samples, materials, artwork, and specifications.
- Control every size during production and final inspection.
Who Needs an Age-Based Size Series?
An age-based size series is useful when one collection must serve preschool, primary, and secondary students. These groups carry different items and have very different body proportions. A single oversized bag may provide enough capacity, yet it will rarely fit every age comfortably.
Common applications include school programs, children’s lifestyle collections, licensed character products, uniform collections, education projects, sports clubs, museum shops, and coordinated retail lines.
A practical collection can begin with three sizes:
| Size Tier | Capacity Reference | Suggested Age | Common Contents |
|---|---|---|---|
| Junior | 8–12L | 3–5 years | Snack, bottle, spare clothes, small folder |
| Primary | 15–20L | 6–11 years | A4 folder, books, lunch, bottle, jacket |
| Senior | 22–30L | 12–18 years | Binders, textbooks, device, lunch, clothing |
These age labels are starting references. The final selection should also consider torso length, school timetable, locker access, lunch arrangements, device use, seasonal clothing, and transport conditions.
The three models can share the same visual identity while using different functional details:
| Feature | Junior | Primary | Senior |
|---|---|---|---|
| Opening | Wide and simple | A4-compatible U opening | Wide access for binders and devices |
| Shoulder straps | Short, light, easy to adjust | Broader with moderate padding | Stronger anchors and shaped padding |
| Hardware | Small and easy to operate | Medium-size zippers and buckles | Stronger hardware suited to higher loads |
| Bottle pocket | Short bottle retention | 500–600ml bottle fit | 600–750ml bottle fit |
| Interior | Simple and visible | Folder section and organizer | Device sleeve and document separation |
| Decoration | Larger character details | Balanced artwork and practical panels | Cleaner styling and discreet details |
The artwork should not be scaled mechanically. A logo that looks balanced on a 28L backpack may dominate a 10L preschool model. Character ears, patches, reflective details, zipper pulls, and labels need separate placement for every size.
A narrow collection does not always need three models. If the intended group covers only ages six to eleven, two carefully developed sizes may provide better inventory control than several small variations.
What Should a Custom Brief Include?
A custom brief should define the intended user, what the bag must carry, how it should fit, and where it will be distributed. A visual sketch is useful, but it cannot replace dimensions, materials, packing requirements, and construction details.
| Brief Item | Information to Confirm | Why It Matters |
|---|---|---|
| Intended age or grade | Age, school stage, approximate body height | Guides bag length, strap shape, and hardware size |
| Capacity | Target liters for each size | Establishes the general storage plan |
| External dimensions | Height, width, and depth | Controls fit, cubby storage, and carton volume |
| Daily contents | Books, folders, lunch, bottle, clothing, device | Defines practical internal space |
| Largest rigid item | Binder, lunch box, tablet, or laptop measurements | Establishes minimum opening and compartment dimensions |
| Filled-weight goal | Normal load and occasional peak load | Influences straps, handles, base, and reinforcement |
| Material | Outer fabric, lining, foam, mesh, coating | Affects weight, durability, cleaning, and appearance |
| Compartment plan | Main section, front pocket, bottle pockets, device sleeve | Controls organization and usable capacity |
| Carrying system | Shoulder straps, chest strap, back panel, handle | Influences stability and comfort |
| Logo method | Printing, embroidery, patch, badge, or custom pull | Changes artwork limits, cost, and lead time |
| Destination | Country or distribution region | Helps identify relevant testing and labeling needs |
| Packaging | Polybag, hangtag, insert, carton quantity, carton marks | Affects packing work and freight volume |
| Quantity structure | Pieces per size, color, and artwork | Shows whether each variation is practical |
| Arrival date | Required delivery date | Allows time for samples, approval, production, and transport |
The daily packing list should use measurements rather than broad descriptions. “Books and lunch” is not precise enough. A 32 × 29 × 6 cm binder and a 22 × 16 × 8 cm lunch box create very different space requirements from two thin workbooks and a snack pouch.
The brief should also identify which contents are carried daily and which appear only on activity days. Permanent capacity should serve the normal timetable. Occasional sportswear may be handled through an expansion gusset, removable pouch, or separate activity bag.
Capacity and dimensions must remain linked. For example, adding six centimeters of depth to a 42 × 30 cm body increases the external box volume by approximately 7.6L:
| Dimensions | External Box Volume |
|---|---|
| 42 × 30 × 12 cm | 15.1L |
| 42 × 30 × 14 cm | 17.6L |
| 42 × 30 × 16 cm | 20.2L |
| 42 × 30 × 18 cm | 22.7L |
The deeper body offers more space, but it also moves books farther from the back. Increasing liters should therefore be balanced with torso fit and load position.
How Does the Sample Process Work?
The sample process converts the brief into a physical bag that can be measured, packed, worn, and revised. Appearance approval alone is not enough. The sample must demonstrate that folders pass through the opening, lunch fits without crushing books, straps adjust correctly, and the stated capacity remains useful.
A structured process includes:
- Review drawings, dimensions, contents, materials, logo files, and packaging.
- Confirm available fabrics, colors, zippers, webbing, buckles, foam, and lining.
- Develop the pattern for each size.
- Prepare material swatches or decoration trials when needed.
- Produce the first physical sample.
- Measure the finished bag against the specification.
- Pack it with the intended school contents.
- Check it on suitable body sizes or fit forms.
- Record all revisions with measurements and photographs.
- Produce a revised sample when fit or structure changes.
- Approve a signed reference sample and complete specification set.
Every size should be sampled independently. Scaling a pattern by a fixed percentage can create several problems:
- Shoulder straps become too wide on the junior version.
- Zipper pulls and buckles look oversized.
- Bottle pockets become too shallow or too deep.
- Artwork shifts too close to seams.
- The main opening no longer suits the intended folder.
- A device sleeve becomes loose or undersized.
- The top handle changes position relative to the shoulder straps.
- Reinforcement areas no longer match the load.
A sample should be tested with real objects, not only tissue paper or soft filling. Pack the largest folder, thickest binder, intended lunch container, filled bottle, device in its protective case, pencil case, and clothing. The zipper should close without force, and frequently used items should remain accessible without unloading the entire bag.
Jundong’s standard sample time is usually about 5–7 days after the design and materials are confirmed. Straightforward styles may be completed in approximately 2–3 days. Special fabrics, custom-dyed components, multiple sizes, complex decoration, molded parts, and repeated revisions require additional time.
Approval should include more than one physical sample when the collection has several capacities. A signed or sealed reference for each size prevents the junior, primary, and senior versions from being judged against one sample that has different proportions.
Which Tests Verify Capacity and Comfort?
Capacity and comfort are verified through dimensional checks, real-item packing, filled-load trials, strap adjustment checks, and construction tests. Acceptance criteria should reflect the intended age, contents, materials, destination, and product claims.
| Check | Method | What It Reveals |
|---|---|---|
| Finished dimensions | Measure at agreed locations | Incorrect height, width, depth, or shape |
| Usable capacity | Pack a fixed reference set | Space lost to padding, curved panels, and dividers |
| Folder insertion | Insert the specified folder through the opening | Insufficient zipper or corner clearance |
| Binder fit | Load the thickest intended binder | Poor width, depth, or compartment shape |
| Lunch fit | Pack lunch with books and folders | Crowding, tilting, or poor separation |
| Device fit | Insert device with its case | Tight corners, loose sleeve, or exposed edges |
| Normal load | Pack the everyday contents | Sagging, distortion, or poor balance |
| Peak load | Add the agreed occasional items | Stress at straps, handle, seams, and base |
| Strap fit | Check on suitable body sizes | Incorrect strap angle or insufficient adjustment |
| Strap slippage | Carry the filled bag and remeasure | Webbing movement through the adjusters |
| Bottle retention | Walk, bend, and tilt with a full bottle | Pocket depth, elastic strength, and stability |
| Zipper operation | Repeatedly open the filled bag | Fabric catching, corner resistance, or slider strain |
| Handle check | Lift the loaded bag repeatedly | Weak reinforcement or upper-panel distortion |
| Base stability | Set down the filled bag on a level surface | Tipping, sagging, or uneven load position |
| Material performance | Use agreed abrasion, color, and coating methods | Surface wear, color transfer, or coating weakness |
| Packing trial | Place finished samples in the proposed carton | Crushing, deformation, and excessive carton volume |
External box volume should not be presented as verified storage capacity. Seam allowances, foam, lining, curved corners, dividers, and zipper paths reduce or redistribute the internal cavity. A physical packing set gives a clearer view of what the bag can carry.
Fit trials must use the planned filled weight. An empty backpack can sit neatly while a loaded one drops below the waist, pulls away from the back, or causes the straps to rotate outward.
Development checks should be followed by incoming-material inspection, checks during production, and final inspection. Jundong uses an IQC-to-inline-to-final sequence, with final inspection based on the agreed AQL criteria. Dimensions, stitching, zippers, hardware, logo placement, cleanliness, labeling, and packaging can be recorded against the approved specifications.
What Affects Custom School Bag Price?
Custom school bag price is affected by size, material, lining, foam, compartments, hardware, decoration, testing, packaging, and quantity distribution. A larger body uses more fabric, but construction complexity often has a greater effect than liters alone.
| Cost Element | Why It Changes the Cost | Practical Control |
|---|---|---|
| Outer material | Fiber, weight, coating, color, and order volume differ | Use a shared material family across the size series |
| Lining | Full lining requires more fabric and sewing | Use heavier lining only in high-wear areas |
| Foam | Thick or shaped padding adds cutting and assembly | Match padding to the planned load |
| Compartments | Every section adds patterns, zippers, binding, and sewing | Keep pockets connected to real contents |
| Device sleeve | Padding, suspension, closure, and lining add work | Include it only in relevant sizes |
| Zippers | Quantity, gauge, finish, and custom color affect cost | Standardize zipper specifications where suitable |
| Buckles and webbing | Custom colors and special shapes require preparation | Share hardware across several models |
| Decoration | Embroidery, printing, patches, and badges use different processes | Confirm method and artwork size early |
| Reflective details | Material and placement add cutting and sewing | Concentrate them in visible areas |
| Size count | Every size needs patterns, samples, specifications, and checks | Use the fewest sizes that provide proper fit |
| Color count | Small quantities split across colors complicate material use | Build a focused color plan |
| Testing | Product and destination requirements add time and fees | Confirm needs before material selection |
| Packaging | Hangtags, inserts, boxes, and individual packing add work | Match packaging to the distribution method |
| Carton volume | Deep or rigid bags occupy more freight space | Review nesting and carton dimensions during sampling |
Cost reduction should not begin with weaker shoulder anchors, thinner thread at stress areas, insufficient seam allowance, or removing protection from the base. More effective savings often come from eliminating unused pockets, sharing materials and hardware, simplifying decoration, and reducing the number of color combinations.
A confirmed bill of materials and approved sample provide the strongest basis for quotation. Early figures may change if the foam thickness, zipper specification, artwork method, device protection, testing, or packing method remains undecided.
What Are the MOQ Requirements?
The workable minimum depends on the design, material availability, decoration, color count, and number of size variations. Jundong’s standard starting quantity is 500 pieces per design. Straightforward styles at approximately 200–300 pieces may be reviewed individually, while basic price-sensitive constructions may require 1,000 or more pieces.
A collection can become highly fragmented when the total quantity is divided among sizes and colors:
| Collection Plan | Total Variations | 600 Pieces Total | 1,200 Pieces Total |
|---|---|---|---|
| 2 sizes × 2 colors | 4 | 150 each | 300 each |
| 2 sizes × 3 colors | 6 | 100 each | 200 each |
| 3 sizes × 3 colors | 9 | About 67 each | About 133 each |
| 3 sizes × 4 colors | 12 | 50 each | 100 each |
These calculations do not establish automatic feasibility. Fabric dyeing, printed lining, embroidered artwork, specially colored webbing, and custom zipper tape may each have separate preparation needs.
When quantity is limited, practical ways to keep the collection workable include:
- Use one outer fabric across all sizes.
- Share lining, webbing, buckles, and zipper colors.
- Keep one logo method across the collection.
- Reduce the initial color count.
- Use standard hardware instead of custom molds.
- Introduce additional colors after size demand becomes clearer.
Sample fees may be deducted or refunded when the confirmed order reaches 2,000 pieces, subject to the agreed terms. This should be recorded clearly in the quotation.
How Long Do Sampling and Production Take?
Sampling commonly takes about 5–7 days, with certain straightforward designs completed in 2–3 days. Standard bag production often requires approximately 20–30 days, while complex constructions may need 25–45 days. The full schedule must also allow time for revisions, material preparation, inspection, packing, and transport.
| Stage | Planning Reference | Main Variables |
|---|---|---|
| Design review | Depends on brief completeness | Missing measurements, artwork, or packing details |
| Simple sample | About 2–3 days | Available materials and uncomplicated structure |
| Standard sample | Usually about 5–7 days | Size count, pockets, foam, and decoration |
| Revision | Depends on the changes | New pattern, materials, or repeated fit checks |
| Standard production | About 20–30 days | Quantity, colors, decoration, and material readiness |
| Complex production | About 25–45 days | Special materials, several sizes, or detailed construction |
| Air transport | Often about 7–12 days | Route, flight space, customs, and destination |
| Sea transport | Often about 40–45 days | Sailing schedule, port, customs, and inland delivery |
Production timing should begin after the samples, materials, artwork, labels, packaging, and quantity split are approved. A change to dimensions or compartments after approval can affect patterns, material use, workflow, packing, and completion time.
For a fixed school launch, calculate backward from the required arrival date. Allow enough time for at least one serious sample review. Approving an unsuitable size quickly creates more risk than spending several additional days correcting it.
Which School Bag Factory Fits the Project?
A suitable school bag factory should demonstrate how the intended contents and age groups are converted into patterns, samples, test records, workmanship criteria, and finished packing. Evidence from the actual project matters more than broad capability claims.
Useful evidence includes:
- Separate patterns and specifications for every size.
- Capacity figures linked to external dimensions.
- Physical packing tests using the intended school supplies.
- Fit checks at the planned filled weight.
- Confirmed material swatches and hardware.
- Approved artwork with dimensions and placement tolerances.
- Reinforcement details for straps, handles, and the base.
- Incoming-material, in-process, and final inspection procedures.
- Clear quantities by size, color, and artwork.
- Packaging instructions and carton planning.
- Traceable records that support repeat orders.
Jundong has more than 20 years of custom bag experience, an approximately 18,000-square-meter facility, more than 600 team members, and an 80-person quality team. OEM, ODM, and private-label school bag projects can cover capacity, dimensions, materials, structure, color, logo, labels, and packaging.
No factory should imply that every school bag automatically satisfies every requirement in every destination. Materials, labels, tests, and documentation must correspond to the actual design, intended age, distribution region, and order specifications.
For a custom size-series proposal, prepare the age or grade groups, target capacities, external dimensions, daily packing lists, quantity by size and color, logo artwork, destination, and required arrival date. These details can be sent to info@jundongfactory.com for development review, sampling, and quotation.