 Skip to content
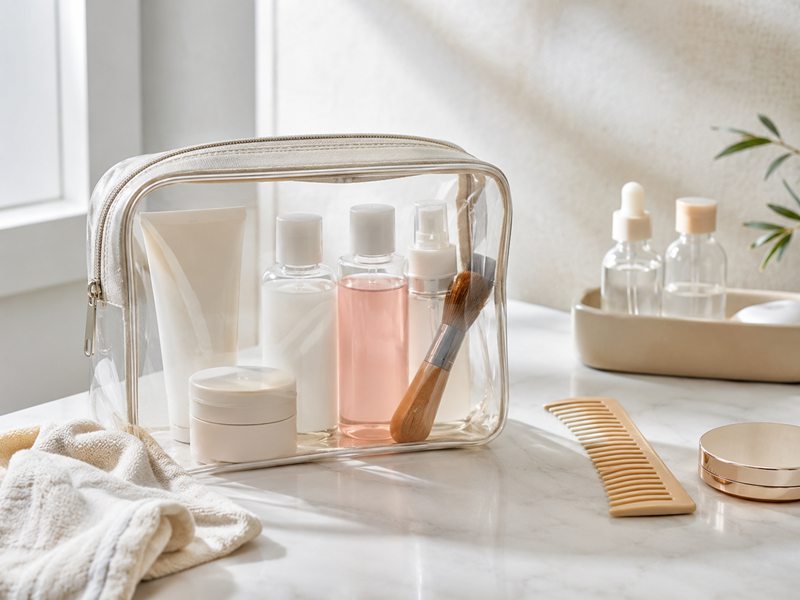
A transparent pouch can look excellent in a rendering yet feel disappointing when the finished cartons are opened. The film may collapse around the bottles, the zipper may pull against the corners, or trapped plastic odor may dominate the unboxing experience. These problems rarely come from one decision. Film formulation, thickness, bag shape, seams, decoration, and packing influence one another.
PVC cosmetic bags work well when film thickness, formulation, construction, odor control, and care instructions are treated as one connected specification. A flexible travel pouch may need a different gauge from a structured beauty case. Approval should cover the actual film, seams, zipper, logo, packing, and destination requirements—not just appearance—followed by checks that confirm the bulk run matches the signed sample.
Consider a clear gift pouch that looks polished when empty. Add three 100 ml bottles, stand it inside a retail box, and ship them through a warm distribution route. The panels begin to bow, the zipper line becomes distorted, and the freshly opened pack releases a noticeable odor. The problem started long before shipment: the film and structure were never evaluated with the real contents and final packing.
Why Are PVC Cosmetic Bags Used for Beauty and Travel Kits?

PVC cosmetic bags are chosen for clear product visibility, easy wiping, flexible shaping and practical decoration. They can support beauty sets, travel kits, hotel amenities and promotional programs, but the result depends on film formulation, thickness, panel size, seams, zipper design and packing. Clear PVC should not be assumed to be leakproof, odor-free, compliant or suitable for every application.
The strongest advantage is visibility. Bottles, tubes, brushes and cosmetic colors remain visible without opening the pouch. In a retail beauty set, this allows the products inside to become part of the presentation. During travel, it reduces the time spent searching for small items.
PVC can also be combined with other materials. A pouch may use transparent front and back panels with polyester binding, a PU base, a nylon handle or a fabric zipper tape. These combinations add color, structure and stronger attachment areas without removing the clear appearance.
However, “clear PVC” is not a complete material specification. Two films of the same thickness may have different softness, odor, transparency and low-temperature performance. Before an order proceeds, several details should be locked:
- Exact material code
- Nominal thickness and accepted tolerance
- Softness or firmness
- Transparency, tint and surface finish
- Printed logo method and ink
- Stitching, binding or welding
- Zipper and hardware
- Individual packing
- Required material documents
- Intended storage and delivery conditions
The film should be tested as part of the finished bag. A loose swatch cannot show zipper distortion, corner stress, bottle pressure or packing creases. The complete sample should be filled with the intended products, stored in its retail packing and checked again after several days.
Who Uses Clear PVC Cosmetic Bags?
Clear PVC cosmetic bags are used in beauty launches, skincare gift sets, travel collections, hotel amenities, beauty tool kits, nail-care programs and event gifts. Each use creates a different set of structural requirements.
| Program | Why clear PVC works | Detail that often needs attention |
|---|---|---|
| Skincare gift set | Bottles and labels remain visible | Base stability and carton fit |
| Makeup launch | Colors contribute to presentation | Staining and print placement |
| Travel collection | Contents are easy to identify | Bottle height and zipper clearance |
| Hotel amenity kit | Compact and easy to distribute | Packing speed and unit weight |
| Beauty tool set | Tools stay visible and organized | Sharp edges and internal sleeves |
| Nail-care kit | Small items can be checked quickly | Chemical contact and staining |
| Event gift | Logo remains highly visible | Film gauge and distribution packing |
A two-product lip kit may need a light flat pouch. A six-bottle skincare set may require a deeper gusset, supported base and stronger zipper ends. The intended contents should determine the construction instead of selecting a ready-made shape first.
Cosmetic Bag vs Toiletry Bag: What Is the Difference?
A cosmetic bag generally stores makeup, brushes, palettes and smaller beauty items. A toiletry bag usually carries shampoo, cleanser, toothpaste, razors and larger personal-care bottles. The two names overlap in retail, but their filled weight and internal requirements often differ.
| Detail | Cosmetic bag | Toiletry bag |
|---|---|---|
| Main contents | Makeup, brushes and small skincare | Bottles, tubes and grooming items |
| Filled weight | Light to moderate | Often heavier because of liquids |
| Common shape | Flat pouch or vanity case | Box case, divided bag or hanging style |
| Main risk | Pigment stains and crushed products | Leakage, bottle pressure and zipper stress |
| Internal design | Brush sleeves and small pockets | Bottle sections and wet-area separation |
| Cleaning need | Powder, lipstick and foundation | Shampoo, cream, oil and water residue |
The label used at retail should not determine the structure. Measure the largest bottle, record the total filled weight and check whether caps touch the zipper. A toiletry bag may need a stronger base even when its external size is similar to a cosmetic pouch.
What Is the Best Material for Makeup Bags?
The best material depends on whether the priority is transparency, softness, internal organization, fashion styling, cleaning or protection. PVC is useful for full visibility, but it is not the only option.
| Material | Strong application | Main benefit | Detail to verify |
|---|---|---|---|
| PVC | Clear beauty and travel pouches | Visibility and easy wiping | Thickness, odor and cold flexibility |
| TPU | Softer clear cases | Flexible, refined hand feel | Cost, scratching and heat response |
| Polyester | Printed organizers | Lightweight and versatile | Coating, lining and fabric density |
| Nylon | Travel beauty cases | Smooth feel and low weight | Abrasion, color and coating |
| PU | Fashion cosmetic bags | Texture and structured appearance | Folding, odor and surface durability |
| Canvas | Lifestyle collections | Natural woven appearance | Liquid stains and cleaning |
| Velvet or satin | Gift-led designs | Decorative presentation | Abrasion and color transfer |
Mixed construction can solve conflicting needs. A polyester body with clear internal pockets offers organization and visibility. A PVC case with a PU base adds structure and a more refined finish. Material choice should follow the actual contents, expected reuse, cleaning method and target cost.
PVC vs TPU: Which Is Best?
PVC often provides a more economical route to a clear, shape-holding pouch. TPU is often considered when softer hand feel and greater flexibility are more important. The choice should come from physical comparison rather than material names alone.
| Comparison | PVC | TPU |
|---|---|---|
| Hand feel | Soft, medium or firm depending on formula | Often softer and more flexible |
| Cost | Usually lower | Usually higher |
| Shape retention | Strong with a suitable gauge | May need supporting trims |
| Odor | Depends on formulation and packing | Still requires physical checking |
| Cold conditions | May become firmer | Often remains more flexible |
| Surface behavior | Can crease under pressure | Can show scratches or surface blocking |
| Processing | Suitable for stitching, binding or welding | Heat response requires careful trials |
TPU should not automatically be described as environmentally compliant, and PVC should not automatically be described as unsafe. The exact formulation, intended use and requested documents matter more than the material name.
Compare swatches under the same lighting and temperature, then compare complete samples after folding, filling and sealed storage.
What Is the Best Toiletry Bag for Travel?
A good travel toiletry bag fits the planned containers, opens widely, remains stable when filled and cleans without damaging the transparent surface. The right capacity depends on trip length and bottle size.
| Travel format | Size reference | Calculated box volume | Suitable contents |
|---|---|---|---|
| Compact organizer | 18 × 12 × 5 cm | 1.08 L | Mini bottles and daily essentials |
| Weekend pouch | 22 × 15 × 8 cm | 2.64 L | Several travel bottles and grooming items |
| Full toiletry case | 25 × 18 × 10 cm | 4.50 L | Larger bottles, tools and accessories |
Calculated box volume does not equal usable capacity. Rounded corners, seam allowances, binding and zipper curves reduce internal space. A packed trial should therefore use the real containers.
Check whether:
- The largest bottle stands upright
- Caps remain below the zipper
- The base stays flat after 24 hours
- The handle carries the filled weight
- Bottle corners mark the clear panel
- The bag still fits the planned retail box
- The zipper opens smoothly around every corner
A compact airport liquids pouch and a full toiletry case serve different purposes. One design rarely performs both jobs equally well.
Do Clear Pouches Meet Travel Rules?
A transparent pouch does not automatically meet airport liquid requirements. For U.S. carry-on screening, the TSA’s current 3-1-1 rule generally allows liquid, aerosol and gel containers of no more than 3.4 fl oz or 100 ml inside one quart-sized clear resealable bag, with one liquids bag per traveler.
| U.S. carry-on detail | Current reference |
|---|---|
| Maximum container size | 3.4 fl oz or 100 ml |
| Liquids bag capacity | One quart |
| Appearance | Clear |
| Closure | Resealable |
| Quantity | One bag per traveler |
Requirements can differ by country, airport and screening equipment. The latest TSA liquids rule should be checked before printing travel claims.
A custom PVC pouch can still be an excellent luggage organizer without being the required airport security bag. “Clear travel organizer” is often more accurate than an unconditional “TSA approved” statement unless dimensions, capacity and closure have been verified against the applicable rule.
Are PVC Bags Safe for Beauty Kits?
PVC suitability cannot be determined from clarity or smell alone. Strong odor deserves investigation, but little detectable odor does not prove chemical compliance. Film, pigments, ink, adhesive, zipper tape, binding and metal decoration may all require review.
Depending on the destination and intended use, relevant checks may include:
- PVC material specification
- Restricted-phthalate testing
- Heavy-metal testing
- REACH documentation
- California Proposition 65 assessment
- Ink and coating information
- Hardware material declaration
- Report date and sample identification
- Confirmation that the tested material matches the order
A bag holding closed cosmetic bottles is different from packaging that directly touches a cosmetic formula. Food contact, children’s use and direct chemical contact require separate evaluation.
Claims such as “food-safe,” “child-safe,” “non-toxic,” “phthalate-free” or “environmentally responsible” should only be used when evidence supports the exact material and application. General documents for another PVC grade or color are not sufficient.
What Is the History of Clear Cosmetic Bags?
Clear cosmetic bags began as simple utility pouches that made contents easy to identify. As flexible film cutting, binding, welding and zipper construction improved, transparent bags developed into structured vanity cases, retail beauty sets and reusable travel accessories.
Airport liquid restrictions introduced after 2006 also increased awareness of clear resealable bags. At the same time, travel-size skincare, hotel amenities and gift-with-purchase programs created more demand for transparent packaging that could remain useful after the original products were removed.
Modern clear cosmetic bags now include:
- Tinted or frosted panels
- Colored fabric and PU binding
- Printed logos and artwork
- Custom zipper pullers
- Reinforced handles and bases
- Internal dividers and brush sleeves
- Retail inserts and gift-box packing
The role of the product has changed from basic storage to visible brand presentation. Modern designs must therefore balance clarity, structure, odor control, cleaning, repeat use and efficient packing rather than relying on transparency alone.
Which PVC Thickness Is Best for Cosmetic Bags?

For most clear cosmetic and toiletry bags, 0.25–0.40 mm PVC offers a practical balance of flexibility, clarity, weight, and durability. Flat zipper pouches may work well at 0.20–0.30 mm, while structured travel kits often need 0.35–0.50 mm. Larger box-shaped bags may require 0.50–0.80 mm panels or added reinforcement. The final choice must also consider softness, panel size, seam design, contents, temperature, and packing method.
What PVC Thickness Options Are Available?
Clear flexible PVC used for cosmetic bags is commonly specified in millimeters. A difference of only 0.10 mm may look small on a specification sheet, yet it can noticeably change hand feel, folding behavior, product weight, seam performance, and the way the bag sits on a shelf.
The following values are useful development references rather than universal rules:
| Nominal Thickness | General Feel | Suitable Applications | Matters to Check |
|---|---|---|---|
| 0.15–0.20 mm | Very light and soft | Small flat pouches, document pockets, internal windows | Wrinkling, tearing near seams, weak body |
| 0.25–0.30 mm | Flexible with moderate body | Everyday makeup bags, travel pouches, promotional kits | Panel size, corner support, zipper tension |
| 0.35–0.40 mm | More substantial | Box pouches, beauty gift sets, medium toiletry bags | Fold marks, seam bulk, cold flexibility |
| 0.45–0.50 mm | Firm and structured | Reusable travel kits, larger clear cases | Finished weight, turning difficulty, packing volume |
| 0.60–0.80 mm | Heavy and rigid-feeling | Structured panels, reinforced display cases | Corner stress, stitch holes, stiffness in cold conditions |
Nominal thickness should not be treated as the only material specification. Two films marked 0.30 mm can feel quite different because flexible PVC contains resin, plasticizers, stabilizers, pigments, and other formulation ingredients. One grade may feel soft and drapable; another may feel crisp and springy.
Thickness should be checked with a calibrated micrometer at several positions across the sheet. Measuring only one spot can miss uneven gauge, particularly near the edges of a roll. The approved sample should record both the nominated value and the agreed tolerance.
How Does Thickness Change Bag Structure?
A thicker panel generally provides more body, but bag structure is created by several interacting details:
- Panel dimensions
- Film hardness
- Gusset depth
- Binding construction
- Seam allowance
- Zipper tape stiffness
- Internal dividers
- Reinforced corners
- Handle and strap attachment
- The weight and shape of the packed items
A 0.30 mm film may hold its shape well in a compact pouch measuring 18 × 12 × 5 cm. The same material can collapse or bow when used for a large travel case measuring 30 × 22 × 12 cm. As panel area grows, unsupported surfaces become easier to bend, crease, or distort.
Gussets also change the result. A flat zipper pouch mainly needs enough tear resistance around the opening and seams. A deep box bag must resist outward pressure from bottles, jars, and brushes. It may need thicker transparent panels, fabric binding, reinforced end panels, or a combination of these features.
The following comparison shows how construction can alter the thickness decision:
| Bag Construction | Structural Demand | Practical Starting Value |
|---|---|---|
| Flat zipper pouch | Low | 0.20–0.30 mm |
| Small pouch with bottom gusset | Low to medium | 0.25–0.35 mm |
| Medium box-shaped cosmetic case | Medium | 0.30–0.45 mm |
| Travel toiletry bag with handle | Medium to high | 0.35–0.50 mm |
| Large organizer with dividers | High | 0.45–0.60 mm |
| Rigid-looking display case | Very high | 0.50–0.80 mm plus reinforcement |
These figures should be validated with finished samples containing the intended products. An empty bag can look stable on a table but deform after six bottles are placed inside.
Which Thickness Fits Each Cosmetic Bag Style?
The right gauge depends on how the bag will be carried, displayed, opened, packed, and reused.
A small makeup pouch for lipstick, mascara, and compact powder usually benefits from a softer film. Approximately 0.25–0.30 mm allows the pouch to flex around its contents and fit easily inside a handbag. Excessive stiffness can make a small format feel awkward and reduce the usable interior space.
A medium travel kit containing skincare bottles, sunscreen, and grooming accessories needs more support. Approximately 0.30–0.45 mm is often a sensible starting specification. If the pouch has a wide opening, handle, or deep gusset, reinforced binding and end panels may be as important as added thickness.
A large toiletry case should not depend on transparent film alone for strength. Bottles create concentrated loads at the base and corners. A heavier panel may help, but bottom reinforcement, woven binding, stronger zipper tape, and secure handle anchoring are usually more effective than continually increasing the gauge.
| Intended Contents | Approximate Filled Weight | Construction Priority |
|---|---|---|
| Lipstick, mascara, small tools | Below 0.5 kg | Flexibility and compactness |
| Daily makeup collection | 0.5–1.0 kg | Seam support and zipper quality |
| Skincare and travel bottles | 1.0–2.0 kg | Gusset stability and reinforced base |
| Full beauty kit | Above 2.0 kg | Load-bearing panels, handles, and corners |
Filled weight is more useful than item count. Four glass skincare bottles may place greater stress on a pouch than twenty lightweight makeup brushes.
Before approval, the test sample should be packed with real or weight-equivalent contents. It should then be lifted by the handle, opened repeatedly, placed on different surfaces, and stored in its intended retail or shipping packaging.
Which Thickness Works for Beauty Gift Sets?
Beauty gift sets require both physical protection and visual presentation. Clear film must remain smooth enough to show the products, yet the bag should not look overbuilt compared with the items inside.
For a lightweight set containing sheet masks, trial-size tubes, or makeup brushes, 0.25–0.35 mm may be sufficient. It keeps the package light and gives the pouch a soft, approachable feel.
For sets containing glass jars, perfume bottles, or several full-size products, 0.35–0.50 mm is usually a stronger starting position. The base may still need a fabric-covered board, removable insert, or reinforced panel to prevent sagging.
Film gauge also affects appearance:
- Thin material may show ripples around printed areas and seams.
- Medium material usually gives a smoother front display.
- Heavy material can create prominent fold lines at the corners.
- Very stiff film may push lightweight products away from their intended positions.
- Thick panels can make a small gift set look bulky.
The insert and pouch should be developed together. A well-fitted internal tray can carry much of the product weight, allowing the transparent shell to focus on protection and presentation. Without an insert, pressure transfers directly to the seams and bottom corners.
Retail packing should also be tested. If the filled kit is compressed into a tight master carton, the film may develop pressure marks or zipper impressions. Dividers, protective tissue, and correct carton dimensions can preserve clarity more effectively than choosing a heavier gauge.
Can PVC Be Too Thin?
Yes. A film that is too thin may reduce material weight, but it can introduce problems that are expensive to correct after production.
Common signs include:
- Wrinkled front and back panels
- Distorted printed logos
- Curling around the zipper
- Punctures from brush handles or bottle caps
- Elongated stitch holes
- Tearing at the ends of the zipper
- Weak handle attachment
- Poor shelf presentation
- Excessive deformation when filled
Thin material is especially vulnerable near seam intersections. At these locations, several forces act on a small area: stitch penetration, zipper tension, binding tension, and outward pressure from the contents.
Increasing thickness is one possible correction, but it is not always the most efficient one. A narrow reinforcement patch, wider binding, rounded corner, larger seam allowance, or stronger backing layer may solve the weak area without making the entire bag heavier.
A flat pouch that only carries cotton pads does not need the same specification as a toiletry case filled with 100 ml bottles. Selecting a heavy film merely to compensate for an unresolved seam design can add cost while leaving the original stress concentration in place.
Can PVC Be Too Thick?
Yes. Extra thickness can create a substantial feel, but more is not automatically better.
Heavy film may cause:
- Difficult turning during assembly
- Bulky seam intersections
- Uneven binding
- Stiff zipper movement
- Strong fold memory
- White stress marks at sharp corners
- Increased carton volume
- Higher freight weight
- Reduced flexibility in cold environments
- An overly rigid feel in a small pouch
Sharp rectangular corners are particularly demanding. When thick PVC is folded tightly, stress accumulates along the fold line. Rounded corners distribute that stress more gradually and usually produce a cleaner finish.
Heavy panels may also resist the natural path of the zipper. If the zipper tape is much softer than the body, the opening can become wavy or difficult to operate. The film, zipper, binding, and reinforcement must behave as one construction rather than as separate materials.
Cold conditions deserve attention. Flexible PVC commonly becomes firmer as temperature falls, although the degree depends on its formulation. A sample that performs well in a warm development room may feel noticeably different after transport or storage in winter. Projects intended for cold destinations should include a low-temperature conditioning trial based on their actual distribution environment.
How Do Softness and Hardness Affect the Decision?
Thickness and softness should be approved separately. “0.30 mm clear PVC” does not fully define how the finished bag will behave.
Softer film usually offers:
- Easier folding
- Better drape
- A comfortable hand feel
- Easier packing into small cartons
- Less resistance when opening the bag
However, very soft film may cling to itself, attract visible dust, stretch around stitches, or lose its shape when filled.
Firmer film usually offers:
- Cleaner panel presentation
- Better free-standing structure
- A more substantial appearance
- Less surface collapse around printing
Yet excessive hardness can increase corner stress, make turning difficult, and create an uncomfortable feel in compact formats.
Clarity must also be reviewed under realistic conditions. Place the film over white, black, and colored objects, then inspect it in daylight and indoor lighting. This reveals tint, haze, surface texture, and optical distortion more clearly than holding an empty sheet in the air.
An approved swatch should record:
| Material Detail | What to Approve |
|---|---|
| Nominal gauge | Required millimeter value |
| Tolerance | Acceptable deviation |
| Hand feel | Soft, medium, or firm reference |
| Transparency | Clarity and acceptable haze |
| Tint | Neutral, blue-toned, or another approved tone |
| Surface | Gloss, matte, textured, or smooth |
| Odor | Agreed condition after sealed storage |
| Temperature behavior | Required flexibility after conditioning |
| Color transfer resistance | Compatibility with binding and printed parts |
Keeping a signed material swatch with the finished sample reduces the risk of approving only by written description.
How Does Thickness Affect Sewing?
A sewing needle creates permanent holes in transparent film. Unlike woven cloth, PVC does not close around the needle after stitching. If stitches are packed too closely, the seam can behave like a perforated tear line.
For many constructions, a trial stitch length near 3–4 mm can be a sensible development starting point, but it must be adjusted to the needle, thread, film formulation, seam load, and appearance. It is not a universal setting.
Important sewing details include:
- Needle size suited to the material stack
- Consistent thread tension
- Sufficient distance from the cut edge
- Reinforcement at zipper ends and handle anchors
- Rounded transitions instead of sharp stress corners
- Binding that covers and supports the film edge
- Limited backstitching in highly visible areas
- Controlled feeding to prevent panel stretching
A longer stitch is not always stronger. If it becomes too long, the seam may lack stability or appear unfinished. The correct setting balances hole spacing, thread support, and visual quality.
Seam allowance also matters. Stitching too near the edge leaves little material to resist outward force. Adding a few millimeters of supported film may improve tear resistance more effectively than moving to a much heavier gauge.
For selected shapes, heat sealing or high-frequency welding may be considered. These methods can create a clean transparent joint, but the design, equipment, film composition, logo placement, and required finish must all be compatible. Sewn binding remains useful when the design includes fabric trims, zipper tape, handles, or decorative edge colors.
How Should Thickness Be Tested?
A finished sample should be tested in the condition in which it will actually be used. Flat sheets reveal material properties; assembled bags reveal construction performance.
A practical development check may include:
| Check | Method | Watch For |
|---|---|---|
| Gauge consistency | Measure several panel positions with a micrometer | Thin spots and edge variation |
| Filled-shape check | Pack intended products or equivalent weights | Bowing, sagging, corner distortion |
| Carry check | Lift by the handle and carry for repeated intervals | Stretching and attachment movement |
| Zipper check | Open and close repeatedly | Waving, jamming, film caught in slider |
| Seam check | Apply controlled hand tension | Enlarged holes or edge tearing |
| Drop check | Drop the packed sample from an agreed height | Bottle impact and corner failure |
| Packing check | Pack, store, and unpack using proposed cartons | Creases, pressure marks, deformation |
| Temperature check | Condition according to destination needs | Hardening, cracking, loss of flexibility |
| Print check | Bend and rub decorated areas | Ink cracking, lifting, or distortion |
A test should resemble the intended use. Dropping an empty pouch provides little information about a kit containing glass bottles. Likewise, testing a sample for ten minutes cannot reveal deformation caused by several weeks in compressed packing.
The approved sample should remain the visual and functional reference for bulk inspection. Thickness data is valuable, but appearance, hand feel, and performance still need direct comparison.
How Does Thickness Affect Weight and Price?
Increasing film gauge adds material throughout every transparent panel. For the same surface area, moving from 0.30 mm to 0.50 mm increases film volume by approximately 66.7%:
That does not mean the completed bag will cost 66.7% more. The zipper, binding, printing, labor, inspection, packing, and other components do not rise at the same rate. Still, the change can noticeably affect unit weight, carton weight, and shipping cost.
The table below estimates raw film mass using an illustrative density of 1.30 g/cm³. Actual mass varies with formulation.
| Thickness | Approximate Film Mass per m² |
|---|---|
| 0.20 mm | 260 g |
| 0.30 mm | 390 g |
| 0.40 mm | 520 g |
| 0.50 mm | 650 g |
| 0.60 mm | 780 g |
| 0.80 mm | 1,040 g |
A compact pouch uses only part of a square meter, but the difference becomes meaningful across a large production volume. Thicker folded panels may also reduce the number of pieces that fit into one carton.
The most efficient specification is therefore not the thinnest or thickest available. It is the lightest construction that passes the required appearance, filled-load, seam, zipper, packing, and temperature checks with an appropriate safety margin.
For many cosmetic bags, begin with 0.25–0.40 mm and develop from there. Use real contents during sampling, record the exact material grade, and assess the complete bag rather than judging the transparent film alone.
Why Do New PVC Cosmetic Bags Smell?
New PVC cosmetic bags may smell because freshly produced film, printing inks, adhesives, bindings, zipper components, and sealed packaging release small amounts of volatile substances. Warm storage and immediate polybag packing can concentrate them inside the pouch. A mild odor that fades after ventilation differs from a persistent, irritating smell. Odor strength alone cannot confirm whether a material is safe or unsafe; material documentation and appropriate testing are still required.
What Causes the Smell?
The clear panel is often blamed first, but a finished cosmetic bag combines several materials. Each part can contribute its own scent, especially shortly after printing, sewing, bonding, and packing.
Flexible PVC is made from resin combined with plasticizers, stabilizers, processing aids, and other ingredients that provide softness, clarity, color, and temperature resistance. Fresh film may retain a material-related scent that varies with formulation, age, storage conditions, and processing temperature.
Other frequent sources include:
| Possible Source | Odor Character | How to Isolate It |
|---|---|---|
| Clear PVC film | Plastic-like or slightly sweet | Smell an unprinted film swatch separately |
| Printing ink | Solvent-like or sharp | Compare printed and unprinted panels |
| Adhesive | Chemical, sweet, or pungent | Check bonded labels, trims, and reinforcements |
| PU binding | Synthetic leather-like | Remove or isolate the trim for comparison |
| Zipper tape | Textile dye or finishing smell | Check the zipper before assembly |
| Rubber puller | Rubber-like | Compare the puller with a metal version |
| Foam insert | Dense synthetic scent | Remove the insert and reseal the empty pouch |
| Polybag | Plastic packing smell | Check an unused polybag by itself |
| Printed carton | Ink or paper-coating smell | Keep the bag outside the carton for comparison |
The strongest scent may not come from the largest component. A small rubber zipper pull or bonded logo patch can dominate the smell of an otherwise acceptable bag.
Heat can intensify the problem. Materials that appear mild in an open room may smell much stronger after several hours inside a closed polybag, carton, shipping container, or warm warehouse. This is why the finished packed sample should be evaluated, not only the raw transparent film.
Is PVC Odor a Safety Warning?
An unpleasant scent deserves investigation, but it is not a reliable chemical test. A strong odor does not automatically prove that a bag contains a restricted substance. In the same way, an odorless pouch is not automatically compliant.
Human smell is sensitive to certain substances at very low concentrations while being unable to detect others that may still require control. Sensitivity also differs from person to person. One evaluator may notice a plastic-like scent immediately, while another may barely detect it.
A responsible review separates three issues:
- Sensory acceptance: Does the pouch smell unpleasant when opened?
- Physical irritation: Does the odor cause eye, nose, throat, or skin discomfort?
- Chemical conformity: Do the exact materials meet the agreed destination and product requirements?
Documentation should match the actual film grade, color, ink system, coating, adhesive, trim, and production lot. A general statement for “PVC material” is too broad when several formulations are in use.
Depending on destination, product category, and contractual requirements, the review may include restricted phthalates, heavy metals, REACH substances, California Proposition 65 substances, or another agreed chemical list. These requirements must be confirmed for the exact project rather than assumed from transparency, softness, price, or smell.
If a scent causes burning eyes, throat irritation, dizziness, nausea, or breathing discomfort, stop the sensory check, move the item to a ventilated area, and arrange a technical investigation. It should not be dismissed as a normal “new bag smell.”
How Long Does the Smell Last?
There is no universal number of hours or days because odor depends on the material formulation, decoration method, drying time, packing speed, storage temperature, and ventilation.
A light scent from newly opened packaging may decrease substantially within 24–72 hours in a clean, ventilated space. A strong smell caused by insufficient ink drying, an unsuitable adhesive, a high-odor component, or prolonged warm storage may remain much longer. Ventilation can reduce what is trapped in the package, but it cannot correct an inherently unsuitable material.
A practical evaluation can record the scent at fixed intervals:
| Check Time | What It Reveals |
|---|---|
| Immediately after opening | The opening experience after sealed storage |
| After 2 hours | Whether trapped packaging odor disperses quickly |
| After 24 hours | Whether the pouch becomes acceptable under normal ventilation |
| After 48 hours | Whether a persistent material source remains |
| After 72 hours | Whether further airing produces meaningful improvement |
| After resealing for 24 hours | Whether the smell builds up again inside a closed bag |
The final resealing step is important. A pouch can smell acceptable after sitting open for two days but become unpleasant again after being closed overnight. That suggests the source is still releasing odor rather than merely retaining air from the original package.
The evaluation should note temperature, ventilation, package type, and elapsed time. “The smell disappeared” has little value unless the conditions are known.
Why Does Sealed Packing Make It Stronger?
A polybag protects the cosmetic pouch from dust, scratches, moisture, and handling marks. It also creates a small enclosed space where volatile substances can accumulate.
If bags are packed immediately after printing or bonding, residual vapors may not have enough time to disperse. Once several individually wrapped pieces are placed into a master carton, airflow becomes even more limited. Warm storage can increase the release of volatile compounds and make the first opening smell noticeably stronger.
This explains why the following samples may give very different impressions:
- An unpacked sample displayed in an office for one week
- A newly assembled sample placed into a polybag on the same day
- A finished pouch sealed for 48 hours
- A packed piece stored in a warm carton
- A bag taken directly from a shipping container
An open display sample is therefore not enough for approval. The review piece should use the intended polybag, tissue, insert, label, and carton arrangement. It should remain sealed for an agreed period before opening.
Packaging can also create false assumptions about the source. When the inner pouch, foam insert, printed leaflet, and polybag are sealed together, their combined scent may be much stronger than any individual component. Each material should be isolated when troubleshooting.
Adding fragrance is not a good correction. Perfume may mix with the underlying chemical smell, create another source of irritation, and make the opening experience less predictable. The cause should be removed or reduced rather than covered.
How Can Odor Be Checked During Sampling?
Smell evaluation becomes more useful when the conditions and scoring method are consistent. Casual comments such as “a little strong” or “seems acceptable” are difficult to compare between sample rounds.
A simple internal scale can be used for development:
| Score | Sensory Description | Suggested Action |
|---|---|---|
| 0 | No noticeable odor | Record and continue normal checks |
| 1 | Very faint; noticed only when held close | Usually acceptable if requirements are met |
| 2 | Noticeable when opened but fades with ventilation | Review packing time and confirm acceptance |
| 3 | Strong, persistent, or unpleasant | Investigate components and revise before approval |
| 4 | Severe or irritating | Stop evaluation and arrange technical review |
This is a practical communication tool, not a legal or laboratory standard.
For better consistency:
- Use at least three evaluators when possible.
- Avoid perfume, smoke, cleaning spray, food, and scented packaging in the room.
- Evaluate samples at similar room temperatures.
- Use identical polybags and sealing periods.
- Check the empty package as well as the filled set.
- Record the score immediately after opening and again after ventilation.
- Do not place the face inside a large pouch or inhale deeply.
- Stop immediately if irritation occurs.
It is useful to compare several controlled specimens:
- Unprinted PVC film
- Printed film
- Binding material
- Zipper and puller
- Adhesive-backed components
- Completed pouch without packing
- Completed pouch in its final package
This comparison often identifies the cause faster than repeatedly airing the assembled bag.
How Can Production Reduce PVC Bag Odor?
Odor control begins with material selection. If the chosen film, binding, ink, adhesive, or rubber part has a strong inherent smell, extra airing may deliver only temporary improvement.
Effective controls include:
- Approving an exact film grade rather than thickness alone
- Comparing raw film from the intended production lot with the signed swatch
- Selecting lower-odor inks and adhesives suited to flexible clear material
- Using the correct mixing, curing, and drying conditions
- Allowing printed and bonded parts sufficient ventilation before assembly
- Keeping rolls and components away from smoke, fuel, fragrance, and strong chemicals
- Preventing unnecessary heat during storage
- Avoiding immediate sealing after odor-producing operations
- Checking the packed item again before shipment
Printing requires particular attention. Ink may feel dry on the surface while solvent remains trapped within the printed layer. Heavy coverage, several colors, or printing on both sides may require more ventilation than a small one-color logo.
Adhesive-backed labels and reinforced handle patches can create similar difficulties. If adhesive is applied too heavily or packed before curing, the smell can remain concentrated between layers. Changing the adhesive type, application amount, curing time, or construction method may be more effective than extending ventilation.
Storage cleanliness matters as well. PVC and textile components can absorb surrounding odors. Material stored near cigarettes, aromatic oils, cleaning chemicals, fuel, rubber goods, or damp cartons may carry those smells into the finished pouch.
A useful control plan checks odor at several stages:
| Stage | Main Check |
|---|---|
| Incoming film | Material scent, clarity, softness, and lot consistency |
| After printing | Ink odor and drying condition |
| After bonding | Adhesive or laminated-part smell |
| After sewing | Combined smell of all components |
| Before polybag packing | Readiness for sealing |
| After sealed storage | Opening odor and persistence |
| Before shipment | Comparison with the approved packed sample |
This staged approach prevents a late discovery after all pieces have been individually wrapped and packed into cartons.
When Should a Sample Be Rejected?
A sample should be held for investigation when the odor remains strong after reasonable ventilation, returns sharply after resealing, differs significantly from the approved material, or causes physical irritation.
Warning signs include:
- A sharp solvent-like scent after printing
- A strong rubber smell concentrated around the puller
- A sour, damp, or mold-like odor
- An oily surface accompanied by unusual smell
- A scent that transfers to the products stored inside
- Strong variation between pieces from the same batch
- Odor that worsens after warm storage
- Eye, nose, throat, or skin irritation
- Missing or mismatched material documentation
- A sample that requires perfume to seem acceptable
A mold-like smell requires separate attention. It may indicate damp cartons, wet textile binding, unsuitable warehouse conditions, or microbial growth. Airing is not a sufficient response if moisture damage is suspected.
An oily or sticky surface can signal material migration, contamination, heat exposure, or incompatibility between PVC and another component. The pouch should be examined for haze, surface tack, print transfer, discoloration, and bonding failure.
Variation between pieces is another concern. If one sample scores 1 and another scores 3 under the same conditions, the issue may involve mixed material lots, inconsistent drying, uneven adhesive use, or contamination during storage.
Rejection does not always mean replacing every component. Once the source is isolated, the correction may involve changing one zipper pull, extending ink drying, replacing a bonded patch, adjusting the polybag timing, or choosing a different clear film grade.
How Should Finished Bags Be Packed and Stored?
Completed pouches should be clean, dry, cooled to room temperature, and sufficiently aired before individual sealing. They should not be packed while still warm from printing, bonding, or heat-related processing.
Storage conditions should minimize heat, direct sunlight, moisture, and contact with strongly scented substances. Cartons should remain dry and should not be placed directly against a damp floor or wall.
Compression also deserves attention. Tightly packed clear bags may trap odor while developing creases, pressure marks, or print transfer. Correct carton dimensions and sensible layering protect both appearance and opening quality.
Before shipment, a retained packed sample can be opened and compared with the approved reference. Check the odor immediately, then inspect:
- Film clarity
- Surface tack
- Yellowing
- Ink transfer
- Binding discoloration
- Zipper operation
- Adhesive lifting
- Moisture or mold signs
For beauty kits packed with cosmetics, compatibility should also be reviewed. Fragrance, essential oils, alcohol-based products, sunscreen, and colored formulas can affect clear plastic or transfer their own scent. Product leakage should never be confused with material odor.
A well-controlled PVC cosmetic bag should provide a clean opening experience without depending on prolonged airing after delivery. The most reliable route is to approve the exact finished and sealed sample, identify every odor-contributing component, document the conditions, and verify the same result before shipment.
How Do You Clean PVC Cosmetic Bags?
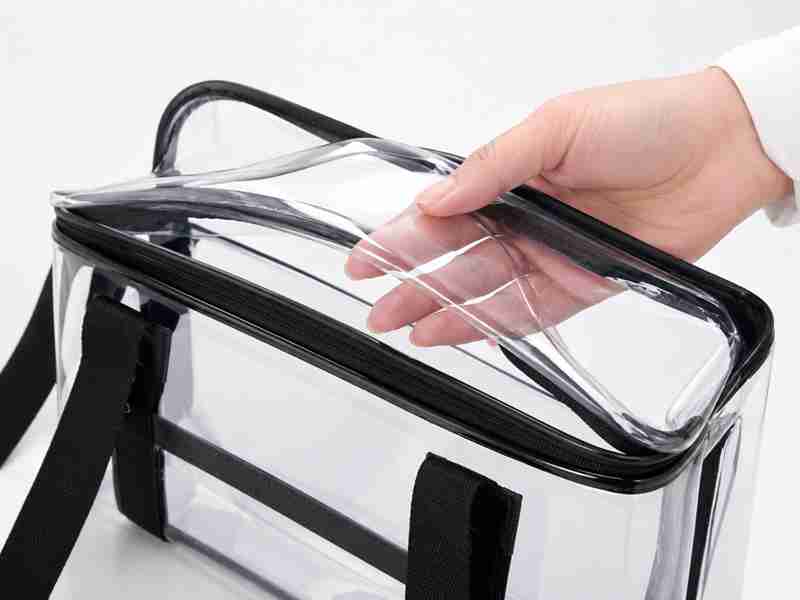
Clean a PVC cosmetic bag with a soft microfiber cloth, lukewarm water, and a small amount of mild pH-neutral soap. Remove loose powder first, wipe gently, clean soap residue with a second damp cloth, and dry the bag fully while open. Avoid machine washing, hot water, bleach, acetone, nail polish remover, abrasive cleaners, and untested disinfectants, as they can cause clouding, cracking, color transfer, or print damage.
What Cleaner Is Safe for PVC?
A mild, pH-neutral liquid soap is the safest starting choice for most clear PVC cosmetic bags. A practical cleaning mixture is approximately 5 ml of soap in 1 liter of lukewarm water, creating a solution near 0.5%. Stronger mixtures usually do not clean proportionally better and can leave a cloudy residue.
Use a white or colorfast microfiber cloth. A white cloth makes it easier to see whether printed ink, binding dye, or makeup color is transferring during cleaning. Avoid colored towels unless their colorfastness has already been checked.
| Cleaning Item | General Suitability | Main Precaution |
|---|---|---|
| Lukewarm water | Suitable | Avoid soaking stitched areas |
| Mild pH-neutral soap | Suitable | Dilute and remove all residue |
| Microfiber cloth | Suitable | Use a clean, nonabrasive cloth |
| Soft cotton swab | Suitable for corners | Do not force it into seams |
| Soft toothbrush | Limited use | Use only on compatible fabric trim |
| Baby wipes | Uncertain | Fragrance, alcohol, and oils may leave marks |
| Disinfectant wipes | Uncertain | Formula may affect clarity or printing |
| Alcohol cleaner | High risk unless tested | May cloud, harden, or damage decoration |
| Bleach | Not recommended | May discolor film and trims |
| Acetone or nail polish remover | Never recommended | Can permanently damage the surface |
| Abrasive powder or sponge | Never recommended | Causes fine scratches and haze |
Even a gentle cleaner should be patch-tested on a hidden area, such as the lower back corner or inside seam allowance. Apply a small amount, wait until the area is dry, and inspect it under good lighting for haze, tackiness, discoloration, print transfer, or loss of gloss.
“PVC” does not describe every ingredient in the finished pouch. Clear film grades, printed coatings, zipper tapes, PU trims, adhesives, and metallic logos can react differently to the same cleaner.
How Should a PVC Cosmetic Bag Be Cleaned?
Begin by emptying every compartment. Remove detachable inserts, dividers, straps, and decorative accessories when the construction allows. Check corners for broken powder, brush hairs, sand, leaking caps, and small sharp objects.
Follow this sequence:
- Shake out loose debris over a waste bin.
- Use a dry microfiber cloth to lift powder and dust.
- Prepare diluted mild soap in lukewarm water.
- Dampen the cloth and wring it until it is no longer dripping.
- Wipe the clear surfaces with light, overlapping strokes.
- Clean corners with a damp cotton swab.
- Use a second cloth dampened with clean water to remove soap.
- Pat the pouch with a dry towel.
- Leave every compartment and zipper open until completely dry.
- Inspect the bag before returning cosmetics.
Do not scrub one small area aggressively. Repeated friction can change the gloss, create fine scratches, or spread pigment across a larger section. Several gentle passes are safer than one forceful attempt.
Support the clear panel with one hand while wiping it with the other. This reduces pulling at stitches and prevents thin film from stretching around seams. Avoid sharply folding the material during cleaning, especially if the pouch has been stored in a cold environment.
Stitched cosmetic bags should not be submerged unless their complete construction has been approved for soaking. Water can enter binding, reinforcement layers, zipper tape, labels, foam, or cardboard inserts and remain trapped after the visible panel appears dry.
How Do You Remove Makeup Stains?
Makeup stains behave differently according to their ingredients. Loose powder should be handled dry first, while foundation, lipstick, sunscreen, and mascara usually need diluted soap. Ink, hair dye, and long-wear pigments are much harder to remove and may permanently stain clear material.
| Stain | First Treatment | What to Avoid |
|---|---|---|
| Loose powder or eyeshadow | Lift with a dry cloth, then wipe gently | Adding water before removing loose pigment |
| Water-based foundation | Diluted mild soap and several light passes | Aggressive rubbing |
| Oily foundation | Blot first, then use diluted soap repeatedly | Spreading oil over the full panel |
| Lipstick or lip balm | Lift excess with a plastic edge, then wipe | Acetone and rough scraping |
| Mascara or eyeliner | Let wet deposits settle, blot, then clean | Smearing fresh pigment |
| Sunscreen | Remove promptly with mild soap | Leaving oily residue in contact with film |
| Perfume or toner | Blot immediately and air the pouch | Heat drying |
| Nail polish | Blot without spreading and seek material guidance | Nail polish remover |
| Hair dye | Blot immediately; staining may remain | Bleach and repeated hard scrubbing |
| Pen ink | Blot carefully; permanent transfer is possible | Alcohol or solvent without testing |
| Adhesive residue | Stop and test a hidden area first | Metal blades and solvent removers |
For a fresh spill, blot rather than rub. Place the cloth on the stain, apply light pressure, lift it, and move to a clean section of the cloth. Rubbing pushes pigment outward and can drive oily color into surface texture or stitching holes.
A soft plastic card edge may help lift thick lipstick, cream, or wax from a smooth panel. Keep the edge almost flat and use very light pressure. Do not use a knife, metal scraper, fingernail tool, or abrasive pad.
Long-wear foundation, sunscreen, hair dye, and lipstick can contain oils and strong pigments that migrate into flexible plastic. Fast cleaning improves the chance of removal, but no method can guarantee recovery once color has penetrated the material.
How Do You Clean Powder and Broken Makeup?
Broken pressed powder is easier to manage before it becomes wet. Water turns fine cosmetic dust into a paste that can spread into zipper teeth, binding fibers, and stitched corners.
Hold the open pouch over a bin and tap the bottom gently. Use a dry microfiber cloth to gather remaining powder. For narrow corners, a small clean makeup brush can move debris toward the opening. The brush should be reserved for cleaning and not returned to cosmetic use.
After dry removal, wipe the area with diluted mild soap. Move from the cleaner outer area toward the center of the remaining stain to limit spreading. Use a cotton swab around zipper ends and seam intersections, but do not push pigment deeper into needle holes.
If powder has entered the zipper, hold the bag with the zipper facing downward and use a dry soft brush. Operate the slider slowly after debris has been removed. Forcing the zipper while compacted powder is present can damage the teeth, coil, or slider.
Check hidden compartments after a pressed powder breaks. Pigment can travel behind dividers and collect beneath a removable base insert even when the main compartment looks clean.
How Do You Remove Oily Foundation and Sunscreen?
Oily stains require patience. Begin by lifting excess product with a dry absorbent cloth. Do not immediately add a large amount of water, as it can spread the oil across the clear surface.
Apply diluted pH-neutral soap with a damp microfiber cloth. Work on a small area using light circular movements, then wipe with clean water. Repeat the process instead of increasing the soap concentration.
After drying, view the panel from several angles. A surface may appear clean from the front but still show an oily film under side lighting. Soap residue can create a similar appearance, so finish with a thorough clean-water wipe.
Sunscreen should be removed promptly. Some formulas contain oils, colorants, fragrances, and ultraviolet filters that may leave a persistent film or affect certain plastics over extended contact. The same applies to facial oils, cleansing balms, and hair serums.
Leaking cosmetics should not be stored loose inside the pouch. Tight caps, secondary bottle sleeves, upright compartments, and removable washable liners reduce repeated contamination far more effectively than stronger cleaning chemicals.
Can You Use Alcohol or Disinfectant Wipes?
Alcohol-based products should not be treated as universally safe for clear PVC. They may affect film softness, surface gloss, printing ink, coatings, adhesives, and trims. Repeated exposure can produce haze, whitening, tackiness, or a harder hand feel on some formulations.
Disinfectant wipes are equally difficult to judge by appearance alone. They may contain alcohol, oxidizing agents, fragrance, surfactants, or other active ingredients. A wipe that performs well on a countertop may not be suitable for a flexible transparent pouch.
Cleaning and disinfection are different tasks. Soap and water remove makeup, oil, and visible dirt. Disinfection uses an active chemical to reduce microorganisms under specified conditions. If disinfection is required for professional kits, salons, travel programs, or shared equipment, compatibility should be confirmed on the exact finished material.
A proper trial should check:
- Transparent front and back panels
- Printed logo
- Colored binding
- Zipper tape
- Rubber or metal puller
- Interior lining
- Adhesive-backed labels
- Heat-transferred decoration
Inspect the treated area immediately and again after 24 hours. Delayed clouding, color transfer, surface tack, or print lifting may not be visible while the panel is still wet.
Can You Machine-Wash a PVC Cosmetic Bag?
Machine washing is generally not recommended unless the care instructions for that exact design specifically permit it. A washing machine combines prolonged water exposure, detergent, heat, tumbling, twisting, and repeated impact. These conditions can damage both transparent film and the surrounding construction.
Possible results include:
- Permanent creases
- Clouded transparent panels
- Distorted shape
- Cracked printing
- Delaminated labels
- Twisted zipper tape
- Damaged pullers
- Dye transfer from binding
- Trapped water in reinforcement layers
- Rust or discoloration on unsuitable metal parts
A dishwasher is even less suitable because high water temperature and strong detergent can deform or dull the film. Tumble drying, heated drying cabinets, radiators, and hairdryers should also be avoided.
Hand wiping gives much better control. It keeps water away from internal boards, foam, labels, and stitched edges while allowing each material to be treated separately.
If a design needs frequent full washing, clear PVC may not be the ideal main material. A removable washable liner, coated polyester body, or detachable transparent insert can make long-term care easier.
How Do You Clean Fabric Binding and Zippers?
Clear panels may be easy to wipe, while fabric binding and zipper tape absorb liquid more readily. These areas should be cleaned with less water and allowed more time to dry.
Dip a soft cloth or toothbrush into diluted soap, then remove almost all excess liquid. Work along the fabric with light strokes. Avoid brushing directly across printed logos or bonded edge decoration.
For zipper teeth or coil:
- Remove dry powder with a soft brush.
- Wipe the area with a barely damp cloth.
- Keep soap from building up inside the slider.
- Move the zipper slowly after the area has dried.
- Never force a slider past hardened makeup.
Metal components should be dried immediately to reduce water spots and corrosion risk. If the pouch includes plated zipper pullers, chains, rivets, or logo plates, prolonged soaking can affect the finish.
Colored binding should be patch-tested for dye transfer. Place a damp white cloth against a hidden section and apply light pressure. If color transfers, do not continue with wet cleaning until a safer method has been confirmed.
PU trim requires special care. Excess water, alcohol, heat, and scrubbing can cause discoloration, peeling, or surface cracking. Use a lightly dampened cloth and dry it promptly.
How Do You Prevent Clouding and Scratches?
Clear PVC can look foggy for several different reasons. Soap residue, oily cosmetics, fine scratches, moisture, material aging, plasticizer interaction, or chemical damage can all reduce transparency.
Start with the least aggressive correction: wipe the panel with clean lukewarm water and a fresh microfiber cloth, then dry it completely. If the cloudiness disappears while wet but returns after drying, residue or fine surface scratching may be present.
To preserve clarity:
- Remove dust before wet wiping.
- Use clean microfiber rather than paper towels.
- Keep sharp cosmetic tools in separate sleeves.
- Do not place metal tweezers or scissors directly against the clear panel.
- Avoid abrasive sponges and cleaning powders.
- Do not store the pouch against dark dyed fabric.
- Keep printed surfaces from pressing against each other.
- Avoid prolonged direct sunlight and excessive heat.
- Do not apply oil, furniture polish, or automotive plastic treatment.
Paper towels can appear soft but may create fine marks when dust or cosmetic particles are trapped beneath them. Dirty cloths have the same effect. Change to a clean section as soon as visible pigment appears.
Once the surface has been deeply scratched, chemically clouded, or aged, cleaning may not restore its original transparency.
How Do You Prevent Yellowing and Color Transfer?
Yellowing is not always dirt. It may result from ultraviolet exposure, heat, material aging, chemical contact, smoke, adhesive migration, or interaction with colored trims. Cleaning cannot reverse every cause.
Color transfer often occurs when soft clear film remains pressed against dark fabric, printed paper, leather-like trim, or strongly pigmented cosmetics for a long period. Heat and pressure can accelerate migration.
Useful precautions include:
- Store the pouch away from windows and direct sunlight.
- Keep it away from radiators, hot vehicles, and heating equipment.
- Avoid prolonged contact with dark denim or unstable printed materials.
- Remove leaking makeup immediately.
- Do not store colored tissue directly against clear panels without testing.
- Place clean white tissue between stacked printed pouches when needed.
- Avoid tightly compressing the bag during long storage.
- Check compatibility between PVC and PU trims during development.
A yellow or pink stain that has migrated into the film may be permanent even when the surface feels clean. Strong solvents can make the damage worse by spreading color or changing the film texture.
How Should the Bag Be Dried?
After cleaning, remove all soap with a separate cloth dampened in clean water. Pat the surface with a dry lint-free towel and leave the pouch open in a shaded, ventilated place.
If the bag has a gusset or structured corners, shape it gently while damp so the panels dry in their intended position. A clean white towel can be placed loosely inside to support the form and absorb moisture. Do not overfill the pouch or stretch the seams.
Avoid:
- Direct sunlight
- Hairdryers
- Radiators
- Tumble dryers
- Heated rooms
- Open flames
- Ironing
- Sealing the bag while damp
Heat can soften, distort, shrink, or harden parts of the construction. Direct sun may accelerate discoloration. Closing a damp pouch can trap moisture in zipper tape, binding, labels, and internal seams, leading to odor or mildew.
Drying time depends on the construction. A wipe-clean transparent pouch may dry in several hours, while fabric binding, foam reinforcement, and multilayer panels may need considerably longer. Touch the seams and zipper tape before closing the bag; a dry front panel does not mean the hidden layers are dry.
How Should a Clean PVC Bag Be Stored?
Store the dry pouch in a cool, shaded, well-ventilated place. A room condition near 15–25°C is a sensible reference where practical, but avoiding extreme heat and direct sunlight is more important than holding one exact temperature.
Keep the bag in its natural shape. Do not fold a structured case sharply or place heavy objects on top of it. If support is needed, fill it loosely with clean, acid-free white tissue rather than colored newspaper or printed paper.
Long-term storage should avoid:
- Damp cupboards
- Hot vehicles
- Direct window light
- Strong fragrances
- Cleaning chemicals
- Smoke
- Dark dyed fabrics
- Sticky rubber items
- Uncured printed materials
A breathable dust cover may be preferable for long storage if the pouch is completely dry. If a protective polybag is used, do not seal the item until all cleaning moisture and soap odor have dispersed.
Before using a stored pouch, check the surface for tackiness, yellowing, haze, odor, or trim transfer. Early detection makes it easier to identify whether the issue came from cosmetics, storage conditions, or contact with another material.
What Care Instructions Should Be Provided?
Clear care instructions help prevent damage caused by well-intentioned cleaning. They should reflect the exact film, printing, trim, and construction rather than relying on one statement for every transparent pouch.
A concise care label may read:
“Wipe clean with a soft damp cloth and mild soap. Do not machine wash, soak, bleach, dry clean, tumble dry, iron, or use solvents. Air dry fully away from direct sunlight and heat. Test any cleaner on a hidden area first.”
Additional instructions may be needed for printed logos, PU binding, metal trims, removable liners, or special coatings.
Before approving the wording, clean the finished sample according to those instructions. Inspect clarity, shape, stitching, zipper movement, trim color, logo adhesion, and surface feel after drying. Care advice should be supported by a real cleaning trial, not copied from an unrelated bag.
The most useful design improvements are often preventive: a removable liner, fewer dirt-trapping seams, rounded interior corners, washable dividers, protected brush sleeves, and sufficient space around bottle caps. A cosmetic bag that is easy to maintain will look better through repeated use and is less likely to be damaged by aggressive cleaning.
How Does a Custom PVC Bag Factory Control Quality?

A custom PVC bag factory controls quality by locking the material, construction, appearance, tolerances, and packing before bulk work begins. Incoming film, printing, cutting, stitching, zipper assembly, cleaning, and final cartons are then checked against one approved specification and sealed sample. Reliable control combines measurable limits, material traceability, filled-use trials, inline inspection, odor checks, and final random inspection—not appearance checks alone.
What Should the Custom Brief Include?
Quality control begins before the first piece is cut. If the development brief only shows an exterior image and overall dimensions, important decisions will be made during sampling without a clear reference.
The brief should describe how the bag will be used, what it will carry, and which details cannot change after approval.
| Development Detail | Information to Confirm |
|---|---|
| Intended use | Makeup set, skincare kit, travel toiletries, gift set, or retail pouch |
| Finished size | Width × height × depth, measured in a defined position |
| Intended contents | Bottle dimensions, item count, shapes, and total filled weight |
| Transparent material | PVC grade, thickness, softness, clarity, tint, and surface finish |
| Construction | Flat pouch, gusseted bag, box case, binding, welded seam, or stitched seam |
| Closure | Zipper type, slider, puller, opening length, and end reinforcement |
| Decoration | Printing, heat transfer, label, metal plate, embossing, or colored trim |
| Internal details | Divider, brush sleeve, lining, removable insert, or bottle holder |
| Carrying parts | Handle, wrist strap, shoulder strap, hook, or detachable hardware |
| Destination | Required chemical documents, labeling, language, and packing marks |
| Retail packing | Polybag, insert card, tissue, barcode, gift box, or display carton |
| Quantity | Total pieces, color split, size split, and SKU count |
| Delivery needs | Approval date, testing time, shipping method, and required arrival date |
Real products or accurate bottle dimensions should be supplied when possible. “Travel-size cosmetics” is too broad: a 30 ml glass serum bottle places a different load on the base than a lightweight plastic tube.
Critical tolerances should be written into the specification. Illustrative development values might include 0.30 mm film with an agreed material tolerance, finished dimensions within an agreed number of millimeters, and logo placement controlled from fixed reference edges. These values must be validated against the selected construction rather than copied from another pouch.
The brief should also define how the bag is measured. A soft pouch measured empty and flattened may differ from the same piece standing open. Using one method prevents unnecessary disputes after production.
How Is PVC Material Verified?
A description such as “clear 0.30 mm PVC” is not enough to preserve consistency. Two films with the same nominal thickness may differ in softness, tint, gloss, odor, cold flexibility, surface tack, and resistance to bending.
Incoming material checks should cover:
- Material code and roll identification
- Nominal thickness and agreed tolerance
- Softness or firmness compared with the approved swatch
- Transparency, haze, tint, and surface texture
- Odor under agreed conditions
- Width, surface cleanliness, and edge condition
- Scratches, bubbles, black specks, oil marks, or uneven areas
- Compatibility with printing, binding, and welding
- Required chemical documents for the exact grade
Thickness should be measured with a calibrated micrometer at several positions. One reading at the center of a roll can miss thin edges or local variation. Measurements can be recorded by roll so that an unusual result can be traced before the material reaches assembly.
Clarity should be checked against consistent backgrounds. Placing the film over white, black, and colored objects reveals haze, blue or yellow tint, surface distortion, and embedded particles more clearly than holding it toward a ceiling light.
The approved material swatch should be stored with its code, thickness, color, date, and project name. A verbal description such as “the same clear PVC as last time” is weak control because several similar-looking grades may be present.
If the design combines PVC with PU binding, printed fabric, rubber pullers, foam, or adhesive-backed parts, compatibility matters. Prolonged contact can cause color migration, surface tack, staining, or odor transfer. The assembled sample should therefore be stored in its intended packed condition before approval.
How Does the Sample Process Work?
A sample is not only a visual model. It is the first complete test of material behavior, pattern shape, seam design, zipper movement, logo execution, packing, and filled performance.
A controlled sampling sequence can follow these steps:
- Review the artwork, intended use, dimensions, quantity, and destination.
- Select transparent film, binding, zipper, lining, hardware, and decoration options.
- Approve physical swatches rather than photographs alone.
- Create the pattern and calculate seam allowances, gussets, and opening dimensions.
- Produce the first sample using the proposed construction.
- Fill it with real products or equivalent weights.
- Check appearance, dimensions, structure, zipper movement, seams, and odor.
- Record every revision with photographs and marked measurements.
- Produce a revised piece when structural changes are required.
- Approve and seal the final sample with a signed specification.
- Prepare a pre-production reference for the sewing and inspection teams.
- Compare early bulk pieces with the sealed approval sample.
Changes should be grouped into one clear revision file. Scattered comments across messages increase the chance that one instruction will be missed. Each revision should identify the location, current condition, required change, measurement, and visual reference.
A change to one detail may affect several others. Increasing the gusset depth changes capacity, film consumption, zipper shape, carton volume, and the way the bag stands. Moving a logo may affect printing screens or heat-transfer positioning. Replacing PVC with a thicker grade may require a new needle, stitch setting, binding width, or corner construction.
Approval should cover the complete packed sample whenever packing can influence appearance or odor. Approving an unpacked pouch and later adding tissue, an insert card, a scented product, and a tight polybag leaves important conditions untested.
How Are Printing and Cutting Controlled?
Transparent material exposes defects that would be less visible on opaque fabric. Dust, scratches, ink marks, fingerprints, and inaccurate cutting can remain visible from both sides.
Before full printing, an initial piece should confirm:
- Logo dimensions
- Pantone or approved color reference
- Position from fixed edges
- Ink opacity
- Edge sharpness
- Registration between colors
- Adhesion after bending
- Resistance to light rubbing
- Compatibility with the film
- Acceptable odor after drying
Printed panels need sufficient drying or curing before stacking. If pieces are stacked too early, ink may transfer to the opposite surface, block panels together, or create a concentrated smell.
Protective interleaving may be needed for large printed areas. The interleaving material must also be checked for color transfer, lint, and surface impressions.
Cut panels should be compared with pattern templates. Small inaccuracies at zipper curves or gusset corners can become visible shape problems after stitching. Paired panels should match so that the completed pouch does not twist.
Cutting tables and handling areas must remain clean. Clear film easily shows metal dust, oil, pen marks, and rough-table scratches. Defects introduced before sewing cannot always be polished or cleaned away later.
How Are Sewing and Assembly Controlled?
Needle holes in PVC are permanent. Closely spaced holes can form a perforated line, while stitching too close to the edge leaves insufficient material to resist load.
The production setup should confirm:
- Suitable needle size
- Appropriate thread and tension
- Tested stitch length
- Consistent seam allowance
- Binding width and coverage
- Reinforcement at zipper ends
- Support beneath handle attachments
- Rounded corner transitions
- Clean thread ends
- Controlled feeding without panel stretching
A stitch length near 3–4 mm can be evaluated during development for many constructions, but the correct setting depends on film softness, material thickness, thread, needle, seam stack, and intended load. It should not be treated as a fixed rule.
The first completed pieces should be checked before the main line continues. This allows early correction of wavy zippers, uneven binding, distorted corners, incorrect logo placement, mismatched panels, or excessive thread tension.
Handles deserve separate attention. A handle sewn directly onto one clear panel may concentrate the entire filled weight around a small group of needle holes. Reinforcement patches, fabric anchors, wider attachment areas, or a construction that transfers the load into the binding can improve durability.
For welded designs, the seal width, alignment, temperature, dwell time, pressure, and finished appearance should be established during sampling. A smooth-looking welded edge can still be weak if the process setting is unsuitable.
Which Performance Tests Matter?
Testing should reflect the way the finished pouch will be filled, carried, opened, packed, and stored. There is no single test plan suitable for every cosmetic bag.
| Check | Practical Method | Main Defects Revealed |
|---|---|---|
| Dimension check | Measure finished pieces in one defined position | Incorrect size, uneven gussets, twisted shape |
| Filled-shape check | Pack real products or equivalent forms | Sagging, bowing, insufficient capacity |
| Filled-load check | Carry or suspend at the intended weight | Handle movement, seam stress, film stretching |
| Zipper cycle check | Open and close repeatedly | Slider jamming, waviness, zipper-end failure |
| Seam check | Apply controlled load or use a force gauge | Enlarged needle holes, edge tearing |
| Drop check | Drop the filled sample from an agreed height | Corner damage, bottle impact, seam opening |
| Print rub check | Use agreed dry and damp rubbing cycles | Ink transfer, fading, adhesion failure |
| Color-transfer check | Place clear film against colored materials | Dye migration and staining |
| Cleaning check | Follow the proposed care instructions | Clouding, logo damage, trim discoloration |
| Packing check | Pack, store, and unpack as planned | Creases, pressure marks, odor buildup |
| Temperature check | Condition for the intended environment | Hardening, cracking, distortion |
| Water-exposure check | Apply the agreed splash or wipe method | Leakage through seams and trim areas |
A starting development check may include at least 100 zipper cycles, followed by visual and functional inspection. Projects intended for repeated long-term use may require a higher count. The required number should be agreed before approval.
A stitched PVC pouch should not be described as waterproof solely because the panel resists water. Needle holes, zipper tape, binding, and seam intersections can allow moisture to enter. If water resistance matters, the required exposure method and acceptance condition should be stated clearly.
Testing an empty bag has limited value. The shape and weight of glass jars, pump bottles, metal tools, and makeup palettes determine where stress appears. Test pieces should contain realistic loads.
How Are Thickness, Clarity, and Odor Controlled?
These three features should be checked separately because they do not always move together. A thicker film may still be soft, a clear film may have a strong smell, and a low-odor grade may have a noticeable tint.
A useful control record includes:
| Feature | Incoming Check | Finished-Bag Check |
|---|---|---|
| Thickness | Micrometer readings from several positions | Confirmation against the approved specification |
| Softness | Comparison with signed swatch | Folding, opening, and filled-shape behavior |
| Clarity | Inspection over light and dark backgrounds | Distortion after sewing and packing |
| Tint | Comparison under consistent lighting | Visual effect around overlapping seams |
| Odor | Raw film check by lot | Opening, ventilation, and resealing checks |
| Surface | Scratches, tack, particles, gloss | Fingerprints, pressure marks, and cleaning residue |
Odor should be reviewed after the complete pouch has been sealed in its intended polybag. Useful intervals include immediately after opening, after 2 hours, after 24 hours, and again after 48–72 hours when needed. Resealing the piece for another 24 hours shows whether the smell builds up again.
If an odor issue appears, components should be isolated: raw film, printed panel, zipper, rubber puller, binding, adhesive-backed part, foam insert, and polybag. Masking the smell with fragrance does not solve its source.
Which Documents Should Match the Order?
A test report is useful only when it can be linked to the exact material used. A broad report titled “PVC” may not cover the selected softness, color, thickness, print, adhesive, or trim.
The documentation file may include:
- Approved specification
- Signed film and trim swatches
- Sealed approval sample
- Material codes and lot records
- Relevant chemical reports
- Print color and placement approval
- Packing artwork approval
- Barcode and carton-mark confirmation
- Inline inspection records
- Final inspection report
- Photographs of packed cartons
- Retained shipment sample
Required chemical checks depend on destination, product use, and contractual needs. They may include restricted phthalates, heavy metals, REACH substances, California Proposition 65 substances, or another specified list.
Compliance documents do not replace workmanship inspection. A chemically conforming bag can still have a broken zipper, weak handle, distorted print, or unacceptable odor. Likewise, a visually clean pouch still needs the required material evidence.
How Are Bulk Bags Inspected?
Bulk control should occur at incoming, inline, and final stages. Waiting until all pieces are packed makes corrections slower and more expensive.
Incoming inspection checks film, trims, zippers, hardware, printing materials, and packing components. Inline inspection identifies repeated defects while work is still in progress. Final inspection reviews randomly selected pieces from completed cartons.
Defects can be classified by their effect:
| Classification | Examples |
|---|---|
| Critical | Prohibited sharp part, confirmed restricted-substance failure, serious documentation mismatch |
| Major | Broken zipper, open seam, wrong material, incorrect size, detached handle, severe odor beyond approval |
| Minor | Loose thread, small removable mark, slight cosmetic variation within the agreed limit |
The final inspection plan should define the sample size, defect classification, and acceptance limits before production. An agreed AQL plan can be used for workmanship sampling, while safety and chemical requirements may require separate testing or zero-acceptance conditions.
Random pieces should be selected from different cartons, positions, and packing times. Checking only cartons prepared for inspection can hide variation across the order.
Carton inspection should confirm quantity, assortment, barcode, shipping marks, carton dimensions, gross weight, sealing, and internal protection. A well-made pouch can still arrive damaged if it is compressed, packed while damp, or placed in an unsuitable carton.
How Do MOQ, Price, and Lead Time Affect Control?
Very short schedules can reduce the time available for material testing, odor dissipation, sample revision, packing trials, and external laboratory work. The delivery plan should separate product development from bulk lead time.
For Jundong bag projects, the following values can be used as planning references:
| Item | Planning Reference |
|---|---|
| Standard MOQ | 500 pieces per style |
| Assessed project quantity | 200–300 pieces for suitable designs |
| Regular sampling | About 5–7 days |
| Regular bulk production | About 20–30 days |
| Complex construction | About 25–45 days |
| Air shipping | About 7–12 days |
| Sea shipping | About 40–45 days |
Sampling time begins after the main specification and available materials are confirmed. Revisions, custom hardware, special printing, laboratory work, several SKUs, and gift-box development can extend the schedule.
A lower unit price should not be created by quietly reducing film gauge, changing the zipper, removing reinforcement, or replacing approved packing. Any value-engineering proposal should show exactly what changes and which performance checks must be repeated.
How Do You Choose the Right PVC Bag Factory?
A suitable factory should be able to explain how it controls the exact risks of a transparent cosmetic pouch, not only display finished photos.
Useful evidence includes:
- Physical material swatches with traceable codes
- Micrometer records for transparent film
- A clear sample-revision process
- Filled-use and zipper testing
- Odor checks after sealed storage
- Printing adhesion and color-transfer checks
- Incoming, inline, and final inspection records
- An agreed defect classification
- Relevant material documents
- Retained approval and shipment samples
- Clear handling of changes after approval
The strongest sign is consistency between the specification, physical swatch, sealed sample, test records, bulk pieces, and final packing. Every stage should refer back to the same approved product.
For a custom PVC cosmetic or toiletry bag, prepare the intended dimensions, bottle sizes, filled weight, preferred thickness, logo artwork, quantity, destination, and packing needs. Jundong can then review the structure, suitable clear material, sampling plan, quality checks, and realistic schedule before production begins.