 Skip to content
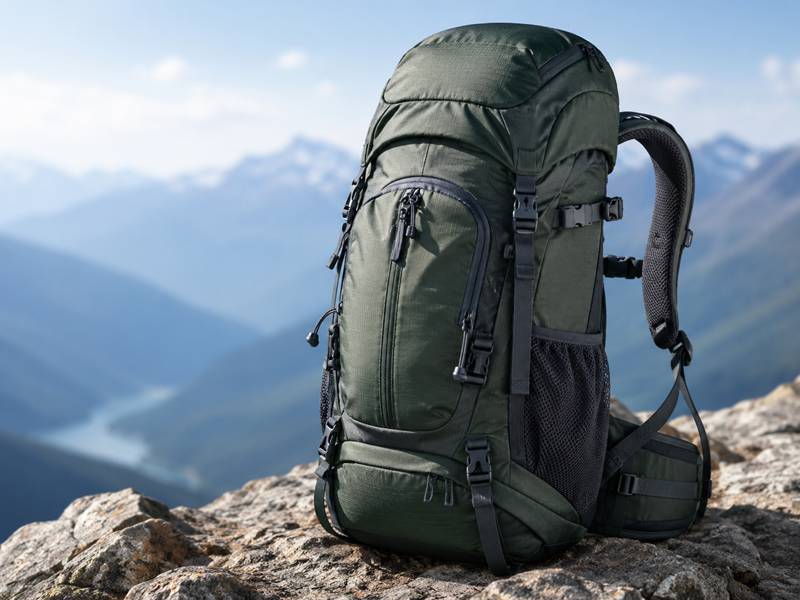
A hiking backpack earns trust after it leaves the product photo. On a real trail, every choice becomes visible: the fabric scrapes against rock, the base touches wet ground, the shoulder straps press under load, the side bottle pocket either holds firmly or drops the bottle, and the front pocket either handles a wet rain shell or becomes stretched out after a few trips. A good outdoor backpack is not only a nice shape in earth-tone colors. It is a carry system, a storage plan, and a durability decision built into one product.
Outdoor backpacks for hiking should be planned around trip length, carried weight, body fit, weather exposure, and gear access. Fabric controls abrasion, weight, and water resistance. Straps and hipbelts control comfort and load transfer. Pocket layout controls how quickly hikers reach water, snacks, phone, rain gear, and wet items. A stronger design balances trail comfort, material durability, practical storage, target price, and repeatable production.
The common mistake is copying a popular hiking silhouette without understanding the load story behind it. A 20L trail daypack, a 35L weekend pack, and a 60L backpacking pack may all look “outdoor,” but they solve very different problems. One needs quick access and light comfort. One needs better weight control. One needs enough volume and stronger support for shelter, sleep gear, food, layers, and water. If the pack looks right but carries badly, hikers will notice within the first hour. If it carries well but becomes too heavy, too expensive, or too complex, it may miss the product’s real position. A strong hiking backpack should be designed from the trail backward.
What Makes A Hiking Backpack Work?

A hiking backpack works when volume, fabric strength, strap comfort, back support, pocket access, and weight control all match the real route. A short trail pack can stay light and simple. A weekend pack needs better load transfer. A multi-day pack needs stronger structure, larger storage, and smarter external access. A good hiking backpack should feel stable after hours, not only look outdoor at first glance.
A hiking backpack is a moving carry system. It does not sit still like a suitcase. It shifts when the user climbs, turns, bends, sits on a rock, reaches for water, or tightens a rain jacket around the waist. Because of that, every part must work under movement: shoulder straps, sternum strap, hipbelt, bottom fabric, side pockets, zipper openings, compression straps, and the back panel.
The most common failure is not dramatic tearing. It is daily discomfort and small frustrations. The shoulder straps press too hard after 40 minutes. The side bottle pocket is too shallow. The front pocket stretches out. The pack pulls backward when fully loaded. The back panel feels hot. The zipper catches when the main compartment is full. These issues turn a good-looking pack into a product people stop using.
A strong hiking backpack usually solves six real-use problems:
It keeps weight close to the body.
It spreads pressure across shoulder, chest, hip, and back areas.
It keeps high-use gear easy to reach.
It uses stronger fabric where abrasion happens most.
It separates wet, dirty, and dry items.
It avoids unnecessary parts that add weight without adding real trail value.
Capacity should be planned by route type and carried gear, not just by visual style.
| Hiking Use | Practical Volume | Common Gear | Main Design Focus |
|---|---|---|---|
| Short trail walk | 10–18L | Bottle, phone, light shell, snack | Light weight, soft straps, simple pockets |
| Day hike | 18–30L | Water, food, rain shell, small tools | Side pockets, front stash, comfort straps |
| Fast hiking | 12–25L | Soft bottle, phone, snacks, thin layer | Low bounce, close fit, front access |
| Weekend route | 30–45L | Layers, food, compact sleep gear | Hipbelt, compression, stronger fabric |
| Multi-day backpacking | 45–65L+ | Shelter, sleep system, food, clothing | Frame support, hip load transfer, large storage |
| Technical outdoor route | 25–50L | Helmet, poles, rope, wet gear | Attachment loops, reinforced zones |
A good outdoor pack also needs restraint. More pockets can look useful, but every zipper, seam, buckle, mesh panel, and foam layer adds weight, labor, cost, and possible failure areas. Good design does not add everything. It adds what the route requires and removes what the user will not actually need.
What Is An Outdoor Hiking Backpack?
An outdoor hiking backpack is designed for trail movement, changing weather, body sweat, abrasion, and fast gear access during walking. It is different from a casual backpack because it must remain comfortable when loaded, stable when moving, and durable when placed on rough ground or brushed against rocks, trees, and outdoor surfaces.
A real hiking pack usually includes several trail-focused details:
Padded shoulder straps shaped for body movement.
A sternum strap to keep the shoulder straps steady.
A hipbelt or waist support for larger loads.
Side bottle pockets or a hydration sleeve.
A front stash area for rain shell, map, gloves, or wet layer.
Compression straps to reduce load swing.
Reinforced bottom fabric for ground contact.
Water-resistant coating or rain cover planning.
Attachment loops for trekking poles or small gear.
Breathable back padding or mesh for warmer conditions.
The level of these parts should match the pack size. A 15L day hiking pack may only need a light sternum strap and soft shoulder straps. A 35L weekend pack should have better compression and a more useful hipbelt. A 60L backpacking pack needs more serious load control, because a large load hanging from weak straps can create shoulder pain quickly.
A hiking backpack should also support natural packing. Heavy items should sit near the back and middle of the pack. Light soft goods can sit toward the outside or upper area. Wet gear needs an external or separated pocket. Small items need a pocket that can be found easily. When the storage logic is clear, the pack feels easier on the trail.
| Backpack Area | Trail Job | Poor Design Result |
|---|---|---|
| Shoulder straps | Guide and stabilize load | Neck rub, shoulder pressure |
| Sternum strap | Keep straps centered | Sliding straps, unstable movement |
| Hipbelt | Reduce shoulder load on larger packs | Tired shoulders, backward pull |
| Back panel | Comfort and airflow | Heat buildup, hard pressure |
| Side pockets | Quick water access | Bottle drops or hard reach |
| Front pocket | Wet gear and fast storage | Messy packing or soaked main compartment |
| Bottom fabric | Resist ground abrasion | Early wear and scuffing |
| Compression straps | Pull load closer | Swinging, poor balance |
A hiking backpack should feel organized without becoming complicated. The user should know where the bottle goes, where the rain shell goes, where the phone goes, and where small valuables stay. If the layout needs too much explanation, it may be overdesigned.
What Are The Different Types Of Outdoor Backpacks?
Outdoor backpacks include day hiking packs, hydration packs, fast hiking packs, weekend packs, multi-day backpacking packs, technical packs, climbing packs, ski packs, and outdoor-travel hybrid packs. Each type needs a different structure. A small hydration pack should not be built like a trekking pack, and a large backpacking pack should not be treated like an enlarged school bag.
A day hiking pack focuses on light comfort, bottle access, and simple storage. A hydration pack focuses on water bladder carry, hose routing, and low bounce. A fast hiking pack uses closer body fit and often includes strap pockets. A weekend pack needs better hip support and compression. A multi-day pack must carry shelter, sleep gear, food, layers, and water while staying stable. Technical packs need attachment details for helmets, ropes, poles, or tools.
| Pack Type | Common Volume | Key Structure | Main Risk |
|---|---|---|---|
| Day hiking pack | 15–30L | Side pockets, front stash, soft straps | Too many pockets, weak bottle hold |
| Hydration pack | 5–20L | Bladder sleeve, hose port, close fit | Bad hose route, poor cleaning access |
| Fast hiking pack | 10–25L | Vest-like straps, front pockets | Bounce, strap pocket mismatch |
| Weekend pack | 30–45L | Hipbelt, compression, stronger panels | Heavy structure for modest volume |
| Multi-day pack | 45–65L+ | Frame, padded hipbelt, large storage | Poor load transfer |
| Technical pack | 25–50L | Gear loops, reinforced zones | Features added without real use |
| Outdoor-travel hybrid | 30–45L | Travel access plus trail comfort | Too bulky for hiking |
A clean product line often works better when each size has a defined purpose. A 20L pack can focus on day hikes and travel-friendly outdoor use. A 32L pack can serve longer day routes or light weekend use. A 45L pack can focus on compact camping or hut-to-hut routes. Larger packs need more serious structure for backpacking.
Trying to make one pack cover every outdoor scene usually creates compromise. It may be too heavy for day hikes, too small for camping, and not supportive enough for long routes. A better approach is to let each pack size solve a clear problem.
Who Needs Hiking Backpacks?
Hiking backpacks are used by casual trail walkers, day hikers, weekend campers, long-distance hikers, outdoor clubs, youth camps, travel adventure groups, school outdoor programs, and retail outdoor collections. Their needs differ by trip length, carried weight, climate, age group, route difficulty, and how often they need access to gear.
A casual trail user may only need water, a snack, a phone, and a thin jacket. A weekend camper may need room for layers, food, a compact sleep system, and extra water. A long-distance hiker may care deeply about weight, pocket reach, strap shape, and abrasion control. A youth camp may need simple structure, strong seams, and clear name-label placement. A travel adventure pack may need outdoor comfort with cleaner organization.
| User Type | Main Carry Need | Better Design Direction |
|---|---|---|
| Casual trail user | Water, phone, light layer | 10–20L, soft straps, simple access |
| Day hiker | Food, rain shell, bottle, tools | 18–30L, front stash, side pockets |
| Fast hiker | Soft bottle, phone, snacks | Close fit, strap pockets, low bounce |
| Weekend camper | Clothing, food, compact gear | 30–45L, hipbelt, compression |
| Long-distance hiker | Low weight, high comfort | Lightweight fabric, balanced storage |
| Youth camp | Repeated use, easy ID | Reinforced base, name label, simple pockets |
| Outdoor club | Durability and easy cleaning | Strong fabric, stable stitching |
| Travel adventure user | Mixed city and trail use | Organized pockets, comfortable back panel |
This is why one “standard outdoor backpack” rarely works for every group. A hiking backpack should have a clear role. Is it for weekend camping? Is it for short trail walks? Is it for fast walking with soft bottles? Is it for youth outdoor programs? Is it for travel with occasional hikes? Each use changes the best material, strap thickness, pocket layout, and price position.
Design should also respect access habits. Some users remove the pack often. Others want to reach bottles, snacks, or phone while walking. Some prefer hydration bladders. Others prefer bottles. Some carry wet gear often. Others hike mostly in dry weather. A pack feels better when these habits are considered before the sample is made.
Is 40 Too Old To Go Backpacking?
No, 40 is not too old to go backpacking. Many people begin hiking or backpacking in their 40s, 50s, or later. What matters more is route choice, fitness level, pack weight, pacing, footwear, and carry comfort. For backpack design, this means comfort, stability, and easy access should not be treated as secondary details.
A broader outdoor audience often cares less about extreme minimalism and more about how the pack feels after several hours. A pack that removes too much padding to save weight may create shoulder pressure. A pack that uses a narrow belt may feel unstable. A side pocket that cannot be reached while walking may frustrate users who prefer not to remove the pack often.
Comfort details that help a wider age group include:
Shoulder straps that sit away from the neck.
Sternum strap with easy height adjustment.
Hipbelt that reduces shoulder pressure on medium and large packs.
Side bottle pockets that can be reached without removing the pack.
Smooth zipper pulls that are easy to grab.
Moderate capacity that discourages overpacking.
Back padding that reduces heat buildup.
Front pocket for quick rain shell storage.
Older hikers, returning hikers, and newer outdoor users often prefer products that feel intuitive. They do not want complicated adjustment systems or pockets that require guessing. A good hiking backpack should help the trail feel easier, not more technical.
This does not mean the pack should be heavy or basic. A well-balanced design can be comfortable, clean, and strong without overbuilding. A practical 28L day hiking pack with good straps, stable bottle pockets, and a breathable back panel may serve a wider audience better than a more extreme product with a narrow use case.
What Are The Big 3 Backpacking Items?
The big 3 backpacking items are usually the backpack, shelter, and sleep system. These three items take much of the volume and a large share of carried weight. For backpack design, they matter because the pack must hold bulky gear, manage load shape, protect the bottom, and transfer weight comfortably over long distances.
Shelter may be a tent, tarp, or hammock setup. The sleep system may include a sleeping bag or quilt plus a sleeping pad. These items are often soft but bulky. They can fill space quickly and affect pack shape. If the main compartment is too narrow or the compression system is weak, the load becomes hard to stabilize.
A backpacking pack should support the big 3 through several design choices:
A main compartment shaped for bulky soft goods.
Compression straps to reduce movement.
A strong bottom panel for loaded ground contact.
A hipbelt that helps carry weight on the hips.
Side straps or lower attachment areas for poles or pads.
Pockets that still function when the main body is full.
A back structure that keeps the pack from collapsing.
The big 3 also influence pocket placement. If shelter or sleep gear fills the main compartment, smaller items need reliable pockets. Food, rainwear, water treatment, headlamp, gloves, and map should not disappear into the bottom of the pack. External pockets become more important as volume increases.
| Big 3 Item | Design Impact | Helpful Feature |
|---|---|---|
| Backpack | Must carry and stabilize all gear | Frame, hipbelt, compression |
| Shelter | Often long or bulky | Side straps, large main tube |
| Sleep system | Bulky soft goods | Wide opening, lower storage |
| Sleeping pad | May sit outside | Lash points or side compression |
| Tent poles | Need long narrow storage | Side pocket + compression strap |
A large backpack that only provides volume is not enough. It must control that volume. Without hip support and compression, the load may pull backward and feel heavier than it is. Without reinforced high-wear panels, ground contact can damage the base early. Without smart pockets, the user may need to unpack too often.
Is A Hiking Pack Different From A Travel Pack?
Yes, a hiking pack is different from a travel pack. A hiking pack is designed for body movement, uneven ground, weather, sweat, and load balance. A travel pack is usually designed for clothing organization, laptop storage, airport handling, and neat packing. Hybrid packs can work well, but the priority must be clear from the start.
A hiking pack often uses shaped straps, sternum strap, hipbelt, back ventilation, compression straps, side bottle pockets, hydration sleeve, and exterior gear storage. A travel pack often uses a clamshell opening, laptop compartment, internal dividers, lockable zippers, luggage sleeve, and a more rectangular shape.
| Detail | Hiking Pack | Travel Pack |
|---|---|---|
| Main Use | Trail walking, uneven ground, outdoor gear | City travel, airport, hotel, clothing |
| Fit Focus | Movement, torso comfort, hip support | General carry comfort |
| Back Panel | Breathability and stability | Padding and shape retention |
| Pocket Logic | Water, snacks, rain gear, poles | Laptop, clothes, passport, cables |
| Opening | Top, panel, roll, or hybrid | Clamshell or front opening |
| Load Control | Compression and hip transfer | Organization and neat packing |
| Fabric Need | Abrasion, weather, weight balance | Scuff resistance, clean appearance |
| Common Risk | Shoulder pain, bounce, heat | Overpacking, laptop imbalance |
A travel backpack can look outdoor but still fail on a trail if the straps are flat, the back panel is too hot, and the bottle pockets are poor. A hiking pack can feel awkward for travel if it has too many external straps, no laptop protection, and a top opening that is hard to pack neatly.
Hybrid outdoor-travel designs should be handled carefully. If the product is mostly for trail use, comfort and load control should lead. If it is mostly for travel with occasional hikes, organization and cleaner shape can take more space. The product should not pretend to be both a serious hiking pack and a full travel office pack unless the structure truly supports both.
A hiking backpack works when every part has a trail reason. The fabric protects the wear zones. The straps match the load. The hipbelt appears when the pack size needs it. The pockets follow real access habits. The back panel manages comfort and heat. The pack feels stable with weight inside. That is the difference between outdoor styling and real hiking function.
Which Fabric Works Best?

The best fabric for a hiking backpack depends on trail use, load weight, weather, abrasion zones, target hand feel, and product position. Nylon often works well for stronger trail performance. Polyester can be practical for daypacks and cost-controlled outdoor lines. Ripstop helps slow tear spread. Oxford gives structure and durability. Stronger fabric should be placed where wear happens most, not everywhere.
Fabric is one of the first decisions that shapes how a hiking backpack feels and performs. It affects weight, touch, color depth, coating, tear strength, abrasion resistance, water resistance, sewing behavior, and final price. A 20L day hiking pack does not need the same fabric plan as a 55L backpacking pack. A fast hiking pack should stay light and close to the body. A weekend pack needs stronger panels and better load stability. A rugged outdoor pack needs tougher wear zones and reliable trims.
A good hiking backpack rarely uses one fabric across the whole bag. Different areas face different stress. The upper body may only need a balanced, lighter fabric. The bottom touches rock, soil, wood benches, wet ground, and truck floors during transport. Side panels rub against trees and stones. Strap roots carry pulling force. Bottle pockets stretch repeatedly. Back panels face sweat and friction. Each area should receive material that matches its job.
A fabric that is too light may reduce weight but create early wear. A fabric that is too heavy may look durable but make the pack tiring and stiff. A shiny coating may resist light rain but peel or crease if the quality is poor. A mesh pocket may look breathable but tear easily if the yarn and stretch recovery are weak. This is why fabric choice should be reviewed together with capacity, carry weight, pocket design, seam structure, and usage scene.
A practical fabric map can look like this:
| Backpack Area | Better Material Direction | Main Job | Common Risk |
|---|---|---|---|
| Upper body | 210D / 420D nylon or polyester, ripstop options | Keep weight controlled | Too thin for harsh routes |
| Main front panel | 420D nylon, coated polyester, ripstop fabric | Balance look and durability | Weak coating or poor shape hold |
| Bottom panel | 600D / 840D / 1000D reinforced fabric | Resist ground abrasion | Too stiff if overused |
| Side panels | 420D / 600D fabric, reinforced zones | Resist rubbing and compression | Bottle pocket seam stress |
| Bottle pockets | Stretch woven, power mesh, reinforced mesh | Hold bottles securely | Loss of stretch or tearing |
| Front stash pocket | Stretch mesh or woven pocket fabric | Hold rain shell or wet layer | Snagging on branches |
| Shoulder straps | Durable face fabric, foam, air mesh | Comfort and friction resistance | Foam collapse or edge rub |
| Back panel | Air mesh, spacer mesh, padded mesh | Ventilation and comfort | Heat buildup or rough touch |
| Inner lining | 150D / 210D polyester or nylon lining | Clean interior and organization | Weak tear strength if overloaded |
The strongest fabric decision is not always the thickest one. A better design uses the right material in the right place, so the pack feels durable without becoming heavy.
What Type Of Fabric Is Used?
Outdoor hiking backpacks commonly use nylon, polyester, ripstop fabric, Oxford fabric, coated woven fabric, stretch mesh, air mesh, webbing, and reinforced bottom fabric. Each material serves a different part of the pack. The shell needs strength and weather resistance. Pockets need recovery and access. Straps need comfort and friction resistance. The base needs abrasion protection.
Nylon is often used for stronger hiking and trekking packs because it can offer a good strength-to-weight balance. Polyester is widely used for practical daypacks, outdoor lifestyle packs, and programs where color stability and cost control matter. Ripstop fabric uses a visible grid yarn structure that helps reduce tear spread. Oxford fabric gives a textured woven look and often feels stronger and more structured. Coated fabric improves water resistance, though zippers and seams still need careful design.
Mesh and stretch fabrics are just as important as the main shell. A side bottle pocket may fail long before the body fabric wears out. If the mesh is too loose, bottles move around. If it is too tight, users struggle to insert bottles. If the elastic edge is weak, the pocket loses shape. A front mesh pocket should hold a wet jacket, gloves, or towel without tearing after repeated use.
A typical material plan for a hiking backpack may include:
| Component | Common Fabric Choice | Practical Reason |
|---|---|---|
| Shell body | Nylon, polyester, ripstop, Oxford | Main structure and outdoor look |
| Reinforced base | 600D, 840D, 1000D fabric | Handles ground contact |
| Front pocket | Stretch mesh or woven stash panel | Stores wet or quick-grab gear |
| Side pocket | Stretch mesh, woven stretch, elastic binding | Holds bottles and poles |
| Back padding surface | Air mesh or spacer mesh | Improves airflow and comfort |
| Shoulder strap surface | Durable fabric + mesh lining | Reduces friction |
| Inner sleeve | Polyester or nylon lining | Keeps hydration or small items organized |
| Webbing | Nylon or polyester webbing | Compression, buckles, loops |
| Zipper tape | Standard or water-resistant zipper tape | Access and durability |
| Coating | PU, PVC, TPU, or other finish by project | Adds water resistance and body structure |
A strong material plan should not only look good on a sample. It should be repeatable in bulk, stable in color, suitable for logo work, and practical for stitching, binding, foam assembly, and packing.
Nylon vs Polyester
Nylon is often chosen for hiking backpacks that need stronger outdoor performance, better strength-to-weight balance, and higher abrasion resistance. Polyester is often chosen for daypacks, outdoor lifestyle products, and cost-sensitive lines because it is versatile, stable in color, and widely available. Both materials can work well when the structure is planned correctly.
Nylon can feel more technical and flexible depending on weave and coating. It is suitable for trail packs that need durability without too much weight. Ripstop nylon, coated nylon, and higher-denier nylon are common in hiking, trekking, and technical outdoor packs. Nylon can be more expensive, so it is often used when the product needs a stronger performance story.
Polyester can be very practical for hiking daypacks and outdoor casual packs. It can hold color well, provide a structured look, and keep cost more controlled. Polyester Oxford, ripstop polyester, and coated polyester are common choices for 15L–30L outdoor packs. When reinforced correctly, polyester can perform well for regular trail use, school outdoor programs, resort hiking activities, and entry outdoor collections.
A direct comparison helps clarify the decision:
| Factor | Nylon | Polyester |
|---|---|---|
| Strength-to-weight | Often stronger for outdoor use | Good when properly specified |
| Abrasion behavior | Strong choice for trail use | Practical for daypacks and light outdoor use |
| Cost | Usually higher | Usually more controlled |
| Color stability | Good | Often strong and stable |
| Hand feel | Can feel flexible or technical | Often more structured |
| Water resistance | Depends on coating and finish | Depends on coating and finish |
| Common use | Hiking, trekking, technical packs | Day hiking, outdoor lifestyle, value lines |
| Better placement | Body, high-use panels, premium packs | Body panels, daypacks, casual outdoor packs |
| Watch area | Cost, coating quality, color matching | Abrasion level for harsher routes |
Material name alone does not guarantee quality. A nylon backpack can still fail if the strap root reinforcement is weak. A polyester backpack can perform well if the base is reinforced, pockets are properly built, seams are clean, and zippers are matched to the load. Fabric works together with construction.
A practical approach is to choose nylon when trail performance and lighter strength matter more. Choose polyester when day-use durability, color, and cost control are more important. For mid-level outdoor backpacks, mixed construction can work well: polyester body, reinforced base, stronger webbing, durable zipper, and upgraded mesh pockets.
Ripstop vs Oxford Fabric
Ripstop fabric uses reinforced grid yarns to help slow tear spread. Oxford fabric uses a basket-style weave that gives a stronger, more structured bag feel. Ripstop often suits lightweight hiking and technical outdoor packs. Oxford often suits daypacks, outdoor lifestyle packs, and rugged products that need shape, body, and reliable surface durability.
Ripstop fabric is popular because it gives a recognizable outdoor look and supports lighter designs. The grid structure can help prevent a small tear from spreading quickly. Lightweight ripstop nylon can work well for fast hiking packs, day hiking packs, and larger packs where weight control matters. Ripstop polyester can also provide a technical look with better cost control in some projects.
Oxford fabric gives a more solid and familiar bag structure. It holds shape well, supports clean panels, and can look strong on retail display. Polyester Oxford is widely used for practical outdoor daypacks, school outdoor bags, promotional hiking packs, and rugged lifestyle backpacks. Nylon Oxford can bring stronger performance when a more durable option is needed.
The two fabric styles can be compared like this:
| Fabric Style | Strong Side | Watch Area | Better Use |
|---|---|---|---|
| Ripstop nylon | Tear control, technical look, lighter feel | Higher cost, coating choice | Hiking, trekking, fast hiking |
| Ripstop polyester | Outdoor appearance, cost control | Abrasion depends on fabric quality | Day hiking, outdoor lifestyle |
| Nylon Oxford | Stronger structured feel | May add weight | Durable hiking packs |
| Polyester Oxford | Stable, practical, widely used | Needs reinforcement for rough trail use | Daypacks, entry outdoor packs |
| Mixed ripstop + Oxford | Balanced weight and wear control | Requires clean color matching | Mid-level hiking packs |
A mixed fabric plan is often more practical than choosing one fabric for the whole pack. For example:
Ripstop body + Oxford bottom for better weight control and abrasion protection.
Polyester body + reinforced nylon base for cost balance.
Ripstop front panel + woven side pockets for a technical look with practical storage.
Oxford body + air mesh back panel for a stronger daypack feel.
The decision should follow the pack’s intended route. If the pack is built for fast hiking, lighter ripstop makes sense. If it is built for outdoor camps or rental-style repeated use, Oxford or reinforced fabric may perform better. If it is built for a premium hiking line, ripstop nylon with reinforced zones can create a strong mix of function and feel.
210D vs 420D vs 600D
210D, 420D, and 600D describe yarn thickness direction. In general, 210D is lighter and more flexible, 420D offers a balanced strength-to-weight feel, and 600D gives more structure and abrasion resistance. For hiking backpacks, the best result often comes from using lighter fabric on the body and stronger fabric on the base and stress zones.
Denier is useful, but it should not be read alone. A 420D fabric with good weave, coating, and finishing may perform better than a heavier fabric with poor construction. A 600D panel may resist abrasion well, but using it everywhere can make a pack heavier and stiffer than needed. A 210D body can feel light and clean, but it may need reinforcement at corners, bottom, and strap roots.
A practical denier guide:
| Denier Direction | Main Feel | Better Placement | Watch Area |
|---|---|---|---|
| 150D | Light lining or inner sleeve | Inside pockets, hydration sleeve lining | Not for outer wear zones |
| 210D | Light, flexible, clean | Upper panels, lightweight daypacks, lining | Abrasion if used on bottom |
| 420D | Balanced strength and weight | Main body, side panels, hiking daypacks | Cost and coating quality |
| 600D | Structured and tougher | Bottom panels, rugged daypacks, stress zones | Added weight |
| 840D | Heavy-duty feel | Base, high-wear side panels | Stiffness |
| 1000D | Very rugged | Extreme wear zones, tool areas | Weight and bulk |
A 20L hiking daypack may use 210D or 420D body fabric with a 600D bottom. A 30L outdoor pack may use 420D body fabric with 600D or 840D reinforcement. A 45L weekend pack may use 420D or stronger body fabric, with reinforced base and strap root areas. A technical pack may need heavier fabric only where tools, rock contact, or sharp gear create abrasion.
Fabric weight affects user experience. A heavier fabric can improve durability, but it also increases total pack weight. On long routes, even a few hundred grams can matter. A lighter fabric can improve comfort, but if it wears through too quickly, the product loses trust. The best denier plan protects the parts most likely to fail while keeping the rest of the bag efficient.
A good fabric map may look like this:
| Pack Size | Body Fabric Direction | Bottom Fabric Direction | Pocket Fabric Direction |
|---|---|---|---|
| 10–18L | 210D / light 420D | 420D / 600D | Mesh or lightweight stretch |
| 18–30L | 210D / 420D | 600D | Stretch mesh or woven pocket |
| 30–45L | 420D | 600D / 840D | Reinforced mesh or stretch woven |
| 45–65L+ | 420D / stronger fabric | 840D / 1000D where needed | Strong mesh, woven stash, compression |
| Technical use | 420D / 600D | 840D / 1000D | Reinforced pocket zones |
The final choice should be tested on a sample with real load. Empty fabric panels can feel strong, but loaded pockets, compressed seams, and rubbed bottom panels show the real performance.
When Is Water Resistance Needed?
Water resistance is needed when a hiking backpack may face rain, wet forest, fog, snow, river splash, wet ground, or damp gear. Coated fabric helps, but it does not make the whole pack fully waterproof. Zippers, seams, openings, stitch holes, hydration ports, and pocket seams still need careful planning.
Most hiking backpacks are water-resistant rather than fully waterproof. This is often the more practical choice because fully waterproof construction can add weight, stiffness, cost, and design limitations. A hiking pack usually needs to resist rain long enough to protect clothing, snacks, documents, phone, and small gear. For long rain exposure, a rain cover or inner dry bag can be more practical than turning the whole pack into a sealed dry bag.
Water resistance should be matched to the route:
| Use Scene | Water Exposure | Practical Fabric Direction | Extra Design Need |
|---|---|---|---|
| Dry day hike | Light dew or brief splash | Basic coated fabric | Simple zipper cover |
| Rainy trail | Rain for 1–3 hours | Coated nylon or polyester | Protected zipper, rain cover option |
| Wet forest | Rain, branches, mud | Strong coated fabric | Reinforced base and side panels |
| Snow route | Snow contact and moisture | Water-resistant shell | Easy-dry pockets, glove-friendly zippers |
| River area | Splash and wet ground | Coated fabric with stronger seams | Drainage or external wet pocket |
| Multi-day route | Repeated weather exposure | Coated fabric + rain cover | Dry storage planning |
| Outdoor rental / camp use | Frequent wet and dirty use | Durable coating and easy cleaning | Strong base and simple layout |
Coating type and quality matter. PU coating is common for water resistance. PVC coating can create a stronger waterproof feel but may add stiffness. TPU coating can feel more premium and flexible in some outdoor products. The choice depends on the desired feel, weight, flexibility, and price position.
Water resistance should also include wet gear management. A rain shell, damp gloves, wet towel, or muddy socks should not go inside the main compartment with dry clothing. Front mesh pockets, external stash panels, drain holes, and separated lower storage can help. A backpack that handles wet gear well feels much more useful in changing weather.
Zipper planning is also important. A water-resistant zipper can help, but it is not a full waterproof solution by itself. Zipper flaps, zipper garages, raised openings, seam direction, and rain cover storage can all improve real rain performance. For many hiking packs, a smart mix works better than chasing a fully sealed structure.
A practical rain-ready hiking backpack should include:
Coated shell fabric.
Reinforced bottom fabric.
Protected main zipper or top opening.
External pocket for wet layer.
Smooth drainage for mesh pockets.
Optional rain cover pocket if needed.
Clear internal pocket for dry valuables.
Durable zipper pulls for wet hands.
Water resistance should support the hike, not overload the pack. The goal is to keep key items dry, separate wet gear, reduce obvious water paths, and preserve comfort during real outdoor use.
How Should Straps And Fit Work?
Straps and fit decide whether a hiking backpack feels stable after one hour or painful after five miles. Shoulder straps guide the load. The sternum strap keeps the upper body stable. The hipbelt reduces shoulder pressure when weight increases. The back panel controls airflow and body contact. Good comfort is not created by thick padding alone; it comes from correct strap shape, foam density, body length, load position, and clean adjustment.
A hiking backpack can use strong fabric and still fail if the carry system is weak. When the shoulder straps are too narrow, pressure builds quickly near the collarbone. When the strap curve is wrong, the edge may rub the neck or chest. When foam is too soft, it flattens under load. When foam is too hard, the strap feels stiff and does not follow body movement. When the hipbelt is only decorative on a larger pack, most weight stays on the shoulders.
The carry system should match the planned load. A 15L trail daypack can stay light with soft shaped shoulder straps and a simple sternum strap. A 28L day hiking pack needs stronger strap foam, better back padding, and side compression. A 40L weekend pack should have a real hipbelt, stronger strap roots, and better load control. A 55L backpacking pack needs a serious hipbelt, back structure, load lifter area, and compression system.
| Pack Size | Expected Load | Shoulder Strap Need | Hipbelt Need | Main Comfort Risk |
|---|---|---|---|---|
| 10–18L | 2–5 kg | Soft shaped straps | None or light webbing | Bounce, sliding straps |
| 18–30L | 4–9 kg | Wider straps, better foam | Light waist support helpful | Shoulder pressure after long walking |
| 30–45L | 8–14 kg | Stronger foam, reinforced strap roots | Padded hipbelt recommended | Load pulling backward |
| 45–65L+ | 12–20 kg | Load control, strong structure | Full padded hipbelt needed | Shoulder overload, unstable carry |
| Fast hiking pack | 2–7 kg | Close-fit or vest-style straps | Flexible waist control | Bounce during fast movement |
A good fit should be checked with weight inside, not only when the pack is empty. An empty pack can look balanced while a loaded pack pulls away from the back, twists sideways, or presses into the shoulders. Strap angle, back length, hipbelt height, and compression all become clearer after the pack is filled with real gear.
What Is The 20% Rule For Backpacking?
The 20% rule means the loaded backpack is often kept near 20% of a person’s body weight or less for more comfortable backpacking. It is not a strict law, because trail difficulty, fitness, weather, water carry, footwear, and route length all change what feels safe. Still, it is a useful reference when planning capacity, strap support, and hipbelt structure.
This rule matters because backpack size can encourage overpacking. A large pack without strong compression may invite extra clothing, oversized toiletries, too much cookware, and duplicate gear. When unnecessary weight is added, even a good pack can feel poor. A comfortable backpack does not only carry more; it helps carry the right amount in the right position.
| Body Weight | 20% Load Reference | Pack Design Meaning |
|---|---|---|
| 50 kg / 110 lb | 10 kg / 22 lb | Good straps and compact volume matter |
| 60 kg / 132 lb | 12 kg / 26 lb | Medium packs need stable back support |
| 70 kg / 154 lb | 14 kg / 31 lb | Hipbelt and compression become important |
| 80 kg / 176 lb | 16 kg / 35 lb | Larger pack needs better load transfer |
| 90 kg / 198 lb | 18 kg / 40 lb | Frame, belt, and back fit become critical |
A short day hike may only require 3–7 kg, so a heavy carry system may be unnecessary. A weekend trip may reach 8–14 kg after food, water, layers, and sleep gear are added. Multi-day backpacking can become heavier, especially when water sources are limited. The structure should rise with the expected load.
The 20% rule also helps control product design. A 25L daypack should not be built with a bulky hipbelt and heavy frame if the intended load is light. A 50L pack should not use thin casual straps if it may carry camping gear. Comfort comes from matching structure to load, not simply adding parts.
Which Shoulder Strap Is Best?
The best shoulder strap is the one that spreads pressure, follows body shape, stays stable, and works with the sternum strap and back panel. Strap width, curve, foam density, inner mesh, edge finish, and root angle all matter. Thick padding alone does not make a strap better. A bulky strap can trap heat, rub the neck, or feel stiff under movement.
Shoulder straps perform three jobs at the same time. They hold the pack against the body. They guide the load downward. They keep the pack stable when walking uphill, stepping down, or turning. If the straps are poorly shaped, the hiker feels the problem quickly, especially when water bottles, food, or dense gear add weight.
Useful strap details include:
Strap width matched to pack volume and load.
Foam that supports pressure without flattening.
Curved shape that avoids neck rub.
Smooth edge binding to reduce friction.
Breathable inner mesh for sweat control.
Reinforced stitching at upper and lower strap roots.
Sternum strap attachment that allows height adjustment.
Webbing tails that stay controlled instead of hanging loose.
| Strap Detail | Better Direction | What Happens If Poorly Built |
|---|---|---|
| Width | Wide enough to spread load | Narrow pressure on shoulders |
| Foam density | Supportive, not too soft | Foam collapses after use |
| Strap curve | Follows shoulder and chest | Neck rub or outer sliding |
| Edge finish | Smooth binding or clean lamination | Chafing during long walks |
| Inner surface | Breathable mesh | Sweat buildup and friction |
| Strap root | Reinforced and correctly angled | Pulling, tearing, uneven load |
| Webbing adjuster | Smooth and slip-resistant | Constant readjustment |
For a small daypack, simple shaped straps may be enough. For a 30L hiking pack, better foam and stronger strap roots are needed. For fast hiking, shoulder straps may become wider and more vest-like, with pockets for soft bottles or snacks. For larger packs, shoulder straps should support balance while the hipbelt carries much of the weight.
A well-designed strap is often quiet in use. The hiker does not constantly pull it away from the neck, loosen it to reduce pain, or adjust it every few minutes. If the strap disappears into the experience, it is doing its job.
J-Strap vs S-Strap
J-straps are simpler and more vertical, while S-straps curve more around the chest and shoulder. J-straps can work well for many classic hiking packs, especially with moderate loads. S-straps can feel more natural for narrower shoulders or body shapes that need more contour. Neither is automatically better; the right choice depends on body fit, pack size, and load.
A J-strap usually has a cleaner shape and is easier to apply across many daypacks. It can feel stable and familiar. The risk is that a straight strap may sit too close to the neck for some people, especially when the pack is loaded or the strap root angle is not correct.
An S-strap gives a more body-following curve. It can reduce pressure near the neck and chest on some body shapes. It can also help the strap stay in place without feeling too wide. The challenge is accuracy. If the curve is too strong or placed in the wrong area, it may feel twisted or awkward.
| Strap Type | Strong Side | Watch Area | Better Use |
|---|---|---|---|
| J-strap | Clean, stable, easy to understand | May rub neck on some body shapes | Daypacks, general hiking packs |
| S-strap | More contoured body fit | Requires accurate pattern work | Fit-sensitive hiking packs |
| Vest-style strap | Close fit, front storage, low bounce | More complex appearance and construction | Fast hiking, hydration packs |
| Wide padded strap | Better pressure spread | Can feel hot or bulky | Larger daypacks, weekend packs |
| Lightweight strap | Low weight and flexible | Less support under heavier loads | Small daypacks, ultralight styles |
A hiking pack series can use different strap shapes by size. A 15L daypack may use a simple curved strap. A 30L pack may use a better-shaped J-strap or S-strap. A fast hiking pack may use wider vest-style straps. A 50L pack may use thicker padded straps combined with hip support.
The strap should not be chosen only for appearance. It should be tested with a loaded pack, different shoulder widths, and common clothing layers. A strap that feels right over a T-shirt may feel different over a fleece or rain shell.
Why Does Torso Fit Matter?
Torso fit matters because the pack must sit in the correct position between shoulders and hips. Height alone is not enough. Two people with the same height can have different torso lengths. If the pack back length is wrong, the shoulder straps may pull poorly, the hipbelt may sit too high or too low, and the load may feel heavier than it really is.
For small packs, torso fit is more forgiving. For medium and large hiking packs, it becomes critical. The hipbelt should wrap around the hip area, not the waist or stomach. The shoulder straps should curve smoothly over the shoulders without a large gap. The pack should stay close to the back instead of leaning outward.
| Fit Area | Good Result | Poor Result |
|---|---|---|
| Back length | Pack sits naturally between shoulders and hips | Pack feels too high, too low, or unstable |
| Shoulder wrap | Straps follow shoulders smoothly | Gap, neck rub, or sliding |
| Hipbelt height | Load can transfer to hips | Shoulders carry too much weight |
| Load position | Weight stays close to the back | Pack pulls backward |
| Back panel width | Stable without restricting arms | Arm rub or side movement |
| Compression | Load stays compact | Gear shifts and swings |
Adjustable back systems can help fit more body types, especially on larger packs. They add weight, cost, and structure, but they can improve comfort for packs carrying 12 kg or more. Fixed-back systems can be lighter and cleaner, but sizing must be more precise.
Torso fit should be reviewed with real items inside: water, clothing, food, and soft gear. If the pack only gets checked empty, problems stay hidden. A filled pack shows whether the back panel collapses, the hipbelt pulls correctly, and the shoulder straps keep the load close.
How Should Hipbelts Carry Weight?
Hipbelts carry weight by transferring part of the load from the shoulders to the hips. On small packs, a simple waist strap may only reduce bounce. On medium and large packs, a padded hipbelt should hold the pack close and carry real weight. As capacity increases, the hipbelt becomes one of the most important comfort parts.
A good hipbelt should wrap around the hips smoothly, tighten without slipping, and connect strongly to the pack body. If it is too soft, it folds under load. If it is too stiff, it presses into the body. If it is too narrow, it creates pressure. If it is attached weakly, it cannot transfer weight effectively.
| Pack Type | Hipbelt Direction | Main Purpose |
|---|---|---|
| Small daypack | Simple webbing or removable strap | Reduce bounce |
| 20–30L hiking pack | Light padded waist support | Improve stability |
| 30–45L weekend pack | Padded hipbelt | Share load and control movement |
| 45–65L backpacking pack | Strong padded hipbelt | Carry a major part of the load |
| Fast hiking pack | Flexible waist control | Prevent bounce without bulk |
Hipbelt shape matters as much as padding. A straight belt may not wrap well. A shaped belt can follow the hip area more naturally. The foam should be supportive but not hard. The buckle should be easy to operate with cold or tired hands. The webbing should stay tight and not slide through the adjuster.
Hipbelt pockets can add real trail value when they are sized well. They are useful for snacks, lip balm, small camera, compact compass, card holder, or energy gel. The pocket should open with one hand and should not block belt tightening. Oversized hipbelt pockets can interfere with arm swing. Tiny pockets may look useful but hold little.
A strong hipbelt should be tested with the pack loaded. The test should check whether the belt carries weight, whether the buckle slips, whether the belt edge digs into the body, and whether hipbelt pockets still open when the belt is tightened.
Do Sternum Straps Improve Stability?
Yes, sternum straps improve stability by pulling shoulder straps inward and reducing side movement. They help the pack stay closer to the body during uphill walking, downhill steps, fast movement, and uneven trail sections. A sternum strap should stabilize without restricting breathing or pressing too high on the chest.
A sternum strap is small, but it changes how the shoulder straps behave. Without it, straps may slide outward, especially on narrow shoulders or when the pack is loaded unevenly. With it placed correctly, the pack feels more controlled and the shoulder straps sit more consistently.
Better sternum strap details include:
Height adjustment to fit different body shapes.
Smooth sliding rail or secure webbing loops.
Small buckle that opens easily.
Optional elastic section for breathing comfort.
Whistle buckle for selected outdoor styles.
Clean webbing end control.
Stable stitching at attachment areas.
| Sternum Strap Detail | Why It Matters | Poor Result |
|---|---|---|
| Adjustable height | Fits more body shapes | Strap sits too high or low |
| Elastic section | Allows breathing movement | Chest pressure when tight |
| Buckle size | Easy opening and closing | Hard to use with gloves |
| Strap width | Stable without bulk | Twisting or discomfort |
| Attachment method | Keeps position secure | Sliding or tearing |
| Webbing control | Keeps clean appearance | Loose tails hang around |
For small daypacks, one adjustable sternum strap is usually enough. For fast hiking packs or vest-style packs, two sternum straps may improve stability because the front carry area is more active. For larger packs, the sternum strap works with the hipbelt, shoulder straps, compression, and back panel. It should not carry main weight, but it helps align the whole system.
A well-designed sternum strap should be easy to adjust while walking. If the hiker needs to stop, remove the pack, and fight with the strap, the design is not practical. On outdoor packs, small hardware details often affect comfort more than expected.
A strong strap and fit system is not about adding the most parts. It is about matching load, body shape, movement, and trail habits. Small packs need light comfort. Medium packs need better support. Large packs need real load transfer. When shoulder straps, sternum strap, hipbelt, torso fit, and compression work together, the backpack feels lighter, more stable, and more trustworthy on the trail.
What Pocket Layout Is Practical?
A practical pocket layout helps hikers reach water, phone, snacks, rain shell, map, gloves, poles, and small tools without stopping too often. The best layout is not the one with the most pockets. It is the one that puts each item in the right place, keeps heavy gear stable, separates wet items, and avoids weak seams or bulky decoration.
Pocket layout affects comfort as much as storage. When heavy items sit too far from the back, the pack pulls outward. When side pockets are too shallow, bottles fall during climbing or bending. When front mesh is too thin, it snags on branches. When small zipper pockets are too deep, keys and headlamps disappear inside. When shoulder strap pockets bounce, users stop using them.
A hiking backpack should be planned by access frequency. Items used while walking should stay close to the body and easy to reach. Items used during short breaks can sit in front, top, or hipbelt pockets. Items that must stay dry should stay inside. Wet or muddy items should stay outside or in separated storage. Heavy items should stay close to the back panel, not hanging far at the front.
A clean pocket layout should usually solve these jobs:
Water access while walking.
Fast storage for a rain shell or wet layer.
Secure storage for phone, wallet, keys, and small valuables.
Quick access to snacks, lip balm, sunscreen, gloves, or headlamp.
Stable carry for poles, umbrella, or compact tools.
Separation between dry items and wet or dirty gear.
Enough organization without adding unnecessary zippers, seams, and weight.
| Pocket Area | Best Items | Practical Size Direction | Main Risk |
|---|---|---|---|
| Side bottle pocket | Bottle, umbrella, poles | Fits 500–1000ml bottle | Bottle falls or pocket tears |
| Hydration sleeve | Water bladder | 1.5–3L bladder fit | Poor hose route, hard refill |
| Front mesh pocket | Rain shell, gloves, towel | Large enough for soft layer | Snagging, weak recovery |
| Front zipper pocket | Headlamp, snacks, tools | Small to medium | Pulls pack outward if overloaded |
| Shoulder strap pocket | Phone, soft flask, snack | Phone with case or 500ml soft flask | Bounce, poor fit |
| Hipbelt pocket | Snack, lip balm, card, small camera | One-hand opening | Too small or blocks tightening |
| Lid pocket | Gloves, cap, map, small gear | Larger packs only | Overfilled top pulls backward |
| Internal pocket | Wallet, keys, documents | Flat and secure | Too deep or hard to find |
| Lower compartment | Sleep gear or dirty items | Medium to large packs | Adds seams and weight |
| Tool loops | Poles, ice tool, cord | Route-specific | Unused loops add clutter |
Pocket design should be checked with real gear, not only drawings. A phone pocket should fit large phones with protective cases. A bottle pocket should hold common bottle shapes after the pack is loaded. A wet-gear pocket should hold a rain shell without stretching out. Zipper pulls should be easy to grab with cold fingers or thin gloves. Small details decide whether the layout feels smart or annoying on the trail.
Which Pocket Layout Works Best?
The best pocket layout depends on pack size, trip length, gear weight, and walking style. A 20L day hiking pack may only need two side pockets, one front stash area, one small secure pocket, and a clean main compartment. A 35L weekend pack may need hipbelt pockets, compression straps, hydration storage, and a larger front pocket. A 60L pack may need lid storage, large side pockets, lower access, and stronger external attachment.
A practical layout follows the trail routine. Hikers often reach for water, snacks, phone, sunscreen, rain shell, gloves, and map many times during a route. They do not want to open the main compartment each time. At the same time, too many compartments can make the pack heavier and confusing. Every pocket should have a clear job.
For a 15–25L day hiking pack, a clean setup may include:
Two side bottle pockets.
One front mesh or woven stash pocket.
One top or front zipper pocket for keys and phone.
One internal flat pocket for wallet or emergency items.
Optional hydration sleeve.
For a 30–45L weekend hiking pack, a stronger setup may include:
Two deeper side pockets.
Hydration sleeve with hose exit.
Front stretch pocket for rain shell.
Hipbelt pockets for snacks and small items.
Side compression straps.
Small lid or upper pocket.
For a 45–65L backpacking pack, storage usually needs more structure:
Large main compartment for bulky gear.
Side pockets that work with compression straps.
Hydration sleeve or bottle carry options.
Lid pocket for small trail items.
Hipbelt pockets.
Front stash pocket.
Lower gear access or sleeping gear storage when needed.
External attachment for poles or pad.
| Pack Capacity | Pocket Layout Direction | Why It Works |
|---|---|---|
| 10–18L | Side pockets + small front pocket | Keeps light gear simple |
| 18–30L | Side pockets + front stash + secure pocket | Works for most day hikes |
| 30–45L | Side pockets + front stash + hipbelt pockets + hydration | Better for longer routes |
| 45–65L+ | Large side pockets + lid + hipbelt + front stash + attachments | Supports bulky gear and long use |
| Fast hiking | Strap pockets + soft flask storage + slim rear pocket | Keeps items close and reduces stops |
A pocket layout should also control weight placement. Dense items such as water, food, battery packs, and tools should not sit too far outside the pack. If a large front pocket carries heavy objects, the pack may pull backward. Side pockets should hold water securely while keeping balance left and right. Hipbelt pockets should carry small items, not heavy objects that twist the belt.
The best layout feels obvious. Bottle on the side. Wet shell in the front. Phone on the strap or safe upper pocket. Snacks in hipbelt or small zipper pocket. Dry clothing inside. Heavy items close to the back. That clarity is what makes a hiking pack feel dependable.
Side Bottle Pockets vs Hydration Sleeve
Side bottle pockets are simple, visible, and easy to refill. A hydration sleeve supports hands-free drinking through a bladder and hose. Side pockets work well for day hikes, travel-outdoor use, and casual routes. Hydration sleeves are useful for longer walking, hot climates, fast hiking, cycling crossover, and routes where frequent drinking matters.
Side bottle pockets need more thought than they appear to require. A pocket that looks good empty can fail when the pack is full. If the side panel bulges, the bottle may become hard to insert. If the elastic is weak, the bottle may fall out. If the pocket is too high, the user may not reach it while wearing the pack. If it is too low, the bottle may swing or hit the arm.
Better side bottle pocket details include:
Depth that covers enough of the bottle body.
Elastic binding with strong recovery.
Angled opening for easier reach on selected packs.
Reinforced lower corner where bottles press.
Drainage or mesh section for wet bottles.
Compression strap placement that does not block access.
Fit testing with 500ml, 750ml, and 1L bottles.
Hydration sleeves also need careful placement. A bladder can weigh 1.5–3 kg when full, so it should sit close to the back. The sleeve should include a hanger loop, hose exit, and shoulder strap keeper. The hose route should feel natural on either the left or right side, depending on design. The sleeve should not create a hard bulge against the back panel.
| Water Carry Type | Strong Side | Watch Area | Better Use |
|---|---|---|---|
| Side bottle pocket | Easy refill, visible, simple | Bottle drop if too shallow | Day hiking, mixed use |
| Angled side pocket | Easier reach while wearing | Needs strong pattern control | Hiking packs above 20L |
| Hydration sleeve | Hands-free drinking | Cleaning and refilling need care | Long hikes, hot weather |
| Shoulder soft-flask pocket | Very fast drinking access | Strap bounce and weight pull | Fast hiking |
| Dual bottle + sleeve | Flexible for different habits | Adds parts and sewing | Mid-size hiking packs |
A dual system can be useful on 25L–45L packs because some hikers prefer bottles and others prefer a bladder. But not every pack needs both. Small daypacks can stay cleaner with side pockets only. Fast hiking packs may use front soft flasks instead of side bottles. Larger packs often benefit from both hydration sleeve and side pockets because water needs change by route.
Front Mesh Pocket vs Zipper Pocket
A front mesh pocket works well for wet, soft, or quick-grab items such as rain shell, gloves, towel, map, cap, or damp layer. A front zipper pocket works better for items that need more security, such as headlamp, snacks, small tools, wallet, or charger. Mesh gives faster access and airflow. Zipper storage gives cleaner organization and better item control.
A front mesh pocket is one of the most useful details on a hiking pack because weather changes quickly. When rain starts, the shell must be easy to grab. When rain stops, the wet shell needs a place outside the dry main compartment. Mesh also lets users see what is stored. The downside is durability. Thin mesh can snag on branches, stretch out, or tear near the seam.
A woven front stash pocket can be stronger than mesh. It may be better for rugged outdoor packs, youth camps, travel adventure, or repeated use. It does not dry as quickly as open mesh, but it can resist scuffing better. A stretch woven pocket can give a cleaner appearance while still holding soft items.
A front zipper pocket feels safer for small items. It is useful for headlamp, snack bar, sunscreen, gloves, wallet, or repair kit. But it adds zipper weight, sewing time, and another possible water path. If users overload the front zipper pocket with heavy items, the pack may pull away from the back.
| Front Storage Type | Best For | Strong Side | Watch Area |
|---|---|---|---|
| Stretch mesh pocket | Wet shell, gloves, towel | Airflow and fast access | Snagging and stretch fatigue |
| Woven stash pocket | Rain shell, map, cap | Stronger surface | Less airflow |
| Front zipper pocket | Tools, headlamp, small valuables | Better security | Added weight and water path |
| Panel pocket with buckle | Jacket or helmet-like soft gear | Secure hold | More straps and hardware |
| Hybrid mesh + zipper | Mixed quick and secure storage | More function | More complex sewing |
For a 20–30L hiking pack, one front mesh or stash pocket plus one small secure pocket is often enough. For a larger pack, front storage can be combined with side compression and a lid pocket. For a clean outdoor-travel hybrid, a front zipper pocket may look neater than mesh, but the design should still provide a place for wet layers.
A good front pocket should not become a trash drawer. Its depth, opening, fabric stretch, and closure should make the intended use clear.
Shoulder Strap Pocket vs Hipbelt Pocket
Shoulder strap pockets keep small items close to the chest, while hipbelt pockets keep them close to the waist. Shoulder strap pockets are useful for phone, soft flask, snack, sunglasses, or small camera. Hipbelt pockets are useful for energy bars, lip balm, compact tools, card holder, compass, or small sunscreen. The better choice depends on pack size and movement style.
Shoulder strap pockets are common on fast hiking and hydration packs because users want access without slowing down. A phone pocket should fit a large phone with a case. A soft-flask pocket should support liquid weight without twisting the strap. A zipper strap pocket should not be so stiff that it presses the chest. Placement should avoid arm swing and sternum strap conflict.
Hipbelt pockets work better when the pack already has a padded hipbelt. They are easy to reach during walking and do not add weight to the chest area. They are useful on 30L and larger hiking packs, especially weekend and backpacking designs. The pocket should open with one hand and should not interfere with belt tightening.
| Pocket Type | Best Items | Better Pack Type | Main Risk |
|---|---|---|---|
| Shoulder phone pocket | Phone, small camera | Fast hiking, day hiking | Bounce, phone size mismatch |
| Shoulder soft-flask pocket | Soft bottle | Fast hiking, hydration packs | Strap distortion |
| Shoulder zipper pocket | Snack, card, sunglasses | Light hiking packs | Chest pressure |
| Hipbelt zipper pocket | Snack, lip balm, compact tool | Weekend and backpacking packs | Too small or hard to open |
| Hipbelt stretch pocket | Snack or gloves | Fast access hiking | Poor item security |
| Removable strap pocket | Flexible accessory use | Modular styles | Movement and compatibility |
Shoulder pockets should be tested while walking, not only while standing. A pocket that feels fine still may bounce during fast movement. Hipbelt pockets should be tested after the belt is tightened, because a pocket can become hard to open when the belt curves around the body.
A pack does not always need both shoulder and hipbelt pockets. A lightweight daypack may use one shoulder pocket or one front secure pocket. A 35L pack may benefit from hipbelt pockets. A fast hiking pack may use shoulder pockets and skip hipbelt pockets. A large backpacking pack may use hipbelt pockets and keep shoulder straps cleaner.
The best choice follows body movement. If an item is needed often and is light, it can sit on the strap. If it is small and used during breaks, the hipbelt is often more comfortable. If it is valuable and must stay protected, an internal or upper zipper pocket may be safer.
What Not To Take Backpacking?
Backpacking becomes easier when unnecessary items are removed. Heavy extras, duplicate clothing, oversized toiletries, full-size tools, bulky cotton items, too much cookware, and rarely used gadgets can make a pack uncomfortable. A good backpack layout should support smart packing instead of encouraging people to carry too much.
Overpacking creates several design problems. Heavy items placed in front pockets pull the pack backward. Too many small items make organization messy. Bulky extras stretch mesh pockets and stress zippers. Oversized side items make the pack wider and more likely to brush against branches or rocks. A large capacity pack with weak compression can feel unstable when partly filled or badly loaded.
Items often reduced or removed include:
Extra shoes unless truly needed.
Large towel instead of compact quick-dry towel.
Duplicate heavy clothing.
Full-size shampoo or large toiletries.
Heavy cookware for simple routes.
Too many electronic accessories.
Large first-aid kit beyond route needs.
Cotton layers that stay wet.
Multiple knives or tools.
Oversized camera gear unless photography is the main goal.
The backpack can help users avoid poor loading by guiding where items go. A slim internal pocket can hold keys and card. Hipbelt pockets can hold snacks so users do not carry too many loose bars in the main compartment. Compression straps can reduce extra volume. A front stash pocket can hold only soft, light items. Side pockets can be shaped for water instead of random heavy gear.
| Item Type | Better Choice | Backpack Design Help |
|---|---|---|
| Large towel | Compact quick-dry towel | Front mesh or outer pocket |
| Duplicate clothing | Layer plan | Main compartment with compression |
| Full-size toiletries | Small travel containers | Small internal pouch |
| Heavy cookware | Compact set | Keep close to back |
| Loose small items | Small organizer | Upper zipper or internal pocket |
| Wet cotton clothing | Quick-dry layers | External wet pocket |
| Extra tools | One compact tool | Secure small pocket |
A practical hiking backpack should not simply hold more. It should help carry better. Good pocket layout encourages lighter, cleaner packing and prevents unstable loading.
Where Should Wet Gear Go?
Wet gear should go outside the dry main compartment or inside a separated pocket. Rain shells, damp gloves, towels, muddy socks, wet tent fly, or soaked cap should not sit against dry clothing, food, electronics, or sleep gear. Front mesh pockets, woven stash pockets, lower wet storage, side compression areas, and external straps can all help.
Wet gear storage matters because weather changes fast on a trail. If a rain jacket is wet, users need somewhere to place it quickly. If the only option is the main compartment, dry layers can become damp. If wet items hang loosely from straps, they may swing, snag, or fall. A defined wet gear area keeps the pack cleaner and easier to use.
| Wet Item | Better Storage Area | Design Detail |
|---|---|---|
| Rain shell | Front mesh or stash pocket | Fast access and airflow |
| Wet gloves | Front pocket or side pocket | Avoid mixing with dry gear |
| Damp towel | Mesh pocket | Helps drying |
| Muddy socks | External pocket or small pouch | Keeps main compartment clean |
| Wet tent fly | External straps or lower area | Needs stronger contact fabric |
| Trekking poles | Side compression or pole loops | Avoid sharp pressure on fabric |
| Umbrella | Side pocket with upper strap | Needs height control |
Drainage should be considered if the pocket regularly holds wet items. Mesh naturally drains, but it can be weaker. Woven pockets can be stronger, but may trap moisture. Drain eyelets can help, but they must be placed carefully to avoid tearing or uncomfortable contact. The lower corner of a wet pocket should be strong enough to handle weight when fabric is damp.
Wet gear storage also affects odor and cleaning. Packs used in rainy areas, summer camps, mountain routes, or travel adventure programs often need exterior pockets that dry faster and wipe clean more easily. If the pack will be used often in muddy or wet places, simple external storage can be better than complex hidden compartments.
A good wet gear plan protects dry items, keeps the trail routine simple, and extends the useful life of the pack. The user should not need to choose between soaking the main compartment and tying wet clothing loosely outside. The pack should already provide a better place.
How Do Custom, Sample, And Price Work?

A hiking backpack project becomes reliable when the idea is turned into clear specifications: capacity, fabric, strap system, back panel, pocket layout, reinforcement, logo method, packing, quantity, and timing. Price changes with structure, not only size. A smaller fast hiking pack with vest-style straps and stretch pockets may cost more than a larger simple pack. A strong sample should prove comfort, storage, stitching, and loaded shape before bulk work begins.
Outdoor backpacks have many hidden cost drivers. A clean 22L daypack with two side pockets, soft straps, and one front stash pocket can stay efficient. A 35L hiking pack with shaped shoulder straps, hipbelt pockets, hydration sleeve, front mesh, rain cover storage, reinforced base, and compression straps needs more materials, more cutting, more sewing steps, and more checking. The difference is not only fabric consumption. It is the full structure.
The safest way to control cost is not to remove important parts. A weaker bottom panel may reduce cost slightly but can create early abrasion. Shallow bottle pockets may save sewing time but lead to poor trail use. Thin shoulder foam may look fine at first but can flatten after repeated load. Better cost control comes from keeping the essential trail functions and simplifying low-value decoration.
A practical custom plan should confirm these details early:
| Area | What To Confirm | Why It Matters |
|---|---|---|
| Capacity | 15L, 20L, 30L, 45L, 60L or target size | Decides body size, fabric use, support level |
| Use scene | Day hike, fast hike, weekend route, camping, travel-outdoor | Guides fabric, straps, pockets, and load support |
| Target load | Approximate kg or real gear list | Helps choose strap foam, hipbelt, and back structure |
| Fabric | Nylon, polyester, ripstop, Oxford, coated fabric | Affects durability, weight, hand feel, price |
| Reinforcement | Bottom, strap roots, side panels, zipper ends | Protects high-stress areas |
| Back system | Flat padding, air mesh, spacer mesh, frame sheet | Affects comfort, heat, and structure |
| Straps | J-strap, S-strap, vest-style, sternum strap, hipbelt | Controls fit and load stability |
| Pockets | Side bottle, front mesh, shoulder, hipbelt, lid, internal | Affects access, sewing time, and user experience |
| Hydration | Sleeve, hanger loop, hose exit, hose keeper | Needed before pattern work starts |
| Logo | Print, patch, label, puller, reflective mark | Must match fabric and stress area |
| Packing | OPP bag, hangtag, barcode, carton label, display need | Affects presentation and carton planning |
| Quantity | Quantity by color and style | Affects material sourcing and unit cost |
| Timing | Sample date and bulk delivery date | Helps plan material, approval, and production slot |
For many custom bag projects, 500 pcs per design is a common MOQ direction. Simple styles may be reviewed at 200–300 pcs depending on material, structure, and trim availability. Sampling often takes 5–7 days, while simple styles may take 2–3 days. Bulk production commonly takes 20–30 days after approval and confirmed details. Sample fees may be refunded or deducted when the order reaches 2000 pcs.
What Makes The Best Hiking Backpack Brand?
A strong hiking backpack line is built through clear use scenes, reliable material choices, comfortable carry, practical storage, and repeatable quality. The strongest products are rarely remembered for one flashy feature. They earn trust because they feel right after miles of use: straps sit well, pockets make sense, zippers move smoothly, and high-wear areas hold up.
A good outdoor line usually has a clear product ladder. A 20L daypack should not simply look like a smaller 60L pack. A 60L backpacking pack should not feel like an enlarged school bag. Each capacity should have its own role.
| Product Role | Better Design Direction |
|---|---|
| Light daypack | 15–25L, soft straps, side pockets, front stash |
| Trail daypack | 20–30L, better back panel, bottle access, rain shell storage |
| Fast hiking pack | Close fit, strap pockets, soft-flask option, low bounce |
| Weekend pack | 30–45L, hipbelt, compression, front storage |
| Multi-day pack | 45–65L+, frame support, strong hipbelt, large storage |
| Outdoor-travel pack | Cleaner shape, useful organization, still comfortable for short trails |
The product also needs consistency. If one color uses soft mesh and another color uses stiff mesh, the side pockets may feel different. If one batch has thicker strap foam and another batch has thinner foam, comfort changes. If logo placement moves too close to a seam, the front panel can look uneven. Good hiking packs depend on small details staying stable.
A strong hiking backpack line often shares a recognizable material language: similar fabric texture, trim style, zipper puller, logo placement, and color tone. But the structure should change by use. Small packs stay lighter. Mid-size packs add support. Large packs use stronger load control. This creates a product family that feels connected without forcing every style into the same pattern.
How Is A Sample Developed?
A hiking backpack sample should prove capacity, shape, fabric feel, strap comfort, pocket logic, zipper function, reinforcement, logo placement, and loaded balance. The process starts from reference images, sketches, size targets, or a tech pack, then moves into material review, pattern making, cutting, sewing, logo trial, load check, and revision.
The most useful sample request includes real gear information. A 28L hiking pack for day trails may carry a rain shell, 1L bottle, snacks, phone, first-aid kit, gloves, and small tools. A 40L weekend pack may carry layers, compact sleep gear, food, and more water. These loads change the pocket layout and strap system.
A practical sample path can look like this:
| Step | Work Detail | What Should Be Checked |
|---|---|---|
| Use review | Define trip type, capacity, gear list, weather need | Does the structure match the route? |
| Material selection | Pick body fabric, base fabric, mesh, foam, webbing, lining | Weight, durability, color, coating |
| Structure plan | Decide opening, pockets, straps, back panel, belt | Is the layout easy to use? |
| Pattern work | Build panels, seam allowance, pocket depth, strap curve | Shape and sewing feasibility |
| Cutting | Cut fabric, lining, foam, mesh, trims | Panel accuracy and fabric direction |
| Sewing | Assemble body, pockets, straps, lining, webbing | Stitching, symmetry, stress areas |
| Logo trial | Test print, patch, label, puller, reflective detail | Placement, color, durability |
| Load check | Fill the pack with reasonable weight | Comfort, balance, pocket access |
| Revision | Adjust strap curve, pocket depth, fabric, zipper, shape | Move toward approval |
A first sample often reveals issues that are hard to see in drawings:
The bottle pocket is too shallow for a 1L bottle.
The front mesh stretches too much when filled.
The shoulder strap edge rubs the neck.
The hipbelt pocket is hard to open after tightening.
The hydration hose exit is too low or too high.
The main zipper becomes tight when the pack is full.
The bottom fabric needs stronger reinforcement.
The logo looks too close to a curved seam.
These are normal findings when handled early. The sample is not just a visual model. It is a working object used to check comfort, access, material behavior, and production feasibility. Moving into bulk with a sample that only looks good but carries poorly can create larger issues later.
What Affects Hiking Backpack Price?
Hiking backpack price is affected by capacity, fabric type, fabric mix, reinforcement, strap system, back panel, hipbelt, pocket count, zipper choice, webbing, buckles, logo method, packing, quantity, and checking requirements. The largest cost differences often come from structure and labor, not only fabric area.
A simple hiking daypack may include one main compartment, two side pockets, padded shoulder straps, and one front pocket. A more advanced pack may include hydration sleeve, air mesh back, shaped foam straps, hipbelt pockets, rain cover pocket, front stretch pocket, side compression, trekking pole loops, and reinforced bottom. Each detail adds material and sewing time.
| Cost Area | Efficient Direction | Higher-Cost Direction | Why It Changes |
|---|---|---|---|
| Main fabric | Polyester Oxford | Ripstop nylon, coated nylon | Strength, weight, hand feel |
| Base fabric | Same as body | 600D / 840D / 1000D reinforcement | Abrasion protection |
| Shoulder straps | Simple padded straps | Shaped foam straps with air mesh | Comfort and labor |
| Back panel | Flat padding | Air mesh, spacer mesh, frame sheet | Breathability and structure |
| Hipbelt | Webbing strap | Padded belt with pockets | Load transfer and sewing steps |
| Pockets | Few simple pockets | Mesh, stretch, lid, hipbelt, strap pockets | Function and assembly time |
| Hydration | No sleeve | Sleeve, hanger, hose exit, keeper loops | Added pattern and sewing |
| Zippers | Standard zipper | Water-resistant zipper, custom puller | Function and appearance |
| Webbing / buckles | Basic trim | Stronger buckles, special webbing | Durability and feel |
| Logo | One print or label | Patch, embroidery, reflective, multiple marks | Material and process |
| Packing | OPP bag | Hangtag, barcode, display card, color box | Labor and carton space |
| Checking | Basic visual check | Load, pull, zipper, pocket, fit checks | Time and consistency |
Cost should be adjusted with purpose. Removing a decorative zipper pull may be harmless. Removing strap reinforcement may be risky. Reducing the number of interior pockets may simplify production. Making the side bottle pocket too weak may damage the user experience. Good cost control protects the parts hikers feel most: straps, back panel, bottle pockets, zippers, and bottom fabric.
Useful cost-control choices include:
Use reinforced fabric only in high-wear zones instead of the full shell.
Keep the pocket layout focused and avoid repeated storage functions.
Choose one clear logo method instead of several decorative marks.
Use standard zipper sizes where possible.
Avoid heavy packaging when hangtag and carton marking are enough.
Match strap structure to real load instead of overbuilding small packs.
Confirm fabric color and logo method before sampling.
A hiking backpack does not need every premium detail to perform well. It needs the right details in the right places.
How Long Does Sampling Take?
Sampling often takes 5–7 days for many custom bag styles. Simple styles may take 2–3 days. Hiking backpack samples may need more time when they include mixed fabrics, shaped shoulder straps, padded hipbelt, hydration sleeve, stretch pockets, frame sheet, special zippers, reflective parts, or repeated fit revisions.
Timing depends on clarity and complexity. A 20L daypack with standard fabric and simple pockets can move faster. A 35L hiking pack with hipbelt pockets, hydration routing, front mesh, compression straps, and reinforced bottom needs more pattern work and checking. A fast hiking pack with strap pockets may also need extra adjustment because front pocket weight affects movement.
| Stage | Time Direction | Main Work |
|---|---|---|
| Detail review | 0.5–1 day | Confirm size, use, fabric, layout, logo, quantity |
| Material preparation | 1–2 days | Prepare fabric, mesh, foam, webbing, zipper, buckle |
| Pattern work | 1–2 days | Create body, straps, pockets, back panel, belt |
| Cutting | 0.5–1 day | Cut shell, lining, mesh, foam, trims |
| Sewing | 2–4 days | Assemble body, pockets, straps, lining, trims |
| Logo work | 0.5–1 day | Print, patch, label, puller, reflective detail |
| Load and function check | 0.5–1 day | Test shape, strap comfort, zipper, pockets |
| Revision | Depends on change | Adjust structure, material, pocket, strap, logo |
Common causes of delay include:
Capacity is not fixed.
Fabric direction changes after pattern work starts.
Pocket layout changes after cutting.
Logo artwork is not ready.
Special mesh or buckle needs sourcing.
Hydration sleeve is added late.
Rain cover storage is added after the first sample.
Strap shape needs comfort revision.
Color approval is delayed.
Packing requirements are added at the end.
The fastest path is a clear starting package: use scene, capacity, rough size, reference image, fabric direction, pocket needs, strap preference, logo file, quantity, packing plan, target date, and destination. When these details are ready, the first sample can be much closer to the final product.
Speed matters, but the sample should not skip load and fit checks. A hiking backpack that is approved too quickly may show problems after bulk work has started. One careful revision during sampling is usually better than fixing the same issue across hundreds or thousands of pieces.
How Is Bulk Quality Checked?
Bulk quality for hiking backpacks should be checked through material inspection, cutting accuracy, stitching, zipper function, strap strength, pocket usability, load shape, logo placement, color consistency, and packing accuracy. Hiking packs have many stress areas, so checking should happen during production as well as at the finished stage.
Quality issues often appear at stress points first. Shoulder strap roots loosen. Side pockets tear. Zipper ends pull apart. Buckles slip. Bottom panels scuff too quickly. Front mesh loses recovery. Hipbelt pockets become uneven. A pack may look fine empty but show shape or fit problems when loaded.
A practical quality check plan:
| Check Stage | What To Check | Common Risk |
|---|---|---|
| Incoming material | Fabric color, coating, mesh stretch, foam density, webbing, buckles | Material mismatch |
| Cutting | Panel size, fabric direction, reinforcement pieces | Uneven shape |
| Strap assembly | Foam placement, stitch density, strap root strength | Shoulder strap failure |
| Pocket assembly | Bottle pocket depth, elastic tension, mesh edge | Bottle drop or tearing |
| Zipper sewing | Smooth pull, alignment, zipper end strength | Jamming or seam stress |
| Back panel | Padding position, mesh comfort, panel shape | Hot spots or uneven feel |
| Hipbelt | Buckle function, pull strength, pocket access | Poor load transfer |
| Logo | Position, color, adhesion, stitch quality | Uneven appearance |
| Finished pack | Size, shape, compression, loaded balance | Difference from approved sample |
| Packing | Hangtag, barcode, carton mark, color label | Mixed SKU or wrong label |
Load-related checking is especially useful. The pack should be filled with reasonable weight to see whether the shoulder straps sit correctly, the hipbelt supports the load, the compression straps pull evenly, and pocket access still works. Empty-bag checking cannot reveal every problem.
High-priority areas include:
Shoulder strap root reinforcement.
Hipbelt connection.
Bottom panel seams.
Side bottle pocket depth and recovery.
Front mesh strength.
Zipper ends and puller function.
Hydration sleeve hanger and hose exit.
Compression strap attachment.
Sternum strap adjustability.
Logo position and finish.
Carton packing to avoid deformation.
Bulk consistency depends on clear approved sample records. Material code, color, zipper type, webbing size, buckle model, foam thickness, pocket fabric, stitching details, logo placement, and packing method should be confirmed before production begins. When these details are loose, variation becomes easier to miss.
What Should A Quote Request Include?
A useful quote request should include backpack type, capacity, intended use, target load, fabric direction, strap system, pocket layout, logo artwork, quantity, packing need, delivery schedule, and destination. For hiking backpacks, gear details are especially helpful because straps, pockets, and reinforcement depend on what the pack will actually carry.
A request such as “quote outdoor backpack” is too broad. It could mean a 15L daypack, 25L hiking pack, 35L weekend pack, 50L trekking pack, hydration pack, youth camp pack, or outdoor-travel hybrid. Each style uses different fabric, trims, pocket structure, and checking steps.
| Information To Send | Useful Detail |
|---|---|
| Backpack type | Day hiking, fast hiking, weekend, backpacking, hydration, outdoor-travel |
| Capacity | 15L, 20L, 30L, 45L, 60L or size target |
| Intended use | Trail, camping, outdoor school, travel, club program |
| Target load | Approximate kg or main gear list |
| Fabric | Nylon, polyester, ripstop, Oxford, reinforced bottom |
| Water resistance | Coated fabric, zipper flap, rain cover pocket |
| Strap system | J-strap, S-strap, vest-style, sternum strap, hipbelt |
| Back panel | Flat padding, air mesh, spacer mesh, frame sheet |
| Pocket layout | Side bottle, front mesh, hydration sleeve, hipbelt, strap pockets |
| Logo | Vector file, size, position, preferred method |
| Quantity | Pieces by style and color |
| Packing | OPP bag, hangtag, barcode, carton label, display card |
| Timing | Sample target date and bulk delivery date |
| Destination | Country, port, warehouse, or forwarder |
| Special details | Pole loops, reflective trim, name label, rain cover, laptop sleeve |
The most important detail is the real use scene. If the pack is for short hikes, the structure can stay light and simple. If it is for weekend camping, support and pocket depth become more important. If it is for youth programs, reinforced seams and easy cleaning may matter more. If it is for outdoor retail, color consistency, logo placement, hangtag, and carton labeling should be planned early.
A complete request also reduces revisions:
If the bottle size is known, side pockets can be shaped correctly.
If the target load is known, strap foam and hipbelt support can be reviewed.
If wet gear is expected, front mesh or external stash storage can be included.
If hydration is needed, hose routing can be built into the first sample.
If rain cover storage is needed, the pocket can be planned early.
If logo method is fixed, the fabric surface can be selected correctly.
For new outdoor backpack projects, send reference photos, capacity, size target, fabric direction, pocket layout, strap preference, logo file, quantity, packing needs, deadline, and destination. Jundong can review material, structure, sample, logo, quality checks, packing, and delivery details based on the product’s intended route and load.
A hiking backpack succeeds when the design supports real movement. Fabric should protect the wear zones. Straps should match the load. Pockets should follow real access habits. Samples should be checked with weight inside. Bulk goods should stay close to the approved sample. When these details work together, the pack feels better on the trail and performs better after repeated use.