 Skip to content

How to Design Kid-Friendly Size, Graphics, Wheels, and Safety Details?
Good children’s luggage is not an adult suitcase reduced to 70% scale and covered with cartoon artwork. A child interacts with a suitcase differently: the hand is smaller, the pulling angle is lower, body weight is lighter, walking speed is slower, and control can change dramatically when the case is packed. A playful appearance may attract attention, but poor proportions can make the product frustrating within minutes of real travel.
A well-developed kids’ suitcase should combine age-appropriate dimensions, controlled empty weight, usable internal capacity, an adjustable trolley position, easy rolling, stable geometry, durable graphics, secure decorative details and destination-specific safety review. The physical sample should be assessed while packed and moving—not only while standing empty. Size, trolley height, wheels, shell, lining, weight, graphics and transport protection should work as one system.
The most useful early decision is therefore not “Which character should go on the front?” It is: Who is expected to pull this suitcase, what will be packed inside, and how will the case behave when that child is tired, turning quickly, crossing a doorway or lifting it over a small step?
Jundong’s luggage development scope includes kids luggage, carry-on luggage, soft luggage, EVA luggage and rolling travel products. Core development details include body structure, wheels, trolley handle, lining, zipper, hand carry handle, weight, dimensions, graphics, packing and transport-related checks.
What Makes Luggage Kid-Friendly?
Kid-friendly luggage is defined less by cartoon artwork and more by whether a child can control the finished case comfortably and predictably during real travel. Size, empty weight, packed balance, wheel behavior, trolley height, grip shape, zipper access, internal organization and exposed components should all fit the intended age group. The product should still work properly after clothing, shoes and travel items have changed its weight distribution.
A useful way to judge the design is simple: put the intended contents inside, extend the trolley, and watch what happens when the child walks, turns, stops, lifts and opens the case.
If the child has to raise the shoulder to hold the trolley, repeatedly kicks the case with the heel, struggles to start the wheels, loses control during a sharp turn, or needs an adult every time the zipper is opened, the suitcase may look child-oriented without actually being child-friendly.
For luggage development, wheels, trolley handles, shell or body structure, lining, dimensions, weight and transport protection should all be verified during sampling rather than treated as decorative details.
A practical evaluation can begin with these areas:
| Design Area | What Good Kid-Friendly Design Should Achieve | Common Problem |
|---|---|---|
| Case size | Fits the child and intended contents | Adult geometry simply scaled down |
| Empty weight | Leaves enough weight allowance for packing | Case already feels heavy when empty |
| Trolley | Comfortable natural pulling position | Handle too high or too low |
| Wheels | Smooth but controllable | Extremely free rolling with weak directional control |
| Carry handle | Easy to reach and grip | Oversized adult-style handle |
| Zipper | Easy to find and operate | Small or stiff pullers |
| Interior | Simple loading and organization | Too many difficult compartments |
| Graphics | Appropriate for intended age | Outgrown visually too quickly |
| Decorations | Secure and practical | Raised parts snag or loosen |
| Loaded stability | Remains controlled after packing | Tips or tracks poorly with uneven load |
Age-Appropriate Proportions
Children’s luggage should be designed around body proportions rather than using only traditional luggage labels such as “16-inch” or “18-inch.”
Two cases carrying the same inch designation can feel completely different because of:
- shell width;
- depth;
- wheel height;
- trolley position;
- carry-handle location;
- overall weight.
A shorter, deeper case may be easier for one age group to control than a tall narrow product with similar capacity.
For early prototype planning, the following size bands can help organize development. They should be treated as starting references for sample comparison, not universal standards.
| Intended Age Direction | Starting Case Height | Main Development Focus |
|---|---|---|
| 3–5 years | Approx. 14–16 in | Low weight, compact geometry |
| 6–8 years | Approx. 16–18 in | Capacity without difficult handling |
| 9–12 years | Approx. 18–20 in | More storage with mature styling |
The finished sample matters more than the nominal size.
A 16-inch case that is unusually deep or heavy may be less manageable than a carefully proportioned 18-inch design.
The useful comparison is therefore:
child height + case height + trolley position + packed weight
rather than case height alone.
Manageable Packed Weight
The most important weight is not the empty suitcase weight. It is the weight after packing.
Consider this simple example:
Empty luggage: 2.0 kg
Clothing: 2.2 kg
Shoes: 0.7 kg
Books and travel items: 0.6 kg
Finished load: 5.5 kg
The child is controlling 5.5 kg during travel, even though the product specification may advertise only a 2 kg case.
Packed weight changes:
- starting force;
- turning behavior;
- stopping distance;
- trolley flex;
- wheel loading;
- lifting difficulty.
The internal layout can also change how that weight feels.
If heavy shoes are packed close to one side, the suitcase may lean or resist turning in one direction.
If the same weight is distributed more evenly near the base, handling may improve.
That is why a sample should be tested at several conditions:
Empty
Check basic wheel and trolley function.
Half loaded
Check normal everyday maneuverability.
Fully loaded
Check balance, turning, lifting and stability.
Reducing empty weight is useful, but structural strength should not be sacrificed around wheel housings, trolley mounting areas, handles or the base.
The goal is manageable weight with sufficient structural support.
Easy Rolling and Turning
A child-friendly suitcase should move easily without feeling uncontrolled.
Very low rolling resistance can sound ideal, but a case that moves too freely on polished flooring or a slight slope can become difficult for a younger child to stop.
The wheel system should therefore balance:
smooth rolling + predictable direction + stable turning
Useful sample checks include:
- starting from rest;
- pulling straight for 10 meters;
- turning 90° left and right;
- making a 180° turn;
- stopping suddenly;
- crossing a small floor transition;
- moving with uneven internal loading.
These distances and movements are useful for prototype comparison rather than formal compliance criteria.
Watch the child rather than only the wheels.
If the child repeatedly lifts the trolley to change direction, the wheel system may not be responding naturally.
If the suitcase swings far to the side during every turn, the relationship between wheel spacing, case width and trolley position should be reviewed.
Wheel performance is therefore a product-level issue, not simply a choice between “two wheels” and “four wheels.”
Child-Reachable Handles
A trolley handle should allow the child to walk with a relaxed shoulder, comfortable elbow angle and natural wrist position.
The common problem is using an adult-style telescopic system with only the maximum height reduced.
The lowest practical locking position can be more important for younger users.
During sample fitting, observe the child from the side.
Look for:
- raised shoulder;
- locked elbow;
- wrist bending;
- trolley contacting the heel;
- excessive backward reach.
Then watch from behind.
The suitcase should follow the child without forcing the arm far away from the body.
The top carry handle also needs separate attention.
Children may use it to lift the case:
- into a car;
- over a small step;
- onto a bed;
- onto a luggage rack with adult help.
The grip should therefore be easy to locate and should not require the child to insert fingers into narrow or awkward openings.
For a product covering several ages, multiple trolley locking positions can provide more flexibility than one fixed height.
Simple Zippers and Interior Layout
A suitcase can be physically small and still feel complicated to a child.
Too many compartments, stiff dividers and hidden pockets may make packing harder rather than easier.
For younger age groups, a clear layout usually works better:
- one main compartment;
- one visible mesh or zipper pocket;
- simple compression straps;
- easy-to-find zipper pullers.
Older children can use more organization, but every additional compartment should solve a real need.
Zipper operation deserves particular attention.
A child should be able to identify the puller, hold it securely and move it around corners without excessive force.
During testing, load the suitcase before judging the zipper.
A zipper that operates smoothly on an empty sample may become much harder to close when clothing presses against the lid.
A useful loaded check is:
- Fill the case with the planned contents.
- Close the internal straps.
- Place the case flat.
- Zip around the full perimeter.
- Repeat several times.
- Check whether the child needs to compress the shell with the other hand.
If strong force is needed every time, either the usable capacity or closure design needs adjustment.
Graphics That Grow With the User
Children need to like the suitcase, but graphics should also remain appropriate long enough for the product to be used repeatedly.
Very young collections can successfully use:
- animals;
- large character faces;
- vehicles;
- dinosaurs;
- bright simple icons.
Older age groups often respond better to:
- sport themes;
- travel graphics;
- space illustrations;
- cleaner characters;
- geometric patterns;
- controlled color combinations.
The visual age of the artwork matters because luggage often lasts longer than clothing.
A graphic that feels perfect at age four may feel too juvenile at age six even though the physical suitcase still fits.
One useful approach is to keep the core suitcase platform consistent while changing graphic treatments by age.
For example:
same wheel system + same trolley + same zipper architecture
with
different artwork + colors + graphic scale
This can create a recognizable collection without forcing every age group into identical styling.
Graphic processes should also be confirmed on the actual surface. Jundong’s project controls call for logo size, color, placement, clarity and attachment to be checked during sampling because execution varies by material and product structure.
Fewer Fragile Decorations
Kids’ luggage often becomes more attractive when ears, horns, badges, eyes or other raised details are added.
But every external component becomes another item that can:
- snag;
- bend;
- scratch;
- loosen;
- increase packing volume;
- become damaged in transport.
The strongest design is therefore not necessarily the one with the greatest number of decorative parts.
Before adding a 3D component, ask whether the same visual identity can be created through:
- printing;
- molded shell geometry;
- embroidery;
- a flat patch;
- color blocking.
If a raised detail is essential, inspect how it attaches to the main structure.
A useful prototype review includes:
Pull
Does normal hand force loosen it?
Twist
Does repeated rotation damage the attachment?
Rub
Does the surface scratch neighboring luggage?
Pack
Does it create unnecessary carton space?
Drop/impact review
Does it take direct impact before the main shell?
This is especially important on younger-age products, where attached decorative components may also need additional safety review depending on the destination and classification.
Safety Built Into the Structure
Safety should not be treated as something added later through warning labels.
It should begin with the physical design.
Important areas include:
- accessible edges;
- trolley movement;
- finger-accessible gaps;
- zipper pullers;
- wheel housings;
- straps;
- attached decorations;
- hard protrusions.
For example, a telescopic trolley should be observed during both extension and retraction.
Where do the child’s fingers naturally go?
Does a moving gap become smaller?
Can the release button be operated without placing fingers near the tube joint?
Likewise, wheel housings should be checked from a child’s height. A lower component that rarely contacts an adult may sit directly beside a child’s ankle.
The same logic applies to decorative pieces.
A strongly attached decoration may be acceptable from a durability perspective, but the design still needs to consider what happens if it becomes damaged after repeated use.
For children’s projects, destination-specific tests and labels may be required, and these should be reviewed according to product type rather than assuming every children’s suitcase follows the same requirements. Jundong’s compliance rules specifically require children’s product claims to be supported by the actual product, target destination and applicable testing documentation.
Stable When Loaded
Stability cannot be judged properly with an empty sample.
A case may stand perfectly upright when empty but behave differently after:
- shoes are packed on one side;
- a book is placed near the lid;
- a front pocket is fully loaded.
This is particularly important for narrow four-wheel cases.
A practical development check can use several loading arrangements:
| Test Load | Purpose |
|---|---|
| Even load | Baseline stability |
| Heavy rear load | Check trolley-side balance |
| Heavy front load | Check forward tipping |
| Heavy side load | Check lateral stability |
| Full top section | Check center-of-gravity shift |
Then repeat:
- standing;
- turning;
- opening;
- trolley extension;
- slight tilting.
For prototype comparison, an internal tilt check can also gradually increase the angle of the test surface and record when wheels begin to lift. This can be useful for comparing two geometries, but it should not be presented as a formal regulatory stability test unless the relevant standard and test method are being followed.
The key is repeatability.
If Case A and Case B are compared, use:
- the same load;
- the same load position;
- the same surface;
- the same direction.
Only then does the comparison reveal whether the geometry has improved.
Easy Independence
One of the best signs of child-friendly design is that the child can complete ordinary travel actions with less adult intervention.
A practical usability session can observe whether the child can:
- extend the trolley;
- pull the case;
- change direction;
- stop it;
- lift it briefly;
- open the zipper;
- identify their belongings;
- close the case again.
The purpose is not to expect a young child to manage every travel situation independently.
It is to identify unnecessary difficulty.
If four out of five children struggle with the same zipper corner, that is useful product information.
If several users automatically hold the trolley below the intended grip because the actual handle feels too high, that is another clear design signal.
Real behavior is often more valuable than asking whether a sample “looks suitable for children.”
What Should Be Confirmed Before Production?
Before the kids’ luggage structure is locked, confirm at least the following:
| Item | Approval Detail |
|---|---|
| Finished dimensions | L × W × H |
| Empty weight | Actual physical sample |
| Loaded test weight | Defined test condition |
| Trolley positions | Actual lock heights |
| Carry handle | Position and grip |
| Wheels | Type, tread, diameter, housing |
| Usable capacity | Real packing test |
| Zipper | Loaded operation |
| Graphics | Color, scale, position |
| Decorations | Attachment and projection |
| Lining | Fit and internal finish |
| Labels | Age/warning details when required |
| Packing | Wheel and shell protection |
The approved physical sample should then work together with the written specifications.
That matters because written data cannot fully describe wheel noise, trolley movement, hand feel or the way a case turns under load.
Conversely, the physical sample alone cannot reliably preserve exact dimensions, material codes, label versions or packing instructions.
Jundong’s quality process uses approved samples and production details as references for later inspection, with checks extending through materials, production, finished goods and packing.
A suitcase becomes genuinely kid-friendly when the size fits the body, the packed weight remains manageable, the wheels behave predictably, the handles fall naturally into the child’s reach, the graphics fit the age group, and safety concerns have been addressed in the physical structure rather than added only after the design is complete.
How Do You Choose the Right Kids Luggage Size?
The right kids luggage size is the smallest case that carries the planned travel load while remaining comfortable to pull, turn, stop, lift and open. Age helps narrow the starting dimensions, but child height, empty weight, packed weight, trolley position, usable capacity, wheelbase and travel use should decide the final specification. A physical sample should be tested loaded, because an empty suitcase can give a misleading impression of size and handling.
A useful sizing process should therefore move in this order:
intended age → body proportions → contents → packed weight → case dimensions → trolley height → wheel geometry → loaded-use test
Nominal labels such as “16-inch” or “18-inch” are useful for product organization, but they do not tell the whole story. Two 16-inch cases can have very different depth, wheel height, trolley geometry and empty weight.
For luggage development, dimensions, weight, wheels and trolley handles are all important sample checks rather than independent cosmetic details.
Start With Age and Body Size
Age is a practical first filter because a four-year-old and a ten-year-old have very different reach, strength and control.
For early prototype work, these case-height bands can help organize development:
| Intended Age | Starting Case Height | Approx. Metric Height | Main Design Focus |
|---|---|---|---|
| 3–5 years | 14–16 in | 356–406 mm | Compact body, low weight |
| 6–8 years | 16–18 in | 406–457 mm | More capacity with easy control |
| 9–12 years | 18–20 in | 457–508 mm | More storage with mature proportions |
These figures are development references, not universal standards.
A child’s height should then be considered together with the suitcase.
A case can be technically short but still feel large if it is very deep or wide. Conversely, a slightly taller narrow case may be easier to pull if the trolley and wheel geometry fit the user better.
During a fitting session, watch whether the child can:
- stand naturally beside the suitcase;
- reach the trolley grip;
- walk without shoulder elevation;
- turn without moving the arm far from the body;
- stop the suitcase without struggling.
If the child has to adapt posture to the luggage, the dimensions need more work.
Case Height vs Total Height
“Case height” and “overall luggage height” should not be confused.
The body may measure 400 mm, but the finished suitcase can become taller after adding:
- wheel housings;
- feet;
- top handle;
- shell projections.
This matters for both child usability and travel compatibility.
A clear specification should record at least:
| Dimension | What It Means |
|---|---|
| Body height | Main suitcase shell/body only |
| Overall height | Finished product including wheels |
| Overall width | Widest finished part |
| Overall depth | Deepest finished part |
| Trolley height | Ground to grip at each lock position |
For example:
Body: 390 mm
Wheel assembly: 45 mm
Finished height: approximately 435 mm
That difference is important.
If only the body size is listed, the product may appear smaller on paper than it actually feels beside a child.
The same issue occurs with width. Large side handles or decorative ears can increase the physical footprint even if the shell itself remains unchanged.
Empty Weight vs Packed Weight
Children do not travel with empty luggage.
This sounds obvious, but many size decisions are still made from an empty sample.
Consider a case that weighs:
2.1 kg empty
Then add:
Clothing: 2.0 kg
Shoes: 0.8 kg
Books and toys: 0.6 kg
Total: 5.5 kg
The child is now controlling more than twice the original weight.
Packed load changes:
- rolling resistance;
- turning effort;
- braking control;
- trolley flex;
- wheel loading;
- lifting difficulty.
That means size and weight cannot be separated.
A larger suitcase encourages more packing. More packing creates more weight. More weight changes how the same wheel and trolley system performs.
A useful sample program should therefore use at least three conditions:
| Condition | Purpose |
|---|---|
| Empty | Basic product weight and movement |
| Half loaded | Normal travel handling |
| Fully loaded | Stability, turning and lifting |
The strongest design is not necessarily the lightest possible case.
Removing too much structure around wheel mounts, trolley supports or the base can reduce durability.
The goal is low unnecessary weight while keeping load-bearing areas properly supported.
Capacity by Actual Contents
Liters are useful, but actual packing tests are more informative.
A 17-liter suitcase does not automatically provide more useful storage than a 15-liter case.
Internal space can be reduced by:
- trolley tubes;
- wheel housings;
- curved corners;
- internal dividers;
- lining structure.
For younger children, capacity should be planned around a realistic travel load.
A simple test set might include:
- 3–4 clothing changes;
- pajamas;
- underwear;
- toiletries;
- one pair of shoes;
- a comfort item;
- one activity book.
Older children may also carry:
- larger shoes;
- electronics;
- jacket;
- travel accessories.
Instead of starting from:
“Make it 18 liters,”
a stronger development brief would be:
“Must fit four clothing sets, one pair of children’s shoes and a small toiletry pouch while leaving enough space for easy zipper closure.”
That gives the development team something measurable.
It also prevents unnecessary oversizing.
An oversized children’s suitcase often becomes a heavy suitcase simply because available space gets filled.
Internal Dimensions Matter
External dimensions should never be the only dimensions on the specification.
The product should also record usable internal space.
Suppose the external body measures:
420 × 300 × 190 mm
The usable interior may be smaller because of:
- shell thickness;
- lining;
- trolley channels;
- wheel recesses.
For products intended around specific travel contents, internal measurements should be checked physically.
A useful record can look like:
| Measurement | Sample Result |
|---|---|
| External height | 435 mm |
| External width | 305 mm |
| External depth | 195 mm |
| Usable internal height | Confirm by sample |
| Usable internal width | Confirm by sample |
| Usable internal depth | Confirm by sample |
| Empty weight | Confirm by sample |
This prevents one common mistake: choosing a case because the external size looks correct, then discovering that the trolley structure consumes too much packing space.
Trolley Height and Pulling Angle
A children’s suitcase can have excellent dimensions and still feel wrong if the trolley is poorly positioned.
The grip should allow the child to walk with:
- relaxed shoulder;
- slightly bent elbow;
- neutral wrist;
- enough distance between the suitcase and heel.
A trolley that is too high can force the shoulder upward.
A trolley that is too low can make the child lean sideways or pull the case too close to the feet.
For products covering several age groups, multiple locking heights are often more useful than one fixed position.
The specification should record each actual lock height from the floor.
For example:
Lowest position: ___ mm
Middle position: ___ mm
Highest position: ___ mm
Do not approve these dimensions only with an adult holding the sample.
A child should actually walk with it.
Observe:
Straight walking
Does the case follow naturally?
Tight turn
Does the child need to lift the trolley?
Sudden stop
Does the case continue moving into the child?
Reverse direction
Can the child change direction without twisting the wrist excessively?
Jundong’s luggage development rules specifically identify trolley handles, dimensions and weight as sample-review items, which is especially important for children’s products.
Width, Depth and Wheelbase
Height gets most of the attention, but width and depth strongly influence stability.
A tall, narrow suitcase can have a higher center of gravity relative to its base.
A very deep case may carry more, but it can also:
- extend farther behind the child;
- hit the heel;
- create more turning inertia;
- become awkward in narrow spaces.
Wheel spacing matters too.
A wider wheelbase generally provides more lateral support, but making the wheel assembly wider also increases the overall product footprint.
The useful relationship is:
body height + body width + depth + wheel spacing + load position
These should be evaluated together.
During prototype review, load the suitcase in several ways:
- Even load.
- Heavy items near the trolley side.
- Heavy items near the front.
- Heavy items on one side.
Then repeat:
- standing;
- rolling;
- turning;
- stopping.
If small changes in packing make the case unstable, the proportions may need adjustment.
Carry-On Compatibility
Carry-on compatibility can be valuable, especially for travel-oriented collections, but it should not override child ergonomics.
Airline cabin limits vary, so claims should be checked against the intended carriers or destination requirements instead of assuming one universal cabin size.
There are therefore two separate checks:
Can the child control the suitcase comfortably?
and
Does the finished size fit the intended baggage requirements?
For younger users, an adult carry-on format can simply be too large.
For older children, a compact cabin-size structure may work well if the weight and trolley geometry remain manageable.
When checking total size, measure the complete finished product where required, including:
- wheels;
- fixed handles;
- shell projections.
A label such as “18-inch carry-on” is less useful than:
Finished size: 455 × 315 × 205 mm including wheels
That gives a much clearer basis for both product development and travel planning.
Size and Graphic Proportion
Size also affects artwork.
A graphic that looks balanced on a 14-inch shell may appear too small on an 18-inch version.
If one visual concept is used across several sizes, artwork should usually be adjusted rather than enlarged mechanically.
For example:
14-inch case: large central character
16-inch case: same character + secondary graphic
18-inch case: character + supporting pattern
This keeps visual balance consistent across the collection.
Raised decorative features also change effective dimensions.
Ears, horns, wings or molded side elements may increase:
- carton size;
- stacking space;
- snagging exposure.
If the decorative structure extends 20 mm beyond each side, a 300 mm body may become approximately 340 mm wide in its finished physical footprint.
That difference can matter in retail packing and transport.
Growth Room Without Oversizing
It is reasonable to want a child to use the luggage for several years, but oversizing the product to “grow into” can reduce usability immediately.
A better approach is to create growth room through:
- adjustable trolley positions;
- slightly flexible capacity;
- less juvenile artwork;
- efficient internal layout.
Not simply through a larger shell.
For example, a 6-year-old may physically be able to pull an 18-inch case, but if the full case becomes difficult to lift or turn, choosing the larger format only for future use can weaken the current experience.
The strongest age-spanning design usually combines:
moderate size + adjustable handle + mature graphics
rather than one oversized case.
Sample Size Validation
Before locking dimensions, the physical prototype should complete a repeatable usability session.
A useful internal sequence is:
- Record external dimensions.
- Record usable internal dimensions.
- Weigh the empty case.
- Pack the intended contents.
- Record the loaded weight.
- Extend each trolley position.
- Walk 10 meters.
- Turn left and right.
- Make a 180° turn.
- Stop quickly.
- Lift the case by the top handle.
- Open and close it while loaded.
Observe the child rather than only the suitcase.
Record whether there is:
- shoulder lifting;
- heel contact;
- difficulty starting;
- excessive side swing;
- tipping;
- zipper difficulty.
These checks do not replace formal safety or durability testing. Their purpose is to compare prototypes using the same conditions.
If Size A and Size B are being compared, keep the following constant:
same user + same contents + same surface + same movement sequence
Only then does the size comparison become meaningful.
Production Size Control
Once the correct dimensions are approved, they should be converted into clear production references.
Do not record only:
“16-inch kids luggage.”
Record:
- overall L × W × H;
- body dimensions;
- internal usable dimensions where important;
- empty weight target;
- trolley lock heights;
- wheel model;
- wheel spacing;
- handle position.
The physical approved sample and written specification should then be used together during later production checks.
This matters because a 5–8 mm shift in trolley placement or wheel position may look minor on a drawing but can change the way a small suitcase feels to a child.
Approved samples and production details are used as inspection references in Jundong’s quality process, while luggage checks specifically include dimensions, weight, wheels and trolley components.
The right kids luggage size is therefore not simply 14, 16, 18 or 20 inches. It is the combination of body size, packed load, usable capacity, trolley position and wheel geometry that allows the intended child to move the finished suitcase naturally. When those elements are validated together, the size becomes a functional design decision rather than just a number printed in the product specification.
How Should You Design Kids Luggage Graphics?
Kids luggage graphics should be designed as part of the suitcase itself, not added after the shell, zipper, trolley and wheels have already been fixed. The strongest design combines age-appropriate visual language, clear recognition, controlled color, suitable decoration methods, durable execution and repeatable SKU specifications. Artwork should still look balanced after it is placed over curves, seams, molded ribs, handles and other functional structures.
A digital illustration can look perfect on a computer and still fail on the finished suitcase. A character’s eyes may fall directly over a zipper line, a logo may disappear beside a trolley housing, or a beautiful full-color print may lose impact because the shell texture breaks up fine detail.
For kids luggage, visual development works best in this order:
age group → product shape → graphic theme → visual hierarchy → color system → decoration process → logo position → physical sample → wear review → final artwork specification
The physical luggage construction matters throughout this process. Size, structure, wheels, trolley, lining, zipper, logo and packaging are all part of luggage development and should be considered together.
Match the Artwork to the Age Group
A strong visual direction begins with a clear age position.
A suitcase for a preschool child should not simply use the same artwork as a preteen case in a smaller size. Children’s visual preferences change rapidly, and luggage is usually kept longer than seasonal clothing or inexpensive accessories.
A useful starting reference is:
| Intended Age | Graphic Direction | Suitable Themes | Main Risk |
|---|---|---|---|
| 3–5 years | Large, simple, expressive | Animals, vehicles, dinosaurs, ocean, simple characters | Too much detail |
| 6–8 years | Strong theme with more storytelling | Adventure, sport, space, wildlife | Looking too preschool |
| 9–12 years | Cleaner, more mature styling | Travel, abstract shapes, sport, icons, typography-led designs | Feeling too childish too soon |
For younger children, recognition matters more than complexity.
One large bear face may work better than:
- six small animals;
- ten decorative icons;
- multiple slogans;
- several unrelated colors.
For older children, the same theme can remain relevant if the illustration style matures.
For example, a dinosaur theme can evolve from:
large smiling cartoon dinosaur
to:
graphic dinosaur silhouette + fossil pattern + controlled colors
This allows the theme to remain familiar without making the suitcase feel suitable only for very young children.
Build One Strong Visual Focus
The front of the suitcase should normally communicate one main idea in less than a second.
That main idea might be:
- a character face;
- one animal;
- one large icon;
- a repeated pattern;
- a bold color-block composition.
Supporting artwork should strengthen that idea rather than compete with it.
For early layout work, a useful visual balance can be:
60–70% primary graphic
20–30% supporting elements
10–15% logo or minor decoration
These percentages are design references rather than fixed requirements.
The important test is recognition.
Place the full-size artwork approximately 2–3 meters away and check whether the dominant visual is still easy to understand.
This matters because luggage is rarely viewed only from close distance. It may be seen:
- on a retail display;
- across an airport terminal;
- beside several other suitcases;
- on a baggage belt;
- inside a hotel lobby.
Tiny details that look impressive at 30 cm can disappear completely from several meters away.
Design Around the Real Suitcase Shape
A suitcase is a three-dimensional object, not a flat printing surface.
Before final artwork begins, mark the exact front-panel geometry.
Include:
- zipper path;
- trolley housing;
- carry handle;
- wheel housing;
- molded ribs;
- shell recesses;
- piping;
- seams;
- badges.
Then establish a graphic-safe zone.
For example, if a suitcase front measures 300 mm wide, placing important facial details within the central 220–240 mm may create more tolerance around curved edges and structural components.
That is only a layout example, not a fixed production dimension.
Critical graphic elements should stay away from structures that can visually interrupt them.
Avoid putting:
- eyes across a zipper;
- text through a shell groove;
- a mouth under a handle recess;
- a logo directly beside a wheel housing.
For molded luggage, check the graphic from:
- front;
- 45-degree left;
- 45-degree right.
An image can look perfectly proportioned from the front but appear stretched when it wraps around a curved shell.
Soft luggage has a different issue.
Fabric tension changes after sewing and again after packing.
A round character face may become slightly oval when the front panel is fully loaded.
That should be reviewed on the actual sample.
Protect High-Value Graphic Areas
Not every area of luggage receives the same amount of wear.
The lower section normally experiences more:
- rubbing;
- floor contact;
- conveyor contact;
- impact;
- contact with nearby luggage.
The most important artwork should therefore stay away from high-wear areas when possible.
A practical front layout can be organized like this:
| Zone | Recommended Use |
|---|---|
| Upper center | Main character or strongest visual |
| Middle center | Secondary graphic |
| Upper corners | Small supporting elements |
| Lower center | Less critical decoration |
| Lower corners | Avoid important facial details |
| Near wheels | Simple graphics or solid color |
For example, placing an animal’s eyes and face in the upper half and footprints near the bottom will usually age better than placing the full face close to the wheel area.
This becomes especially important when the graphic is expected to remain attractive after repeated travel.
Use a Controlled Color System
Colorful does not need to mean visually crowded.
A disciplined kids luggage palette usually performs better than using five or six highly saturated colors with equal visual weight.
A simple structure is:
1 dominant color
1 supporting color
1–2 accent colors
For example:
| Theme | Dominant | Supporting | Accent |
|---|---|---|---|
| Space | Navy | Light blue | Yellow + white |
| Ocean | Aqua | Deep blue | Coral |
| Dinosaur | Olive | Cream | Orange |
| Sport | Grey | Black | Red |
| Rainbow | Soft blue | Cream | Controlled multicolor accents |
This helps the design remain recognizable.
It also reduces component complexity.
Consider two four-SKU programs:
| Detail | Program A | Program B |
|---|---|---|
| Graphic designs | 4 | 4 |
| Zipper colors | 2 | 4 |
| Trolley colors | 2 | 4 |
| Wheel accent colors | 2 | 4 |
Program B creates far more combinations to prepare, match, inspect and pack.
More combinations increase the chance of:
- wrong zipper pairing;
- wrong wheel color;
- incorrect trolley trim;
- mixed cartons;
- SKU confusion.
Sharing selected trims across several graphics can maintain variety while making the final collection easier to reproduce consistently.
Keep Color Approval Physical
Colors seen on screens should not be treated as the final production reference.
Screen brightness, display calibration and file settings can all change how a color appears.
Physical approval is much more useful.
For the final sample, confirm:
- shell color;
- print color;
- zipper color;
- lining color;
- trolley color;
- wheel accent;
- logo color.
A physical color reference or approved sample should be kept together with the artwork file.
For multi-SKU collections, record the visual combination clearly.
For example:
KL-03 Space
Shell: Navy
Graphic: Space V4
Zipper: Navy
Trolley: Black
Wheel accent: Yellow
Logo: White rubber patch
This is much clearer than writing:
“Blue space suitcase.”
Characters vs Original Graphics
Licensed characters and original artwork need different preparation.
Licensed designs may have strict requirements covering:
- proportions;
- color references;
- character size;
- logo clear space;
- positioning;
- packaging;
- hangtags.
Those rules should be obtained before the physical sample is prepared.
Original artwork provides more freedom.
An illustration can be adjusted around the actual structure of the suitcase without conflicting with strict character guidelines.
For example, a custom animal face can be moved upward 15 mm if the zipper line crosses the mouth. A licensed character may not allow that adjustment without approval.
Production-ready artwork is also important.
Vector files are generally preferable where suitable because they allow controlled scaling and cleaner output. Jundong’s graphic and logo development guidance calls for size, color, position, clarity and attachment to be confirmed during sampling.
Third-party logos and characters should also have appropriate authorization before use.
Choose the Decoration Process After the Material
The graphic method should follow the exterior material and required visual effect.
Possible processes include:
- screen printing;
- heat transfer;
- digital printing;
- embroidery;
- rubber patches;
- metal plates.
A detailed four-color illustration and a simple one-color logo should not automatically use the same process.
Jundong’s luggage branding options include screen printing, embroidery, rubber patches and metal plates, with the final method depending on the material, structure, detail level and intended finish.
Before approval, inspect:
Fine lines
Do small details remain clear?
Edges
Are outlines sharp or blurred?
Color density
Does the background show through unexpectedly?
Flexibility
Does the print distort when soft fabric bends?
Surface adhesion
Does the artwork remain stable after rubbing?
Shell texture
Do molded patterns interrupt the image?
The same artwork can require different preparation on polyester fabric, EVA or a hard molded shell.
Use 3D Features Selectively
Children’s luggage often uses:
- ears;
- horns;
- wings;
- tails;
- raised eyes;
- badges.
These features can create strong visual identity, but they should earn their place.
Every added component introduces additional:
- material;
- assembly;
- attachment;
- inspection;
- packing space.
A 3D ear that extends 20 mm from each side increases the physical width by approximately 40 mm.
A 300 mm-wide body can therefore occupy close to 340 mm once those decorations are included.
That affects:
- retail box dimensions;
- master carton utilization;
- stacking;
- transport protection.
It can also create snagging or damage exposure.
Before adding a raised feature, compare it with flatter alternatives:
| Visual Idea | Possible Execution |
|---|---|
| Animal ears | Print, embroidery, molded relief, attached ears |
| Eyes | Print, embroidery, molded detail |
| Brand badge | Print, rubber patch, metal plate |
| Character texture | Print, embossed shell |
If a printed or molded-in feature provides almost the same visual impact, it may create a cleaner product.
Integrate the Logo Quietly
The logo does not always need to dominate the front.
For children’s luggage, the graphic usually carries the emotional appeal. Branding can be integrated more naturally through smaller but repeatable locations.
Useful options include:
- lower front corner;
- side panel;
- zipper pull;
- trolley badge;
- interior woven label.
A large dinosaur graphic plus a small metal logo plate can look more refined than placing a large company name directly across the character.
Brand recognition can also come from repeated details such as:
- the same zipper pull shape;
- consistent lining graphics;
- recurring wheel accent color;
- a standard logo location across all sizes.
That creates a recognizable product family without weakening the main artwork.
Approve the Graphic at Full Size
Do not approve important artwork only from a small PDF or screen mockup.
A full-size physical sample reveals issues that digital layouts often hide.
The approval should check:
- graphic scale;
- vertical position;
- horizontal position;
- physical color;
- relationship to zipper and handle;
- visibility from distance;
- distortion after packing.
A practical specification can record:
| Item | Approved Detail |
|---|---|
| Artwork version | V5 |
| Main graphic width | 238 mm |
| Distance from top | 42 mm |
| Logo width | 30 mm |
| Logo location | Lower right |
| Shell color | Approved sample |
| Zipper color | Navy |
| Wheel accent | Navy |
Actual figures should come from the approved sample.
Precise measurements reduce interpretation later.
“Place the character approximately in the middle” creates much more uncertainty than a controlled dimension.
Test the Graphic After Handling
Fresh graphics are not enough.
The design should still look acceptable after real travel-style handling.
Useful sample comparisons can include:
- repeated surface rubbing;
- packing and unpacking;
- zipper operation;
- trolley cycling;
- contact with carton material;
- repeated handling around corners.
After testing, inspect for:
- fading;
- scratching;
- peeling;
- cracking;
- edge lifting;
- color transfer.
If two graphic methods look equally good when new but one shows obvious wear much earlier, that difference should be discovered during sample development rather than after launch.
Control Multi-SKU Collections
A children’s luggage collection often uses one structure with several graphics.
For example:
| SKU | Shell | Graphic | Zipper | Trolley | Wheel |
|---|---|---|---|---|---|
| KL01 | Green | Dinosaur | Dark Green | Black | Green |
| KL02 | Blue | Ocean | Navy | Navy | Blue |
| KL03 | Navy | Space | Navy | Black | Yellow |
| KL04 | Grey | Sport | Black | Black | Red |
This information should follow the product from preparation through packing.
It helps prevent:
- wrong trim combinations;
- graphic/SKU mismatch;
- incorrect cartons;
- incorrect labels.
The packaging artwork should also match the exact suitcase version.
A blue ocean suitcase packed in a carton showing the green dinosaur version creates a presentation problem even if the luggage itself is correct.
Lock the Final Visual Specification
Once the physical sample is approved, the final record should include:
- artwork file and version;
- shell color;
- graphic dimensions;
- graphic position;
- logo method;
- logo size;
- zipper color;
- trolley color;
- wheel accent;
- lining;
- packaging artwork.
The approved sample should remain the physical reference for later production.
Sampling is valuable precisely because it allows appearance, material, color, structure, logo, zipper, handle and other details to be reviewed before larger quantities are produced. Once approved, the sample can be used as a reference for later production and inspection.
Strong kids luggage graphics are not simply colorful or cute. They should fit the intended age, remain recognizable at distance, work with the actual suitcase geometry, use a disciplined color system, survive repeated handling and remain consistent across every SKU. When those details are resolved before production, the graphics become part of the product identity rather than just decoration.
Which Wheels and Handles Are Best for Kids Luggage?
The most suitable wheel-and-handle system is one a child can start, steer, stop, turn and recover without excessive effort. For most upright kids luggage, four spinner wheels offer convenient multidirectional movement on smooth floors, while two fixed wheels provide stronger directional tracking. The final choice should be based on loaded weight, wheel spacing, tread material, swivel resistance, trolley height, grip dimensions and suitcase stability—not wheel count alone.
A useful development sequence is:
loaded weight → wheel layout → tread material → wheel diameter → axle and bearing → wheel spacing → trolley height → grip → loaded movement test
This matters because a wheel can feel excellent on an empty sample but behave very differently once clothing, shoes and travel items are added. Likewise, a trolley can appear stable while standing still yet feel loose or awkward during fast turns.
For luggage projects, wheels, trolley handles, body structure, dimensions and weight should all be confirmed during sampling rather than evaluated independently.
| Area | What Should Be Verified |
|---|---|
| Wheel layout | Straight tracking and turning |
| Tread | Noise, grip, abrasion and floor contact |
| Diameter | Threshold crossing and case height |
| Swivel | Smooth rotation without uncontrolled movement |
| Axle | Play, looseness and repeated rolling |
| Wheel spacing | Side-to-side stability |
| Trolley height | Natural shoulder and arm posture |
| Grip | Comfortable wrap for the intended age |
| Trolley tubes | Locking, flex and lateral movement |
| Loaded balance | Behavior with realistic contents |
Two Wheels vs Four Wheels
Two-wheel luggage and four-wheel luggage should be treated as different handling systems.
A two-wheel case normally travels tilted behind the child. Because the wheels are directional, the case tends to follow a predictable path. This can make steering straightforward, especially when moving in a straight line.
The tradeoff is that part of the packed load is supported through the trolley and hand.
A four-wheel spinner remains upright and can move forward, sideways or diagonally. This is useful on airport floors and other smooth indoor surfaces because less of the case weight has to be carried through the trolley.
However, very free-moving spinners can also move more easily on sloped or polished flooring.
The goal should therefore be easy movement without excessive free rolling.
A useful comparison uses the same luggage body and the same load:
| Test | Two Wheels | Four Spinners |
|---|---|---|
| Straight pull | Record effort | Record effort |
| 90° turn | Observe control | Observe control |
| 180° turn | Observe arm movement | Observe arm movement |
| Sudden stop | Check stability | Check unwanted rolling |
| Small threshold | Check impact | Check wheel recovery |
| Slight slope | Check control | Check free movement |
The configuration that creates the least effort while remaining predictable is usually the stronger choice for the intended age.
Spinner Wheel Control
Spinner performance depends on much more than whether a wheel rotates 360 degrees.
Four wheels should behave consistently with one another.
If one swivel unit is noticeably tighter, the suitcase may:
- drift;
- rotate unexpectedly;
- require repeated correction.
During sample review, load the case and push it approximately 2–3 meters across a smooth floor.
Repeat the test from several orientations.
Watch whether it:
- travels straight;
- pulls toward one corner;
- develops vibration;
- produces uneven wheel noise;
- oscillates around the vertical axis.
Then make several tight turns.
The child should not have to lift the trolley to force a direction change.
Also inspect clearance around the wheel housing. Hair, thread and debris can accumulate around exposed axles, so the wheel geometry should allow reasonable clearance without creating large finger-accessible openings.
For younger-age designs, exposed edges around the wheel housing should also be checked by hand because this area sits close to the child’s ankles.
Durable Wheel Materials
For luggage expected to spend much of its time on airport, hotel, school and indoor retail flooring, PU and TPU treads are practical materials to evaluate.
Polyurethane wheel materials are widely used where abrasion resistance, floor protection and low rolling resistance are important. Depending on formulation, softer polyurethane systems can also provide quieter operation and improved running comfort. (Blickle)
TPU can also provide strong abrasion resistance with low rolling and swivel resistance; softer TPU constructions may add greater noise absorption and floor protection. (Blickle)
That does not mean “PU wheel” is a sufficient specification.
The finished wheel depends on:
- tread hardness;
- tread thickness;
- hub material;
- diameter;
- axle accuracy;
- bearing;
- wheel housing.
Official wheel-material data illustrate how strongly hardness affects performance: polyurethane and TPU systems are available at distinctly different Shore A hardness levels, with harder versions generally showing stronger wear resistance while softer options place more emphasis on running comfort. (Blickle)
For kids luggage, compare complete wheels rather than polymer names alone.
Wheel Diameter and Width
Wheel diameter changes how easily a suitcase crosses small floor joints and thresholds.
A larger wheel generally has an easier geometry when rolling over a small obstacle, but increasing diameter also:
- increases finished case height;
- occupies more structural space;
- may increase weight;
- changes the visual proportions.
This means “larger is better” is too simple.
During development, compare at least two available wheel diameters on the intended case platform if possible.
For example, if the selected component family offers both 45 mm and 50 mm wheels, test both with the same packed weight. These figures are merely an example for comparison, not universal targets.
Record:
- starting effort;
- noise;
- threshold crossing;
- vibration;
- turning;
- total finished height.
Wheel width matters too.
A wider tread can create a more substantial contact area, but it may also increase wheel-housing size.
The final wheel should therefore be selected together with the luggage body dimensions.
A beautifully proportioned 16-inch shell can easily become taller and bulkier than intended after an oversized spinner assembly is added.
Wheel Spacing and Stability
Wheel spacing is one of the most overlooked details in kids luggage.
Four good wheels do not automatically create a stable suitcase.
The wider and longer the support footprint, the more resistance the case generally has to side-to-side tipping. But pushing wheels too far outward increases the physical footprint and makes them more exposed to impact.
A useful measurement set is:
front-to-rear wheel-center distance
left-to-right wheel-center distance
overall body height
loaded center of mass
These values should be considered together.
Test several load conditions:
- Weight distributed evenly.
- Heavy items close to the trolley.
- Heavy items toward the front.
- Heavy items concentrated on one side.
Then roll and turn the case.
A design that performs well only with perfect packing is not ideal for children, because children rarely distribute their belongings with engineering precision.
If one-side loading causes repeated wheel lift during ordinary turning, widening the effective support footprint or adjusting body proportions may improve the design.
Handlebar Diameter for Younger Children
There is no credible single handle diameter that can be called ideal for every toddler.
Children’s hands develop quickly. Research measuring fingers of children aged 3–10 found that average finger length increased about 37%, girth about 24%, and diameter about 20% across those ages. (PubMed) Grip strength also increases with age and is associated with anthropometric dimensions in preschool children. (ScienceDirect)
This makes physical grip testing more useful than copying an adult trolley handle.
For a preschool-oriented prototype, several grip diameters can be produced for comparison—for example:
22 mm
26 mm
30 mm
These are development trial sizes, not safety limits or official requirements.
Observe whether the child can:
- wrap the fingers naturally;
- place the thumb comfortably;
- keep the wrist neutral;
- pull without repeatedly changing grip;
- hold the handle when turning.
Adult ergonomic studies also show that handle diameter has a measurable effect on comfort and grip effort, reinforcing the principle that grip dimensions should follow hand dimensions rather than one universal size. (ScienceDirect)
Grip Shape and Width
Diameter is only one part of handle comfort.
The trolley grip also needs sufficient usable width so the child can place the hand naturally without the fingers touching hard side structures.
A useful grip should avoid:
- sharp transitions;
- deep grooves that force finger placement;
- slippery glossy surfaces;
- oversized decorative shapes.
Slightly rounded rectangular or oval grips can provide directional feel while still giving the hand a broad contact surface.
During sample testing, observe where the child actually places the hand.
If most users grip one side instead of the center, there may be a reason:
- central section too thick;
- button placed awkwardly;
- molded decoration interfering with grip;
- grip too wide.
The release button also matters.
It should be accessible without forcing the thumb into an uncomfortable angle, but it should not be so exposed that ordinary pulling repeatedly triggers the trolley release.
The best handle is usually the one children use correctly without being instructed where to place their fingers.
Trolley Height
Trolley height should be established from the child’s natural walking position.
A handle that is too high can raise the shoulder.
A handle that is too low can cause:
- sideways leaning;
- excessive elbow bending;
- heel contact with the suitcase.
For products intended to cover several ages, two or three useful locking positions can provide significantly better fit than one fixed height.
Record the actual measurement from the floor to the center of the grip at each lock.
For example:
| Position | Finished Measurement |
|---|---|
| Lowest | Record from sample |
| Middle | Record from sample |
| Highest | Record from sample |
Do not rely solely on tube-extension dimensions from the component specification.
Test the complete assembled suitcase.
Have the child:
- walk straight;
- make a wide turn;
- make a tight turn;
- stop;
- reverse direction.
Observe shoulder, elbow, wrist and heel clearance.
If several children naturally grip below the intended handle position or lift the trolley during every turn, the geometry needs adjustment.
Trolley Stiffness and Locking
A child’s trolley does not need to feel heavy, but it should feel controlled.
Some clearance between telescopic tubes is necessary for operation, yet excessive lateral movement can make a small suitcase feel unstable.
Check the trolley in three conditions:
Empty case
Establish basic movement.
Loaded case
Evaluate flex during normal pulling.
Turning load
Observe side movement during direction changes.
Repeated cycling is also valuable.
Extend, lock and retract the trolley repeatedly during sample development and inspect:
- lock engagement;
- tube scratches;
- button return;
- lateral play;
- abnormal noise.
A component can perform well during the first 20 operations and begin feeling different after repeated use.
The trolley mounting area should be reviewed along with the tubes themselves. A strong telescopic assembly is of little value if its connection to the luggage body flexes excessively.
Jundong’s luggage sample checks include trolley handles, wheels, dimensions and weight because these functional parts need confirmation before later production.
Loaded Tilt and Turn Testing
Stability should be checked with contents inside.
A practical internal comparison can gradually incline the loaded suitcase at:
5° → 10° → 15°
These angles are useful for comparing prototypes only; they are not formal safety limits.
Test:
- front;
- rear;
- left;
- right;
- diagonal directions.
Record:
- when a wheel first lifts;
- whether the suitcase returns upright;
- whether the trolley changes the behavior;
- which load position creates the earliest instability.
Then perform moving turns.
A case can be stable while standing yet lift an inside wheel during a fast 90° turn.
The most useful test is repeatable:
same suitcase load + same floor + same direction + same movement
This makes changes in wheel spacing or body proportions easier to compare.
If stability improves only because the case has become harder to steer, the design has simply traded one problem for another.
Ride-On vs Pull-Along Handles
Ride-on luggage needs a different wheel-and-handle discussion from ordinary pull-along luggage.
A pull-along trolley mainly transfers steering forces.
A ride-on product can place additional forces on:
- shell;
- wheels;
- axle;
- steering handle;
- seat area.
The child may also twist the handle while sitting, lean sideways or push against the ground with the feet.
For this type of product, evaluate:
- seated-load stability;
- wheel attachment;
- steering travel;
- shell deformation;
- handle rotation;
- foot clearance.
Do not take a trolley developed for an ordinary case and assume it can support ride-on use.
The intended function has to be considered from the beginning.
If the product is intended or promoted as a plaything, separate toy-related requirements can apply depending on the destination and age classification. The structural test plan should therefore be confirmed before full production rather than decided after the physical design is complete.
What Should Be Locked Before Production?
The approved wheel-and-handle specification should record more than “4 spinner wheels + adjustable trolley.”
A practical technical record includes:
| Item | Approval Detail |
|---|---|
| Wheel quantity | 2 or 4 |
| Wheel model | Exact approved component |
| Tread | PU, TPU or approved alternative |
| Wheel diameter | Actual mm |
| Tread width | Actual mm |
| Wheel spacing | Center-to-center measurement |
| Axle/housing | Approved structure |
| Trolley model | Exact approved component |
| Lock positions | Floor-to-grip measurements |
| Grip dimensions | Width and diameter/profile |
| Loaded test weight | Defined kg |
| Turn behavior | Approved sample reference |
During later production, functional parts should be compared with the approved sample and production details. Jundong’s in-process controls include handles, zippers, structural components and other product-specific checks so issues can be detected before all goods are completed.
The strongest kids luggage wheel-and-handle system is therefore not simply four wheels, quiet wheels or a short trolley. It is a matched combination of packed weight, wheel material, rolling resistance, support footprint, grip dimensions and trolley geometry that allows the intended child to move the suitcase smoothly without losing control.
How Does a Custom Kids Luggage Factory Control Safety?
Safety control for custom kids luggage should begin before materials are ordered and before the first sample is approved. The strongest process defines the intended age, product function, destination, materials, moving parts, foreseeable misuse, required tests and labeling first, then carries those requirements through sampling, component approval, production checks and shipment inspection. A finished test report cannot correct a poorly designed trolley, detachable decoration or unstable wheel layout after thousands of units have already been assembled.
For children’s luggage, safety work is especially sensitive because two products that look similar may fall into different regulatory categories. A conventional pull-along suitcase and a ride-on case promoted as a plaything may require different assessments. In the United States, products designed primarily for children 12 or younger may be children’s products, while toy requirements apply when the product falls within the toy definition and applicable ASTM F963 provisions. (U.S. Consumer Product Safety Commission)
A practical control path looks like this:
intended age → product classification → risk review → material specification → component approval → functional sample → required testing → production reference → in-process checks → final inspection → labels and shipment records
Classify the Product Before Testing
The first safety decision is not which laboratory to use. It is what the product actually is.
A conventional rolling suitcase may primarily be travel equipment. A ride-on suitcase with a seat, steering feature or strong play function can require a different review.
Before development is locked, define:
| Item | What Should Be Confirmed |
|---|---|
| Intended age | Exact age direction |
| Main use | Travel storage, pull-along, ride-on or combined use |
| Child interaction | Pulling, pushing, sitting, riding |
| Destination | U.S., EU or other region |
| Main materials | Shell, textile, lining, wheels, handles |
| Moving parts | Wheels, trolley, hinges, folding parts |
| Decorations | Attached 3D parts, badges, zipper pullers |
| Straps | Fixed, removable, adjustable |
| Test requirements | Confirmed according to classification |
For U.S. children’s products subject to applicable CPSC rules, third-party testing and certification can be required. Toy-specific requirements depend on the design and the ASTM F963 sections that actually apply. (U.S. Consumer Product Safety Commission)
This classification should happen early. Testing the wrong standard wastes time and can leave relevant hazards unchecked.
Freeze a Safety Specification
A safe production run requires more than an approved appearance sample.
The technical specification should record the details that affect both function and compliance:
- intended age;
- overall dimensions;
- loaded test weight;
- shell or textile material;
- wheel model;
- trolley model;
- zipper and puller;
- decorative parts;
- label requirements;
- approved packing.
For children’s luggage, the safety specification should also identify any component that must not be changed without review.
Examples include:
wheel tread material
trolley grip
shell resin
coating
printed ink
3D decorations
metal zipper pullers
A component that appears visually identical may have a different material formulation or mechanical strength.
Jundong’s production controls use approved samples and written production details as inspection references rather than depending only on a final visual check.
This is particularly important for children’s products because later substitutions can affect both physical performance and testing status.
Control Materials and Components
Material safety should be managed at the exact component level, not with broad descriptions such as “safe plastic” or “eco material.”
For example, a kids suitcase may contain:
- EVA or another body material;
- polyester or nylon lining;
- PU or TPU wheel tread;
- plastic trolley grip;
- metal fasteners;
- printed graphics;
- rubber badges;
- coatings.
Each accessible component can have a different material composition.
The correct record is therefore closer to:
Component: wheel tread
Material: TPU
Color: blue
Approved code: TW-06
Sample reference: PP-03
rather than simply:
Material: plastic
For U.S. children’s products, applicable rules can include lead, surface coatings, phthalates, small parts and relevant ASTM F963 requirements depending on the product. CPSC specifically states that the required testing varies according to product type, intended age, use and material composition. (U.S. Consumer Product Safety Commission)
The same principle applies in the EU: chemical, physical, mechanical and other hazards need to be considered for products classified as toys. (Internal Market and SMEs)
Eliminate Mechanical Hazards Early
Many important kids luggage risks come from structure rather than chemistry.
Areas worth checking include:
- sharp accessible edges;
- protruding hardware;
- finger-accessible gaps;
- pinch areas;
- loose wheel caps;
- folding mechanisms;
- zipper pullers;
- trolley joints;
- long straps.
A trolley handle deserves special attention.
Children may place fingers around the tubes while pressing the release button. During retraction, any narrowing gap should therefore be examined from several hand positions.
The same applies around:
- wheel housings;
- recessed handles;
- hinge areas;
- molded decorative parts.
For toy-classified products in the U.S., ASTM F963 includes provisions covering areas such as folding mechanisms, cords and straps, wheels and axles, accessible mechanisms and other mechanical hazards where applicable. (U.S. Consumer Product Safety Commission)
The less avoidable risk left in the physical structure, the less reliance there is on warnings later.
Check Wheels, Trolley and Stability
Children’s luggage safety depends heavily on what happens once the case starts moving.
The sample should be loaded before wheel and stability review.
A practical internal comparison can include:
Straight roll: 10 m
90° turns: left and right
180° turn: both directions
Sudden stop: observe continued movement
Small threshold: observe wheel recovery
Uneven loading: repeat the same sequence
These are development checks, not formal regulatory tests.
For four-wheel cases, inspect:
- wheel attachment;
- swivel consistency;
- axle movement;
- wheel spacing;
- side-to-side tipping.
For trolley systems, inspect:
- lock engagement;
- retraction;
- tube movement;
- grip control;
- connection to the body.
Ride-on designs need additional attention because the shell, wheels and handle may carry child body loads rather than luggage loads alone. ASTM F963 includes stability and overload provisions for relevant toy types. (U.S. Consumer Product Safety Commission)
A wheel that spins smoothly is not enough; the entire case must remain controllable.
Control Small Parts and Decorations
Kids luggage often uses character details that create additional attachment risks.
Common examples are:
- molded eyes;
- rubber badges;
- wheel caps;
- decorative zipper pullers;
- ears;
- horns;
- small logo plates.
Each part should be evaluated for both attachment and foreseeable damage.
During sample development, inspect whether the part can be:
pulled
twisted
bent
struck during transport
For U.S. products intended for very young children, small-part requirements may become especially important, and toy rules can require relevant small-object testing when applicable. (U.S. Consumer Product Safety Commission)
From a design perspective, a printed detail often creates less risk than a separately attached component.
If a removable 3D decoration adds little value, simplifying it can reduce:
- component count;
- assembly work;
- transport damage;
- inspection complexity.
Safety and cost sometimes improve through the same design decision.
Use Needle Control Where Required
For soft kids luggage or textile sections, broken-needle control can be an additional safety measure.
It should not be confused with the entire QC process.
Jundong’s documented system allows needle detection or broken-needle control to be arranged for selected projects where required, including children’s bags, school bags and higher-requirement retail orders. It is not automatically applied to every order and does not replace material, functional or finished-product inspection.
Where needle control is specified, useful production records can include:
- broken-needle log;
- affected workstation;
- affected production quantity;
- recovered needle fragments;
- isolation of suspect goods;
- re-check status.
This creates traceability if a sewing needle breaks during production.
For products combining hard luggage structures and sewn textile components, the needle-control plan should clearly identify which sections are included.
Test the Pre-Production Sample
Safety-related testing should be performed on a sample that closely represents the intended production specification.
Testing an early sample with:
one wheel
one coating
one decoration
and then changing those components before production reduces the value of that test.
The pre-production sample should therefore confirm:
- final material;
- final color;
- final wheel;
- final trolley;
- final artwork;
- final attached parts;
- intended labeling.
Jundong’s sampling process can include first samples, revised samples, approved samples and pre-production samples, with the approved version becoming an important reference for later production and inspection.
If a safety-critical component changes after testing, the change should be reviewed before assuming the earlier result still applies.
U.S. CPSC Requirements
For U.S. children’s products subject to CPSC-enforced rules, applicable safety requirements must be identified first.
Children’s products requiring certification generally need third-party testing by a CPSC-accepted laboratory and a Children’s Product Certificate based on passing results. For goods produced outside the United States, the U.S. importer is responsible for issuing the CPC. (U.S. Consumer Product Safety Commission)
For toy-classified kids luggage, applicable ASTM F963 sections should be identified individually rather than citing the toy standard generically. Relevant areas can include, depending on the design:
| Area | Possible Relevance |
|---|---|
| Surface coatings | Paint or printed coating |
| Small objects | Detachable decorative parts |
| Folding mechanisms | Folding handles or structures |
| Cords and straps | Straps or elastic parts |
| Wheels and axles | Rolling or ride-on designs |
| Stability | Applicable ride-on structures |
CPSC’s current guidance lists these provisions and identifies which require third-party testing. (U.S. Consumer Product Safety Commission)
As of July 8, 2026, CPSC certificate eFiling is also in effect for imported regulated products subject to certification requirements. (U.S. Consumer Product Safety Commission)
EU Toy Compliance
A children’s suitcase should not automatically carry CE marking simply because children use it.
For luggage classified as a toy, the current EU process includes safety assessment, the applicable conformity procedure, technical documentation, declaration of conformity, CE marking, traceability and required warnings or instructions. (Internal Market and SMEs)
Harmonised toy standards can support the conformity process where relevant, and the European Commission maintains the currently referenced standards. (Internal Market and SMEs)
There is also an important transition now underway.
Regulation (EU) 2025/2509 entered into force on January 1, 2026, while its new toy-safety requirements apply from August 1, 2030. The new system strengthens chemical controls and introduces a digital product passport for toys. (Internal Market and SMEs)
For product programs expected to continue into 2030 or beyond, that transition should be considered during development instead of waiting until the product is already established.
Lock Labels and Traceability
Safety does not end when the physical suitcase passes inspection.
Labels and traceability information need to match:
- product classification;
- age grading;
- destination;
- tested product;
- production batch.
Jundong can support warning labels, age labels, material labels, instruction cards, product labels and carton information based on confirmed requirements. Safety wording should not be invented or reused blindly across different products.
For EU toys, traceability and warnings form part of the placement requirements, and warnings must be clear and understandable in the required language context. (Internal Market and SMEs)
For a large program, link the finished SKU to:
model → production batch → approved materials → test report → label version
That makes later documentation much easier to retrieve.
Control Safety During Bulk Production
Safety control should continue while the luggage is being assembled.
Jundong’s in-process inspection can cover:
- correct materials;
- cut-piece dimensions;
- graphic position;
- stitching;
- handles;
- zippers;
- reinforcement;
- lining;
- labels and packing.
For kids luggage, add product-specific checks for:
- wheel installation;
- trolley locking;
- sharp exposed edges;
- loose decorations;
- zipper puller attachment;
- correct warning label;
- correct age/SKU packing.
This is far more effective than discovering the wrong wheel or loose decoration after every carton is sealed.
The final pre-shipment review should confirm that the finished goods still match the tested and approved construction. A test report is valuable only when the goods shipped continue to follow the same controlled specification.
A strong kids luggage safety system therefore does not depend on one inspection or one certificate. It connects product classification, safer structure, controlled materials, physical testing, approved samples, production checks, traceability and destination-specific documentation so that the finished luggage remains aligned with the product that was originally reviewed and tested.
Let's work together
With over 10 years of OEM/ODM bag industry experience, I would be happy to share with you the valuable knowledge related to leather products from the perspective of a leading supplier in China.

Factory catalogue
Table of Contents
Latest blogs
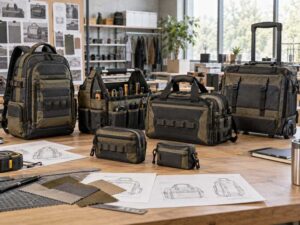

Make A Sample First?
If you have your own artwork, logo design files, or just an idea, please provide details about your project requirements, including preferred fabric, color, and customization options, we’re excited to assist you in bringing your custom bag designs to life through our sample production process.