 Skip to content

How Can Tool Bags Become Part of an Equipment Kit? A Custom Development Guide
A professional tool bag should not begin as an empty shell with pockets added afterward. In a well-developed equipment kit, the tools determine the bag. The weight of a meter affects bottom structure. A fragile probe changes the padding plan. Frequently used hand tools influence opening direction. Batteries, adapters, cables, manuals, consumables, and replacement parts each need different levels of access, retention, and protection.
A tool bag becomes part of an equipment kit when its dimensions, compartments, protection, reinforcement, carrying method, identification, and packing are developed around the actual contents. The equipment list comes first; the bag follows. This approach creates clearer organization, safer transport, faster tool access, easier missing-item checks, and more consistent kits across service teams, product lines, and repeat production.
That shift sounds small, but it changes almost every technical decision. An 18-inch bag specified before the equipment is studied may later prove too wide, too shallow, badly balanced, or filled with pockets that do not match the tools.
A better development process starts by putting the complete kit on the table.
Only then does the bag begin to take shape.
What Makes a Tool Bag Part of an Equipment Kit?
A tool bag becomes part of an equipment kit when it is designed around the complete set of tools, instruments, accessories, spare parts, documents, and real working conditions—not treated as an empty bag that happens to carry them. The strongest designs control tool position, loaded weight, protection, access order, carrying balance, kit completeness, identification, and repeatable packing from the beginning.
The difference is easy to underestimate.
A general tool bag mainly solves storage.
An equipment-kit bag must solve several jobs at once:
- Keep the complete set together
- Prevent heavy parts from damaging lighter ones
- Make frequently used tools easier to reach
- Keep fragile devices from moving
- Make missing parts easier to notice
- Carry the loaded weight without excessive deformation
- Maintain the same internal arrangement across repeated kits
- Support model identification, labels, and packing
- Remain practical after hundreds or thousands of use cycles
This is why an equipment kit should normally be developed from the contents outward.
The equipment defines the internal architecture. The internal architecture defines the outer dimensions. The loaded weight then determines reinforcement, handles, shoulder straps, bottom support, and hardware.
Jundong’s documented industrial tool-bag guidance follows this same logic: load-bearing, abrasion resistance, structural strength, hardware, pocket layout, bottom reinforcement, long-term use, and consistency in volume production are all treated as core considerations rather than cosmetic details.
Storage vs Integration
A useful way to understand the difference is to compare two products that carry exactly the same 15 components.
| Area | General Tool Bag | Integrated Equipment Kit |
|---|---|---|
| Starting input | Bag size | Complete equipment list |
| Interior | General pockets | Component-specific layout |
| Heavy tools | Placed where space allows | Positioned for balance |
| Fragile devices | Mixed with other contents | Separated or padded |
| Tool access | User searches inside | Access follows work sequence |
| Missing parts | Harder to notice | Easier to identify |
| Protection | Broad | Based on actual risk |
| Packing | Bag and tools packed separately | Complete set controlled |
| Reorder consistency | Depends on how each set is packed | Defined layout can be repeated |
The second approach usually requires more work during development, but it can simplify everything that follows.
The internal structure becomes more predictable.
Packing becomes clearer.
Quality checks become easier because the required positions and components are already defined.
A technician also learns one layout rather than reorganizing the bag after every job.
The bag therefore becomes part of the operating system of the product rather than simply a container.
Equipment Kit Types
Not every tool set needs the same degree of integration.
The need becomes stronger as equipment value, component count, loaded weight, service frequency, or protection requirements increase.
Common applications include:
- Electrical service kits
- HVAC service sets
- Power-tool systems
- Machine maintenance kits
- Installation equipment
- Automotive diagnostic kits
- Testing and measurement sets
- Field repair systems
- Construction service kits
- Facility maintenance sets
Consider three very different examples.
| Kit Type | Main Contents | Main Bag Priority |
|---|---|---|
| Power-tool set | Drill, batteries, charger, bits | Load support and fixed storage |
| Diagnostic set | Meter, probes, cables, adapters | Protection and organization |
| Maintenance kit | Hand tools, parts, consumables | Access speed and durability |
A single “heavy-duty tool bag” specification would not serve all three equally well.
The power-tool bag may need a molded or reinforced base.
The diagnostic set may need padded dividers or fitted foam.
The maintenance kit may benefit more from an open top, visible tool sleeves, and removable pouches.
The first technical task is therefore not choosing fabric.
It is understanding what the complete kit actually does.
Kit Completeness
One of the strongest reasons to integrate the bag with the equipment is to make completeness easier to control.
Imagine a service kit containing 22 separate items.
If those items are placed into four large compartments, the bag may technically hold everything, but it offers little assistance when one adapter or specialized tool is missing.
A controlled layout can make the absence visible.
Useful methods include:
- Individual elastic loops
- Shaped tool sleeves
- Mesh zipper pockets
- Fixed foam cavities
- Color-contrasting interiors
- Removable labeled modules
- Dedicated battery sections
- Flat document compartments
The goal is not to create a fitted cavity for every object.
That can make a working kit too rigid.
Instead, components can be divided into three groups.
| Category | Examples | Storage Approach |
|---|---|---|
| Essential fixed items | Meter, charger, main probes | Dedicated location |
| Regular tools | Pliers, screwdrivers, cutters | Loops or sleeves |
| Variable items | Consumables, spare parts | Flexible pouch |
This gives the kit enough structure to stay organized without making every minor component permanent.
A useful design test is:
Can someone open the bag and understand within a few seconds what belongs where?
If not, the layout may still be functioning as general storage rather than an integrated kit.
Tool Position
Position is not only about keeping the interior neat.
It affects weight distribution, access, safety, and product life.
Heavy components should normally sit low and close to the carrying center.
Frequently used tools should be accessible without removing larger items first.
Sharp tools should not rub directly against soft cables or electronic surfaces.
Fragile devices should not share uncontrolled space with dense metal tools.
A simple layout exercise can assign every item four attributes:
| Attribute | Example |
|---|---|
| Weight | 0.8 kg |
| Fragility | High |
| Access frequency | Daily |
| Movement tolerance | Low |
Suppose a diagnostic meter weighs 0.8 kg, is used on every job, has a fragile screen, and should not move.
That suggests:
- Fast-access position
- Padded compartment
- Controlled movement
- Separation from metal hand tools
Now compare that with a roll of tape.
The tape is light, durable, frequently used, and tolerant of movement.
It may only need an open sleeve.
This method creates a more rational interior because the compartment type follows the actual component.
Missing-Item Control
A structured bag can also act as a visual inventory system.
This matters where the kit must return complete after each use.
For example, assume a service team uses the same kit five times per day.
If one specialty adapter costs little but stops the next job when missing, its operational value is much greater than its purchase cost.
Fixed positioning helps because an empty position is immediately visible.
Several structures can support this:
- Shadow-style foam
- Contrasting cavity colors
- Numbered sleeves
- Dedicated loops
- Transparent mesh pockets
- Removable inventory pouches
The bag does not need electronic tracking to improve accountability.
Simple physical organization can already reduce uncertainty.
This also helps during initial kit assembly.
When 2,000 identical sets need to be packed, a defined layout gives the packing team a clearer reference for verifying contents before the bag is closed.
The bag therefore supports both field use and set assembly.
Field Efficiency
A well-planned bag can reduce repeated handling.
The most important metric is not pocket quantity.
It is the number of unnecessary actions required to use the kit.
Consider two layouts.
Layout A
- Meter under hand tools
- Probes in bottom compartment
- Cable loose in main cavity
- Spare parts mixed with daily items
Layout B
- Meter in primary padded compartment
- Probes beside the meter
- Cable in dedicated mesh pocket
- Daily tools in front sleeves
- Spare parts in secondary pouch
The second layout may have fewer compartments, yet it can be substantially faster to use.
An illustrative time calculation shows why this matters.
Suppose improved organization saves:
- 40 seconds during setup
- 35 seconds during repacking
Total saving:
75 seconds per job
At 7 jobs per day:
75 × 7 = 525 seconds
That equals 8.75 minutes per technician per day.
Across 40 technicians:
8.75 × 40 = 350 minutes
That is almost 5.8 working hours per day.
The exact value will vary, but the principle is important: a small improvement repeated daily becomes meaningful.
Workflow Sequence
The internal structure should follow the real sequence of work.
Take a machine-service kit used in this order:
- Read service document
- Remove diagnostic device
- Connect probes
- Use hand tools
- Replace spare part
- Record result
- Return components
That sequence already suggests the layout.
The document sleeve belongs near the opening.
The diagnostic device and probes belong in the same primary zone.
Hand tools should remain accessible while the device is in use.
Spare parts should be contained separately so they do not mix with returned components.
This is more reliable than starting with:
“Add 16 pockets.”
A pocket count does not explain how the bag will be used.
A strong layout gives every storage feature a reason to exist.
Weight Distribution
Loaded weight is one of the clearest differences between a general bag and an integrated tool system.
An empty bag may weigh only 1.8 kg.
The finished kit may weigh 10–15 kg.
That changes almost everything.
Consider this example:
| Component | Weight |
|---|---|
| Main equipment | 4.2 kg |
| Hand tools | 3.6 kg |
| Batteries | 1.8 kg |
| Accessories | 0.9 kg |
| Bag | 1.9 kg |
| Loaded Total | 12.4 kg |
The bag should therefore be reviewed as a 12.4 kg carrying system.
At that weight, important structural areas include:
- Handle anchors
- Shoulder-strap anchors
- Webbing route
- Bottom panel
- Side seams
- Hardware attachment
- Zipper ends
- Corner joints
A common mistake is using very heavy outer fabric while leaving the load path poorly reinforced.
The bag may feel rugged but still fail at the handle base.
A stronger design distributes force through webbing, internal reinforcement, and bottom support.
Jundong’s industrial project guidance specifically highlights load-bearing, structural strength, hardware, pocket layout, and bottom reinforcement as areas requiring review before sampling.
Protection Zones
Not every item needs the same level of protection.
One practical method is to divide the contents by risk.
| Protection Level | Example | Suitable Structure |
|---|---|---|
| Low | Steel wrench | Fabric sleeve |
| Medium | Battery | Padded divider |
| High | Digital meter | Foam-lined compartment |
| Very High | Precision instrument | Fitted EVA or foam system |
This prevents overbuilding.
A steel tool does not need the same cushioning as a display screen.
At the same time, the steel tool should not be allowed to strike the screen.
The correct solution may be simple separation rather than thick padding everywhere.
This targeted approach can reduce:
- Bag weight
- External size
- Material use
- Packing volume
- Unnecessary cost
while still increasing protection where it matters.
Carrying Balance
A bag can fit every tool perfectly and still be unpleasant to carry.
This usually happens when layout is developed only in two dimensions.
A heavy component placed high and far from the body creates leverage.
A battery cluster placed entirely on one side creates imbalance.
A rigid device positioned against the body panel may make shoulder carry uncomfortable.
Loaded samples should therefore be tested in the actual carrying orientation.
For a shoulder bag, review:
- Center of gravity
- Strap angle
- Strap width
- Hardware rotation
- Body contact
- Bag tilt
For a backpack, also review:
- Left/right balance
- Back-panel pressure
- Strap spacing
- Shoulder load
- Bottom stability
For a rolling tool bag, review:
- Wheel position
- Handle extension
- Loaded tipping tendency
- Base strength
Comfort becomes especially important when the kit moves frequently between vehicles, workshops, ladders, stairs, and job sites.
Kit Standardization
Integrated tool bags are useful when many people need to use the same kit in the same way.
Standardization can help with:
- Training
- Replacement
- Tool return
- Internal audits
- Kit assembly
- Spare inventory
- Service consistency
A company operating 100 field kits can define one layout instead of allowing each technician to organize equipment differently.
For example:
Position A1: diagnostic meter
Position A2: primary probe
Position A3: secondary probe
Position B1: screwdriver set
Position C1: replacement components
That layout can then appear in:
- Packing instructions
- Service documents
- Training photos
- Inspection records
It also makes replacement easier.
If one removable pouch becomes damaged, the pouch can be replaced without changing the complete bag.
Modular Structure
A bag can also become part of a broader equipment family by using interchangeable internal modules.
This is useful where several product versions share the same exterior identity.
For example:
| Version | Main Shell | Internal Module |
|---|---|---|
| Standard | Same | Basic divider set |
| Professional | Same | Expanded tool insert |
| Service | Same | Spare-parts modules |
| Diagnostic | Same | Padded instrument insert |
This approach can reduce the need to develop four completely different outer bags.
Benefits can include:
- Shared materials
- Shared hardware
- Consistent logo position
- Easier spare stock
- Easier visual identification
- Faster future revisions
If the equipment changes, only the module may need adjustment.
That can be particularly useful for long-running equipment families where electronic devices change more frequently than the bag shell.
Product Identity
Once the functional architecture works, the bag can support the identity of the complete equipment line.
This may include:
- Exterior color
- Embroidered logo
- Rubber patch
- Woven label
- Model number
- Service-team identification
- Interior color coding
- SKU labels
- Packing labels
The important sequence is:
equipment → function → structure → identity
not the reverse.
A large logo cannot compensate for weak access, poor balance, inadequate reinforcement, or badly sized compartments.
When the functional work is completed first, visual identity becomes much more effective because the bag already feels like an intentional part of the product.
Commercial Value
The commercial value of an integrated tool bag is not limited to the bag itself.
It can improve how the whole equipment set is presented, used, packed, serviced, and reordered.
A structured kit may support:
- Higher perceived completeness
- Better presentation
- Easier technician deployment
- More repeatable packing
- Lower missing-part exposure
- Better protection for valuable equipment
- Easier replacement of damaged modules
- Clearer product-family differentiation
This is why a tool bag should not be evaluated only by cost per piece.
A $14 bag that organizes and protects a $1,500 equipment kit plays a very different role from a $14 promotional bag.
The correct cost discussion should consider what the bag protects, organizes, and simplifies.
A well-developed tool bag becomes valuable because it connects the equipment, the person using it, the packing process, and the product identity into one physical system.
How Should Tool Bags Be Designed Around Equipment?
Tool bags should be developed from the equipment inward, not from an assumed bag size outward. The process starts with the complete component list, dimensions, weight, fragility, access frequency, carrying conditions, and expected use. From there, the internal layout, protection zones, reinforcement, opening style, carrying system, and final external dimensions can be defined around the real loaded kit.
A good equipment bag is therefore not simply “large enough.”
It should also be:
- Easy to load and unload
- Stable when carried
- Strong enough at high-stress areas
- Protective where equipment is vulnerable
- Fast to work from
- Clear enough that missing components are easy to identify
- Consistent enough to reproduce across repeat production
Jundong’s industrial tool-bag guidance specifically identifies load-bearing, abrasion resistance, structural strength, hardware, pocket layout, bottom reinforcement, long-term use, and consistency in volume production as critical development considerations.
Equipment Brief
Development should begin with a complete equipment brief.
A photo alone can show shape, but it does not reveal total loaded weight, daily access order, fragile areas, cable behavior, or whether one component must remain separated from another.
For each item, record:
| Data | Example | Design Impact |
|---|---|---|
| Length × width × height | 220 × 140 × 65 mm | Compartment size |
| Weight | 1.35 kg | Load structure |
| Quantity | 2 pcs | Space planning |
| Fragility | High | Padding |
| Access frequency | Every job | Placement priority |
| Orientation | Face upward | Pocket direction |
| Sharp edges | Yes | Abrasion protection |
| Movement tolerance | Low | Retention method |
This exercise is particularly useful when a kit contains 10–30 different items.
A component weighing 1.5 kg should not be treated like a 150 g accessory merely because both occupy similar space.
The equipment brief should also include the complete loaded weight.
For example:
- Main instrument: 3.8 kg
- Hand tools: 4.2 kg
- Batteries: 1.6 kg
- Cables and accessories: 0.9 kg
- Bag structure: 1.9 kg
Total loaded weight: 12.4 kg
That 12.4 kg figure is much more important for structural development than the empty bag weight.
Industrial Fit
There is no single universal size for “standard industrial equipment.”
Even devices used for the same function can differ in:
- Housing dimensions
- Handle position
- Cable outlet
- Battery geometry
- Probe length
- Control location
- Protective bumpers
- Accessories
For that reason, statements such as “fits standard industrial equipment” should be verified against actual models.
If one bag must support several equipment versions, adjustable organization may be more practical than a fully fixed interior.
| Interior Structure | Better For |
|---|---|
| Fixed foam | One stable equipment model |
| Adjustable dividers | Several similar models |
| Elastic loops | Hand tools of varying sizes |
| Removable pouches | Changing accessories |
| Open compartment | Large variable equipment |
| Tool roll | Slim hand tools |
A shared outer shell can sometimes support several internal configurations.
That is especially useful when one equipment family has:
- Standard version
- Advanced version
- Service version
- Regional accessory version
The exterior stays consistent while the internal modules change.
1:1 Layout
One of the most effective development steps is creating a full-size 1:1 layout before the pattern is finalized.
Lay every component on a table and arrange it approximately as it should sit inside the finished kit.
Then evaluate:
- Which component should sit lowest?
- Which item should be removed first?
- Which parts can touch?
- Which parts must remain separated?
- Which components need finger clearance?
- Which items can share a compartment?
- Which objects require a fixed orientation?
A simple footprint calculation can prevent unnecessary bag volume.
Suppose the equipment itself occupies approximately:
410 × 230 × 210 mm
The final interior cannot automatically use those exact dimensions.
Allowance may be needed for:
- Foam
- Dividers
- Seam structure
- Zipper movement
- Hand clearance
- Lining
- Support panels
The final bag may therefore become approximately:
445 × 260 × 245 mm
This is only an illustration, but it shows why equipment dimensions and finished-bag dimensions are not interchangeable.
A good layout also avoids unused voids.
Large empty spaces increase outer dimensions and packed volume without improving usability.
Fixed Positions
Fixed positions should be reserved for components that benefit from controlled placement.
A practical evaluation can use four criteria:
Value
How expensive is the component?
Fragility
Can movement or impact damage it?
Accountability
Would a missing item stop the job?
Consistency
Does this item belong in every kit?
Consider three examples:
| Component | Fixed Position Need |
|---|---|
| Diagnostic meter | High |
| Specialized probe | High |
| Cleaning cloth | Low |
The meter may need a dedicated padded section.
The probe may need an elastic holder or shaped cavity.
The cloth can remain in a flexible pocket.
Fixed positioning also helps with visual checks.
If a dedicated location is empty, a missing tool is easier to notice.
This becomes useful when several identical kits must remain complete after repeated daily use.
Custom Compartments
Internal compartments should be designed around the tool, not around standard pocket dimensions.
Possible structures include:
- Sewn fabric dividers
- Padded sleeves
- Elastic loops
- Hook-and-loop dividers
- Zipper mesh pockets
- Removable pouches
- EVA trays
- Foam cavities
- PP support panels
- Tool rolls
Each solution behaves differently.
A fitted foam cavity gives strong positional control but little flexibility.
An adjustable divider offers less precise retention but supports different component sizes.
Elastic loops give fast access but are less suitable for delicate equipment.
Mesh pockets make contents visible but may not protect sharp objects well.
One overlooked detail is finger clearance.
A pocket that exactly matches the object dimensions can become difficult to use.
If a device is 60 mm wide, the compartment may need additional clearance depending on:
- Material stiffness
- Pocket depth
- Glove use
- Removal direction
- Shape of the device
Good fit should feel controlled, not tight.
Workflow Access
Pocket layout should follow the actual sequence of work.
Imagine a service kit used in this order:
- Read work instruction
- Remove diagnostic device
- Attach probe
- Use hand tools
- Replace component
- Record service details
- Repack kit
This immediately suggests the internal structure.
The document sleeve should be accessible first.
The main device and probe should sit close together.
Frequently used hand tools should remain reachable while the main device is out.
Replacement parts should stay separated from used components.
The most useful measure is not pocket count.
It is the number of unnecessary actions required to reach essential equipment.
A bag with 12 well-designed compartments can work far better than one with 30 generic pockets.
Consider an illustrative service operation:
If better organization saves:
- 35 seconds during setup
- 40 seconds during repacking
Total saving per job:
75 seconds
At 8 jobs per day:
75 × 8 = 600 seconds
That is 10 minutes per technician per day.
Across 25 technicians:
250 minutes, or more than 4 working hours per day.
The exact result will vary, but repeated access efficiency can become significant over time.
Heavy-Load Support
Heavy equipment should be supported through the structure rather than relying on heavy fabric alone.
The load path normally runs through:
equipment → bottom → body panels → reinforcement → webbing → handle or strap
Weakness anywhere in that sequence can cause failure.
Critical areas include:
- Handle bases
- Shoulder-strap anchors
- Bottom corners
- Side seams
- Hardware patches
- Zipper ends
- Divider attachment
A heavy-duty construction may use:
- Extended webbing
- Multiple stitch lines
- Bartacks
- Internal reinforcement patches
- PP or PE board
- Molded base
- Additional fabric layers
One common mistake is choosing extremely heavy outer fabric but leaving the handle webbing attached only to a small surface area.
The textile may be strong, but the concentrated load can still tear the attachment area.
A better design distributes force over a larger section of the bag.
For a 10–15 kg loaded kit, bottom and handle development should be treated as structural engineering rather than decoration.
Equipment Protection
Protection should match the actual risk of each component.
Not every item needs thick foam.
A practical zoning system may look like this:
| Risk Level | Example | Protection Direction |
|---|---|---|
| Low | Steel hand tool | Fabric separation |
| Medium | Battery | Padded divider |
| High | Electronic tester | Foam-lined compartment |
| Very high | Precision instrument | Fitted EVA or foam |
This keeps the bag from becoming unnecessarily bulky.
The main objective is not maximum padding.
It is preventing harmful contact.
A steel wrench may need almost no cushioning itself, but it should not repeatedly strike an electronic screen.
Protection can therefore come from:
- Separation
- Retention
- Foam
- Structural board
- Raised base
- Dedicated compartment
Abrasion also matters.
Metal edges can slowly wear through fabric after hundreds of movements.
High-contact areas may need stronger textile or replaceable reinforcement even if impact protection is not required.
Carrying System
The carrying method should be selected after loaded weight and movement conditions are understood.
| Working Condition | Suitable Direction |
|---|---|
| Light local service | Top handles |
| Moderate mobile use | Handle + shoulder strap |
| Frequent walking | Backpack |
| Bench-side tool access | Open-top tote |
| High loaded weight | Rolling bag |
| Sensitive equipment | Semi-rigid EVA case |
| Severe transport | Hard protective case |
A 7 kg kit carried from a van to a nearby machine may work perfectly with handles.
The same kit carried through airports, stairs, plant corridors, and outdoor service sites may need backpack straps or wheels.
Distance changes the decision.
So does working posture.
A technician who repeatedly opens the bag on the floor may prefer a wide top opening.
A kit used on a workbench may suit a clamshell design.
A bag used while moving between locations may benefit from stronger closure and more controlled internal retention.
Loaded comfort should therefore be tested with the actual equipment rather than judged from an empty sample.
Modular Inserts
Modularity is useful when the equipment family has several configurations.
Instead of redesigning the complete bag for every version, one outer structure can use interchangeable interiors.
For example:
| Kit Version | Shared Bag | Internal Change |
|---|---|---|
| Standard | Same shell | Basic divider set |
| Advanced | Same shell | Additional tool module |
| Service | Same shell | Spare-parts pouch |
| Diagnostic | Same shell | Padded instrument insert |
Useful modular structures include:
- Detachable pouches
- Removable tool rolls
- Hook-and-loop divider panels
- Replaceable foam trays
- Color-coded inserts
- Accessory modules
This can simplify:
- Product-family consistency
- Spare inventory
- Future product updates
- Replacement parts
- Packing
- Revision work
If the main device changes dimensions in a later generation, replacing one insert may be easier than developing a completely new bag.
For long-running equipment programs, that flexibility can be highly valuable.
Loaded Prototype
The first meaningful test happens after the sample is fully loaded.
An empty tool bag can look excellent while hiding serious problems.
Once the equipment is inside, review:
- Total weight
- Center of gravity
- Handle deformation
- Strap angle
- Bottom sag
- Sidewall collapse
- Zipper tension
- Tool movement
- Pocket distortion
- Hardware rotation
- Access speed
A simple prototype test can include repeated use:
- Load all equipment.
- Carry the bag.
- Place it on the intended surface.
- Open every compartment.
- Remove items in working order.
- Return the complete kit.
- Repeat the process several times.
- Record measurable changes.
Comments should be numerical whenever possible.
Instead of:
“Move this pocket lower.”
Use:
“Move the pocket opening 18 mm downward.”
Instead of:
“Add more padding.”
Use:
“Add 5 mm foam to the device compartment side wall.”
This makes revisions easier to execute and easier to verify.
Jundong’s documented project process allows development to begin from reference photos, existing samples, sketches, design files, use scenarios, and other available information, while final sampling and quotation require confirmed specifications such as size, material, logo, quantity, packing, and timeline.
The strongest tool bags are usually not the ones with the most pockets or the heaviest fabric. They are the ones where the equipment list, internal layout, loaded weight, protection, workflow, carrying system, and future kit variations have all been considered before the final structure is approved.
Which Materials and Structures Work Best?
The best tool-bag construction depends on what the kit carries, how much it weighs, how often it moves, where it is used, and what level of protection the equipment needs. Heavy fabric alone does not create a heavy-duty bag. Reliable performance comes from combining the right shell material, reinforcement, bottom support, webbing, hardware, padding, compartments, and closure system around the loaded equipment.
For industrial tool bags, material strength, abrasion resistance, load-bearing, hardware, compartment layout, bottom reinforcement, and long-term use should be considered together rather than evaluated separately. Jundong’s documented tool-bag guidance identifies these as core development factors before sampling.
Material Selection
Material should be selected according to the actual working environment rather than by fabric name alone.
A tool bag used inside a service vehicle may need moderate abrasion resistance and good structure. A bag dragged across concrete floors needs stronger bottom protection. A kit carrying electronic instruments may benefit more from padding and internal support than from an extremely heavy exterior textile.
A practical material review should include:
| Requirement | What to Check |
|---|---|
| Abrasion | Contact with floors, metal tools, vehicle surfaces |
| Tear strength | Loaded seams and sharp equipment |
| Weight | Effect on total carried load |
| Water exposure | Coating, lamination, zipper and seam behavior |
| Cleanability | Oil, dust, grease and workshop residue |
| Flexibility | Ease of opening and packing |
| Structure | Whether walls collapse under load |
| Branding | Printing, embroidery or patch compatibility |
| Color | Batch consistency |
| Sewing | Thickness and handling difficulty |
The material should also be considered as part of a layered structure.
A practical heavy-duty bag may use:
- Strong outer textile
- Lighter internal lining
- Reinforcement patches at handle anchors
- PP or PE support board
- EVA or foam around sensitive equipment
- Heavier textile only at high-abrasion zones
This targeted approach can reduce unnecessary weight.
For example, increasing every textile panel by 120 g/m² may add several hundred grams to a large tool bag while doing little for weak handle anchors or an unsupported bottom.
A better result often comes from strengthening the areas that actually carry force.
Oxford vs Nylon vs Canvas
Oxford polyester, nylon, and canvas can all work well, but they create different product characteristics.
Polyester Oxford is commonly used for general industrial tool bags because it provides useful structure, coating options, color consistency, and cost control.
Nylon is often selected when strength-to-weight, abrasion performance, and a more technical hand feel are priorities.
Canvas provides a workwear appearance and can perform well for hand-tool storage, but moisture absorption, weight, dirt retention, and cleaning should be evaluated carefully.
| Material | Main Strength | Watch Carefully |
|---|---|---|
| Polyester Oxford | Balanced cost and structure | Fabric grade varies significantly |
| Nylon | Strong for its weight | Higher material cost |
| Canvas | Rugged workwear feel | Weight and moisture |
| PVC-coated textile | Easy-clean surface | Stiffness and weight |
| TPU-laminated textile | Strong liquid barrier potential | Process and seam requirements |
A specification such as “600D polyester” is not complete enough for final approval.
Two fabrics carrying the same denier description can differ in:
- Fabric weight
- Weave density
- Back coating
- Surface finish
- Hand feel
- Color consistency
- Water resistance
- Abrasion behavior
Physical approval is therefore more reliable than approving from a material name.
For heavy-duty projects, the most useful comparison is often not:
600D vs 900D vs 1680D
but:
Which construction gives the required durability at the lowest unnecessary weight?
A well-designed 600D or 900D structure with proper reinforcement can sometimes outperform a poorly engineered bag made from heavier textile.
Waterproof Structure
Water resistance should be defined carefully because the outer textile is only one part of the finished product.
A coated fabric may resist water well while stitched seams, zipper openings, handle attachments, and pockets still allow water to enter.
A heavy-duty wet-environment bag should therefore be reviewed as a full structure.
Key areas include:
- Outer textile
- Back coating
- Seams
- Zippers
- Bottom construction
- Opening design
- Hardware
- Drainage
- Stitch penetration
There are several practical protection levels.
| Use Condition | Suitable Construction |
|---|---|
| Indoor service | Standard durable textile |
| Occasional rain | Coated outer fabric |
| Wet ground | Coated shell + protected bottom |
| Frequent outdoor use | Coated shell + protected zipper and seams |
| Strong liquid exposure | Welded or highly sealed structure |
Not every project needs a fully sealed bag.
For many maintenance or service kits, a practical specification may be:
water-resistant upper structure + highly protected bottom + covered zipper + easy-clean lining
This can offer better daily usability than a completely sealed structure.
A full waterproof build may require fewer stitched openings, welded seams, roll-top closures, or specialized zipper systems. Those choices can increase stiffness, production complexity, and cost.
The correct requirement should therefore describe the real use condition:
light rain, wet floor, splash exposure, or sustained water contact.
That is much more useful than simply requesting “waterproof.”
Soft Bag vs EVA Case
Soft bags and EVA cases should be compared according to protection, access, loaded weight, packing, and equipment shape.
A soft structure usually offers:
- Better external pocket access
- Easier compression
- Lower packed volume
- Greater flexibility
- More carrying options
- Easier adaptation to irregular tools
An EVA structure usually offers:
- Better shape retention
- More controlled internal movement
- Increased impact protection
- Cleaner equipment presentation
- Better support for fitted inserts
Consider a kit containing:
- Digital meter
- Two probes
- Charger
- Battery
- Six hand tools
- Cable set
If the meter is rugged and the tools need frequent access, a padded soft bag may be more practical.
If the meter has a sensitive display and is transported frequently between sites, EVA may be a better direction.
A hybrid structure is also possible:
semi-rigid main body + textile tool pockets + removable accessory pouches
This often works well when the project needs both protection and fast access.
The decision should also consider packed volume.
Rigid cases normally maintain their shape during shipping and storage, while soft bags can often be compressed or folded.
That difference can affect carton quantity and freight.
Foam Protection
Foam should be used according to equipment risk, not as decoration.
Padding is most valuable around:
- Electronic instruments
- Screens
- Batteries
- Sensitive connectors
- Calibration equipment
- Fragile accessories
Foam performance depends on more than thickness.
Important factors include:
- Density
- Compression behavior
- Equipment weight
- Impact direction
- Adjacent support
- Available space
For example, a 10 mm soft foam layer may work well around a lightweight meter.
The same foam beneath a 4 kg metal device may compress heavily and provide limited structural support.
A better solution may combine:
foam + support board + reinforced base
Internal protection can be divided into levels.
| Equipment Type | Protection Direction |
|---|---|
| Steel hand tools | Fabric separation |
| Batteries | Padded divider |
| Electronic device | Foam-lined section |
| Precision equipment | Fitted EVA or foam cavity |
This keeps the bag from becoming unnecessarily large.
Padding every surface can increase dimensions quickly.
If 10 mm is added to both sides, front, back, top, and bottom, external dimensions can increase significantly, which affects:
- Carton size
- Storage
- Freight
- Loaded weight
Protection should therefore be concentrated where equipment actually needs it.
Bottom Structure
The bottom of a heavy-duty tool bag deserves separate engineering because nearly all loaded weight eventually transfers through it.
A useful layered structure may include:
- Abrasion-resistant outer textile
- Reinforcement layer
- PP or PE board
- Foam where shock reduction is needed
- Internal lining
More demanding applications may use:
- Molded EVA base
- Rubberized base
- Plastic tray
- Protective feet
Suppose a finished kit weighs 13 kg.
If the main tools sit directly over a soft textile base, repeated loading can create:
- Bottom sag
- Seam stress
- Local abrasion
- Board deformation
- Poor standing stability
A structural board can distribute the load over a larger area.
However, making the base excessively rigid can also create problems:
- Higher weight
- Reduced folding
- Uncomfortable carrying
- Larger packed volume
The bottom should therefore match actual loaded weight.
A 4 kg electrical kit and a 14 kg mechanical kit should not automatically use the same base.
Bottom corners should also be reviewed carefully because they often experience both internal load and external abrasion.
Hardware Selection
Hardware should be selected as part of the load path.
A strong buckle does not create a strong bag if it is attached to weak webbing.
Likewise, strong webbing can still fail when stitched into a small unsupported fabric section.
The load path can be viewed as:
equipment → bottom → body → reinforcement → webbing → hardware → handle or strap
Every connection matters.
Important components include:
- Zippers
- D-rings
- Snap hooks
- Buckles
- Adjusters
- Rivets
- Handle hardware
- Pullers
For a shoulder strap, review:
- Strap width
- Webbing thickness
- D-ring attachment
- Hook orientation
- Loaded angle
- Reinforcement area
A 12 kg bag carried by a shoulder strap creates very different stress from a 3 kg organizer.
Wider straps may distribute pressure more comfortably, while larger attachment zones help distribute force into the body.
Metal hardware can provide a premium appearance and strong performance, but it also adds:
- Weight
- Cost
- Noise
- Potential scratching
High-quality engineering plastic can be more practical for some industrial kits.
The correct choice depends on loaded use rather than appearance alone.
Stress Reinforcement
Stress reinforcement should follow actual force paths.
Common high-stress areas include:
- Handle bases
- Strap anchors
- Zipper ends
- Pocket corners
- Bottom corners
- Side-to-bottom seams
- Hardware attachment
- Internal divider anchors
Reinforcement can use:
- Bartacks
- Box stitches
- Cross stitches
- Extended webbing
- Internal textile patches
- Additional layers
- Rivets where suitable
The strongest result is not always created by adding more stitches.
Too many needle penetrations within a small area can weaken certain textiles.
Stitch density, thread, seam allowance, reinforcement area, and material type should work together.
Consider a handle attached to a tool bag carrying 15 kg.
Weak approach:
Handle webbing ends 30 mm below the top edge.
Stronger approach:
Webbing extends substantially farther into the side panel and is stitched across a larger reinforced area.
The second structure distributes force over more material instead of concentrating the load around a narrow seam.
The same principle applies to shoulder straps and D-rings.
Material Verification
Material inspection should happen before volume production because many finished-product problems begin with incoming components.
Useful checks include:
- Fabric color
- Thickness
- Texture
- Coating
- Hand feel
- Zippers
- Webbing
- Hardware
- Buckles
- Lining
- Labels
- Packing materials
Jundong’s documented incoming-material process includes checks across these areas before production.
For tool bags, the most important materials should also be compared against the approved sample.
For example:
- Is the webbing width identical?
- Is the bottom board the approved thickness?
- Is the zipper specification unchanged?
- Is the buckle the approved size?
- Is the fabric coating consistent?
A visible substitution can be easy to notice.
A hidden reduction in board thickness or reinforcement may not become obvious until the finished bag is fully loaded.
For heavy-duty equipment kits, hidden construction details deserve the same attention as visible fabric and logo.
Loaded Structure
The final material decision should always be tested with the complete load.
An empty bag cannot reveal:
- Bottom sag
- Handle stretch
- Strap discomfort
- Sidewall collapse
- Hardware rotation
- Pocket deformation
- Zipper strain
- Equipment collision
Consider this example:
| Component | Weight |
|---|---|
| Main equipment | 4.5 kg |
| Hand tools | 4.0 kg |
| Batteries | 2.0 kg |
| Accessories | 1.0 kg |
| Bag | 2.1 kg |
| Loaded Total | 13.6 kg |
A 13.6 kg tool kit should be judged as a 13.6 kg carrying structure.
A practical prototype review should include:
- Carrying by handles
- Shoulder carrying where applicable
- Repeated lifting
- Setting the bag on the floor
- Opening while fully loaded
- Removing heavy equipment
- Repacking
- Checking reinforcement afterward
The strongest tool-bag construction is rarely created by selecting the heaviest fabric, thickest foam, or largest hardware.
It comes from matching material strength, protection, reinforcement, bottom support, hardware, and loaded behavior to the actual equipment.
That creates a bag that is strong where strength matters, protective where equipment is vulnerable, and efficient enough to remain practical for daily use.
How Does the Custom Tool Bag Process Work?
Custom tool bag development usually moves through project briefing, equipment mapping, structure planning, material selection, pattern work, sample development, loaded testing, revision, approval, bulk preparation, production, inspection, and packing. The strongest process starts with the real equipment rather than an assumed bag size, because loaded weight, tool position, protection, access, logo, and packing all affect whether the finished bag can be reproduced reliably.
Project Brief
A useful project brief should explain the equipment before discussing the bag.
The first information normally includes:
- Equipment list
- Dimensions of each component
- Weight of each component
- Total loaded weight
- Reference photos or samples
- Intended use
- Carrying method
- Material preference
- Logo artwork
- Quantity
- Packing
- Delivery deadline
- Destination
- Testing requirements
A project can still begin with incomplete information. Jundong’s documented process allows review from a reference image, existing sample, sketch, design file, logo file, use scenario, target price, packing idea, or other available details. Final quotation and sampling become more accurate once size, material, logo, quantity, packing, and timing are confirmed.
For equipment kits, one extra document is especially useful: a component table.
| Component | Size | Weight | Qty. | Special Requirement |
|---|---|---|---|---|
| Main meter | 230 × 150 × 70 mm | 1.4 kg | 1 | Padded |
| Battery | 120 × 80 × 55 mm | 0.6 kg | 2 | Separate |
| Cable | 1.5 m | 0.3 kg | 1 | Mesh pocket |
| Screwdriver | 220 mm | 0.15 kg | 4 | Tool loops |
This immediately gives the development team something measurable to work from.
Equipment Mapping
The next step is a 1:1 layout.
Place the complete equipment set on a table and decide:
- Which item is heaviest
- Which item is most fragile
- Which tools are used first
- Which components must not touch
- Which parts need fixed positions
- Which accessories may change
- Which parts need finger clearance
- Which items should sit near the opening
The purpose is not to make the layout as compact as possible.
The goal is to balance:
space + access + protection + carrying balance
Suppose the equipment itself occupies approximately:
420 × 240 × 220 mm
The final bag cannot simply use those same dimensions because space may be needed for:
- Padding
- Dividers
- Lining
- Structural boards
- Zipper movement
- Hand clearance
- Seam construction
The finished interior may need to be closer to:
450 × 270 × 250 mm
That difference is where many early design errors occur.
Cost Feasibility
Cost should be reviewed before the first sample becomes fixed.
Tool-bag cost can change quickly when the project adds:
- Heavy fabric
- Large zipper openings
- Multiple compartments
- Custom hardware
- Molded bases
- EVA panels
- Foam inserts
- Embroidery
- Rubber patches
- Special packing
The useful discussion is not simply “make it cheaper.”
It is:
Which features protect the equipment or improve daily use, and which features add cost without enough value?
For example:
| Change | Illustrative Unit Impact |
|---|---|
| Add removable padded divider | +$0.35 |
| Upgrade zipper puller | +$0.12 |
| Add molded bottom | +$0.70 |
| Add internal mesh pocket | +$0.18 |
| Add second embroidered logo | +$0.22 |
Five individually small changes can add more than $1.50 to the unit cost.
At 10,000 pieces, that becomes more than $15,000.
That is why structure and cost should be reviewed together during development rather than after approval.
Pattern Development
Once the internal layout is stable, pattern development begins.
The pattern controls:
- Outer dimensions
- Pocket depth
- Zipper route
- Handle position
- Bottom shape
- Seam location
- Material consumption
- Sewing access
- Reinforcement placement
A drawing can look correct while still being difficult to produce consistently.
For example, a very tight curved zipper opening may create:
- Difficult sewing access
- Uneven zipper tension
- Puckering
- Slower assembly
- Higher rework risk
A small adjustment to the curve can preserve the appearance while improving repeatability.
Pattern development should therefore consider both the finished look and how the bag will actually be assembled.
Sample Development
The first sample is a functional prototype, not simply a presentation sample.
It should confirm:
- Dimensions
- Equipment fit
- Pocket layout
- Opening
- Handle position
- Carrying balance
- Material behavior
- Reinforcement
- Logo
- Packing
Jundong’s documented sampling time is usually 5–7 days, while some simple styles may be completed in 2–3 days.
Complex tool bags may require longer when they involve:
- Molded EVA
- Special hardware
- Custom-dyed material
- New molds
- Complex embroidery
- Several fitted inserts
The first sample should be reviewed with real tools whenever possible.
An empty bag can hide problems that only appear under load.
Loaded Testing
Loaded testing is one of the most important steps in tool-bag development.
Consider a kit with:
- Main equipment: 4.0 kg
- Hand tools: 3.8 kg
- Batteries: 1.7 kg
- Accessories: 0.9 kg
- Bag: 2.0 kg
Loaded total: 12.4 kg
The sample should be evaluated as a 12.4 kg carrying system.
Check:
- Handle deformation
- Strap comfort
- Bottom sag
- Sidewall collapse
- Zipper tension
- Hardware rotation
- Pocket distortion
- Tool movement
- Carry balance
A practical test sequence may be:
- Load the complete kit.
- Lift by the handles repeatedly.
- Carry by shoulder or backpack straps where applicable.
- Place the bag on the intended working surface.
- Open all compartments.
- Remove tools in actual working order.
- Repack all components.
- Inspect stress areas.
The exact test method should match the intended use.
A light electrical service kit and a 15 kg mechanical tool set should not be evaluated in the same way.
Revision Control
Most custom tool bags need some revision.
The important part is making changes measurable.
Avoid comments such as:
“Make the pocket a little larger.”
Use:
“Increase pocket opening from 140 mm to 165 mm.”
Avoid:
“Move the handle slightly.”
Use:
“Move handle center 20 mm toward the rear panel.”
A revision log keeps development controlled:
| Version | Change | Cost Effect | Status |
|---|---|---|---|
| V1 | Initial sample | — | Reviewed |
| V2 | Pocket +25 mm | None | Approved |
| V2 | Thicker bottom board | +$0.16 | Approved |
| V2 | New zipper puller | +$0.10 | Pending |
This becomes increasingly important when several departments are involved.
One consolidated revision list is usually safer than scattered comments across messages and emails.
Logo Branding
Branding should be confirmed on the actual material.
Common methods include:
- Screen printing
- Embroidery
- Woven labels
- Rubber patches
- PVC patches
- Heat transfer
- Metal plates
- Embossing
The correct method depends on:
- Material
- Logo size
- Color count
- Surface shape
- Abrasion exposure
- Quantity
- Visual requirement
A logo that looks flat on an empty sample may distort once the bag is loaded.
Logo position should therefore be reviewed on the filled product.
Jundong can support different branding methods according to material, structure, and project requirements; one process should not be assumed to behave the same way on every fabric or surface.
Pre-Production Approval
Sample approval should freeze the important details before volume production begins.
The final production information should confirm:
- Dimensions
- Material
- Color
- Pattern
- Lining
- Foam
- Structural boards
- Webbing
- Hardware
- Zippers
- Logo
- Labels
- Packing
- Inspection criteria
The approved sample is important, but it should not be the only reference.
Hidden details such as reinforcement size, board thickness, foam density, and webbing extension also need to be recorded.
Jundong’s documented process uses approved samples and production details as references during bulk production and inspection.
This reduces the risk of a visually similar bag being structurally different from the approved version.
OEM Quantity
Jundong’s standard MOQ is usually 500 pieces per design.
Selected simple styles may be reviewed at 200–300 pieces depending on the project, while some basic low-unit-price products may require 1,000 pieces or more because the same preparation and production stages still apply.
MOQ is also affected by:
- Custom fabric colors
- Special webbing
- Hardware
- Molded components
- Logo setup
- Packing
- SKU count
A black tool bag using existing materials and standard hardware is usually easier to plan than a project requiring a custom fabric color, molded base, special buckle, custom zipper, and retail box.
The specification should therefore be reviewed before quantity is treated as a fixed commercial number.
Bulk Production
Once the specification is stable, bulk work can begin.
Jundong’s documented bulk production time is usually 20–30 days, depending on product structure, quantity, materials, logo process, packing, and production schedule.
A practical production sequence may include:
- Material preparation
- Incoming inspection
- Cutting
- Logo processing
- Sewing
- Structural assembly
- In-process inspection
- Finished inspection
- Packing
- Pre-shipment checks
The important distinction is that production time is not the same as total delivery time.
Development, sample approval, material preparation, packing, and freight all need to be considered separately.
Quality Control
Tool-bag inspection should follow the product through production rather than only checking finished goods.
A useful control plan can include:
| Stage | Main Check |
|---|---|
| Incoming material | Fabric, webbing, zipper, hardware |
| Cutting | Size, direction, defects |
| Logo | Position, size, appearance |
| Sewing | Seams, reinforcement |
| Assembly | Compartments, hardware |
| Function | Zippers, straps, pockets |
| Finished goods | Shape, dimensions |
| Packing | SKU, labels, quantity |
| Pre-shipment | Cartons, marks, documents |
Jundong’s documented QC process covers incoming materials, cut pieces, logo, sewing, function, finished goods, packing, and pre-shipment checks, supported by 80 QC inspectors.
For tool bags, loaded structure should remain part of the inspection thinking because some weaknesses cannot be seen when the bag is empty.
Packing
Packing should be confirmed before production is finished.
A single tool bag may require only a polybag and carton.
A complete equipment kit may need:
- Model label
- Barcode
- SKU label
- Instruction card
- Set packing
- Carton mark
- Destination label
- PO number
Jundong can support polybags, hangtags, care labels, woven labels, barcode labels, SKU labels, FBA labels, color boxes, gift boxes, carton marks, and multi-SKU packing depending on project requirements.
Packing affects more than presentation.
It can influence:
- Unit cost
- Carton size
- Freight volume
- Warehouse handling
- SKU accuracy
- Receiving efficiency
For a complete equipment kit, component control should also be included before the bag is closed.
A well-run custom tool bag process therefore does not move directly from sketch to production. It moves through equipment study, layout, cost review, structure, sampling, loaded testing, measurable revision, final approval, controlled production, inspection, and packing. That sequence is what turns a one-off prototype into a repeatable equipment-kit component.
Which Tool Bag Factory Is Best for Equipment Kits?
The best tool bag factory for an equipment kit is the one that can translate real equipment into a repeatable carrying system—not simply sew an existing drawing. Strong evaluation should cover development depth, loaded-sample performance, material control, reinforcement, QC, packing accuracy, confidentiality, capacity planning, and the ability to keep approved specifications stable from first sample through repeat orders.
For equipment kits, unit price alone is a weak selection metric.
A bag may carry:
- $800 diagnostic equipment
- $1,500 calibration instruments
- Several kilograms of professional hand tools
- Batteries, chargers, cables, and adapters
- Model-specific replacement parts
Saving $0.40 on the bag can become irrelevant if poor internal organization damages a device, a handle structure fails under load, or one production batch uses the wrong bottom board.
A stronger evaluation follows the entire working path:
equipment review → technical development → sample → loaded test → material approval → production → QC → set packing → shipment
Jundong’s documented structure includes product development, design, a professional sample room, production, and quality inspection teams. The facility records more than 600 employees, approximately 18,000㎡ of production space, and 80 QC inspectors.
Factory vs Trading Company
The important issue is not whether an intermediary exists. It is whether technical control is clear.
An equipment-specific tool bag may require decisions involving:
- Pattern construction
- Reinforcement
- Foam
- Structural boards
- Webbing
- Hardware
- Zippers
- Tool retention
- Logo
- Packing
If one company handles communication while an unknown plant controls all technical decisions, revisions can become slow or distorted.
Before development begins, clarify:
| Area | What Should Be Clear |
|---|---|
| Sample | Where is it developed? |
| Pattern | Who controls revisions? |
| Materials | Who approves substitutions? |
| Production | Where does bulk work occur? |
| QC | Who defines and performs checks? |
| Packing | Who controls SKU and carton rules? |
| Claims | Who handles corrective action? |
A direct facility relationship is especially useful when a prototype requires several technical revisions.
For example, changing a shoulder strap from 32 mm to 38 mm may also affect:
- Webbing
- Buckles
- D-rings
- Reinforcement
- Stitch width
- Carry comfort
The revision should be understood as one structural change, not five unrelated component requests.
OEM vs ODM
OEM is usually appropriate when the technical package is already stable.
This may include:
- Finished drawings
- Dimensions
- Material specifications
- Hardware codes
- Logo files
- Pocket construction
- Packing requirements
- Inspection criteria
In that case, execution accuracy becomes the priority.
ODM becomes more useful when the starting material is incomplete.
A project may begin with:
- Equipment samples
- Equipment drawings
- Existing case
- Reference photos
- Rough layout
- Desired carrying method
- Target cost
The development team then needs to convert those inputs into:
- Outer dimensions
- Internal zones
- Protection
- Reinforcement
- Material combination
- Hardware
- Opening
- Carrying structure
For equipment kits, this distinction matters because many industrial companies understand their equipment extremely well but do not have bag-pattern engineers internally.
The plant should be able to explain why a structure is recommended, not merely confirm that it can be produced.
Factory Audit
A useful audit should follow the physical product flow.
Do not spend the entire visit looking at a showroom filled with attractive samples.
Start with incoming materials.
Then follow:
- Material storage
- Incoming inspection
- Pattern development
- Sample room
- Cutting
- Logo processing
- Sewing
- Structural assembly
- In-process checks
- Finished inspection
- Packing
- Carton storage
For tool bags, inspect especially closely:
- Handle anchoring
- Bottom construction
- Webbing routes
- Strap attachment
- Zipper installation
- Reinforced seams
- Hardware fixation
- Divider construction
Jundong’s documented incoming-material controls can include fabric color, thickness, texture, coating condition, hand feel, lining, zippers, webbing, hardware, buckles, labels, and packing materials.
This matters because hidden substitutions can be more serious than visible differences.
Changing an exterior shade slightly may be noticeable immediately.
Reducing board thickness from the approved specification may remain invisible until the bag is fully loaded.
Development Team
One of the best ways to evaluate technical ability is to present a real problem.
For example:
The loaded bag weighs 13 kg and leans to one side.
A useful technical response might investigate:
- Heavy component position
- Battery location
- Handle center
- Strap anchor
- Bottom rigidity
- Width-to-height ratio
Another example:
The bag needs an 8% cost reduction without changing the exterior appearance.
A capable team might review:
- Hidden panel count
- Internal lining
- Foam allocation
- Hardware standardization
- Zipper length
- Reinforcement placement
- Packing volume
The strongest response should explain trade-offs.
For example:
“Reducing foam here saves weight, but the electronic device will have less lateral protection.”
“Changing this metal hook to engineering plastic reduces weight, but the visual finish will change.”
That kind of reasoning is more useful than immediate agreement with every requested change.
Sample Room
The sample room is one of the clearest indicators of development quality.
A first prototype proves that a bag can be made once.
A second prototype proves whether revisions can be controlled.
Suppose V1 receives these comments:
- Increase depth by 20 mm
- Move meter compartment 15 mm left
- Add 5 mm foam
- Extend handle webbing
- Replace buckle
- Reduce logo width from 90 mm to 75 mm
- Add removable battery divider
V2 should reflect those changes accurately.
A useful revision record could look like this:
| Revision | Change | Status |
|---|---|---|
| V1 → V2 | Depth +20 mm | Approved |
| V1 → V2 | Meter section moved 15 mm | Approved |
| V1 → V2 | Foam +5 mm | Approved |
| V1 → V2 | New buckle | Pending |
Jundong’s documented process treats approved samples as references that should be converted into production standards and QC requirements rather than assuming the sample alone controls every hidden detail.
Quality Control
Tool-bag QC should reflect how the product will actually be used.
Appearance checks alone are not enough.
A practical control plan may include:
| Stage | Typical Focus |
|---|---|
| Incoming materials | Fabric, zipper, webbing, hardware |
| Cutting | Dimensions, direction, defects |
| Logo | Size, position, appearance |
| Sewing | Seams, bartacks, reinforcement |
| Assembly | Dividers, boards, hardware |
| Function | Zippers, pockets, straps |
| Finished goods | Shape and dimensions |
| Packing | SKU, labels, quantity |
| Pre-shipment | Cartons, marks, documents |
Jundong’s documented QC scope covers incoming materials, cut pieces, logo, sewing, function, finished goods, packing, and pre-shipment checks, supported by 80 QC inspectors.
No serious facility should describe that as a zero-risk guarantee.
QC works best when there are clear references:
- Approved sample
- Final specification
- Material requirements
- Critical dimensions
- Inspection criteria
For heavy-duty tool bags, several checks should also consider the loaded condition because handle distortion, bottom sag, or strap imbalance may not be visible when the bag is empty.
Capacity Planning
Large headcount or floor area does not automatically mean unlimited available capacity.
A serious production plan should consider:
- Quantity
- Product complexity
- Number of colors
- SKU count
- Special materials
- Logo processes
- Packing requirements
- Required ship date
For example, 20,000 simple tool pouches and 20,000 multi-compartment technical backpacks are not equivalent production programs.
The second may involve:
- More cut panels
- More sewing operations
- More hardware
- More QC checkpoints
- More packing complexity
Jundong’s documented rules specifically state that production capacity needs to be planned according to quantity, schedule, and product complexity rather than presented as unlimited.
That is the more credible way to discuss capacity.
Kit Packaging
Equipment-kit packing should be developed early because the bag may become part of a complete set rather than ship as an empty product.
A kit may contain:
- 1 tool bag
- 1 instrument
- 2 probes
- 2 batteries
- 1 charger
- 6 hand tools
- 1 manual
This creates a set-control requirement.
Before the kit is closed, the packing process should verify that all required components are present.
The packaging specification may also define:
- Individual protection
- Model label
- Barcode
- SKU
- PO
- Carton mark
- Destination
- Units per carton
Jundong’s documented capabilities include polybags, hangtags, care labels, woven labels, barcode stickers, SKU labels, FBA labels, color boxes, gift boxes, carton marks, and multi-SKU packing according to project requirements.
Packaging should not be left until the final week because it can affect cost, carton volume, production time, and receiving accuracy.
SKU Control
Equipment programs often have several visually similar versions.
For example:
TK-100A
Basic equipment + standard insert
TK-100B
Same outer bag + additional probe set
TK-100C
Same outer bag + service-parts module
If the exterior looks identical, internal SKU control becomes essential.
Useful identification can include:
- Style code
- Equipment model
- Color code
- Barcode
- PO number
- Destination
- Insert type
- Carton mark
The set-packing instruction should clearly link:
outer bag + internal insert + component list + label + carton
This helps reduce the chance of a correct bag being combined with the wrong accessory configuration.
Jundong can support labeling based on confirmed project information, while barcode data, warning text, platform labels, and destination information need to be provided or confirmed rather than guessed.
Compliance
Compliance should be evaluated according to product type, destination, materials, and required documentation.
Avoid broad claims such as:
“all products are certified.”
A project may instead need specific review of:
- Material restrictions
- Product testing
- Labels
- Packaging
- Third-party testing
- Documentation
Jundong’s documented rules state that testing and compliance documents should be reviewed according to product type, destination requirements, and project specifications; broad certification claims should not be made without supporting documents.
For recycled materials, the same discipline applies.
RPET does not automatically mean every finished product is covered by a specific recycled-material certification. Required documentation should be checked against the actual material and project.
Confidentiality
New equipment programs may involve:
- Unreleased products
- Private-label collections
- New tool layouts
- Proprietary components
- Channel-exclusive designs
Confidentiality should be discussed before sensitive drawings, CAD files, or equipment details are shared.
Jundong’s documented policy allows NDA support to be reviewed for unreleased brand projects, private-label designs, IP-related work, and confidential development.
If additional contractual protection is required, it should be discussed early so the signing entities, covered information, permitted use, and responsibilities are clear before technical files are exchanged.
Commercial Warranty
There is no single warranty period that automatically applies to every commercial tool bag.
The terms should define:
- Covered production defects
- Claim period
- Evidence required
- Normal wear exclusions
- Overloading
- Misuse
- Repair
- Replacement
- Credit handling
A seam failure caused by incorrect construction is different from abrasion caused by repeatedly dragging a textile bag across concrete.
Likewise, a handle used within the approved load is different from a handle repeatedly carrying significantly more weight than the agreed specification.
The available Jundong factual documentation does not establish one fixed warranty term for every tool-bag project, so any warranty should be agreed for the specific order rather than presented as a universal promise.
Factory Comparison
A useful factory comparison should combine cost with technical and delivery capability.
An illustrative weighting system could be:
| Area | Weight |
|---|---|
| Development capability | 20% |
| Sample accuracy | 15% |
| Quality control | 15% |
| Cost | 15% |
| Material capability | 10% |
| Capacity planning | 10% |
| Packing control | 5% |
| Technical communication | 5% |
| Documentation | 5% |
| Total | 100% |
The weighting should change according to the kit.
For a basic hand-tool pouch, cost may deserve more weight.
For a bag carrying expensive electronic equipment, development, protection, and sample accuracy may deserve considerably more.
Consider three illustrative quotations:
| Facility | Price | Sample | Loaded Structure | QC Visibility |
|---|---|---|---|---|
| A | $12.80 | Strong | Strong | Clear |
| B | $12.35 | Good | Good | Clear |
| C | $11.95 | Weak | Unverified | Limited |
The difference between A and C is $0.85.
At 5,000 pieces, that equals $4,250.
But if C creates structural rework, incorrect set packing, or equipment damage, the apparent saving can disappear quickly.
The best option is the facility that delivers the strongest total program economics, not simply the lowest unit quotation.
Custom Quote
A productive quotation starts with the equipment, not merely a desired bag dimension.
Useful information includes:
- Equipment list
- Individual dimensions
- Individual weights
- Total loaded weight
- Reference photos
- Quantity
- Material preference
- Logo artwork
- Packing
- Destination
- Required delivery timing
If an existing bag already works well, sending a physical sample can accelerate development.
If the project is new, start with the complete equipment set.
Jundong’s documented process allows projects to begin from photos, samples, sketches, design files, use scenarios, logos, target prices, and packing ideas, with final quotation and sampling based on confirmed specifications.
The strongest opening discussion is therefore not simply:
“What is the price of a 20-inch tool bag?”
It is:
“This is the equipment, this is the loaded weight, this is how the kit is used, and this is what the carrying system needs to achieve.”
That gives the development team enough information to evaluate structure, material, internal layout, sample strategy, cost, quality requirements, packing, and production feasibility before the project becomes expensive to change.
Let's work together
With over 10 years of OEM/ODM bag industry experience, I would be happy to share with you the valuable knowledge related to leather products from the perspective of a leading supplier in China.

Factory catalogue
Table of Contents
Latest blogs


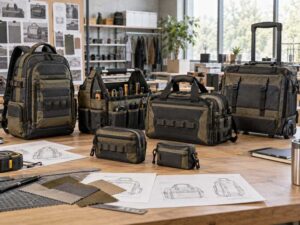
Make A Sample First?
If you have your own artwork, logo design files, or just an idea, please provide details about your project requirements, including preferred fabric, color, and customization options, we’re excited to assist you in bringing your custom bag designs to life through our sample production process.