 Skip to content
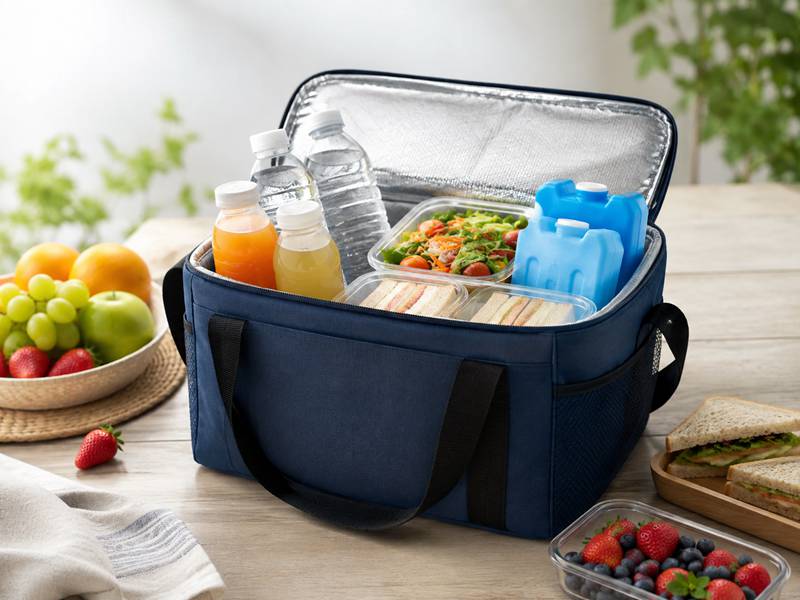
A cooler bag can look substantial, feel thick, and still lose cold faster than expected. The reason is simple: cold retention is not created by one material. It depends on the complete construction—insulation thickness, foam structure, lid fit, zipper closure, seam design, internal volume, chilled load, ice packs, starting temperature, and the surrounding environment.
That is why statements such as “keeps food cold for 8 hours” need context. Eight hours at 22°C indoors with several frozen packs is very different from eight hours inside a parked vehicle, on a delivery route, or at an outdoor event.
A well-constructed insulated bag can keep chilled food cold for several hours, and longer retention is possible when sufficient frozen gel packs are used. The exact duration cannot be judged from foam thickness alone. Reliable performance depends on starting temperature, ambient temperature, load volume, ice-pack quantity, opening frequency, insulation continuity, and closure design. Cold retention should therefore be measured under defined conditions.
The difference becomes obvious in real use. Imagine two 20-liter cooler bags leaving the same cold room at 8:00 a.m. Both hold the same food. One has a loose top zipper, thin insulation around the lid, and large empty spaces inside. The other has continuous insulation, a tighter closure, and cold packs positioned around the load.
By lunchtime, both bags may still feel cool when opened. Their internal food temperatures, however, can be very different.
How Long Do Insulated Bags Keep Food Cold?

An insulated bag can keep chilled food cold for several hours, but the useful duration is determined by the entire thermal setup rather than the bag alone. Insulation thickness, foam structure, the amount of chilled food, frozen packs, starting temperature, surrounding temperature, zipper design, internal air space, and opening frequency all change how quickly heat reaches the contents.
This is why two bags described with the same “5 mm insulation” can produce noticeably different results.
For refrigerated perishable food, there is also an important difference between “still feels cool” and “still being held at a suitable refrigerated temperature.” USDA guidance uses 40°F / 4°C or below for keeping cold perishable food cold and recommends adequate ice or frozen gel packs when a cooler is used.
A meaningful cold-retention claim should therefore contain more than an hour figure. It should state the test temperature, starting load temperature, amount of food or test load, frozen-pack configuration, opening conditions, and the temperature reached after the stated period.
A statement such as:
“Maintained the defined test load at or below the agreed temperature for 8 hours at 30°C ambient temperature with two 500 g frozen gel packs”
is far more useful than simply:
“Keeps food cold for 8 hours.”
The first can be repeated and checked. The second leaves too many unknowns.
| Condition | Why It Matters |
|---|---|
| Starting food temperature | Colder contents contain more usable cooling capacity |
| Ambient temperature | Greater temperature difference increases heat entering the bag |
| Frozen-pack quantity | More cold mass can absorb more incoming heat |
| Internal fill level | Empty air warms rapidly when the bag opens |
| Foam structure | Influences resistance to heat transfer |
| Lid and zipper | Often become important heat-entry areas |
| Opening frequency | Replaces chilled internal air with warmer outside air |
| Bag size | Changes air volume, surface area, and cooling requirement |
| Direct sunlight | Can raise the temperature of the outer surface |
| Test duration | Determines whether short or extended use is being evaluated |
How Long Do Insulated Bags Keep Food Cool?
For everyday use, an insulated bag should be thought of as a heat-transfer barrier, not as a refrigerator.
It does not continuously generate cold. Instead, it slows heat entering from the environment. The cold energy comes mainly from the chilled contents, ice, frozen gel packs, frozen bottles, or another cold source placed inside.
This distinction explains why the same bag can give very different results.
Consider a 15-liter lunch cooler used in three ways:
| Loading Condition | Expected Thermal Behavior |
|---|---|
| Chilled meal + no frozen pack | Temperature begins rising immediately |
| Chilled meal + one frozen pack | Slower temperature increase |
| Chilled meal + several well-positioned frozen packs | Longer cold-retention period |
The construction has not changed. The available cold mass has.
Food loaded directly from a refrigerator at approximately 4°C also starts in a much better condition than food that has already warmed during preparation, packing, or transport.
The fill level matters as well.
A nearly full bag contains more chilled mass and less empty air. A half-empty bag has more air that can be replaced by warm outside air every time the zipper opens. This does not mean every cooler should be packed completely solid, but unused internal volume should be considered when choosing capacity.
For a 10-liter meal requirement, moving unnecessarily to a 25-liter body may not improve performance. It may increase material use, shipping volume, and the amount of air that needs to remain cool.
Do Cooler Bags Actually Work to Keep Food Cold?
Yes. A properly constructed insulated bag slows the movement of heat between the surrounding environment and the colder interior.
A cooler bag commonly works as several layers rather than one material:
outer fabric → structural or insulation layer → inner lining
For Jundong cooler-bag applications, materials such as polyester, Oxford fabric, nylon, RPET, PEVA, aluminum foil, EPE foam, and neoprene may be used depending on the required construction. The company’s factual material guidance also notes that PEVA, aluminum foil, and EPE foam are often combined rather than treated as interchangeable single-layer solutions.
The foam layer usually provides much of the thermal resistance, but the finished performance can be weakened elsewhere.
Common heat-entry areas include:
- zipper tracks and zipper ends;
- the joint between the lid and body;
- compressed foam along stitch lines;
- corners where insulation does not meet evenly;
- thin base panels;
- handle attachment zones;
- sections where foam shifts during assembly.
This is why inspecting only the large side panel can be misleading.
A bag may use relatively substantial foam through the front and back yet have a lightly insulated top. Once the top becomes the weakest thermal area, increasing sidewall thickness further may produce less improvement than correcting the lid.
Good performance comes from continuous insulation, not simply a thick sample of foam shown separately from the finished bag.
How Long Can Groceries Last in a Cooler Bag?
There is no responsible single time that applies to every grocery item.
Cold beverages, leafy vegetables, yogurt, raw meat, seafood, frozen products, ice cream, and shelf-stable packaged foods have different temperature sensitivities.
For refrigerated perishables, actual food temperature is more useful than asking whether the bag still feels cold.
USDA advises holding cold perishable food at 40°F / 4°C or below. FDA guidance also notes that perishables should generally not remain unrefrigerated for more than two hours, shortened to one hour when outside temperatures exceed 90°F / 32.2°C. (Food Safety and Inspection Service)
This has an important practical implication:
A six-hour bag claim does not automatically mean every perishable food can safely remain inside for six hours under every condition.
If the internal temperature rises beyond the intended refrigerated condition during that period, the hour claim alone is not enough.
Different grocery programs therefore need different thermal priorities.
| Contents | Main Thermal Concern | Useful Design Direction |
|---|---|---|
| Yogurt and dairy | Staying refrigerated | Insulation + frozen packs |
| Raw meat | Maintaining low temperature | Strong cooling support and controlled transport |
| Frozen seafood | Slowing thawing | Greater insulation and sufficient frozen mass |
| Ice cream | Melting and texture loss | More demanding low-temperature control |
| Fresh produce | Excessive heat exposure | Moderate insulation may be sufficient |
| Cold beverages | Drinking temperature | Less strict than many perishables |
| Shelf-stable groceries | Heat exposure rather than refrigeration | Lightweight insulated tote may be enough |
A grocery tote designed for a 30-minute drive home should not automatically receive the same construction as a product intended for several hours in a vehicle.
More insulation can improve thermal resistance, but it can also increase thickness, cost, carton volume, and folded size.
The useful design is the one that supports the longest realistic trip without unnecessarily increasing the product.
How Long Do Ice Packs Keep Food Cold?
Frozen packs are one of the biggest variables in cold-retention performance.
USDA recommends using sufficient ice or frozen gel packs to keep perishable food at 40°F / 4°C or below and specifically recommends at least two cold sources when packing perishable food in an insulated lunch bag. (Food Safety and Inspection Service)
Their effect depends on much more than the number of packs.
Pack weight matters.
Two 150 g packs do not provide the same cold mass as two 500 g packs.
Starting condition matters.
A pack that has been frozen solid overnight is not equivalent to one that has only partially frozen.
Location matters.
Placing all cold sources at the bottom of a tall cooler may cool the lower section strongly while the upper area warms faster. Positioning cold packs around the load can produce a more even thermal condition.
A controlled comparison might record:
| Item | Example Test Record |
|---|---|
| Bag capacity | 15 L |
| Chilled load | 6 kg |
| Starting load temperature | 4°C |
| Frozen packs | 2 × 500 g |
| Pack location | One above, one below load |
| Ambient temperature | 30°C |
| Openings | None |
| Sensors | Center + upper interior |
| Reading interval | Every 30 minutes |
| Duration | 8 hours |
The numbers above are an example of a test setup, not a performance promise.
They show why an hour claim is incomplete without the conditions that created it.
The amount of cold-pack material also has to remain realistic.
If a 10-hour lunch bag only reaches its target when half the usable interior is filled with frozen packs, it may perform well technically but poorly as a lunch product.
Usable food capacity and thermal performance need to be developed together.
When Is an Insulated Bag No Longer Cold Enough?
The correct threshold depends on the contents.
For bottled drinks, “cold enough” may simply mean a pleasant drinking temperature.
For refrigerated perishable food, appearance, touch, and smell are not reliable ways to determine whether correct temperature has been maintained. FDA and USDA guidance emphasizes temperature control, with 40°F / 4°C used as the key refrigerated-food reference. (U.S. Food and Drug Administration)
This is why temperature measurement should be built into performance evaluation.
Sensor placement deserves particular attention.
Putting the probe directly against a frozen pack can create a reading far colder than the rest of the food.
Suspending it in the warmest air pocket near an open zipper can create the opposite distortion.
For a detailed test, several measurement positions can be used:
Center of the load
Shows what is happening to the main chilled contents.
Upper interior
Helps detect warmer conditions near the lid.
Near the opening
Shows whether the zipper and closure are becoming thermal weak spots.
For products carrying several container layers, temperatures at the top, middle, and bottom can also be compared.
A recorded temperature curve is especially useful.
Instead of knowing only that the bag measured 7°C after eight hours, it shows whether the temperature rose gradually:
4°C → 4.5°C → 5°C → 5.8°C → 7°C
or changed rapidly near the end.
That difference can reveal whether a small construction change is likely to help.
Why Do Cold-Retention Times Vary?
Cold-retention time varies because every use creates a different balance between incoming heat and available cold energy.
One of the largest variables is ambient temperature.
A bag used at 22°C indoors faces much less thermal stress than the same product used at 32°C outdoors.
A closed vehicle can create still harsher conditions.
Direct sunlight introduces another problem because the surface of the outer fabric may become hotter than the surrounding air.
Opening frequency can change results just as dramatically.
Imagine the same delivery cooler under two conditions:
| Condition A | Condition B |
|---|---|
| Closed for 6 hours | Opened every 20 minutes |
| Full chilled load | Load gradually removed |
| Fixed frozen packs | Same frozen packs |
| Stable internal volume | Increasing empty air |
| Indoor storage | Vehicle use |
It would be unrealistic to expect identical temperature curves.
The same applies to lunch bags.
A product tested closed from 8:00 a.m. until 6:00 p.m. is operating under much easier conditions than one opened for breakfast, snacks, drinks, and lunch throughout the day.
Heat also enters through different parts of the construction at different rates.
The wall may be well insulated while the zipper area remains relatively weak. Increasing foam thickness everywhere can add bulk while failing to address the dominant leakage path.
Jundong’s cooler-material documentation reflects this principle: cold performance is affected by the exterior, lining, insulation thickness, stitching, opening design, zipper, ice-pack use, and testing conditions rather than a single material.
What Does an 8-Hour or 10-Hour Claim Really Mean?
An hour figure only becomes meaningful when the conditions are attached to it.
For example, compare these two claims:
Version A:
“Keeps food cold for 10 hours.”
Version B:
“In the defined test, the specified chilled load remained below the agreed temperature after 10 hours at 30°C ambient temperature using two 500 g frozen packs, with the bag kept closed.”
The second statement makes it possible to reproduce the result.
It also makes product development easier.
If a revised prototype lasts only seven hours under identical conditions, the difference can be investigated.
Possible causes might include:
thinner foam;
different foam density;
larger internal volume;
a changed zipper;
greater seam compression;
weaker lid insulation;
or different cold-pack positioning.
Without controlled conditions, these differences can be hidden behind vague hour claims.
What Should Be Defined Before a Cold-Retention Test?
A useful test specification can fit on one sheet.
| Test Detail | What Should Be Recorded |
|---|---|
| Product | Style and internal capacity |
| Outer structure | Fabric and coating |
| Insulation | Material and nominal thickness |
| Lining | Material specification |
| Load | Type and total weight |
| Initial load temperature | Recorded before packing |
| Cold source | Type, number and weight |
| Placement | Exact location of cold packs |
| Ambient condition | Temperature during test |
| Opening cycle | Closed or defined openings |
| Sensor position | Exact measurement locations |
| Duration | Total test time |
| Acceptance | Maximum agreed temperature |
Once these conditions are fixed, different prototypes can be compared on equal terms.
This is especially valuable when deciding whether a more expensive insulation structure actually adds enough performance to justify the extra cost and shipping volume.
Cold retention should therefore not be reduced to one number.
The better way to evaluate an insulated bag is:
how cold + for how long + under what conditions + with what load + with how much cold source.
When those five elements are known, “How long does it keep food cold?” becomes a measurable product specification rather than an uncertain claim.
What Affects Cooler Bag Cold Retention?
Cooler bag cold retention is controlled by the whole thermal system: insulation material, foam thickness, lid construction, zipper closure, seam compression, bag volume, fill level, cold-pack quantity, starting temperature, ambient heat, and how often the bag is opened. A thicker wall can help, but it cannot fully compensate for a weak lid, large zipper gaps, oversized internal space, or insufficient frozen packs.
This is why two cooler bags with nearly identical dimensions and the same nominal foam thickness may show very different temperature curves.
The most useful way to evaluate a design is to separate the major heat-transfer areas:
| Area | Main Variables | What Can Go Wrong |
|---|---|---|
| Side walls | Foam type, thickness, density | Thin or heavily compressed insulation |
| Lid | Foam coverage, fit, overlap | Top warms faster than the body |
| Base | Foam, board, compression | Heat enters from hot surfaces |
| Zipper zone | Gap size, zipper route, closure fit | Warm air enters around opening |
| Seams | Stitching, binding, foam interruption | Thermal bridges form |
| Interior | Capacity, fill level, lining | Excess warm air or poor pack placement |
| Cold source | Pack weight, number, location | Uneven cooling |
| Environment | Temperature, sun, opening frequency | Faster heat gain |
For cooler-bag development, PEVA, aluminum foil, and EPE foam are commonly used together rather than treated as one interchangeable material. Performance also depends on the outer fabric, lining, insulation thickness, stitching, opening construction, zipper, frozen-pack use, and test conditions.
Why Does Insulation Thickness Matter?
Insulation slows heat movement through the walls of the bag. Increasing thickness usually increases thermal resistance, provided the foam remains continuous and is not excessively compressed during sewing.
But nominal thickness is not the same as finished thickness.
A sheet may begin at 8 mm before assembly, then become much thinner where it is stitched into:
- corners;
- zipper edges;
- binding;
- handle attachment areas;
- bottom seams;
- lid joints.
These compressed zones can become easier paths for heat to enter.
This is why comparing “5 mm” with “8 mm” on a quotation sheet is not enough.
A more useful comparison is:
| Item | Sample A | Sample B |
|---|---|---|
| Nominal foam thickness | 5 mm | 8 mm |
| Finished bag size | Same | Same |
| Lining | Same | Same |
| Zipper | Same | Same |
| Chilled load | Same | Same |
| Frozen packs | Same | Same |
| Ambient temperature | Same | Same |
| Temperature after 6 hours | Measured | Measured |
Only then can the extra thickness be judged against the actual improvement.
Thickness also affects the physical product.
More foam can increase:
- wall stiffness;
- sewing difficulty;
- finished weight;
- folded thickness;
- master-carton volume;
- freight volume.
A grocery tote that only needs short-duration protection may not benefit enough from a very thick structure to justify the extra bulk.
A soft outdoor cooler has a different requirement. More wall thickness may support both stronger insulation and a more substantial body.
The useful goal is not the thickest wall possible.
It is the lowest practical thickness that passes the intended temperature test with a reasonable margin.
Which Foam Keeps Food Cold Longer?
Foam performance depends on more than the material name.
PE-based foam, EPE foam, EVA foam, and other cellular structures can differ in:
- density;
- cell structure;
- flexibility;
- resilience;
- compression resistance;
- thickness;
- water resistance;
- recovery after folding.
A dense or resilient foam may maintain its structure better after sewing and repeated use. A softer foam may compress more easily and create thinner areas at seams.
That means a lower-cost foam at 8 mm does not automatically outperform a better-performing 5 mm construction.
The finished bag needs to be tested.
Jundong’s material documentation identifies EPE foam as a material commonly used for cooler insulation, cushioning, and structural support, while also noting that thermal behavior depends on the full construction rather than one layer.
When comparing foam options, change one variable at a time.
For example:
| Version | Foam | Thickness | Lid | Zipper | Test Load |
|---|---|---|---|---|---|
| A | EPE | 5 mm | Same | Same | Same |
| B | EPE | 8 mm | Same | Same | Same |
| C | EVA | 5 mm | Same | Same | Same |
| D | EVA | 8 mm | Same | Same | Same |
This prevents a common mistake: comparing one lightweight tote against one heavy structured cooler and then concluding that the foam alone caused the difference.
It did not.
The entire construction changed at the same time.
PE Foam vs EVA Foam: Which Is Better?
Neither is automatically better for every insulated bag.
PE-based foam is often selected where low weight, flexibility, insulation, and controlled cost are important.
EVA can be useful when greater resilience, cushioning, or a more structured feel is needed.
The better choice depends on how the product will be used.
For a foldable grocery tote, useful characteristics may include:
- low weight;
- easy folding;
- moderate insulation;
- controlled carton volume;
- simple daily cleaning.
For a structured soft cooler, priorities may shift toward:
- stronger wall support;
- more substantial hand feel;
- greater shape retention;
- higher carrying load;
- longer cold-retention targets.
The decision should also consider compression.
If a foam performs well in sheet form but collapses heavily around seam lines, the thermal benefit may be smaller than expected after assembly.
A practical comparison looks at five things together:
thermal result
finished structure
weight
packed volume
cost
This matters because cooler bags are shipped as physical volume.
A thicker, more resilient wall may improve temperature control, but if it doubles the folded thickness, master-carton efficiency can change sharply.
That is especially relevant for larger runs, where a small difference in carton count becomes a meaningful logistics cost.
Aluminum Foil vs PEVA: What Is the Difference?
Aluminum-style foil lining and PEVA lining serve different roles, and neither should be confused with the main insulation layer.
The foam behind the lining usually provides much of the resistance to heat transfer.
The lining influences other practical characteristics.
| Feature | Aluminum-Style Foil | PEVA |
|---|---|---|
| Visual appearance | Reflective thermal look | Smooth, clean interior |
| Cleaning | Wipeable depending on construction | Commonly selected for easy cleaning |
| Flexibility | Depends on laminate | Usually flexible |
| Surface feel | Metallic | Softer plastic-like surface |
| Common use | Grocery, picnic, promotional coolers | Lunch bags, meal prep, soft coolers |
| Thermal role | Part of layered system | Part of layered system |
The file supplied for Jundong notes that aluminum foil is often used as an insulation-facing lining, PEVA is often selected for an easy-clean interior, and EPE foam commonly provides insulation and structural support. These materials are generally used in combination.
This is why judging a cooler from a shiny interior can be misleading.
A very thin bag with reflective lining can look highly insulated while providing limited thermal resistance.
A less reflective interior backed by a stronger insulation layer may perform better.
Other details matter too:
- how the lining is joined;
- whether needle holes are exposed;
- whether corners trap dirt;
- whether seams resist condensation;
- whether the inner surface wrinkles or pulls away;
- how easy it is to wipe clean.
For products that may carry unpackaged food directly against the lining, material suitability should be confirmed for the intended use rather than assumed from the words “PEVA” or “foil.”
Jundong’s project boundaries also state that food-related claims require material and testing confirmation.
How Do Zippers and Seams Affect Insulation?
Zippers and seams are often where a cooler loses more heat than expected.
Foam works best when it forms a continuous barrier.
Every time that barrier is interrupted by stitching, binding, zipper tape, or a corner joint, heat can find an easier path.
This does not mean seams are a defect. They are unavoidable in soft-bag construction.
The issue is how they are designed.
The top opening deserves special attention because it combines several thermal challenges:
- zipper tape;
- slider gaps;
- zipper ends;
- lid seams;
- compressed foam;
- repeated opening.
A bag may have excellent insulation in the body and still warm quickly through the top.
Useful sample checks include:
- Does foam continue into the lid?
- Is the lid thinner than the side wall?
- Are there visible zipper-end gaps?
- Does the lid overlap the body cleanly?
- Is foam crushed around the zipper seam?
- Do corner seams create thin areas?
- Does the zipper close smoothly when fully loaded?
Opening shape matters as well.
A large U-shaped zipper gives excellent access but exposes a large internal area whenever it opens.
A shorter top zipper reduces opening area but may make loading more difficult.
A three-sided opening can improve visibility and access, but the longer zipper line may create more potential heat-entry area.
The correct structure depends on how often the bag will be opened.
A picnic cooler opened twice during an afternoon behaves differently from a delivery bag opened every 15 minutes.
That difference should influence the closure design.
Does Cooler Bag Size Affect Performance?
Yes.
Bag size changes internal air volume, exposed wall area, chilled load, cold-pack requirement, and the amount of warm air entering each time the bag is opened.
A larger bag is not automatically more efficient.
Consider a 20-liter cooler carrying only 5 liters of food.
Most of the internal cavity is air.
When the lid opens, part of that cooled air is replaced by warmer external air. The cold packs then have to absorb the additional heat.
A 10-liter cooler holding the same food more tightly may perform differently because there is less unused air.
This creates an important sizing rule:
Capacity should be based on the realistic load, not the largest possible load.
Useful sizing information includes:
- number of containers;
- bottle or can dimensions;
- largest package size;
- total food volume;
- frozen-pack volume;
- required clearance;
- carrying weight.
Fill level also changes performance.
| Fill Level | Likely Effect |
|---|---|
| Nearly full | Less internal air, higher chilled mass |
| Around 70–80% full | Good usable balance in many applications |
| Half full | More internal air to cool |
| Mostly empty | Greater temperature fluctuation after opening |
These percentages are not universal test standards; they simply show why load condition should be recorded whenever temperature results are compared.
Geometry matters too.
A wide shallow tote opens a large section of the interior at once.
A tall narrow cooler reduces opening area but can create temperature differences between top and bottom.
A long horizontal meal-prep bag may need several cold-pack positions to avoid warmer areas at the far ends.
This is why dimensions should be designed around the contents first.
How Do Loading and Cold-Pack Placement Change the Result?
Even a well-insulated cooler can perform poorly when loaded badly.
Cold packs concentrated in one location can create a very cold area next to the pack and much warmer areas farther away.
For a tall bag, placing one frozen pack only at the bottom may not cool the upper load effectively.
For a layered meal-prep design, cold packs between container levels may produce more even temperatures.
For a compact lunch bag, one upper and one lower cold source may be practical.
A useful development test can map temperatures at several positions:
| Sensor Position | What It Reveals |
|---|---|
| Bottom | Cooling near lower pack |
| Center | Main load temperature |
| Upper interior | Warmest area near lid |
| Near zipper | Closure weakness |
| Side wall | Wall insulation behavior |
If the center remains cold but the top warms rapidly, adding thicker foam to the bottom will not solve the real issue.
The problem is more likely to be the lid, upper insulation, cold-pack placement, or repeated opening.
This type of test often saves unnecessary material changes.
How Does Ambient Heat Change Cold Retention?
External temperature has a major effect because greater temperature difference increases heat flow into the chilled interior.
A bag used at 22°C indoors has an easier task than the same bag used at 32°C outdoors.
Direct sunlight can make the outer surface even hotter than the surrounding air.
A reliable comparison should therefore record:
- room or outdoor temperature;
- direct sun or shade;
- test start time;
- opening frequency;
- test duration.
If one sample is tested in an air-conditioned room and another in a warm warehouse, comparing their hour figures has little value.
The more useful method is to keep external conditions consistent and compare the resulting temperature curves.
What Matters Most in a Real Cooler Bag?
Cold retention usually improves when several parts of the product work together:
- insulation is thick enough for the intended duration;
- foam remains continuous around the body;
- the lid is not weaker than the side walls;
- zipper gaps are controlled;
- seam compression is limited;
- the bag is not unnecessarily oversized;
- frozen packs are sufficient and well positioned;
- the load begins cold;
- opening frequency reflects actual use.
No single material can replace the rest of the system.
That is why cooler performance should be judged from the finished product rather than from a lining swatch, foam sample, or thickness number alone.
The most useful comparison is:
same load + same frozen packs + same ambient temperature + same opening pattern + different construction
Once those variables are controlled, it becomes much easier to see which design changes genuinely improve cold retention and which ones only add bulk or cost.
Which Type of Cooler Bag Is Best?
The most suitable cooler bag is the one whose size, insulation, opening, carrying system, and internal layout match the way it will actually be used. A lunch bag, grocery tote, meal-prep carrier, delivery cooler, picnic bag, backpack cooler, and structured soft cooler may all use insulated construction, but they face very different demands.
A lightweight design may be ideal when the trip is short and the bag needs to fold flat. A more structured version makes more sense when the contents are heavier, the carrying time is longer, or the product is expected to hold its shape after repeated use.
Jundong’s documented cooler category includes lunch bags, insulated lunch bags, soft coolers, picnic coolers, meal-prep bags, bottle coolers, delivery coolers, and cooler beach bags. Common material options include polyester, Oxford fabric, nylon, RPET, PEVA, aluminum foil, EPE foam, and neoprene.
The important difference is not the name printed on the product. It is how the structure performs under the intended load.
| Cooler Type | Main Use | Structural Priority | Common Trade-Off |
|---|---|---|---|
| Lunch bag | Individual meals | Compact size, easy cleaning | Capacity vs portability |
| Grocery tote | Chilled shopping | Wide opening, strong handles | Insulation vs foldability |
| Meal-prep bag | Multiple containers | Stable base, organization | Structure vs weight |
| Delivery cooler | Repeated transport | Strong closure, durable lining | Fast access vs heat loss |
| Picnic cooler | Family or group use | Capacity, comfort, easy loading | Volume vs portability |
| Backpack cooler | Hands-free carrying | Shoulder comfort, back support | Insulation vs weight |
| Soft cooler | Longer or heavier use | Stronger body, better closure | Performance vs bulk |
| Promotional cooler | Events and campaigns | Logo area, simple construction | Cost vs thermal level |
What Are the Main Types of Insulated Bags?
The easiest way to separate insulated bags is by how they are loaded and carried.
A lunch bag normally holds one meal, snacks, a drink, and one or more frozen packs. It should be compact enough for daily use and easy to clean after repeated contact with containers and condensation.
A grocery cooler tote usually needs a larger opening. This makes it easier to load cartons, vegetables, dairy products, frozen packs, or bottled drinks, but the large opening also releases more cool air every time the bag is opened.
A meal-prep bag is often more structured because several food containers need to remain horizontal. Internal shelves, dividers, bottle pockets, cutlery pockets, or separate dry sections may become more important than maximum overall volume.
A delivery cooler needs to survive repeated loading, carrying, opening, and cleaning. Handle reinforcement, zipper reliability, base support, lining durability, and opening speed all become important.
A picnic or beach cooler usually needs more capacity and comfortable carrying. Some designs prioritize a large top opening; others use a more structured lid to improve closure.
A soft cooler often uses heavier construction and more insulation than a simple tote. It may also use reinforced webbing, stronger zippers, padded straps, and a more stable base.
The type should therefore be chosen from the use condition rather than from appearance alone.
Cooler Tote vs Soft Cooler: Which Lasts Longer?
A structured soft cooler can usually be developed for longer cold retention than a lightweight cooler tote because it gives more room for thicker insulation, stronger lid construction, better closure, and more complete wall coverage.
But this does not mean every soft cooler will automatically perform better.
A weak top opening can become the main heat-entry area even when the side walls are thick. A well-built tote can perform better than expected if it is correctly filled and used with enough frozen packs.
The two formats usually differ like this:
| Feature | Cooler Tote | Structured Soft Cooler |
|---|---|---|
| Foldability | High | Lower |
| Empty weight | Lower | Higher |
| Wall structure | Flexible | More substantial |
| Packing efficiency | Better | Lower |
| Access | Usually very easy | Depends on lid |
| Carrying load | Light to medium | Medium to heavier |
| Insulation potential | Moderate | Higher |
| Retail feel | Casual | More substantial |
| Shipping volume | Lower | Higher |
The commercial difference can be significant.
If a soft cooler takes twice as much carton space as a foldable tote, the cold-retention improvement needs to justify that extra volume.
For short grocery trips, employee gifts, event use, or lightweight lunch programs, a tote may be the more sensible structure.
For longer outdoor use, heavier contents, or a higher-performance product, a soft cooler is usually easier to engineer around.
Lunch Bag vs Cooler Bag: What Is the Difference?
The main difference is capacity and duty.
A lunch bag is generally designed around one person’s daily food.
A larger cooler may need to carry multiple meals, beverages, groceries, or heavier containers for several people.
This affects the complete construction.
A small lunch bag may use:
- short carrying handles;
- a simple shoulder strap;
- moderate padding;
- a lightweight zipper;
- one exterior pocket;
- flexible base support.
A larger cooler may need:
- wider webbing;
- stronger handle stitching;
- reinforced attachment areas;
- heavier zipper;
- shoulder padding;
- more substantial base;
- greater insulation coverage;
- additional internal support.
The same 5 mm insulation can also behave differently in these two products.
In a small lunch bag, the chilled contents and frozen packs occupy a large percentage of the internal volume.
In a larger cooler carrying only a few items, there may be much more warm air inside.
For this reason, a product labelled “cooler bag” is not automatically stronger than something labelled “lunch bag.”
The actual dimensions, construction, loading condition, and temperature results are more useful than the product name.
What Lunch Bag Keeps Food Cold for 10 Hours?
A lunch bag intended for ten-hour use should be developed around a ten-hour test condition.
It is not enough to choose a shiny lining and thick-looking foam.
A meaningful ten-hour evaluation should define:
- starting food temperature;
- ambient temperature;
- frozen-pack number and weight;
- pack placement;
- internal load;
- opening frequency;
- sensor position;
- maximum acceptable temperature.
A practical test sheet might look like this:
| Item | Example Test Setup |
|---|---|
| Bag capacity | Defined by finished sample |
| Food load | Realistic meal containers |
| Starting temperature | Recorded before test |
| Frozen packs | Fixed quantity |
| Pack weight | Recorded |
| Placement | Fixed for all samples |
| Ambient condition | Controlled |
| Openings | Closed or defined cycles |
| Sensors | Center + upper interior |
| Test duration | 10 hours |
The usefulness of the product should also be checked at the same time.
If a lunch bag reaches ten hours only when most of the internal space is occupied by frozen packs, the test result may look strong but the product may be inconvenient.
A better design balances:
food capacity + cold-pack space + bag size + carrying comfort + thermal result
This is especially important for workday lunch products, where portability matters almost as much as cooling.
Which Cooler Bag Is Best for Food Delivery?
A delivery cooler needs to handle repeated operation rather than one closed test.
Imagine a bag leaving a kitchen fully packed at 11:00 a.m.
At 11:20, it opens.
At 11:45, it opens again.
By 1:00 p.m., several containers have been removed and the internal air space has increased.
This is completely different from a cooler that remains closed for two hours.
Delivery use therefore places more importance on:
- opening size;
- closure speed;
- lining durability;
- handle strength;
- shoulder comfort;
- base reinforcement;
- interior organization;
- repeated cleaning.
A large U-shaped lid gives excellent access but exposes much of the interior.
A smaller zipper opening can reduce thermal exposure but may slow loading.
The right balance depends on how the route works.
For example:
| Delivery Situation | More Important Feature |
|---|---|
| Many short stops | Fast opening and closure |
| Fewer long trips | Stronger cold retention |
| Heavy meal boxes | Reinforced base and handles |
| Several food categories | Internal dividers |
| Daily commercial use | Durable lining and zippers |
| Motorcycle delivery | Stable shape and secure closure |
The thermal test should also reflect opening frequency.
Testing a delivery cooler completely closed for six hours can show insulation capability, but it does not show how the bag behaves during an actual route.
Which Type Is Best for Retail and Promotions?
Retail and promotional cooler bags often need very different levels of construction.
A retail product is judged repeatedly after it is taken home.
The zipper needs to continue working.
The handles should stay comfortable.
The lining should remain neat.
The bag should maintain an acceptable shape.
The insulation should continue performing after repeated use.
A promotional cooler may have a shorter use cycle and place greater emphasis on:
- large logo area;
- simple construction;
- easy distribution;
- predictable cost;
- efficient carton packing.
Neither direction is automatically better.
The mistake is using the same specification for both.
For retail programs, the following details usually deserve more attention:
- zipper feel;
- lining finish;
- pocket usefulness;
- shape retention;
- strap comfort;
- repeated cleaning;
- retail labels;
- individual packing.
For promotional programs, common priorities often include:
- logo visibility;
- fewer complex panels;
- foldable construction;
- lower packed volume;
- easy event distribution.
This creates a useful rule:
Retail structure should support repeated use. Promotional structure should support the required function without unnecessary complexity.
What Insulation Level Does Each Use Need?
Insulation level should be selected after the use duration and environment are understood.
A short grocery journey does not normally need the same construction as a full-day outdoor cooler.
A practical way to plan the structure is:
| Use | Thermal Need | Structural Direction |
|---|---|---|
| Short grocery transport | Low to moderate | Flexible tote |
| Daily lunch | Moderate | Compact insulated bag |
| Meal prep | Moderate to stronger | Structured internal layout |
| Delivery | Moderate to stronger | Durable closure and lining |
| Picnic | Moderate to stronger | Larger insulated body |
| Outdoor use | Stronger | More complete thermal structure |
| Premium soft cooler | Stronger | Thicker insulation + reinforced body |
These categories are design directions, not guaranteed hour figures.
The correct level still needs testing.
The material file provided for Jundong makes the same distinction: cooler performance depends on the combination of the outer fabric, lining, insulation layer, thickness, stitching, opening, zipper, frozen packs, and test conditions rather than one material alone.
That becomes especially important when comparing two visually similar products.
One may use:
polyester exterior
- thin foam
- foil lining
- simple zipper
Another may use:
Oxford exterior
- thicker EPE
- PEVA lining
- better lid coverage
- reinforced opening
The second construction is more complex, but whether that complexity is worthwhile depends on the actual temperature test and expected use.
How Should Capacity Be Chosen?
Capacity should follow the contents.
Oversizing a cooler can make the bag less efficient because the interior contains more air and users may not fill it consistently.
Undersizing creates a different problem: users may remove frozen packs to make room for food.
A useful capacity calculation starts with real products.
Lay out:
- meal boxes;
- beverage bottles;
- frozen packs;
- snacks;
- utensils;
- dividers.
Then calculate the internal dimensions around that load.
Do not forget the space occupied by insulation.
A cooler that measures 30 × 20 × 25 cm externally will have smaller usable dimensions after foam and lining are added.
This difference becomes more important as insulation gets thicker.
For multi-container designs, the actual container dimensions should be tested physically.
An extra 10 mm in internal width can determine whether two meal boxes fit side by side.
How Should Carrying Weight Affect the Design?
Cold contents are heavy.
A cooler holding bottles, cans, meal containers, and several frozen packs can weigh much more than the empty sample suggests.
That weight changes the handle design.
A lightweight webbing loop may work well for a lunch bag but be uncomfortable or insufficient for a larger cooler.
For heavier applications, inspect:
- webbing width;
- stitching length;
- reinforcement patch;
- handle spacing;
- shoulder pad;
- D-ring position;
- base support.
Jundong’s documented production guidance notes that handles, shoulder straps, zippers, lining, padding, and reinforcement should follow the approved construction, with cooler-bag sewing control paying particular attention to lining, insulation, and the opening.
The carrying system should therefore be tested with the intended load, not with an empty bag.
What Is the Most Practical Cooler Bag Choice?
The most practical style is the one that meets the required thermal performance without adding unnecessary weight, bulk, or complexity.
Before settling on a format, define:
- what goes inside;
- how much it weighs;
- how long it travels;
- how often the bag opens;
- how much frozen-pack space is realistic;
- whether the bag needs to fold;
- how it will be carried;
- how it will be packed.
Then compare the formats under the same conditions.
A foldable tote may be the strongest commercial choice for one project.
A structured soft cooler may be the right choice for another.
A delivery carrier may need less foam than an outdoor cooler but much stronger zippers and reinforcement.
A lunch bag may need better internal organization instead of greater capacity.
The right product is therefore not defined by the words “premium,” “heavy-duty,” or “best insulated.”
It is defined by whether the size, thermal structure, load capacity, opening, carrying system, packing volume, and tested performance all fit the intended use.
How Should Cooler Bag Performance Be Tested?

Cooler bag performance should be tested under repeatable conditions that reflect actual use. The test should control the starting temperature, chilled load, frozen-pack quantity, ambient temperature, bag fill level, opening frequency, sensor position, and total duration. If these variables change between samples, an “8-hour” or “10-hour” result becomes difficult to compare and even harder to reproduce in later production.
Cold-retention testing should therefore measure a temperature curve, not simply check whether the inside still feels cool at the end.
A useful record may look like this:
| Test Item | What Should Be Fixed |
|---|---|
| Bag style | Same size and construction |
| Chilled load | Same product type and weight |
| Starting load temperature | Recorded before packing |
| Frozen packs | Same number, weight, and starting condition |
| Pack position | Same location in every unit |
| Ambient temperature | Controlled or continuously recorded |
| Sensor positions | Fixed locations |
| Opening frequency | Closed or repeated at fixed intervals |
| Test duration | Predefined |
| Readings | Every 5–30 minutes or continuous logger data |
| Acceptance temperature | Defined before the test |
The company material documentation also makes an important distinction for cooler bags: PEVA, aluminum foil, and EPE foam may form part of the construction, but cold retention also depends on outer fabric, insulation thickness, stitching, opening design, zipper construction, ice-pack use, and the test environment.
That makes finished-bag testing much more meaningful than comparing material samples on a desk.
How Do You Test Cold-Retention Time?
Start by deciding what the cooler needs to do in real use.
A lunch bag used between 7:30 a.m. and 12:30 p.m. does not need the same test as a delivery cooler used repeatedly for an entire afternoon. A grocery tote used for a one-hour drive home is different again.
Once the use period is clear, build a controlled test around it.
A practical test sequence is:
- Condition all chilled contents to the same starting temperature.
- Freeze all gel packs under the same conditions.
- Measure and record the room or chamber temperature.
- Load each bag with the same items in the same arrangement.
- Position the frozen packs identically.
- Place temperature probes in predetermined locations.
- Close the zipper completely.
- Start logging temperature immediately.
- Open the bag only according to the planned test cycle.
- Continue until the planned duration has been reached.
- Record the final temperature and the full time-temperature curve.
For development work, the test should be repeated when possible.
A single result can be affected by slight differences in loading, sensor contact, room temperature, or how tightly the zipper was closed. Repeating the same setup helps show whether a design behaves consistently.
A simple test may use one prototype during early development. Once the construction is close to final, testing multiple samples provides much stronger evidence because it reveals whether one unit performed unusually well or poorly.
The most useful data is not:
“Sample stayed cold for 8 hours.”
It is closer to:
“Three samples with the same chilled load and frozen-pack configuration were tested for 8 hours under the same ambient condition, and their temperature curves remained close to one another.”
That tells much more about repeatability.
What Temperature Should a Test Start At?
The starting temperature should match the way the product will actually be packed.
If a lunch bag will normally receive food directly from refrigeration, the test load should begin under similar chilled conditions.
If the bag is intended for frozen groceries, the starting condition should reflect frozen goods.
If the contents are loaded warm, an insulated bag should not be expected to cool them simply because the walls contain foam.
Starting temperature matters because it strongly affects the final result.
Consider these two tests:
| Test | Starting Load | Same Bag | Same Packs |
|---|---|---|---|
| A | 3°C | Yes | Yes |
| B | 9°C | Yes | Yes |
Even if every other condition is identical, Sample A begins with a much stronger thermal advantage.
This is one reason cold-retention claims can appear better than everyday use if the test conditions are not disclosed.
The frozen packs should also have a controlled starting condition.
“Frozen pack” is not precise enough.
Record:
- pack weight;
- dimensions;
- freezer temperature if known;
- freezing duration;
- whether the pack is completely solid;
- time between freezer removal and test start.
A pack taken from a freezer and loaded immediately will behave differently from one left on a workbench for 30 minutes before packing.
The bag itself can also be conditioned.
If one sample sits overnight in a cool room while another has been stored in a warm warehouse, the initial wall temperature can affect the first part of the test.
For tighter comparisons, allow all samples to reach the same room condition before loading.
Why Does Ambient Temperature Matter?
Ambient temperature is one of the strongest influences on cooling performance.
The greater the temperature difference between the chilled interior and the surrounding air, the faster heat tends to move toward the cooler contents.
A bag tested in a 22°C office is facing much less thermal stress than the same bag used at 32°C outdoors.
This creates a major problem when hour claims are compared without conditions.
An “8-hour” result from one test may not be comparable with another 8-hour result if the surrounding temperatures were different.
A practical development program can use more than one condition.
For example:
| Condition | Purpose |
|---|---|
| Moderate indoor temperature | Everyday lunch or office use |
| Warm indoor condition | Warehouse or vehicle simulation |
| Higher-temperature condition | Outdoor stress evaluation |
| Direct sunlight exposure | Additional surface-heating check |
Direct sunlight deserves special attention.
The temperature of the outer fabric can become substantially hotter than the surrounding air, especially with dark colors. That surface heat then transfers inward through the walls.
This means exterior color can also influence real outdoor behavior even when the internal construction is unchanged.
When testing outdoors, record:
- ambient air temperature;
- sun or shade;
- approximate start time;
- surface condition;
- wind exposure;
- opening events.
When testing indoors, keep the sample away from heaters, cooling vents, direct sunlight through windows, or hot machinery.
The goal is not to create artificially favorable conditions.
The goal is to create conditions that can be repeated.
How Should Ice Packs Be Used in Testing?
Frozen packs should be treated as part of the test equipment because they can change the result dramatically.
Their effect depends on:
- total frozen mass;
- dimensions;
- formulation;
- starting temperature;
- location;
- contact with the load;
- bag size;
- amount of food inside.
Using “two ice packs” is not detailed enough because two 150 g packs and two 750 g packs create very different cooling capacity.
A better test sheet records the actual mass.
For example:
| Item | Test Specification |
|---|---|
| Cooler capacity | 18 L |
| Chilled load | 7 kg |
| Frozen packs | 2 pcs |
| Pack weight | 600 g each |
| Total frozen mass | 1.2 kg |
| Placement | One above and one below |
| Starting load temp | Recorded |
| Ambient temp | Recorded |
| Test duration | 8 hours |
Pack position should stay identical when comparing designs.
For a tall cooler, putting both packs at the base can produce a colder lower section and a warmer upper section.
For a meal-prep design with stacked containers, packs between layers may produce a more even result.
For a lunch bag, placing one pack above the meal and another below may be more useful than placing both together.
Dedicated cold-pack pockets can also improve repeatability because the pack stays in the intended position.
However, cold-pack quantity needs to remain realistic.
A cooler should not reach an impressive duration only because a large portion of its capacity has been replaced with frozen material.
If a 12-liter lunch bag requires 5 liters of frozen packs to meet its claim, the usable food capacity becomes a serious issue.
A more useful ratio considers:
usable food volume + frozen-pack volume + total bag volume
rather than measuring cold retention in isolation.
What Should a Factory Sample Be Tested For?
Temperature is only one part of cooler performance.
A prototype should also be evaluated for actual loading, weight, opening, carrying comfort, lining behavior, cleaning, structure, and packing.
A complete sample review can include:
| Area | What to Check |
|---|---|
| Dimensions | External and usable internal size |
| Capacity | Fit of real food containers, bottles, or cans |
| Insulation | Presence, coverage, thickness, compression |
| Lid | Alignment, insulation continuity, fit |
| Zipper | Smooth operation, end gaps, closure |
| Lining | Fit, wrinkles, punctures, cleanability |
| Base | Stability when fully loaded |
| Handles | Attachment and comfort under load |
| Shoulder strap | Length, reinforcement, comfort |
| Pockets | Usability when bag is full |
| Logo | Size, position, color, finish |
| Thermal test | Temperature curve under defined conditions |
| Packing | Folded size and carton efficiency |
Cooler-bag assembly deserves additional inspection because insulation can shift or compress during sewing.
Useful physical checks include:
- feeling the wall for thin areas;
- comparing the lid thickness with the body;
- checking corners for missing padding;
- inspecting foam near zipper seams;
- checking whether lining is pulled too tightly;
- looking for large zipper-end gaps;
- testing the bag fully loaded rather than empty.
Jundong’s production documentation identifies lining, insulation layer, and opening construction as important control areas for cooler bags. It also lists zippers, handles, shoulder straps, lining, padding, dimensions, reinforcement, and stitching among items that can be checked during production.
A prototype that looks excellent when empty may change noticeably after being loaded with 8–10 kg of food and frozen packs.
That is why weight testing should happen before approval.
How Should Temperature Sensors Be Positioned?
Sensor position can change the reading dramatically.
A probe placed directly against a frozen pack may show a temperature that is much lower than the rest of the contents.
A sensor near the top zipper may show the opposite.
For a more useful test, use several positions.
A common arrangement can include:
Center sensor
Placed near the center of the chilled load to represent the main contents.
Upper sensor
Placed near the top section to detect warming near the lid.
Closure sensor
Placed close to the zipper area without touching the cold source.
Lower sensor
Useful for tall bags when a frozen pack is placed near the base.
This helps reveal temperature distribution.
Imagine these readings after six hours:
| Position | Temperature |
|---|---|
| Bottom | 3.5°C |
| Center | 4.8°C |
| Upper section | 7.2°C |
| Near zipper | 8.1°C |
The result suggests that simply adding more insulation to the base may do little.
The larger weakness is probably near the lid, zipper, upper wall, or cold-pack placement.
This is where multi-sensor testing becomes valuable: it helps identify where the heat is entering, not just whether the bag became warmer.
How Should Opening Frequency Be Tested?
A bag that stays closed for ten hours is performing under a much easier condition than one opened repeatedly.
For lunch use, an uninterrupted test may be reasonable if the bag normally stays closed until lunchtime.
For delivery, events, family outings, or beverage use, repeated opening should be included.
A simple opening-cycle test might specify:
- open every 30 minutes;
- leave open for 20 seconds;
- remove one standard load item;
- close fully;
- continue logging temperature.
This simulates two things at once:
warm external air entering;
and chilled mass gradually leaving.
As contents are removed, more internal air space also appears.
That can accelerate later temperature changes.
For delivery coolers, this may be more realistic than a closed six-hour test.
Both results can be useful:
Closed test: shows the insulation potential of the structure.
Opening-cycle test: shows how the product behaves in repeated real use.
How Do You Compare Sample vs Bulk Performance?
The approved prototype needs to become a written specification before production begins.
A physical reference alone is not enough because the internal layers cannot always be identified after the bag is completed.
Record at least:
- outer fabric;
- coating if applicable;
- lining;
- insulation material;
- nominal insulation thickness;
- zipper specification;
- webbing;
- reinforcement;
- dimensions;
- internal structure;
- logo;
- packing.
The file supplied for Jundong also states that material hand feel, color, thickness, and logo effect should be confirmed during sampling, while material choice should be considered together with structure, packing, and delivery requirements.
During bulk production, critical thermal elements should be checked before they become hidden inside the finished bag.
This may include:
- insulation material;
- insulation thickness;
- insulation coverage;
- lining;
- opening construction;
- zipper placement;
- lid assembly;
- seam consistency.
Finished units can then be selected and tested using the same method used for the approved prototype.
The conditions must remain the same.
If the prototype was tested with:
two 600 g frozen packs,
7 kg of chilled load,
30°C ambient temperature,
no opening,
and an eight-hour duration,
the production verification should not switch to lighter contents, larger packs, or a cooler room.
Otherwise the comparison loses much of its value.
The objective is straightforward:
approved construction → documented test → controlled production → repeat test
When these four stages stay connected, cold-retention performance becomes much easier to reproduce from sample to bulk.
How Do You Develop a Custom Cooler Bag?

A custom cooler bag should be developed from its intended use inward. Capacity, cold-retention time, carrying weight, frozen-pack space, opening frequency, cleaning needs, and packing volume should be defined before the exterior fabric or logo is finalized. Once those conditions are clear, the insulation, lining, closure, handles, internal structure, sample test, and bulk controls can be built around measurable requirements.
A practical development sequence is:
use → contents → dimensions → thermal target → insulation → opening → carrying system → sample → load test → temperature test → revision → approved specification → bulk control
This order matters because cooler bags are functional products. A small structural change can affect several things at the same time.
Increasing foam thickness may improve insulation but reduce internal capacity.
Adding a large U-shaped zipper may make loading easier but increase the opening area.
Adding a rigid base may improve shape and carrying stability but make the bag harder to fold.
A better custom cooler is therefore not created by adding more features. It is created by balancing the features that matter for the actual use.
What Specifications Should You Send Before Sampling?
The clearer the starting information, the fewer unnecessary sample revisions are usually needed.
A useful project brief should include:
- reference photo, sketch, or existing sample;
- external dimensions;
- expected internal capacity;
- contents to be carried;
- approximate loaded weight;
- required cold-retention duration;
- likely ambient condition;
- preferred outer material;
- preferred lining;
- closure type;
- handle or shoulder-strap requirement;
- pockets or dividers;
- logo artwork and position;
- expected quantity;
- packing method;
- destination;
- required delivery date.
For cooler bags, the contents deserve more attention than they do with many ordinary bags.
A statement such as “20-liter cooler” is still incomplete.
A much more useful description would be:
“Designed to hold six 500 ml bottles, four meal boxes, and two frozen gel packs, with enough clearance for easy loading.”
This allows the internal dimensions to be built around real objects.
The same applies to carrying weight.
A bag holding lightweight snacks does not need the same handle reinforcement as a cooler holding bottled drinks, frozen food, and several kilograms of ice packs.
If an existing product is being modified, mark which details must remain unchanged and which details can move.
For example:
- keep overall appearance;
- reduce height by 20 mm;
- increase base width;
- change foil lining to PEVA;
- move logo to front pocket;
- add shoulder strap;
- improve lid insulation.
That is much more precise than simply sending a reference bag and asking for something “similar.”
Jundong’s material documentation lists polyester, Oxford fabric, nylon, RPET, PEVA, aluminum foil, EPE foam, neoprene and other materials among the options used for cooler projects, while stressing that the final choice depends on use, structure, quantity, appearance, function, packing and delivery needs.
How Do You Choose the Best Insulation Structure?
Start with the thermal requirement, not the foam name.
If the cooler only needs to protect groceries during a short trip, a flexible construction may be enough.
If the bag needs to support a full workday, outdoor activity, or repeated delivery use, stronger insulation coverage and a more controlled opening may be needed.
When the correct structure is uncertain, comparing two or three sample versions is often more useful than making one heavily specified sample immediately.
For example:
| Version | Construction Direction | Main Purpose |
|---|---|---|
| A | Lighter foam, flexible body | Folding and lower packed volume |
| B | Medium foam, improved lid | Balanced daily use |
| C | Thicker foam, stronger base and lid | Longer cold-retention target |
The samples should keep the same basic dimensions, chilled load, frozen packs, zipper style, and test condition whenever possible.
That makes the thermal difference easier to understand.
Insulation should also be evaluated as a complete layer system.
Jundong’s cooler material guidance notes that aluminum foil, PEVA, and EPE foam are often used together. Aluminum foil may provide a reflective thermal interior, PEVA may provide an easy-clean surface, and EPE foam may provide insulation, cushioning, and structural support.
The visible inner material alone does not determine performance.
A shiny foil interior with very thin foam may perform worse than a PEVA-lined bag with better insulation coverage and a tighter lid.
The most useful comparison is therefore:
thermal result + finished thickness + usable capacity + weight + carton volume + cost
All six matter.
How Thick Should Custom Cooler Bag Insulation Be?
There is no single correct thickness for every cooler.
The required thickness depends on:
- foam type;
- density;
- bag size;
- thermal duration;
- opening design;
- lid construction;
- ambient condition;
- cold-pack quantity;
- folding requirement;
- total carrying weight;
- target cost.
Nominal foam thickness also changes after sewing.
A sheet may begin at 8 mm, but seams, binding, zipper edges, corners, and handle attachment areas can compress it considerably.
For that reason, two measurements are useful:
raw material thickness
and
finished assembled thickness
Both should be considered.
A practical test could compare:
| Sample | Foam Thickness | Other Structure | Thermal Test |
|---|---|---|---|
| A | 5 mm | Same | Recorded |
| B | 8 mm | Same | Recorded |
If Sample B gives a meaningful improvement, the thicker construction may be justified.
If the improvement is small, the real weakness may be somewhere else:
- thin lid;
- zipper-end gaps;
- large opening;
- oversized cavity;
- poor cold-pack location;
- compressed seams.
This is why adding foam should not be the automatic response to every cooling issue.
Sometimes improving the lid or closure gives a better result with less added bulk.
What Is the Custom Cooler Bag Sample Process?
A good sample process should verify fit, function, thermal behavior, appearance, and production feasibility before bulk work begins.
A practical sequence is:
- Confirm dimensions and intended contents.
- Confirm the initial material structure.
- Prepare artwork and color references.
- Build the first sample.
- Check external and internal dimensions.
- Load real containers, bottles, or food packs.
- Add the intended frozen packs.
- Test handles and straps at full load.
- Check zipper access.
- Run the agreed cold-retention test.
- Inspect weak areas.
- Revise only the necessary details.
- Build the approval sample.
- Record the final specification.
The first prototype does not need to be treated as the final version.
Its main purpose is to expose problems early.
For example:
The capacity may be correct, but the zipper opening may be too narrow.
The foam may provide enough insulation, but the bag may become too bulky.
The shoulder strap may be comfortable when empty but uncomfortable at 10 kg.
The temperature result may be strong at the bottom but weak near the lid.
Each issue should lead to a targeted revision.
Changing foam, zipper, dimensions, and lining all at once makes it difficult to know which change improved or weakened the result.
Jundong’s documented sampling time is normally 5–7 days, while some simple styles may be completed in 2–3 days. The exact timing still depends on material availability, structure, logo process, revisions, and any required testing.
What Affects Custom Cooler Bag Price?
Cooler bag cost comes from the complete specification.
The main cost drivers include:
- bag dimensions;
- outer material;
- material coating;
- insulation type;
- insulation thickness;
- lining;
- zipper size and quality;
- webbing;
- buckles and hardware;
- pockets;
- dividers;
- base reinforcement;
- shoulder strap;
- logo process;
- printing colors;
- sewing complexity;
- individual packing;
- carton structure;
- order quantity;
- testing requirements.
A larger bag affects cost twice.
It uses more material, and it may also occupy more shipping volume.
A thicker wall can have the same double effect.
It increases insulation material consumption while reducing the number of finished pieces that fit into a carton.
This is why a slightly lower unit price is not always the cheapest overall solution.
Consider two designs:
| Item | Design A | Design B |
|---|---|---|
| Wall structure | Flexible | More structured |
| Unit cost | Lower | Higher |
| Pieces per carton | Higher | Lower |
| Cold-retention result | Moderate | Stronger |
| Shipping volume | Lower | Higher |
Neither design is automatically better.
The right decision depends on whether the additional thermal performance has commercial value.
Quantity also affects unit cost because material preparation, printing setup, sewing arrangement, QC and packing work can be spread across more pieces. Jundong’s factual pricing guidance notes that quantity can improve production efficiency, but material, structure, logo, packing and testing still establish the base cost.
Its standard MOQ is usually 500 pieces per design, with some simple styles reviewed at 200–300 pieces depending on the project.
How Does a Factory Control Bulk Quality?
The approved sample should become a measurable production reference.
A physical sample alone is not enough because many important cooler components become hidden after assembly.
The written specification should record:
- outer material;
- lining;
- foam type;
- foam thickness;
- zipper;
- webbing;
- reinforcement;
- dimensions;
- logo size and location;
- pockets;
- internal structure;
- packing.
For cooler bags, several areas deserve special attention during production.
Insulation layer
The correct foam must be used, and coverage should continue through the intended wall, base and lid areas.
Lining
The lining should be fitted cleanly without excessive pulling, punctures, or major wrinkles that affect use.
Opening
Zipper alignment, zipper-end gaps, lid fit and seam construction should follow the approved sample.
Handles
Attachment areas should match the load requirement.
Dimensions
Small dimension changes can affect internal container fit and usable volume.
Jundong’s production documentation specifically identifies lining, insulation layer and opening construction as important sewing areas for cooler products. Its in-process inspection can also include material, dimensions, logo placement, stitching, handles, shoulder straps, zippers, compartments, reinforcement, lining and padding.
Where cold-retention performance is important, selected finished units can be retested under the same conditions used for the approved sample.
The test conditions should not become easier.
If the sample passed with:
- a 7 kg chilled load;
- two 600 g frozen packs;
- 30°C ambient temperature;
- eight-hour duration;
the selected bulk units should be checked under the same setup.
That is how appearance consistency and functional consistency stay connected.
How Do You Choose a Custom Cooler Bag Factory?
A strong development partner should be able to discuss the cooler as a functional product, not only as a fabric bag with a logo.
Useful conversations usually cover:
- required cold-retention duration;
- insulation options;
- lining choices;
- opening structure;
- zipper design;
- usable capacity;
- cold-pack placement;
- carrying weight;
- packing volume;
- sample testing;
- bulk inspection.
Be cautious when a fixed hour claim is given without test conditions.
Also be cautious when a material is automatically described as food-safe, leakproof, or suitable for every region.
Jundong’s documented cooler guidance specifically avoids those absolute claims. It states that cooling performance depends on material, insulation, structure, frozen packs, test conditions and actual use, while food-related material requirements and leak resistance need to be reviewed according to the specific construction.
That approach is more useful because cooler performance can actually be checked.
A capable project partner should be able to move from:
“we need a cooler bag”
to:
“we need this internal volume, this carrying weight, this thermal duration, this opening structure, this cold-pack arrangement and this packing efficiency.”
Once those details are clear, the sample becomes much easier to evaluate, cost becomes easier to control, and bulk production has a much stronger reference to follow.