 Skip to content
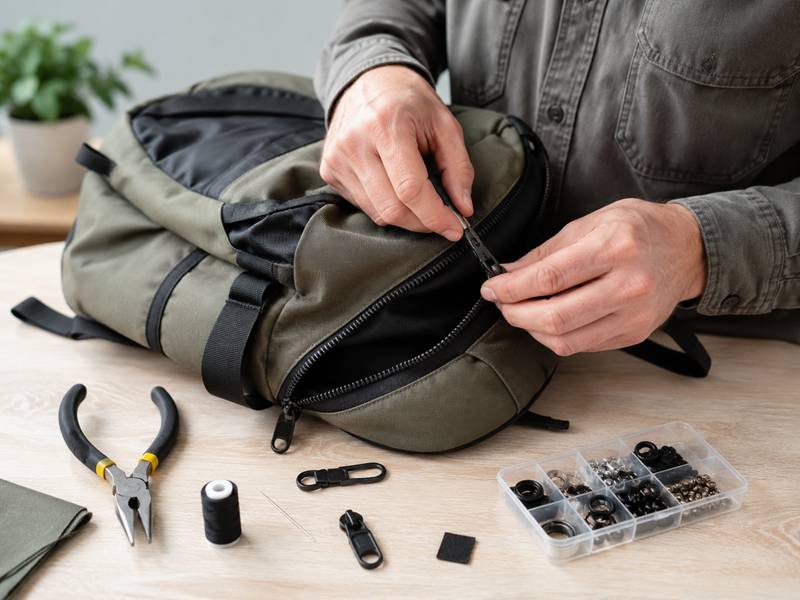
A backpack zipper can fail long before the fabric, straps, or main body wears out. That makes it one of the smallest components capable of disabling an otherwise usable backpack. A slider that has opened by less than a visible millimeter may stop gripping the chain correctly. A section of lining caught inside the slider can make a perfectly good zipper feel broken. A heavily packed compartment can also pull sideways on the zipper and make a newly replaced slider split again.
That is why squeezing the slider with pliers should never be the first reaction.
To fix a backpack zipper correctly, unload the bag and identify whether the problem comes from trapped fabric, a worn slider, an off-track slider, damaged teeth, distorted zipper tape, or excessive tension around the opening. Minor jams and slider problems can often be repaired without replacing the complete zipper. Missing teeth, badly torn tape, or repeated splitting under normal load usually require a more extensive repair.
This distinction becomes especially important with custom backpacks. Zipper type, zipper size, slider, puller, opening direction, double-slider construction, and water-resistant requirements can all affect how the opening performs in real use. Backpacks in particular depend on smooth operation, durability, and secure closure.
Consider two backpacks placed on a workbench. Both appear to have the same complaint: “the zipper keeps opening.” On the first bag, replacing a worn slider solves the problem in minutes. On the second, the new slider separates again as soon as the laptop compartment is filled. The visible symptom is identical, but the second failure comes from structural tension rather than the slider alone.
Correct repair begins by finding that difference.
What Is Wrong With Your Backpack Zipper?
A backpack zipper should be diagnosed before any repair is attempted. The most useful clues are simple: where the failure happens, whether it happens only under load, whether the slider still moves freely, whether the chain closes behind it, and whether the zipper tape stays flat. A jam, split opening, loose slider, missing tooth, and torn tape may look similar at first, but they require very different repairs.
For backpacks, zipper performance is closely tied to smooth movement, durability, and secure closure. Zipper type, size, slider, puller, opening direction, single- or double-slider layout, and water-resistant construction can all change how the finished opening behaves.
A useful first check is to empty the backpack completely and run the zipper slowly from one end to the other. Then repeat the test with the compartment filled to its normal working volume. If the problem only appears when the bag is loaded, the root cause may be structural tension rather than the zipper alone.
| What You See | Most Likely Cause | First Check | Repair Difficulty | Replacement Risk |
|---|---|---|---|---|
| Slider will not move | Fabric, thread, dirt, distorted chain | Look inside both slider entrances | Low | Low |
| Slider moves but zipper opens behind it | Worn or widened slider | Slider fit and chain condition | Low–Medium | Medium |
| Zipper works empty but splits when packed | Excessive side tension | Opening shape and panel pressure | Medium | Medium–High |
| Slider is attached to one side only | Slider came off track | Stops, ends, alignment | Medium | Medium |
| Same location jams repeatedly | Bent tooth, damaged coil, thick seam | Inspect the exact section | Medium | Medium |
| Pull tab breaks but zipper still closes | Puller failure | Slider body | Low | Very low |
| Teeth or elements are missing | Chain damage | Length and location of loss | High | High |
| Tape is torn beside the chain | Wear or seam stress | Tape, stitching, reinforcement | High | High |
| Tape twists during closure | Sewing distortion or uneven tension | Seam line and panel alignment | Medium | Medium–High |
Why Does a Custom Backpack Zipper Keep Splitting Open?
A zipper that appears to close normally but separates again behind the slider usually has one of two problems: the slider is no longer pressing both sides of the chain together firmly enough, or the backpack opening is pulling the two zipper tapes apart faster than the slider can keep them engaged.
The fastest way to separate these two causes is to compare the zipper unloaded and loaded.
Place the backpack on a table and empty the compartment. Close the zipper slowly.
If it still splits immediately behind the slider, inspect the slider first.
If it stays closed while empty but opens when the backpack is filled, the opening itself may be creating too much crosswise force.
That difference matters because replacing a slider cannot correct a backpack structure that is continuously pulling the chain apart.
Common causes include:
- worn slider geometry;
- slider size that does not match the zipper chain;
- stretched zipper tape;
- worn coil or molded elements;
- excessive tension around a curved opening;
- stiff foam pushing the panels outward;
- a tightly packed laptop compartment;
- thick seam transitions near corners;
- uneven sewing on the two zipper sides;
- insufficient room for the intended packed volume.
For a heavy canvas backpack, the fabric itself can increase the problem. Thick canvas, foam, binding, and reinforcement create a rigid opening. If that opening is slightly undersized for the packed volume, outward pressure can be transferred directly to the zipper.
A practical test is to mark the location where splitting begins. If it always starts at the same corner, seam junction, or padded section, inspect the backpack construction at that location rather than changing sliders repeatedly.
Why Is the Backpack Zipper Stuck?
A stuck zipper is often caused by something entering the slider rather than by a failed chain.
Backpacks contain many layers near the zipper: shell fabric, lining, binding, seam allowance, foam, pocket fabric, piping, reinforcement tape, and loose thread. Any of these can become trapped.
The first rule is simple: do not pull harder.
Excessive force can turn a small fabric jam into a bent slider, torn lining, damaged tape, or distorted zipper chain.
Work through the problem in this order:
- Empty the compartment so there is no tension on the zipper.
- Move the slider backward a few millimeters if possible.
- Inspect both entrances of the slider under strong light.
- Look for loose thread, lining, coating residue, fibers, sand, or small debris.
- Pull trapped material away from the slider while moving the slider backward.
- Clean the chain gently if dirt is visible.
- Test the repaired area several times.
If the slider stops at exactly the same location every time, the problem is probably more than loose fabric.
Inspect that section for:
- a distorted tooth;
- damaged coil;
- tape twisting;
- unusually thick seam allowance;
- misaligned binding;
- fabric pulled too close to the chain.
A zipper that jams only once may need cleaning. A zipper that jams at the same position ten times needs structural inspection.
Why Does the Slider Come Off the Track?
A slider normally leaves the zipper because one of the controls that keeps it aligned has failed.
This may include a missing top stop, worn slider, damaged zipper end, stretched tape, or uneven feeding of the two zipper sides.
Before reinstalling the slider, compare both sides of the zipper carefully.
They should begin from the same position. If one side enters the slider several elements ahead of the other, the chain may close crookedly or immediately separate again.
Check the zipper end for these details:
- top stop still present;
- zipper tape not torn;
- end seam still secure;
- no missing teeth or coil damage;
- slider not visibly widened;
- both zipper sides the same length.
If the slider has come off because the stop is missing, correcting the stop may be enough.
If the slider keeps coming off after reinstallation, look deeper. A stretched tape or damaged zipper end can continue forcing the slider out of alignment.
This matters on large backpack openings because long zippers experience more movement, especially around corners. Double-slider designs also need accurate end construction because both sliders depend on stable alignment throughout the chain.
Why Do Zipper Teeth Become Crooked or Misaligned?
The correct repair depends on the zipper construction.
Metal zippers use individual metal elements. Molded zippers use separate plastic elements. Coil zippers use a continuous synthetic coil. These systems do not fail in the same way.
A slightly bent metal tooth may sometimes be moved back into position.
A cracked molded element usually cannot be restored reliably.
A distorted coil may indicate damage to the coil itself or tension in the zipper tape.
Before touching the teeth, place the backpack flat and inspect the tape.
Many “crooked teeth” problems are actually tape problems.
If the zipper tape is being twisted by sewing, seam pressure, or the shape of the backpack panel, the elements may appear misaligned even though they are not damaged.
Compare the faulty area with an undamaged section.
If one metal tooth is slightly displaced but still firmly attached, use fine pliers and make very small corrections. Do not bend it backward and forward repeatedly.
Stop if:
- the element becomes loose;
- several adjacent teeth are affected;
- the tape starts tearing;
- the slider needs heavy force to pass;
- the chain still fails to engage after alignment.
Once several elements lose their original spacing, slider replacement alone will not solve the problem.
Is the Zipper Slider or Puller Broken?
The slider and puller are different parts and should never be treated as the same failure.
The puller is the part held by the hand.
The slider is the mechanical body that brings the two sides of the zipper together.
If the pull tab breaks but the zipper still opens and closes correctly, the repair is usually simple. A suitable replacement pull, cord loop, or metal tab may restore normal use without touching the chain.
A damaged slider produces different symptoms.
Watch for:
- zipper reopening behind the slider;
- excessive side-to-side movement;
- slider tilting during closure;
- irregular resistance;
- chain not fully engaging;
- visible bending in the slider body;
- repeated splitting after closure.
A slider can look normal from the outside and still be worn internally.
For custom backpacks, the puller and slider should also be specified separately. The puller affects grip, appearance, glove use, noise, and branding. The slider must remain mechanically compatible with the zipper chain. This is why zipper development should confirm zipper size, slider, puller, opening direction, and overall configuration independently.
Is the Zipper Tape Torn or Loose?
Zipper tape is one of the most important parts of the system because it connects the chain to the backpack body.
When the tape tears, the problem is no longer limited to the slider.
Inspect three areas separately.
First, check the edge directly beside the zipper elements.
If the fabric is fraying next to the teeth or coil, the chain may eventually separate from the tape.
Second, check the sewing line.
Broken stitches can make it look as though the zipper itself is failing when the real problem is the seam connecting it to the backpack panel.
Third, inspect corners and high-load areas.
Zipper zones can experience stress together with handles, shoulder straps, webbing, D-rings, side connections, bottom seams, reinforcement stitches, and loaded corners.
Repeated damage in the same location should be treated seriously.
If five, ten, or twenty backpacks develop tape tearing near the same top corner, it is unlikely to be random wear. The opening shape, seam allowance, reinforcement, or panel tension should be reviewed.
Small tears away from the chain can sometimes be reinforced.
Damage extending into the chain usually has a much higher replacement risk.
Which Zipper Problems Can Be Repaired?
Many backpack zipper problems can be repaired without replacing the entire zipper, but the decision becomes much easier when the system is separated into three parts: slider, chain, and backpack structure.
| Area | Common Failure | Usually Repairable? | Usual Action |
|---|---|---|---|
| Puller | Broken tab | Yes | Replace puller |
| Slider | Slightly loose | Often | Adjust carefully |
| Slider | Worn or distorted | Often | Replace slider |
| Chain | Minor metal-tooth misalignment | Sometimes | Realign carefully |
| Chain | Missing teeth | Rarely | Replace zipper |
| Coil | Local distortion | Sometimes | Inspect and correct |
| Coil | Torn or missing section | Rarely | Replace zipper |
| Tape | Small tear away from chain | Sometimes | Reinforce |
| Tape | Tear beside chain | Limited | Major repair or replacement |
| Structure | Excessive opening tension | Yes, but not with slider repair alone | Modify construction |
The easiest problems are usually trapped fabric, damaged pullers, and mildly worn sliders.
The more difficult problems involve damaged chain geometry or tape.
The most expensive problems are often structural because replacing one component may not stop the failure from returning.
A practical repair decision can be made by checking four conditions:
Is the chain still complete?
Does the zipper close correctly while the backpack is empty?
Does it remain closed when the compartment is normally loaded?
Does the same failure return after a suitable slider is installed?
If the chain is intact and the problem disappears after slider repair, replacing the entire zipper is unnecessary.
If the chain has missing elements, torn coil, or badly damaged tape, replacement becomes much more sensible.
If the zipper only fails when the backpack is loaded, examine the opening design, sewing, reinforcement, padding, and compartment volume.
This last situation is especially important when developing a custom backpack. Incoming inspection can confirm that the correct zipper specification arrived, while later functional checks confirm whether it works correctly after being sewn into the finished structure. Jundong’s recorded QC process includes checking zipper specifications before production and checking zipper smoothness and puller security during functional inspection.
A good diagnosis therefore does more than identify a broken component.
It tells you whether the problem comes from wear, hardware compatibility, chain damage, sewing accuracy, or structural tension.
That distinction is what separates a repair that lasts from one that works for a few days and then fails again.
How Do You Fix a Backpack Zipper Step by Step?
Fixing a backpack zipper starts with one simple rule: repair the failed part, not the symptom you happen to see first. A slider that will not move may only have trapped lining inside it. A zipper that opens behind the slider may need a new slider rather than a new chain. A main compartment that closes perfectly when empty but separates when packed may have excessive tension around the opening.
Before using pliers, lubricant, or replacement parts, empty the backpack and test the zipper without load. Then inspect the chain, slider, puller, tape, stops, seams, and nearby fabric. Work from the smallest repair toward the largest. This reduces unnecessary damage and makes it much easier to identify whether the problem is local wear or something in the backpack structure.
A practical repair sequence is:
- Empty the backpack and remove tension.
- Locate the exact failure area.
- Clean or release trapped material.
- Check slider condition.
- Check teeth or coil condition.
- Inspect zipper tape and stitching.
- Repair or replace only the damaged component.
- Test empty.
- Test with normal contents.
- Recheck the same area after repeated opening and closing.
| Problem | First Repair to Try | Tools Often Needed | Typical Hands-On Time |
|---|---|---|---|
| Fabric trapped in slider | Release obstruction | Tweezers, fine pliers | 5–15 min |
| Dirt or grit in chain | Clean the zipper path | Soft brush, cloth | 5–10 min |
| Loose slider | Very light slider adjustment | Smooth-jaw pliers | 5–10 min |
| Broken pull tab | Replace puller | Small pliers | 5–15 min |
| Slider came off one side | Reinstall and secure stop | Pliers, screwdriver | 10–30 min |
| Worn slider | Install matching replacement | Slider, pliers, stop | 15–40 min |
| Slightly bent metal tooth | Carefully realign | Fine pliers | 10–20 min |
| Torn tape | Reinforce or resew | Needle, thread, machine | 20–60+ min |
| Complete zipper failure | Replace zipper | Seam ripper, machine | 1–3+ hr |
What Tools Do You Need for Backpack Zipper Repair?
Most zipper problems can be handled with a small kit rather than heavy workshop equipment.
Useful tools include:
- fine needle-nose pliers;
- small smooth-jaw pliers;
- tweezers;
- small flat screwdriver;
- soft nylon brush;
- clean cloth;
- seam ripper;
- scissors;
- strong sewing thread;
- hand-sewing needles;
- matching replacement sliders;
- zipper top or bottom stops.
Tool size matters.
Large pliers are difficult to control and can crush a slider. Fine pliers let you make very small adjustments. Tweezers are often better than pliers when thread, lining, or fine fibers are trapped inside the slider.
If stitching must be opened, remove as little as possible. A backpack zipper may sit next to lining, foam, binding, reinforcement tape, piping, or internal pockets. Opening a large section unnecessarily makes restoration harder.
When replacing a slider, identify the zipper construction and size first. Two sliders that look almost identical may not have the same internal geometry.
What Is the Best Tool to Fix a Stuck Tactical Backpack Zipper?
For a stuck tactical backpack zipper, fine tweezers and narrow needle-nose pliers are usually the most useful tools because the blockage often comes from thread, lining, webbing fibers, or dirt.
Tactical styles frequently combine thick woven fabric, binding, MOLLE webbing, reinforcement, multiple pockets, and heavier sewing. These extra layers make fabric entrapment more likely around the zipper path.
Use this sequence:
- Empty the compartment.
- Hold the slider body instead of pulling hard on the tab.
- Move it backward slightly if possible.
- Look into both slider openings.
- Release trapped thread or fabric with tweezers.
- Brush away sand, dust, or loose fibers.
- Straighten the zipper tape.
- Move the slider slowly through the affected section.
- Repeat at least 10 cycles.
Avoid driving a screwdriver between the slider plates. This can widen the slider and create a splitting problem that did not exist before.
If the same spot jams repeatedly, check seam thickness, binding placement, or a distorted zipper element.
How Do You Fix a Split Zipper on a Heavy Canvas Backpack?
Heavy canvas backpacks often create more zipper stress because thick fabric, reinforcement, and padding can make the opening relatively stiff.
First test the zipper with the bag empty.
If it separates directly behind the slider even when laid flat, inspect the slider for wear or widening.
If it stays closed while empty but splits when the compartment is filled, look at the backpack structure before changing hardware.
Possible causes include:
- the opening is too tight for the packed volume;
- stiff canvas pulls outward across the zipper;
- thick seam allowances create local pressure;
- foam pushes the panels apart;
- a sharp corner changes the slider angle;
- zipper tape is sewn under uneven tension.
If the slider is only slightly loose, smooth-jaw pliers can be used to make a very small adjustment.
Do not squeeze hard once.
Apply light pressure, test the zipper, then repeat only if necessary. After every adjustment, open and close 20–30 cm of the chain several times.
If the zipper becomes difficult to move, stop. The slider may already be too tight.
If a properly matched replacement slider still splits when the backpack is loaded, the opening construction needs attention.
How Do You Tighten a Loose Zipper Slider?
A worn slider often lets the zipper chain enter normally but fails to join both sides firmly enough.
Before adjusting the slider, inspect the chain.
Do not tighten a slider over missing teeth, damaged coil, or badly distorted elements.
Place the slider near the middle of a straight section. Using small smooth-jaw pliers, apply extremely light pressure to the slider body. Keep the adjustment even on both sides.
Then test.
A useful check is to run the slider through the same 20–30 cm section at least five times.
Stop adjusting when:
- the chain closes without reopening;
- slider movement remains smooth;
- no abnormal scraping appears;
- the tape stays flat.
Replace the slider rather than continuing to reshape it if:
- splitting returns quickly;
- the slider tilts;
- visible cracks appear;
- the body is badly worn;
- heavy pressure is needed to close the chain.
Repeated squeezing is not a permanent repair for a heavily worn part.
How Do You Replace a Broken Slider on a Nylon Backpack?
Many backpacks described as having a nylon zipper actually use synthetic coil construction. The replacement slider needs to match that chain type and size.
Start by moving the old slider toward an accessible zipper end.
If the zipper has a removable stop, take it off carefully with fine pliers. If the end is enclosed inside a seam, open only enough stitching to expose the chain.
Then:
- Remove the worn slider.
- Check both zipper sides for damage.
- Align the two sides evenly.
- Feed both sides into the replacement slider at the same height.
- Pull slowly.
- Check whether the chain closes evenly.
- Run the slider through the complete opening.
- Reinstall a suitable stop.
- Restore any opened seam.
Do not force a replacement slider that feels excessively tight.
Also do not accept a slider that moves freely but leaves a gap behind it.
Both conditions indicate poor compatibility.
When evaluating a custom backpack, zipper type, zipper size, slider, puller, opening direction, and double-slider arrangement should be confirmed separately because each affects handling and durability.
How Do You Put a Zipper Slider Back on Track?
A slider that has come off one side can often be reinstalled if the chain and tape remain intact.
First find out why it came off.
Check:
- whether the top stop is missing;
- whether the zipper end is torn;
- whether the slider is widened;
- whether one side is stretched;
- whether teeth or coil are damaged;
- whether the end seam has opened.
Lay the zipper flat and remove tension.
Feed both zipper sides into the slider as evenly as possible. A difference of only a few elements can make the chain close crookedly.
Pull the slider 5–10 cm and stop.
Inspect alignment before continuing.
If both sides engage correctly, run the slider farther and then restore the stop or end construction.
If the slider comes off again, do not keep reinstalling it. Inspect the stop, chain end, tape, and slider fit.
Repeated derailment usually means another part has failed.
How Do You Realign Crooked Teeth on a Metal Zipper?
Metal zipper elements can sometimes be corrected when only one or two are slightly displaced and still firmly attached.
Open the zipper fully and place the backpack flat.
Compare the damaged area with several undamaged teeth nearby. Use fine pliers to make very small corrections.
The aim is to restore the original angle and spacing, not to flatten the tooth.
After each small movement:
- release the pliers;
- inspect the tooth;
- move the slider slowly toward the area;
- stop immediately if resistance increases.
Do not continue if:
- the tooth becomes loose;
- several adjacent teeth are bent;
- metal begins to crack;
- the zipper tape tears;
- the slider cannot pass smoothly.
Repeated bending weakens metal.
Also confirm that the tape itself is not twisted. Sometimes teeth appear crooked because the zipper has been sewn under uneven tension.
How Do You Replace a Broken Zipper Pull?
A broken pull tab does not necessarily mean the slider is damaged.
First test the slider using a temporary cord loop or by carefully gripping the slider bridge.
If the zipper opens and closes normally, replace only the puller.
Common options include:
- replacement metal tab;
- cord loop;
- fabric pull;
- molded rubber pull;
- clip-on replacement;
- custom-shaped hardware.
Choose the pull according to use.
A small polished pull may suit a compact lifestyle backpack but can be difficult to grip with gloves. Long cord pulls improve grip on outdoor styles. Heavy metal pulls may add noise and strike nearby hardware during walking.
The pull should also move freely without twisting the slider body excessively.
How Long Does Backpack Zipper Repair Take?
The time required depends mainly on how deeply the failed part is built into the bag.
Simple repairs can take minutes.
Complete replacement can require several hours because lining, binding, foam, piping, or reinforcement may need to be opened and rebuilt.
| Repair | Approximate Hands-On Time |
|---|---|
| Remove trapped thread | 5–10 minutes |
| Clean zipper path | 5–10 minutes |
| Replace pull tab | 5–15 minutes |
| Adjust loose slider | 5–10 minutes |
| Reinstall slider | 10–30 minutes |
| Replace slider | 15–40 minutes |
| Repair stop | 10–30 minutes |
| Reinforce small tape tear | 20–60 minutes |
| Replace complete zipper | 1–3+ hours |
A complex travel or laptop backpack may take longer because the repair has to preserve original shape, padding, and seam strength.
When the same failure appears on several pieces, spend time finding the shared cause rather than repeatedly repairing finished bags one by one.
How Do You Test the Zipper After Repair?
One successful open-close cycle is not enough.
Start with the backpack empty.
Run the slider through the entire opening at least 10 times. Pay attention to changes in resistance, especially near corners and seam junctions.
Then fill the bag to a realistic working volume.
Repeat the test.
Check whether:
- the chain stays closed behind the slider;
- resistance increases under load;
- lining enters the slider;
- zipper tape twists;
- the slider tilts;
- the puller remains secure;
- stops remain in position;
- corners continue to run smoothly;
- the opening becomes visibly distorted.
For larger main compartments, also hold the backpack in its normal carrying position. Gravity and internal contents can change zipper tension compared with a bag lying flat on a table.
Functional inspection should include zipper smoothness and puller security, not appearance alone.
For a newly developed backpack, test several pieces rather than relying on one approved sample. Small differences in sewing, tape tension, slider fit, and reinforcement can affect real performance.
A useful final check is simple:
empty test → normal-load test → repeated-cycle test → corner check → seam inspection
If the zipper remains smooth, closes completely, stays engaged under normal load, and shows no new tape or seam distortion, the repair is far more likely to hold during regular use.
Repair vs Replacement: Which Is Better?
Repair is usually the better option when the zipper chain and tape remain structurally sound and the failure is limited to the slider, pull tab, stop, trapped material, or a small alignment issue. Full replacement makes more sense when teeth are missing, the coil is torn, the tape has failed next to the chain, or the zipper still separates after a correctly matched slider has been installed.
The decision should be based on where the damage is, whether it returns under load, and whether the original zipper geometry can still be restored.
A backpack zipper is not one component. It combines the chain, slider, puller, tape, stops, stitching, seam allowance, and surrounding panels. Fixing only the visible failure can create a temporary result while leaving the real cause untouched.
A useful first check is to empty the backpack, lay the opening flat, and operate the zipper 10–20 times. Then fill the compartment to a normal working volume and repeat the test. If performance changes significantly after loading, look beyond the slider.
| Condition | Repair First | Slider Replacement | Full Zipper Replacement |
|---|---|---|---|
| Broken pull tab | Yes | No | No |
| Fabric trapped inside slider | Yes | No | No |
| Slightly loose slider | Yes | Maybe | No |
| Worn or distorted slider | No | Yes | Usually no |
| Slider came off one side | Usually | Maybe | Depends on end damage |
| One slightly bent metal tooth | Sometimes | No | Usually no |
| Several damaged teeth | Rarely | No | Usually yes |
| Missing molded elements | Rarely | No | Usually yes |
| Torn coil section | No | No | Usually yes |
| Small tape tear away from chain | Sometimes | No | Maybe |
| Tape torn beside chain | Limited | No | Often yes |
| Splits only when packed | Inspect structure | Maybe | Not automatically |
| New slider still splits | No | Already tested | Inspect chain and construction |
When Is a Slider Repair Enough?
Slider repair is often enough when the chain is complete, the zipper tape remains flat, and the failure comes from a slider that has opened slightly through wear.
The most recognizable symptom is a zipper that appears to close but separates immediately behind the slider.
Start with the backpack empty. If separation happens on a straight, unloaded section, the slider deserves close inspection.
A mildly widened metal slider can sometimes be corrected with smooth-jaw pliers. The adjustment should be very small. Apply light pressure, release, and test before making another adjustment.
A useful workshop check is to move the slider across the same 20–30 cm section five to ten times.
A successful repair should show:
- consistent chain engagement;
- smooth slider travel;
- no visible tape twisting;
- no reopening behind the slider;
- no abnormal scraping;
- stable closure after normal loading.
Do not continue squeezing once the zipper closes correctly. Over-tightening can make the slider difficult to move and accelerate chain wear.
If the same slider needs repeated adjustment within a short period, replacement is usually more sensible.
When Should a Zipper Slider Be Replaced?
A slider should be replaced when its internal geometry can no longer guide and compress the chain reliably.
Common signs include:
- repeated splitting after careful adjustment;
- visible widening;
- permanent twisting;
- cracks in the slider body;
- excessive side-to-side movement;
- uneven resistance during travel;
- the slider tilting under light load;
- poor closure even though all zipper elements are intact.
The replacement must match the chain.
This includes more than physical width. Chain type, nominal size, slider orientation, locking behavior, and single- or double-slider construction all matter.
A slider that can be forced onto a zipper is not necessarily compatible.
After installation, test the complete opening at least 10 times while the backpack is empty. Then repeat after filling the compartment.
Watch especially around:
- top corners;
- curved sections;
- seam junctions;
- padded panels;
- double-slider meeting positions.
If the new part also separates at the same location, stop changing sliders. The chain or backpack structure is likely contributing to the failure.
Can Waterproof Backpack Zippers Be Repaired Without Sewing?
Some water-resistant zipper problems can be repaired without sewing.
This is practical when the failure involves:
- dirt around the chain;
- trapped lining;
- a broken pull tab;
- a worn slider;
- an accessible end stop;
- a replacement slider that can be installed without opening the seam.
The situation changes when the coated tape itself is damaged.
Water-resistant zipper tape often has a surface treatment that should not be unnecessarily pierced, folded sharply, or repeatedly compressed. A small mechanical repair may restore opening and closing while still leaving the original moisture protection reduced.
After any repair, inspect:
- surface coating;
- tape cracking;
- peeling around bends;
- slider pressure;
- zipper-end construction;
- sewing holes;
- nearby seam treatment.
Also remember that a water-resistant zipper does not make an entire backpack waterproof.
Fabric coating, seam construction, needle holes, panel joints, opening design, and other access areas all contribute to moisture protection.
Where rain protection is an important product feature, the finished backpack should be tested after repair rather than judged only by whether the slider moves normally.
Can Missing or Damaged Zipper Teeth Be Repaired?
Slight damage can sometimes be corrected. Missing elements are much harder to deal with reliably.
The repair method depends heavily on zipper construction.
Metal zippers use separate metal teeth. A single bent tooth may sometimes be repositioned if it remains firmly attached.
Molded plastic zippers use individual molded elements. Once an element cracks or breaks away, restoring the original geometry is difficult.
Coil zippers use a continuous synthetic coil. Cuts, tearing, or local stretching can interrupt engagement even if the damage looks small.
Minor repair is more realistic when:
- only one or two elements are affected;
- nothing is missing;
- the tape remains strong;
- element spacing can be restored;
- the slider passes smoothly afterward.
Replacement becomes safer when:
- several teeth are missing;
- several adjacent elements are bent;
- molded elements have detached;
- coil damage extends beyond a very small area;
- the defect sits near a heavily loaded corner;
- separation returns after repair.
Do not attempt to compensate for missing teeth by tightening the slider aggressively. Slider pressure cannot replace lost chain geometry.
Can Torn Zipper Tape Be Fixed?
A small tear in the textile tape can sometimes be reinforced, but the location of the damage matters more than the tear length alone.
A tear several millimeters away from the chain is generally easier to stabilize because healthy textile remains available for stitching.
Damage immediately beside the teeth or coil is more serious.
Inspect three zones.
First, check directly beside the chain. Fraying here can allow the zipper elements to pull away from the tape.
Second, inspect the stitching line. Sometimes the tape is healthy but the seam connecting it to the backpack has opened.
Third, look at the surrounding panel. If the same location is being pulled outward every time the backpack is filled, sewing the tear closed may only reset the failure.
Repeated tape damage often comes from:
- insufficient seam allowance;
- overly tight opening geometry;
- high tension around curves;
- stiff padding pushing outward;
- zipper placement too close to a stressed edge;
- uneven stitching tension;
- inadequate local reinforcement.
For a one-off worn backpack, reinforcement may be enough.
For repeated failures in the same location across multiple pieces, the construction itself needs review.
When Should the Entire Backpack Zipper Be Replaced?
Full replacement becomes the stronger option when the original zipper can no longer maintain consistent chain engagement.
Clear warning signs include:
- several missing teeth;
- long sections of torn coil;
- multiple cracked molded elements;
- serious tape tearing beside the chain;
- repeated splitting with a correctly matched new slider;
- badly damaged zipper ends;
- widespread corrosion on metal components;
- severe tape distortion;
- chain separation caused by permanent structural damage.
Replacing a main backpack zipper can be much more involved than replacing a pocket zipper.
A main opening may contain several layers:
shell fabric, zipper tape, lining, binding, foam, reinforcement, piping, and internal pocket material.
Before removing the original zipper, record:
- finished zipper length;
- chain type;
- zipper size;
- slider type;
- single or double sliders;
- tape width;
- opening direction;
- end-stop position;
- seam allowance;
- alignment at corners.
For curved main openings, mark several reference positions before removing stitches. Small changes in zipper placement can alter tension and make the new zipper harder to operate.
Test the replacement before every inner seam is closed again. Correcting a misalignment while the construction is still open is much easier than reopening a finished backpack.
When Is Professional Zipper Repair Better?
Skilled repair is generally the safer option when replacing the zipper requires opening structural seams or working with materials that are difficult to restore cleanly.
This is especially relevant for:
- leather backpacks;
- laminated fabrics;
- coated technical textiles;
- heavy canvas;
- thick foam structures;
- padded laptop compartments;
- bound seams;
- piping;
- complex clamshell openings;
- shaped travel backpacks.
A complete zipper replacement affects more than closure.
The repaired opening should retain:
- original panel shape;
- zipper alignment;
- seam strength;
- tape tension;
- lining clearance;
- corner geometry;
- local reinforcement.
Professional inspection is also worth considering when the same fault occurs repeatedly.
If 15 pieces fail near the same top corner, individual repair does not explain why that location keeps failing.
Compare the affected bags under the same conditions:
| Check | What Repetition May Reveal |
|---|---|
| Same failure location | Local structural stress |
| Same slider issue | Component compatibility or wear |
| Failure only when packed | Excessive opening tension |
| Tape tearing at seam | Sewing or seam allowance problem |
| Failure around one curve | Geometry or panel tension |
| Random isolated failures | Individual wear or handling |
Patterns are much more informative than a single damaged zipper.
What Does Backpack Zipper Repair Cost?
The zipper itself is often not the largest cost. Labor rises quickly when lining, foam, reinforcement, binding, or multiple panels must be opened and restored.
| Repair Type | Labor Level | Main Cost Influence |
|---|---|---|
| Release trapped fabric | Very low | Time |
| Replace puller | Low | Puller hardware |
| Adjust slider | Low | Labor |
| Replace slider | Low–Medium | Slider access |
| Replace stop | Low–Medium | End construction |
| Reinforce tape | Medium | Sewing access |
| Replace pocket zipper | Medium | Opening construction |
| Replace main zipper | High | Disassembly and resewing |
| Rebuild curved technical opening | Very high | Multiple structural layers |
Several details drive cost sharply upward.
Zipper length matters because a long clamshell opening requires much more alignment and sewing than a short accessory pocket.
Internal construction matters because foam, binding, piping, and lining may need partial removal.
Material matters because leather, laminated textiles, coated nylon, and heavy canvas require more careful handling.
Opening shape matters because straight runs are easier to rebuild than tight curves.
Accessibility also matters. A slider replacement can be straightforward when the zipper end is exposed but much more involved when both ends are buried inside reinforced seams.
For a single backpack, the choice is usually based on repair effort, product value, and remaining service life.
For a custom backpack program, the calculation is broader. Repeated zipper failures can create rework, replacement stock, extra inspection, repacking, delayed delivery, and unnecessary after-sales work.
That makes one principle especially useful:
Repair the smallest failed component when the chain and structure remain healthy. Replace the full zipper when the chain has lost integrity. Revisit the backpack construction when the same failure keeps returning.
Which Zipper Type Is Best for Custom Backpacks?

The best zipper for a custom backpack is not simply the thickest or most expensive option. It should match the opening shape, packed weight, fabric stiffness, frequency of use, weather exposure, pocket function, and desired appearance. Coil zippers usually work well on curved backpack openings, molded zippers suit more structured applications, and metal zippers are often selected when appearance and tactile feel matter as much as function.
Backpacks place different demands on different openings. A small front pocket may need only a light, flexible zipper, while a clamshell travel compartment may require a larger chain, stronger slider, secure stops, and better reinforcement around the opening. Zipper type, size, color, slider, puller, opening direction, water-resistant construction, and single- or double-slider layout should therefore be confirmed separately rather than specified simply as “zipper.”
A useful starting comparison looks like this:
| Backpack Area | Practical Zipper Direction | Main Concern |
|---|---|---|
| Small accessory pocket | Light coil zipper | Smoothness, low weight |
| Laptop compartment | Medium coil or molded zipper | Repeated use, corner movement |
| Main everyday compartment | Medium-duty coil | Smoothness, durability |
| Travel clamshell opening | Medium/heavier coil or molded | Long opening, packed tension |
| Heavy canvas backpack | Larger coil, molded, or suitable metal | Side tension, stiffness |
| Outdoor backpack | Coil with water-resistant option | Rain exposure, flexibility |
| Tactical backpack | Strong coil or molded construction | Repeated operation, load |
| Leather lifestyle backpack | Metal, coil, or molded depending on styling | Appearance, hand feel, structure |
These are selection directions rather than fixed rules. The finished backpack should always be evaluated with the actual material, pattern, padding, and contents.
Coil vs Molded Zipper: Which Is Better?
Coil zippers are often the most versatile choice for backpacks because the continuous synthetic coil can bend around curves with relatively low resistance. This makes them particularly useful on rounded top openings, front pockets, laptop compartments, and clamshell structures.
Molded zippers use separate plastic elements fixed to the tape. They usually look more structured and visually substantial. They can work well on straighter openings, sports styles, travel bags, outdoor products, and designs where the zipper itself is part of the appearance.
The choice becomes clearer when the opening is examined physically.
A tight curve favors flexibility.
A long, relatively straight opening can tolerate a stiffer construction.
A heavily padded compartment needs enough chain strength but should still allow the slider to turn corners without excessive force.
A useful sample comparison is to sew both options into the real backpack opening and check:
- opening force;
- corner movement;
- zipper tape twisting;
- slider resistance;
- appearance after packing;
- separation under normal load.
Testing only a loose zipper strip can be misleading because sewing and panel tension change its behavior.
Nylon vs Metal Zipper: Which Is Better?
For most backpacks, synthetic coil zippers offer an excellent balance of flexibility, weight, smooth operation, and ease around curved openings.
Metal zippers offer a different feel.
They are heavier, more visually prominent, and often suit leather, waxed canvas, heritage-inspired, fashion, and premium lifestyle designs. Their individual metal elements create a more substantial appearance, but they also make alignment and corner handling more sensitive.
Metal does not automatically mean stronger.
A heavy metal chain can still perform poorly when:
- the opening is too sharply curved;
- tape alignment is uneven;
- the slider does not match correctly;
- the surrounding material creates excessive tension;
- the seam is positioned too close to a loaded edge.
Likewise, a well-selected coil zipper can provide excellent service on travel and everyday backpacks.
Weight should also be considered. One zipper may seem insignificant, but a backpack with several metal zippers, metal pullers, buckles, and other hardware can gain noticeable total weight.
For a premium canvas or leather backpack, the visual value of metal may justify that tradeoff. For lightweight travel or commuter use, coil construction often makes more sense.
Which Zipper Size Fits a Backpack?
Zipper size should be matched to the actual load and opening rather than selected from appearance alone.
Common bag development frequently involves zipper gauges such as #3, #5, #8, and #10, although exact dimensions and compatibility vary by zipper system.
A practical direction is:
| Zipper Size Direction | Common Backpack Use |
|---|---|
| Smaller | Interior pocket, small accessory pocket |
| Medium | Front pocket, laptop compartment, everyday main opening |
| Medium-heavy | Travel main compartment, large opening |
| Heavy | Equipment, tactical, very large or demanding openings |
A larger zipper may provide a more substantial structure, but it also increases:
- weight;
- stiffness;
- slider size;
- visual prominence;
- sewing space;
- hardware cost.
A zipper that is unnecessarily large can make a compact backpack feel bulky.
An undersized zipper creates the opposite problem. It may feel weak, flex excessively under packed tension, or wear more quickly.
Review zipper size together with:
- opening length;
- expected packed volume;
- fabric thickness;
- foam thickness;
- compartment position;
- curve radius;
- daily opening frequency;
- expected service life.
Incoming inspection should also confirm the correct zipper specification before sewing begins, because installing the wrong size into finished pieces creates expensive rework. Zipper specification is included among the trims that should be checked before production.
Which Slider Type Is Best for Backpacks?
The correct slider is the one designed to work with the selected zipper chain and the way that compartment will be used.
Slider selection affects closing force, movement, security, and long-term wear.
Important details include:
- chain compatibility;
- nominal size;
- locking or non-locking design;
- one-way or two-way operation;
- puller attachment;
- finish;
- corrosion exposure;
- orientation;
- single- or double-slider arrangement.
A locking slider can help resist unintended movement in certain applications. A freer-running slider may suit compartments that need fast, repeated access.
The puller should be considered separately.
A small metal pull may look refined on a laptop backpack. A cord pull may be easier to grip on an outdoor or tactical style. A large puller may work well with gloves but can strike nearby hardware and create noise.
A practical sample check should include at least 20–30 full opening and closing operations, not because that number replaces formal durability testing, but because it often reveals obvious binding, poor corner behavior, loose pullers, and incorrect slider-chain matching before the construction is approved.
Are Double Sliders Better for Large Openings?
Double sliders are usually valuable when the opening is long or when access from different directions improves usability.
They are especially common on:
- clamshell travel backpacks;
- large main compartments;
- laptop sections;
- equipment cases;
- wide top openings.
Their advantage is convenience.
They do not automatically make the zipper stronger.
Two sliders also create additional details that need to be controlled:
- both should move with similar resistance;
- they should meet cleanly;
- the chain should stay fully engaged between them;
- pullers should not interfere;
- both stops should be secure;
- the closing direction should feel natural.
Pay particular attention to where the two sliders normally meet.
If the bag is heavily packed and both sliders are routinely parked at the same high-tension location, that area can experience considerable outward force.
On a large travel backpack, the more reliable arrangement may be to position the meeting area away from the most heavily stressed curve.
The best configuration should therefore be decided on the actual pattern, not just because double sliders look more premium.
When Should You Use a Water-Resistant Zipper?
A water-resistant zipper is useful when the backpack needs additional protection against rain, splashes, or wet outdoor use.
It can be appropriate for:
- commuter backpacks;
- cycling bags;
- camera backpacks;
- outdoor packs;
- travel backpacks;
- electronics bags;
- technical equipment styles.
However, adding a coated zipper to every design is not automatically an improvement.
Water-resistant constructions can feel stiffer than standard coil zippers. Tight corners may require more pulling force. The coated surface can also influence appearance, sewing, and long-term wear.
The opening shape should be tested carefully.
A straight laptop pocket may perform very well with a coated zipper, while a very small rounded pocket may feel unnecessarily stiff.
Also avoid treating the zipper as proof that the whole backpack is waterproof.
Water can still enter through:
- sewing needle holes;
- untreated seams;
- fabric joints;
- panel edges;
- openings around hardware;
- uncoated fabric areas.
Where moisture protection is a key function, evaluate the finished backpack rather than the zipper alone.
Which Zipper Fits Travel Backpacks?
Travel backpacks place high demands on the main opening because the zipper is often long, repeatedly operated, and exposed to pressure from tightly packed contents.
Clamshell designs deserve particular attention.
The zipper may travel around two or three corners, and every curve changes slider resistance.
Useful choices often include a medium or heavier coil zipper, or a suitable molded construction when the opening geometry permits.
Evaluate:
- zipper size;
- chain flexibility;
- slider strength;
- double-slider operation;
- zipper-end reinforcement;
- corner radius;
- lining clearance;
- packed pressure.
The main zipper should normally receive more attention than small organizer-pocket zippers because its failure can make the whole backpack difficult to use.
Travel bags place particular importance on durability and opening length, while backpacks generally require smooth movement, durability, and secure closure.
A useful development test is to pack the sample to its intended volume, close it fully, carry it normally, then reopen it repeatedly. Problems that never appear on an empty sample can become obvious once the panels are under pressure.
Which Zipper Fits Heavy-Duty Backpacks?
Heavy-duty backpacks need a zipper system that matches the load carried by the surrounding structure.
This includes tactical, equipment, outdoor, work, and heavy canvas styles.
A larger zipper may be appropriate, but chain size alone cannot solve a weak opening.
Review the complete area:
- zipper chain;
- slider;
- tape;
- seam allowance;
- stitching;
- reinforcement;
- surrounding fabric;
- foam;
- corner geometry;
- load distribution.
Heavy fabric can create its own challenge.
1680D-type fabrics, heavy Oxford, thick canvas, multiple reinforcement layers, and stiff foam can make the zipper path less flexible. If the opening is curved too tightly, even a strong zipper can become difficult to operate.
The area around the zipper should also be considered together with other stress locations such as straps, handles, D-rings, side connections, bottom seams, and reinforcement stitching. Load performance depends on the entire structure rather than fabric thickness alone.
Does Zipper Price Affect Durability?
Price can reflect material quality, slider precision, finishing, plating, coating, consistency, testing, and tighter production control, but higher cost alone does not guarantee better backpack performance.
The wrong premium zipper is still the wrong zipper.
A more useful comparison is to evaluate candidate options after they are sewn into the actual backpack.
Check:
| Test Area | What to Observe |
|---|---|
| Empty opening | Smooth movement |
| Packed opening | Separation or excessive tension |
| Curves | Resistance or tape twisting |
| Slider | Tilting, looseness, engagement |
| Puller | Grip and attachment |
| Stops | Security |
| Tape | Wrinkling or distortion |
| Repeated use | Change in movement |
| Appearance | Finish after handling |
The cost of a zipper should also be considered against the cost of failure.
A slightly cheaper component can become expensive when it creates:
- rework;
- replacement pieces;
- extra inspection;
- delayed packing;
- returned goods;
- additional after-sales work.
For custom backpacks, the best zipper is therefore the option that delivers the required function, durability, appearance, sewing stability, and cost balance in the finished product.
The most reliable decision is rarely “use the biggest zipper.”
It is:
match the zipper type, size, slider, puller, opening shape, material, and expected load—then verify those choices on the finished backpack before bulk production.
How Does a Custom Backpack Factory Prevent Zipper Failure?

Zipper failure is best prevented before the first production piece is sewn. The process starts with choosing the correct chain, size, slider, puller, opening direction, and zipper layout, then checking those choices on an actual backpack sample under realistic loading. During production, incoming components, sewing alignment, slider movement, zipper stops, surrounding seams, and finished function should be checked in stages rather than relying on appearance alone.
A zipper can be perfectly good as a loose component and still perform poorly after it is sewn into a backpack. Curved openings, thick padding, stiff fabric, tight compartments, uneven tape tension, and reinforcement around corners can all change the forces acting on the chain.
That is why preventing failure requires control across the complete development path:
| Stage | What Should Be Controlled | Failure It Helps Prevent |
|---|---|---|
| Specification | Chain type, size, slider, puller, length | Wrong component selection |
| Sample | Opening shape, load, corner movement | Structural splitting |
| Incoming check | Correct zipper specification and condition | Wrong materials entering production |
| Sewing | Tape alignment, seam position, curves | Twisting and jamming |
| Assembly | Slider direction, stops, pullers | Slider loss and poor operation |
| Functional check | Smooth opening and secure closure | Hidden operation defects |
| Load check | Packed opening and stressed areas | Splitting under use |
| Final inspection | Zipper, stitching, packing | Defects reaching shipment |
How Is a Backpack Zipper Specification Confirmed?
A zipper specification should describe enough details for the same construction to be repeated consistently.
Simply writing “nylon zipper” or “metal zipper” leaves too much room for variation.
A useful specification normally identifies:
- zipper construction;
- zipper size;
- chain material;
- tape color;
- finished zipper length;
- slider type;
- slider finish;
- puller style;
- puller finish;
- single or double sliders;
- opening direction;
- water-resistant requirement where needed;
- top and bottom stop construction;
- zipper position on the backpack.
These decisions should be connected to actual use.
A front accessory pocket does not carry the same pressure as a fully packed main compartment. A curved travel opening does not behave like a straight laptop pocket. A thick canvas backpack may place more lateral pressure on the chain than a softer lightweight style.
Jundong’s zipper development records treat zipper type, size, color, slider, puller, opening direction, water-resistant needs, double-slider construction, and metal-versus-nylon selection as separate items rather than one generic trim.
The more clearly these details are fixed before sampling, the less room there is for unintended substitutions later.
What Should a Custom Backpack Sample Test?
A sample should prove that the zipper works as part of the finished backpack, not merely that the slider moves on an unattached zipper strip.
The most useful checks happen after the bag has been fully assembled.
Review:
| Sample Check | What to Look For |
|---|---|
| Empty opening | Smooth movement from end to end |
| Curved sections | No sharp increase in resistance |
| Double sliders | Even meeting and full engagement |
| Lining clearance | No fabric entering the slider |
| Packed compartment | No chain separation |
| Corners | No tape twisting |
| Puller | Secure attachment and comfortable grip |
| End stops | Slider cannot escape |
| Tape | No wrinkling or pulling |
| Seam beside zipper | No opening under tension |
The backpack should also be filled according to its intended use.
A laptop style should be checked with the main protected compartment occupied. A travel backpack should be assessed with the main cavity filled. A heavily structured canvas bag should be checked after its panels are under realistic outward pressure.
The important comparison is empty versus loaded.
If a zipper works empty but becomes difficult when packed, the problem may be panel tension, foam thickness, opening geometry, or insufficient allowance around the compartment.
That should be corrected before the approved sample becomes the reference for production.
How Are Zippers Checked Before Sewing?
Incoming inspection is one of the cheapest places to catch a zipper problem.
Once an incorrect chain or slider has been sewn into hundreds of backpacks, correction becomes expensive and slow.
Before sewing, check that incoming zippers match the confirmed specification.
Important items include:
- correct zipper type;
- correct size;
- correct tape color;
- correct slider;
- correct puller;
- correct finish;
- correct zipper length;
- correct quantity;
- intact chain;
- intact tape;
- secure stops where supplied;
- smooth basic movement.
A few pieces should also be operated by hand rather than checked only visually.
Jundong’s incoming inspection records include zipper specification together with fabric, lining, webbing, hardware, buckles, and other materials before those components enter later production stages.
This stage is especially important when several visually similar zipper sizes or slider types are being used in the same project.
A small component mix-up can create a large consistency problem later.
How Is Slider-to-Chain Compatibility Checked?
A slider should not be accepted simply because it can be installed on the chain.
Compatibility means the slider can guide both sides into engagement smoothly and repeatedly without excessive looseness or resistance.
Check several things.
First, observe opening force. The slider should move without needing abnormal pulling.
Second, observe closure. The chain should remain fully engaged immediately behind the slider.
Third, watch the slider body. It should travel straight rather than tilting sideways.
Fourth, inspect curves. Many backpack zipper problems appear only after the slider reaches a corner.
For double-slider openings, both sliders should:
- move with similar resistance;
- meet cleanly;
- keep the chain fully engaged;
- stop securely at the ends.
Custom pullers should also be evaluated after installation.
A large or heavy puller can create more leverage on the slider than a standard pull tab. A cord pull may behave differently again.
The visual design can change, but mechanical compatibility between slider and chain should remain stable.
How Does Backpack Structure Affect Zipper Stress?
Many recurring zipper failures begin outside the zipper itself.
The surrounding backpack determines how much force is transferred into the chain.
Several construction details have a strong influence:
Opening shape
A straight zipper usually runs with less directional change than one that travels around several tight corners.
Fabric stiffness
Heavy canvas, dense Oxford fabric, coated materials, and reinforced panels resist bending. This can increase pressure around curved openings.
Padding
Foam around laptop compartments or structured back panels can push the bag outward after packing.
Internal volume
An over-compressed compartment can pull the two zipper tapes away from each other.
Seam placement
If the zipper sits too close to a heavily stressed edge, opening force can be transferred directly into the chain.
Reinforcement
Reinforcement is valuable, but very rigid construction around one section can move stress into an adjacent weaker area.
This is why the area surrounding a zipper deserves the same attention as other stressed parts of a backpack. Jundong’s inspection guidance includes zipper surroundings together with handles, shoulder straps, webbing, D-rings, side connections, bottom seams, reinforced stitching, and loaded corners.
A stronger zipper cannot fully compensate for poor load distribution.
How Are Zippers Checked During Bulk Production?
Zipper inspection should continue after cutting and sewing begin.
Many defects are created during assembly rather than arriving with the zipper component.
Check production pieces for:
- correct zipper direction;
- correct opening length;
- even zipper tape placement;
- consistent stitching distance from the chain;
- clean curves;
- no twisted tape;
- lining clear of the slider path;
- correct slider orientation;
- correct puller;
- secure end construction;
- balanced double sliders.
The zipper should be opened and closed rather than merely viewed.
If several pieces become difficult at the same corner, compare the sewing there. The cause may be excessive seam thickness, inconsistent alignment, or pressure from nearby foam.
If several sliders separate behind the same section, compare the chain and tape installation before replacing hardware.
The advantage of checking during production is timing.
A sewing adjustment made early can prevent the same defect from appearing across the remaining quantity.
What Does Final Zipper QC Include?
Final zipper inspection should combine appearance with operation.
A straight-looking zipper can still be difficult to use.
A smooth-looking slider can still allow the chain to reopen.
A useful final inspection covers:
- smooth opening;
- complete closure;
- secure chain engagement;
- no separation behind the slider;
- correct puller;
- secure puller attachment;
- secure stops;
- no missing elements;
- no damaged tape;
- no loose threads entering the slider;
- acceptable alignment;
- clean sewing around the zipper;
- correct opening direction.
Double-slider systems should be checked from both ends and at the meeting position.
Main compartments should receive more attention than small decorative pockets because a failure there can make the entire backpack difficult to use.
Functional inspection at Jundong includes whether zippers run smoothly and whether zipper pullers remain secure, together with other working parts such as straps, pockets, openings, buckles, and internal compartments.
How Does Load Affect Zipper Performance?
A zipper can behave very differently once a backpack is filled.
When the compartment is empty, the chain may lie naturally with almost no outward force.
After packing, the panels can pull apart and place continuous pressure across the opening.
This is especially common around:
- upper corners;
- laptop sections;
- clamshell openings;
- heavily padded areas;
- expansion sections;
- stiff side panels.
The test should therefore focus on the complete backpack, not only the zipper.
Do not assign a fixed weight capability unless there is real test data or an agreed load requirement.
Load performance depends on much more than fabric thickness. Webbing, stitching, reinforcement, bottom structure, hardware, zipper placement, and overall design all contribute to how the bag carries pressure. This same principle is reflected in Jundong’s load and stress inspection guidance.
If a zipper repeatedly opens only under load, increasing zipper size may help, but the packed geometry should be checked first.
How Does an Approved Sample Reduce Bulk Risks?
An approved sample becomes useful only when its details are treated as production references.
For zipper control, the approved piece should establish:
- zipper construction;
- size;
- slider;
- puller;
- opening direction;
- opening length;
- sewing position;
- tape alignment;
- corner treatment;
- lining clearance;
- reinforcement around the opening.
If any of these change during production, the finished backpack may still look similar while behaving differently.
The approved sample also helps during troubleshooting.
When a production piece feels harder to open, it can be compared directly with the approved construction rather than relying on memory.
Jundong’s QC records state that approved samples and production details are used as references during bulk inspection.
That comparison is particularly valuable for components such as zippers, where small differences in slider fit, sewing position, or tape tension can affect use.
How Do Factories Control Sample-to-Bulk Consistency?
Consistency is built through several connected checks rather than one final inspection.
A practical sequence is:
confirmed specification → incoming zipper check → sewing control → functional inspection → finished inspection → packing check
Each stage catches a different type of problem.
Incoming inspection catches wrong components.
Sewing control catches alignment and construction variation.
Functional checking catches opening problems.
Finished inspection catches visible and mechanical defects.
Packing inspection helps prevent damaged or incorrect pieces from being mixed into shipment.
Jundong has 80 QC inspectors supporting multi-stage checks for custom bag orders, and its recorded procedures cover materials, production, finished goods, packing, and shipment preparation rather than relying only on final inspection.
The goal is not to pretend that every possible failure can be eliminated.
The goal is to reduce avoidable variation before it becomes difficult and expensive to correct.
What Should Brands Send for a Custom Backpack Review?
A clear development brief makes zipper selection much easier.
Useful information includes:
- reference photo or technical drawing;
- finished backpack size;
- intended use;
- shell material;
- lining requirement;
- main opening style;
- expected contents;
- preferred zipper type if already decided;
- logo artwork;
- color requirement;
- target quantity;
- packaging requirement;
- delivery deadline;
- destination.
For an existing zipper problem, close-up photos are especially useful.
Photograph:
- the slider;
- the zipper chain;
- both zipper ends;
- the damaged location;
- surrounding stitching;
- the backpack while empty;
- the backpack while normally packed.
A short video showing exactly where the zipper jams, separates, or comes off track can reveal information that still photos cannot.
When developing a new custom backpack, the zipper should be reviewed together with fabric stiffness, padding, compartment shape, reinforcement, and expected loading. That is much more reliable than choosing a chain based only on size or appearance.
For project evaluation, these details can be sent to info@jundongfactory.com.
A durable backpack zipper comes from controlling the whole opening: chain, slider, puller, tape, sewing, structure, load, and consistency from sample through production.