Skip to content
 Waterproof Bag Manufacturer
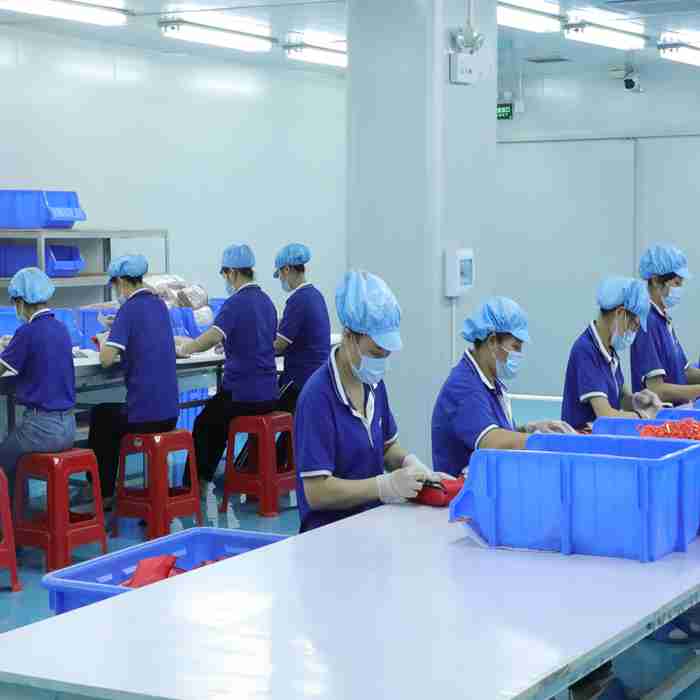
We manufacture waterproof bags using PVC, TPU, and coated fabrics, combined with heat-welded seams and leak-resistant structures to ensure reliable performance in outdoor, travel, and marine environments. From dry bags and duffel bags to backpacks and waist bags, all products can be fully customized in size, color, logo, and construction.
We support OEM / ODM with a typical MOQ of 50-300 pcs. Samples are ready in 3–15 days, allowing you to confirm sealing performance and structure before bulk production.
Waterproof Bags: Strategy Before Price
A strong waterproof bag manufacturer does not treat “waterproof” as a single feature. In real projects, waterproof performance depends on a combination of decisions, including material selection, construction method, closure design, seam treatment, and actual use conditions. If these are not aligned early, you often get a bag that looks correct in photos but performs differently in field use.
(1) First decision: What does “waterproof” mean in your project?
This is the first thing that should be clarified. You often use “waterproof” to describe different goals, such as:
- resisting light rain/splash
- handling heavy outdoor rain
- protecting contents during marine/boating use
- surviving temporary submersion risk
- protecting electronics or tools in wet industrial environments
(2) Should ask application questions before locking a quote
Instead of rushing into a number, a capable manufacturer should ask:
- Where will the bag be used? (urban commute, outdoor, marine, field work, industrial site)
- What will be stored inside? (clothing, electronics, tools, documents, kits)
- How long is the exposure to water? (occasional splash vs repeated wet use)
- Is full submersion a real risk or only a concern?
- What matters most right now? (water protection, cost, comfort, look, speed to market, durability)
Many clients focus first on fabric (for example, coated fabrics, laminated materials, TPU/PVC-based solutions, or nylon/polyester with treatment). Fabric is important, but it is only one part. Real field performance also depends on:
- seam construction
- seam sealing/welding, The route
- zipper or roll-top closure choice
- opening path design
- stress-zone reinforcement
- how the bag is packed and used
They should explain where water risk is most likely to enter:
- top opening
- zipper track area
- seam intersections
- accessory attachment points
- high-flex zones
(4) Early route alignment improves the whole project
When the waterproof route is defined early, the next steps become much easier:
- Quotes become more comparable (less vague)
- Sample goals become clearer (what to validate first)
- Revision cycles are shorter (less back-and-forth)
- Bulk planning is more stable (fewer late changes)
- Repeat orders are easier to control (same route, cleaner baseline)


Choose the Right Waterproof Bag Route
(1) Think in “water exposure scenarios,” not only in product names
A useful planning habit is to define the real water environment first. For example:
Occasional splash or light rain
Example: city commuting, short outdoor movement, light moisture exposure.
Main concern is often balance: appearance and comfort, basic protection, and cost.
Repeated rain or wet outdoor use
Example: field work, outdoor operations, repeated rain contact.
Main concern shifts to closure reliability, seam risk, and durability in repeated use.
High wet-risk environment (marine, boating, near-water operations)
Example: boat deck, dock, kayaking support gear, wet logistics environments.
Main concern is stronger water-entry control at the opening and seam system level.
Moisture-sensitive contents protection
Example: electronics accessories, test kits, documents, maintenance tools.
Main concern is not only “bag gets wet or not,” but whether the contents remain protected in real handling conditions.
(2) “Waterproof level” should be linked to business priorities
You often ask for the “best waterproof” solution first. But the best route is not always the most logical or styling protective one. The right route depends on business priorities, including:
- target market price
- end-user comfort and usability
- brand look/styling constraints
- launch timeline
- expected order volume
- repeat-order consistency goals
For example, if a project needs fast market entry and moderate water protection for daily outdoor use, the best route may prioritize stable production and practical closure design, and controlled cost rather than overbuilding a heavy structure.
A project-capable waterproof bag factory should help you make this trade-off clearly, instead of pushing one generic solution.
(3) Clients should evaluate the waterproof route at the system level
The most common sourcing mistake is evaluating only one element (usually fabric). A stronger method is to review the waterproof route as a system:
A. Material system
Outer material route, backing/lamination/coating direction, lining logic (if applicable), and reinforcement zones.
B. Closure system
Opening path and closure type often have the biggest effect on actual water-entry risk.
C. Seam or joining method
Even a strong material route can underperform if seam execution is not aligned with the target use condition.
D. Structure and load behavior
How the bag flexes under load affects stress points, seam movement, and practical waterproof stability over time.
E. Use behavior
How users open, pack, carry, and place the bag in real life changes performance outcomes.
(4) A practical route-selection workflow you can use
Before asking for a final quote, clients can use this 5-step method:
- Define use scenario (where and how used)
- Define water exposure (splash, repeated rain, higher wet-risk use)
- Define contents risk (what happens if moisture gets in?)
- Define top priorities (cost, look, usability, durability, speed, repeatability)

Waterproof Bag System: Material and Build
When you compare a waterproof bag factory, material discussions often become too narrow. Teams may focus on one line item (“use stronger waterproof fabric”) while overlooking the project reality: if the closure path, joining method, or stress zones are not aligned, the final result may still underperform in field use. This is why professional manufacturers evaluate waterproof projects as a material and construction system.
(1) Start with the material route, but do not stop there
We usually care about:
- water protection performance
- durability in repeated use
- weight or carry comfort
- surface look and brand feel
- cost target
- production consistency
- timeline risk
A material route decision should therefore consider:
- outer material behavior under wet use and handling
- flexibility vs structure (how the bag feels and holds shape)
- compatibility with the planned joining or construction route
- long-term appearance under folding, abrasion, and repeated use
(2) The closure path often matters more than you expect
In many waterproof bag projects, the highest risk is not the fabric panel itself. It is the opening/closure area. A manufacturer with real project experience should evaluate:
- opening direction (top / side/front)
- access frequency (how often users open it)
- opening size (wide access vs controlled opening)
- user behavior (quick access, gloved use, one-hand use, etc.)
- how closure choice affects usability and water-entry riskStronger
This is a key trade-off area:
- Stronger water-entry control may reduce convenience
- Easier access may increase risk if the structure is not adjusted
- Premium appearance choices may affect practical closure behavior
(3) Seam or joining route is a major performance and consistency decision
Treat seams as a production detail. In waterproof bag development, seam or joining decisions are often a core product decision because they affect:
- water-entry risk at panel intersections
- durability under flex and load
- production repeatability
- rework risk during sampling and bulk
- visual finish quality
Even when the material route is good, a poor seam strategy can create weak points in real use. This is why a sample review should not only check appearance. It should also check where the structure bends, where tension concentrates, and how joining areas behave after handling.
(4) Structural design changes waterproof outcomes over time
A waterproof bag may perform well when empty and new, but real-world performance depends on how the structure behaves when packed, carried, and repeatedly used. A project-capable waterproof bag manufacturer should review:
- load path (where weight transfers through the bag)
- stress zones (strap attachments, corners, opening edge areas)
- fold lines and flex points
- internal layout pressure against the outer shell and closure
- shape stability when partially filled vs filled
Why this matters: waterproof performance is not only about “static test thinking.” It is also about daily-use stability.


Control Water Entry at Risky Openings
Waterproof Bag Openings: Managing the Highest Water-Entry Risk
When evaluating a waterproof bag manufacturer, you must prioritize a critical question: How will users open and close this bag in real life? The opening is the highest water-entry risk area, combining repeated interaction, movement, alignment needs, and wear over time. Unlike sealed panels, this zone requires balancing protection with usability.
(1) Why Openings Are High-Risk
Openings face unique challenges: frequent user contact, flex, sealing behavior, and access-speed demands. Optimizing only for convenience—like faster access—can unintentionally increase water-entry risk without structural adjustments.
(2) Define Access Behavior First
You should clarify real-use scenarios: How often is the bag opened? Is access needed with gloves or in low visibility? Will it be opened in wet conditions or overfilled? These factors determine closure suitability—what works for occasional use may fail under frequent field stress.
(3) Opening Path Impacts Risk
Opening orientation matters: top openings support gravity control; front/side access improves usability but may increase exposure. Wide-mouth designs aid packing but add closure complexity. The optimal choice depends on exposure, use frequency, contents, and user ergonomics.
(4) Understand Closure Trade-Offs
Key decisions involve balancing protection vs. convenience, speed vs. alignment stability, appearance vs. functional reliability, and lightweight feel vs. structural control. Each trade-off must align with the target user behavior.
(5) Failure Often Comes from Behavior Mismatch
Post-launch complaints like “water got in” typically stem not from material failure but from behavior mismatch—frequent opening in rain, incomplete sealing under time pressure, or overpacking. Effective development requires real-use simulation, not just sample review.

Control Failure Points at Stress Zones
A waterproof bag may look strong in photos and pass visual sample review, but issues often emerge later if seam and stress-zone planning is weak. Experienced you don’t just ask about materials—they ask how the bag is joined and where it will fail first under real use.
(1) Why Seams Matter Most
Water-entry and durability issues typically appear at joining lines, seam intersections, corners, strap attachments, and opening transitions. These areas combine movement, load transfer, repeated handling, and shape change—making them higher risk than flat panel surfaces.
(2) Think in Stress Behavior, Not Static Shape
Reviewing an empty, gently handled bag misses real-use conditions: overloading, dragging, quick opening, and uneven carrying. You should ask which parts experience the most movement, pulling force, and repeated bending in daily use.
(3) Seam Quality Affects Performance and Consistency
Poor joining zones increase water-entry risk, durability problems, and deformation. They also cause variation between samples and bulk, more rework, and inconsistent finishing. Seam review is both a technical check and a project risk-control step.
(4) Identify Stress Zones Early
Priority areas include opening transitions, bottom corners, strap connections, handle attachments, and fold points from packing. In samples, check where flex occurs first, shape changes under load, and which zones may wear faster.
(5) The Right Route Depends on Use Case
No single joining method fits all. Entry-level products need stable, cost-effective routes. Professional field-use bags require flex durability and stress-zone reinforcement. Multi-SKU programs need standardization for consistency.


Use First Samples to Validate the Route
One of the fastest ways to improve project speed is to clarify what each sample stage must prove. Delays often come not from production time but from unclear sample objectives—teams review one sample with mixed expectations and leave without clear decisions.
(1) First Samples Are Often Overloaded
You want to save time, so they ask for the first sample to confirm everything. This creates problems: design feedback mixes with engineering, branding comments block structural reviews, and cost discussions restart before core risks are understood. The sample looks “busy” but fails to answer critical questions.
(2) What the First Sample Should Prove
The first sample should focus on route validation—not perfection. Key objectives include overall size direction, layout logic, closure suitability, structure stability, high-risk zone visibility, and basic usability. The goal is to answer: Are we on the right route, or should we change direction early?
(3) What to Avoid: Finalizing Too Soon
Do not force the first sample to finalize branding artwork, packaging details, color decisions, cosmetic finishing, or production-ready consistency. These items matter but are better handled after the core route is confirmed.
(4) A Stage-Based Sample Plan
Prototype or Route Sample: Validate concept, opening logic, layout, and structure. Focus on usability and risk points.
Engineering Sample: Refine construction, stress zones, and waterproof execution. Focus on stability and seam behavior.
Validation Sample: Confirm approval details and cross-team alignment before production prep.
PP Sample: Establish production reference and bulk consistency baseline.
(5) Run Better Sample Reviews Ask
What was this sample meant to validate? What did it prove? Which issues are must-fix now versus later? Do we need a route change or only refinements? This creates cleaner revision lists and shorter cycles.

Confirm Real-Use Performance Before Bulk
In custom waterproof bag development, treating testing as a final checkpoint is risky. If validation happens too late—after structure, timeline, and costs are locked—core problems may only surface after complaints. A better approach is stage-based validation integrated throughout development.
(1) Testing Alone Is Not Enough
Statements like “the material is waterproof” or “the sample passed testing” miss the bigger question: Will the bag perform consistently in real user scenarios? Waterproof performance depends on a system—material, opening/closure behavior, seam execution, load flex, handling patterns, and repeated use.
(2) Align Validation with Project Stages
Early Sample Stage: Validate route direction—opening usability, water-entry risk areas, structure behavior under light load. Catch wrong directions early.
Development Stage: Confirm construction refinements—seam stability under repeated handling, stress-zone behavior with realistic loading, and opening alignment.
Pre-Bulk Stage: Verify critical performance—waterproof risk points under agreed conditions, closure repeatability, consistency of high-risk zones.
(3) Include Real-Use Simulation
Issues often emerge from human behavior. Test with partially filled bags, frequent opening or closing, wet handling conditions, overpacking, and misaligned closures. Evaluate after repeated handling, not just when new. Ask: How will the bag behave when you actually use it?
(4) Validation Must Support Decisions
Results should lead to clear actions: Is the route acceptable? What must improve? What risks are controlled? What needs monitoring before bulk? This turns validation into a project accelerator, not a bottleneck.
(5) Avoid Common Mistakes
Late validation, appearance-only checks, no real-use simulation, unclear pass or fail criteria, and assuming “tested material” equals “tested product system” all create post-launch surprises.
Compare Quotes by Project Variables
(1) Why are MOQ, cost, and lead time connected
In custom waterproof bag projects, these three factors affect each other:
- MOQ affects how efficiently materials, setup, and production planning can be arranged.
- Customization depth affects development time, sampling loops, and production complexity.
- Lead time target may affect material options, planning flexibility, and revision tolerance.
- Waterproof route complexity affects construction and validation workload.
- Multi-SKU structure affects production organization, packaging flow, and consistency control.
(2) The biggest cost drivers are often not what you first expect
You often assume price differences come mainly from material thickness or margin. In many real projects, larger cost differences come from the combination of:
- Waterproof route selection (system complexity level)
- Closure or opening design complexity
- Construction or joining and high-risk zone control
- Customization scope (logo, labeling, packaging, internal layout changes, multi-version needs)
- Sample development rounds and revision frequency
- Order quantity split (single SKU vs mixed quantities)
- Quality control expectations and approval process
(3) Lead time risk often comes from decision timing, not factory speed alone
Many clients ask, “What is your lead time?” A stronger question is:
What decisions must be locked to protect lead time?
In custom waterproof bag projects, delays often come from:
- late route changes (material/closure/structure direction changes)
- unclear sample-stage goals
- scattered revision feedback
- late branding/packaging approvals
- changing quantity/SKU plan after quote
- hidden assumptions discovered during development
A strong waterproof bag factory should help you identify which items need to be fixed early and which can remain flexible for a while. This improves schedule reliability without forcing premature decisions on every detail.
(4) MOQ should be discussed in the context of the project route and order strategy
MOQ is not only a “factory rule.” It is often linked to:
- customization level
- material route and sourcing arrangement
- production setup efficiency
- whether the project is a single SKU or a mixed SKU
- whether it is a pilot order or a scalable program
- packaging and labeling complexity
You can get better responses by explaining:
- trial quantity vs expected bulk
- whether they need a single SKU or a multi-SKU
- Which features are must-haves now vs later version options
- whether they are testing market demand or preparing a long-term line

Turn Sample Decisions into Bulk Control
Waterproof Bag QC and Production Consistency: Turn Sample Decisions into Bulk Control
When choosing a waterproof bag manufacturer, you are buying the ability to repeat sample results at scale. Bulk production introduces more units, operators, and handoffs—if sample decisions aren’t converted into production controls, inconsistency risk rises quickly.
(1) Sample Success Doesn’t Guarantee Bulk Stability
Sample and bulk performance diverge when samples receive extra attention, critical tolerances aren’t documented, approvals focus on appearance over execution, and operator interpretation varies. Without a translation step from approval to production, consistency suffers.
(2) Consistency Starts with Route Locking
Protect bulk quality by confirming material choices, closure logic, seam execution, stress-zone priorities, and validation findings before production. Without documentation, final inspection becomes reactive rather than preventive.
(3) Convert Learning into Control Points
Material Checks: Verify approved materials, component consistency, and no unreviewed substitutions.
Closure Checks: Confirm alignment, operation, and behavior under packed conditions.
Seam or Stress-Zone Checks: Inspect high-risk transitions, attachment points, and load zones identified during development.
Handling Checks: Review practical opening or closing with loaded and partially filled bags.
(4) Align QC with Project Priorities
Different use cases need different QC focus:
Daily commuter: Usability, closure consistency, appearance balance
Field or outdoor use: Repeated handling, stress zones, closure reliability
Equipment protection: Layout stability, load-related checks
Multi-SKU programs: Route standardization, cross-version consistency
(5) Why This Matters
Route clarity early in the project enables QC that reflects real-use priorities. The goal: turn sample-stage learning into bulk-stage control points that protect performance at scale.

Waterproof Bag Workflow: RFQ to Repeat Orders
Process clarity is a strong trust signal when evaluating a waterproof bag manufacturer. A clear workflow reduces confusion, improves quote quality, shortens sample cycles, and protects consistency from sample to bulk. Below is a practical framework for custom projects.
Stage 1 — RFQ Intake
Clarify use scenario, water exposure, contents, size, load, customization scope, quantity, timeline, and priorities. The goal is a usable project baseline, not just a quick price.
Stage 2 — Waterproof Route Review
Assess opening or closure logic, seam or joining risk areas, stress zones, and trade-offs between protection, usability, cost, and lead time. This prevents scope drift later.
Stage 3 — Quotation Alignment
Provide stable quotes with clear assumptions, cost drivers, MOQ factors, lead time risks, and first-sample objectives. Compare suppliers by clarity and logic, not price alone.
Stage 4 — Sample Development
Use staged samples with clear goals: prototype or route sample, engineering sample, validation sample, and PP reference sample. Each stage reduces uncertainty and rework.
Stage 5 — Testing and Validation
Combine controlled checks with real-use verification. Confirm route suitability, high-risk zone behavior, closure consistency, and acceptable performance before bulk.
Stage 6 — Bulk Production Setup
Convert sample decisions into route lock points, production instructions, in-line QC checkpoints, and high-risk zone priorities. This prevents “sample good, bulk unstable.”
Stage 7 — Production and Inspection
Execute in-line checks on critical zones, final review against approved behavior, packaging alignment, and shipment coordination. Visibility builds your confidence.
Stage 8 — Repeat-Order Optimization
Review field feedback, user complaints, and improvement opportunities for closure, layout, stress zones, cost, and lead time. Strong partners optimize for long-term cooperation.
This workflow ensures every stage builds toward consistent, scalable waterproof bag production.

Make A Sample First?
See your idea come to life before mass production.
At Jundong Factory, we offer free design mockups and custom samples to ensure every detail is perfect — from material and color to logo placement and stitching.
Start your project with confidence today: info@jundongfactory.com.
FAQs About Waterproof Bag Manufacturing
How do I know whether I need a “waterproof bag” or just a water-resistant solution for my project?
A useful decision method is to ask three questions first:
- What kind of water exposure will happen in real use? (splash, repeated rain, wet-site use, near-water operations)
- What is stored inside? (clothing, tools, documents, electronics, kits)
- What happens if moisture gets in?
This matters because many sourcing mistakes come from over-simplified wording. For example, two buyers may both ask for a “custom waterproof bag manufacturer,” but one is solving for a commuter product, and the other is solving for repeated field use. The correct material route, closure strategy, and validation plan may be very different.
A stronger way to communicate with suppliers is to describe your use scenario, water exposure frequency, and top priorities (cost, protection, speed, appearance, durability). When suppliers reply, compare them based on whether they explain the route clearly, not only by price. A lower price based on a weaker assumption can become a more expensive project later if samples need multiple revisions.
If you are still unsure, ask them to recommend a route-based solution and explain the trade-offs. That usually gives you a better starting point than asking for “the best waterproof material” immediately.
What should I focus on in the first waterproof bag sample review to avoid wasting time on revisions?
Use the first sample to validate the route and major risks, not to finalize every visual detail. One of the most common reasons waterproof bag projects slow down is that you treat the first sample like a final approval sample. Teams try to approve structure, waterproof performance, logo details, color, packaging, and finishing all at once. The result is usually mixed feedback, conflicting priorities, and extra revisions.
A stronger first-sample review focuses on route validation:
- Is the size direction right for the use case?
- Does the opening/closure logic make sense for how users will access the bag?
- Does the overall structure support the intended load and handling style?
- Where are the likely high-risk zones (opening edges, seams, corners, attachment points)?
- What usability issues appear in basic handling?
In other words, the first sample should help you answer:
Are we on the right route, or do we need to change direction now before refining details?
What should usually be handled later (after the route is confirmed):
- final branding placement perfection
- packaging details
- final cosmetic finishing expectations
- final cost negotiation based on unstable scope
- broad aesthetic comments that conflict with unresolved structure issues
A good review meeting also needs a clear output. Instead of collecting scattered comments, create one prioritized revision list with three groups:
- Must fix now (affects route/performance/usability)
- Next-stage improvement (construction refinement, consistency improvements)
- Later-stage finalization (branding, packaging, visual polish)
Our MOQ is low for the first order. How can we still start a waterproof bag project without creating too much risk?
Use a staged project strategy—lock the core route first, then scale after validation. A low-MOQ first order is common, especially for new product launches, market testing, distributor trials, or brand line expansion. The risk is not the low quantity itself. The real risk is trying to force a fully optimized, high-complexity waterproof bag project into a small pilot order before the route is stable.
A better approach is to divide the project into phases:
Phase 1 — Pilot launch with controlled scope
Focus on proving the product direction with a manageable route:
- confirm the use scenario and target client
- lock core waterproof route assumptions
- control the customization scope (avoid too many changes at once)
- prioritize functional decisions over cosmetic perfection
- define what success means for the pilot (sales response, usability feedback, return rate, etc.)
Phase 2 — Improve based on sample and market feedback
After pilot feedback, refine what matters most:
- closure/opening behavior
- layout usability
- stress-zone durability
- branding/packaging upgrades
- cost optimization opportunities for higher volume
Phase 3 — Scale with better route confidence
Once the route is proven, we can discuss:
- broader SKU expansion
- stronger cost planning
- repeat-order consistency controls
- lead-time optimization for larger orders
For low-MOQ projects, customs should also communicate clearly:
- pilot quantity vs expected future volume
- Which features are must-haves now
- Which items can wait until the second order
- timeline expectations and launch constraints
If the sample is approved, what should I still confirm before bulk production to reduce risk?
Confirm that sample approval has been translated into bulk execution rules and QC control points. Sample approval is a major milestone, but it is not the same as bulk readiness. Many projects get into trouble because teams assume “approved sample = ready for production” without checking whether the approved decisions were actually converted into production instructions, inspection priorities, and consistency controls.
Before bulk production starts, you should confirm at least these areas:
(1) What exactly is approved—and what is still flexible?
Make sure the team has a clear list of:
- approved route assumptions (material/closure/structure direction)
- approval-critical features
- open items (if any)
- items that are acceptable within a range vs items that must match the reference strictly
This prevents confusion during production.
(2) Which sample findings became QC control points?
Ask to identify:
- high-risk zones from sample/validation stages
- closure/opening behavior checkpoints
- seam/joining priority inspection areas
- stress-zone checks under practical handling
- in-line checks vs final checks
This is the key step that protects sample-to-bulk consistency.
(3) What is the QC reference baseline?
You should confirm what QC will compare against:
- approved sample / PP sample/production reference sample
- agreed practical behavior expectations (not appearance only)
- project-specific critical checkpoints
If there is no clear baseline, QC may become too generic.
(4) What assumptions could still change lead time or consistency?
Even after sample approval, some risks may remain:
- pending branding/packaging approvals
- unresolved SKU split changes
- quantity change after planning
- late changes in project scope
- unconfirmed component details in critical areas
It is better to identify these before production starts than after issues appear.
(5) What communication path will be used if a production issue appears?
A strong project setup should define:
- who receives issue escalation
- What kind of issue needs immediate confirmation
- what can be handled under pre-agreed rules
- What requires you approval before action
This reduces slowdowns during bulk.
In short, sample approval should be followed by a bulk-readiness review, not a direct jump into production. Those who ask for this step usually reduce both quality risk and communication friction.
How can I balance waterproof performance, appearance, hand feel, and cost without over-designing the bag?
Define your product priority order first, then build the bag around the real use case—not an idealized specification. Many waterproof bag projects become difficult because teams try to maximize everything at once: stronger protection, better look, softer hand feel, lower weight, lower cost, faster lead time, and premium finishing. In practice, these goals often compete with each other.
A practical way to do this is to rank your top priorities before sampling:
- Primary goal (what must not fail)
- Secondary goals (what should be strong, but can be balanced)
- Flexible goals (nice to have, not launch-critical)
For example, a daily commuter waterproof bag may prioritize:
- usable protection for rain/splash
- easy opening/closing
- comfortable hand feel / lighter carry
- reasonable cost for retail positioning
A field-use or equipment-related bag may prioritize:
stronger protection consistency
closure reliability
load/structure stability
repeat-use durability
…and accept some trade-offs in softness, weight, or cosmetic detail.
Where projects go wrong is when teams approve design changes one by one without checking the system effect. A change that improves hand feel may affect structural behavior. A cost reduction may change consistency in high-risk zones. A visual detail upgrade may increase sample revisions and push timing.
That is why a strong waterproof bag manufacturer should discuss trade-offs openly and connect them to:
- use environment
- stored contents
- user behavior
- target price band
- timeline
- repeat-order goals
How should we manage a multi-SKU or mixed-order waterproof bag project to keep quality and timelines stable?
standardize the shared route first, then control SKU differences intentionally. Multi-SKU and mixed-order programs are common in business, but they add complexity fast. The biggest mistake is treating all SKUs as separate projects without identifying what can be standardized. This creates repeated sampling work, inconsistent QC, and slower communication.
A more stable approach is to divide the project into two layers:
Layer 1 — Shared platform
Define what is common across SKUs:
- core waterproof route direction
- closure/opening logic (where possible)
- key seam/joining principles
- critical stress-zone control rules
- QC baseline and control-point format
- packaging process logic (where possible)
Standardizing these elements improves consistency and reduces rework.
Layer 2 — SKU-specific customization
Then define what is intentionally different by SKU:
- size variations
- internal layout differences
- color/branding changes
- accessory details
- packaging/label distinctions
- target market positioning differences
For mixed-order projects, you should communicate clearly:
- total order quantity
- quantity split by SKU
- Which SKUs are priority for launch
- Which features must stay consistent across all SKUs
- Which differences are customer-facing and important
- whether some SKUs can follow in later production windows
Why this matters: In many projects, the visible SKU differences (color/logo) are not the hardest part. The harder part is the hidden inconsistency in route execution, closure behavior, or high-risk zones across versions. If the shared platform is not locked early, the project may look organized on paper but become unstable in production.
A capable waterproof bag manufacturer should also help you build a SKU review structure:
- shared requirements review (all SKUs)
- SKU-specific delta review (only differences)
- sample validation priorities by SKU group
- QC plan with common checkpoints + SKU-specific checkpoints
We already have an existing waterproof bag model. How can we upgrade it efficiently instead of redesigning from zero?
Start with a structured upgrade review—keep what already works, fix what creates complaints, and avoid changing stable parts without a reason. They assume a redesign must start from zero when they want a “new version,” but this often increases cost, delays launch, and adds new risks. In many cases, an upgrade project is more efficient if it begins with a version audit.
A practical upgrade approach is to review the current model in three groups:
Group A — Keep
These are features that should remain unless there is a strong reason to change:
- route elements with stable field performance
- user-approved size and handling logic
- parts with good repeat-order consistency
- features that support current sales positioning
Keeping stable parts protects the timeline and reduces unnecessary sampling loops.
Group B — Improve
These are the highest-value upgrade targets:
- closure/opening usability complaints
- seam/joining durability issues
- stress-zone wear or deformation
- layout inefficiency for actual contents
- packaging issues causing damage or poor presentation
- cost pain points that come from over-spec areas
This is where the best upgrade ROI usually comes from.
Group C — Optional enhancement,
Examples:
- brand presentation upgrades
- cosmetic refinements
- accessory updates
- SKU extension planning
- packaging premiumization
These can add value, but should not delay fixes to core functional issues.
The key to efficient upgrades is evidence. You should share:
- photos/videos of field issues
- return/complaint patterns (if available)
- feedback on usability
- which features users like and do not want changed
- target improvements for the next version
- launch deadline and inventory transition plan
A professional waterproof bag manufacturer should then help classify changes into:
- route-level changes (higher impact)
- construction/QC changes (execution improvements)
- cosmetic/packaging changes (lower functional risk)
- phase-now vs phase-later decisions
What should I send in my first inquiry so a waterproof bag manufacturer can give a faster and more useful reply?
A strong first inquiry does not need to be complicated. Even without a full technical package, you can send a practical RFQ set that covers the essentials:
Recommended first-inquiry package
- Reference images (or current product photos)
- Use scenario (commuting, outdoor use, equipment carry, kit bag, etc.)
- Water exposure level (splash, rain, frequent wet use, higher wet-risk environment)
- What will be stored inside
- Target size / approximate dimensions
- Estimated quantity (trial order + expected bulk if known)
- Customization scope (logo only / structure changes/packaging needs)
- Target timeline
- Top priority (cost / speed / waterproof performance / durability / appearance)
If you already have issues with an existing bag, include:
- photos/videos of problem areas
- what you complain about
- what you do not want to change
Why does this make the reply better?
When a waterproof bag manufacturer receives structured information, they can usually give a more useful reply that includes:
- route assumptions
- What may affect the price later
- What should be validated in the first sample
- What affects lead time risk
- What should be clarified next
We do not have a full tech pack yet. Can we still start a custom waterproof bag project?
Yes, many projects can start without a full tech pack—as long as the early stage focuses on requirement framing and route review first. A complete tech pack is helpful, but it is not always required to begin. Many brands, importers, and distributors start with a concept, reference product, market need, or problem they want to solve. The key is to structure the project in stages, so the missing technical details are developed in the right order instead of guessed too early.
A practical way to start without a full tech pack is:
Step 1 — Start with business and use-case clarity
Before technical details, define:
- who the product is for
- where and how it will be used
- what goes inside
- What problem must the bag solve
- what matters most (cost, speed, waterproof performance, appearance, durability)
This creates the project decision framework.
Step 2 — Use references to communicate direction
If you do not have drawings yet, you can still use:
- reference photos
- competitor products
- current product photos (if upgrading)
- annotated screenshots
- simple hand sketches
- notes on what to keep / change
Step 3 — Let the early sample stage validate the route
Without a full tech pack, it is even more important to avoid overloading the first sample. Use it to validate:
- size direction
- layout logic
- opening/closure usability
- structure direction
- high-risk areas
Step 4 — Document decisions as the project moves
A strong manufacturer should help convert early decisions into clearer project records:
- approved route assumptions
- revision priorities
- key dimensions (when confirmed)
- critical control points for production/QC
- packaging and branding requirements (later stage as needed)
What you should avoid
Starting without a tech pack is possible, but avoid these mistakes:
- asking for a final quote and final lead time with too many open assumptions
- mixing route decisions and cosmetic finalization too early
- changing core requirements repeatedly without impact review
- assuming “sample looks OK” means all technical details are now locked
When is it better to start with a route review first, and when should we go directly into sampling for a waterproof bag project?
If key assumptions are still unclear, start with a route review first; go directly into sampling only when the project direction is already stable. You often want to save time by moving immediately to sampling, but sampling is most efficient when the project route is already reasonably defined. If the bag’s use scenario, waterproof expectation, closure direction, or customization scope is still unclear, direct sampling can create more revisions instead of saving time.
Start with a route review first when…
A route review is usually the better first step if:
- The project is a new product concept
- We only has reference images, but many open questions
- The water exposure level is not clearly defined
- There are multiple possible closure/opening directions
- The bag stores risk-sensitive items, and the failure cost is high
- different internal teams have different priorities (cost vs durability vs appearance)
- the project includes complex customization or multi-SKU planning
In these cases, a route review helps align assumptions before time and budget are spent on the wrong sample direction.
Go directly into sampling when…
Direct sampling can work well when:
- The project is a version update of an existing model with clear issues
- The use scenario is already well understood
- The waterproof route direction is already agreed internally
- customization scope is limited and specific
- You can clearly define what the first sample should validate
- Timing is tight, but the project assumptions are stable
Even then, it is still helpful to define the sample stage goal in writing before sampling starts.
Why this decision matters
The question is not “route review or sample”—most projects need both. The real question is which should come first. Starting with the wrong sequence can lead to:
- sample rework
- unstable quotes
- timeline drift
- internal confusion during review
- approval decisions based on mixed criteria
A strong waterproof bag manufacturer should help you choose the right starting step by reviewing:
- requirement clarity
- risk level
- timeline pressure
- development scope
- whether the project is a new build or upgrade
Everything You Need to Know Before Customizing Your Bags
Waterproof bag sourcing decisions are rarely based on appearance alone. For procurement teams, a reliable evaluation depends on clear answers around MOQ versus bulk pricing, lead time, waterproof material route, seam and construction method, closure design, hardware compatibility, internal structure feasibility, packing logic, and repeat-order consistency. This FAQ section is designed to address operational questions up front, helping you assess fit quickly while reducing unnecessary internal back-and-forth.
We recommend structuring FAQs around real procurement triggers: what information is required to start RFQ and sampling, how to choose the right waterproof bag system based on water exposure and use scenario, how to prevent sample-to-bulk drift in fabric texture, coating, weld/seam quality, and closure performance, how to align reinforcement architecture with real load conditions, and which QC checkpoints protect long-term durability and repeatability. When written clearly, these FAQs also support long-tail search intent, such as “waterproof bag manufacturer,” “OEM waterproof dry bag factory,” or “private label waterproof bags wholesale.”
For a quick evaluation, you can share your bag type, target dimensions, intended use, waterproof requirement level, closure preference, logo method, and packing requirements by email. Our team will review your inputs and provide structure recommendations, material system options, and a realistic development route to support your waterproof bag program from sampling to repeat production.