 Skip to content
 How to Control Lead Time for Custom Bags
Controlling lead time for custom bags is not about pushing a factory to “go faster.” It’s about removing schedule risk before production starts: lock a phase timeline, freeze the BOM, choose stock-first materials when deadlines are fixed, and run sampling with clear stop rules. This guide gives you a buyer-ready system—checklists, decision tables, and contract milestones—so you can ship on time, avoid last-week packing rework, and keep sample-to-bulk consistency across repeat orders.
Lead Time Control: Practical System, Not Promise
Most customers ask, “Can you deliver in 30 days?” The better question is: “What must be true for 30 days to be realistic?” Custom bag lead time is not one number. It’s a chain. If one link slips, the final date slips.
A factory can only control what is defined. That’s why lead time control is built on clarity, approval speed, and stable inputs. In real programs, the biggest lead-time killers are not sewing speed. They are:
- Incomplete RFQ (missing size, materials, logo method, packaging rules)
- Late material decisions (custom colors, special hardware, new fabric testing)
- Unplanned sample rounds (T1, T2, T3… with no “stop rule”)
- Quality rework caused by unclear specs or weak checkpoints
- Shipping plan changes (air vs sea, consolidation delays, carton mark mistakes)
At Jundong, we treat lead time as a project with milestones. Your timeline becomes more stable when you lock five things early:
- The reference sample standard (what “approved” means)
- Material system (outer, lining, webbing, zipper, hardware)
- Logo method and placement (artwork and tolerance)
- Packaging and labeling rules (barcodes, carton marks, inserts)
- Communication rhythm (who approves, in how many hours, with what format)
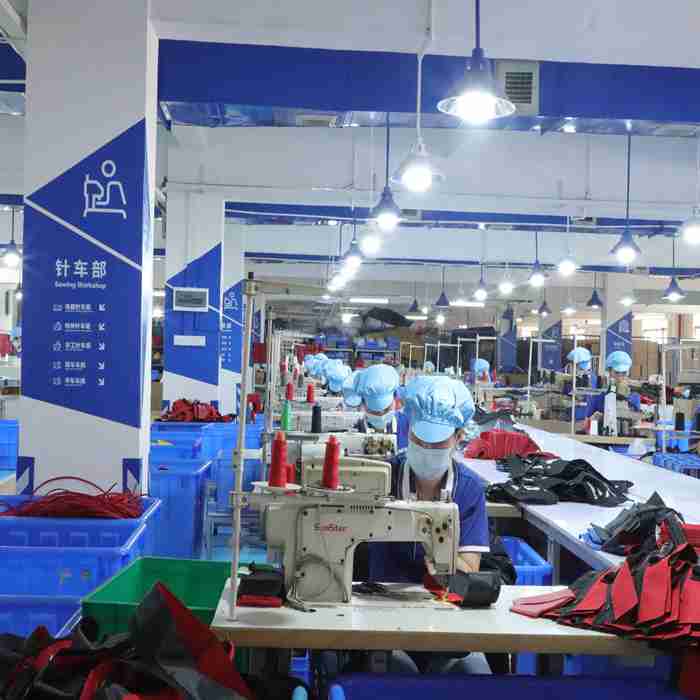
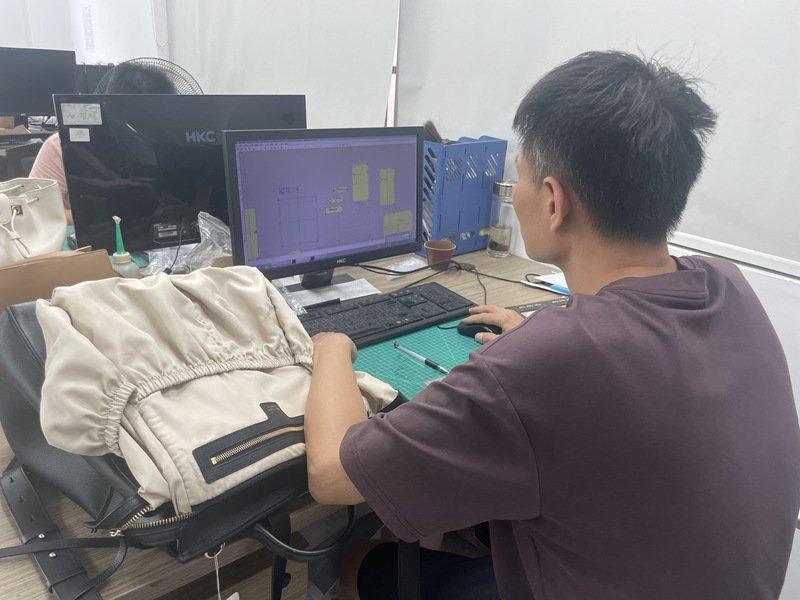
Our internal structure supports this approach: we have a large manufacturing team and a dedicated quality organization (for example, 600+ staff, about 18,000㎡ facility space, and an in-house inspection team), so production planning and QC can work as one schedule, not two separate workflows. When the plan is clear, we can book capacity, stage materials, and place QC gates in the right points—so “sample looks good” also means “bulk repeats.”


Custom Bag Lead Time Map — From RFQ to Delivery
A lead time plan becomes real when each phase has: (1) a start signal, (2) a finish signal, and (3) a decision owner. Without that, buyers are guessing.
Below is a practical phase map for custom bags. It’s not a promise; it’s a planning tool. Your actual timing depends on complexity, materials, quantity, and how quickly your team approves samples and artwork.
| Phase | What Happens | Typical Range | What Can Extend It | How You Control It |
|---|---|---|---|---|
| RFQ Confirmation | specs, target price, packaging, compliance needs | 1–5 days | missing info, unclear drawings | use RFQ checklist and “one source of truth.” |
| Material & Component Sourcing | fabric, lining, webbing, zipper, hardware | 1–5 days | custom dye, special hardware | Choose stock options or approve vendor samples fast |
| Sampling (T0/T1/T2) | pattern, prototype, logo trials | 3–10 days | too many sample rounds | Set a sample stop rule and change list |
| PP Sample / Pre-Production | final approval standard | 3–10 days | late artwork or packaging changes | Lock art files and pack-out rules early |
| Bulk Production | cutting, sewing, assembly | 7–35 days | mixed SKUs, rush changes | book capacity, freeze specs |
| In-Line & Final QC | inspection, function checks, AQL | 2–10 days | Rework from unclear specs | define QC checkpoints and tolerances |
| Packing & Carton Marks | bagging, inserts, barcodes, carton marks | 2–10days | labeling errors, late barcode files | Send barcode files early, approve carton mark layout |
| Shipping | air/sea, consolidation, customs | 5–35days | peak season, port congestion | Lock shipping mode early, plan buffers |


Lead Time RFQ Checklist Before Date Confirmation
If your internal team has ever said, “Why are we still emailing about basic details?” the RFQ is the problem.
A lead-time-friendly RFQ is built like a technical brief. It does not need to be complicated, but it must be complete. Here’s a buyer-side checklist we recommend using before you ask any supplier to commit to dates.
RFQ Checklist
A. Product Definition
- Bag type: tote, backpack, duffel, cooler, drawstring, EVA case, clear bag
- Target dimensions: L x W x H, plus handle drop or strap length
- Capacity and compartments: pocket count, laptop sleeve, bottle holders
- Target load and use case: daily retail, travel, promo event, and industrial carrying
- Reference photos or competitor links (2–5 images)
B. Material System
- Outer material: canvas, nylon, polyester, PU, PVC, neoprene, EVA, leather
- Lining: 210D, 190T, oxford, brushed, non-woven, EVA inner, etc.
- Webbing: width, thickness, color
- Zipper type: coil, molded, waterproof, plus puller style
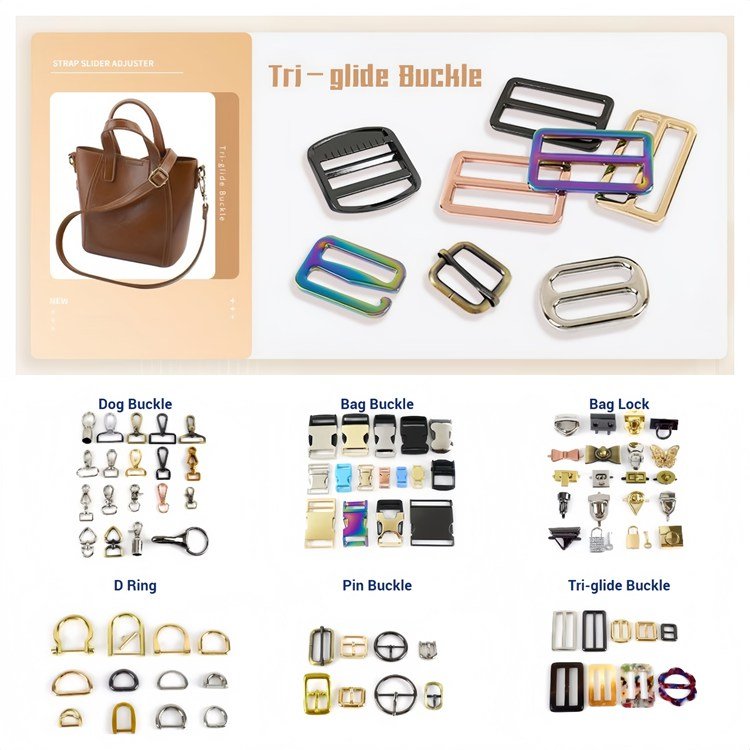
- Hardware: finish color, metal vs plastic, strength requirement
C. Branding & Artwork
- Logo method: embroidery, silk screen, heat transfer, woven label, rubber patch, metal plate
- Logo size, position, and “allowable shift” (tolerance)
- Artwork files: vector (PDF, SVG), Pantone codes
- Any legal restrictions (IP ownership, usage rights)
D. Packaging & Labeling (Often Forgotten, Often Delays Shipping)
- Individual bagging (OPP or biodegradable), hangtags, inserts
- Barcode format, label size and position
- Carton marks: layout, language, SKU coding rules
- Master carton size limits and gross weight limits
E. Compliance & Test Expectations (If Needed)
- Market: US, EU, UK, AU, etc.
- Requirements: CPSIA, REACH, Prop 65, flame resistance, azo-free, etc. (project dependent)
- Testing responsibility: who pays, when to test
F. Timeline Inputs
- Target ship date and target arrival date
- Shipping mode preference (air or sea)
- Whether partial shipment is acceptable
- Approval SLA: who approves samples and how fast

Material Lead Time: Stock, Colors, Hardware
When a factory says “25 days,” many teams hear “delivery in 25 days.” In reality, production starts only after materials are ready, so lead time is mainly a material strategy decision.
To control timing, choose one of three paths early. Fast Track uses stock fabrics, common linings, standard zippers and hardware, and simple logo methods, so the project can start sooner. Brand Match prioritizes custom colors and Pantone matching, which adds lab dips and approval time but improves long-term color consistency. Feature Priority focuses on special components such as waterproof zippers, coated fabrics, or branded hardware, which increases supplier dependency and schedule fluctuation.
Pantone dyeing is a workflow, not a single step: lab dip, approval, batching, and lot stability. Delays usually come from slow approvals or late color changes after sign-off, so treat lab dip approval as a timed gate.
Hardware and zippers are small parts with big impact. A custom puller or special plating can hold the whole order. The safest route is to confirm zipper model, chain size, and a hardware reference early.
To reduce risk on first orders, lock a BOM and material system (outer, lining, webbing, zipper, hardware) before bulk, and control multi-SKU projects by fixing one reference SKU first, then extending to the rest.

Sampling to Protect Deadlines With Stop Rules
Many custom bag projects lose 2–4 weeks in sampling simply because the process has no structure. The buyer asks for changes, the factory revises, and nobody defines what “done” looks like.
A Simple Sampling Framework:
T0 (Concept Prototype)
Purpose: validate shape, size, pocket layout, and main function.
What to avoid: arguing about the exact color or final logo before the structure is proven.
Lead time control tip: approve T0 quickly with “structure-level” feedback only.
T1 (Function and Material System Sample)
Purpose: confirm materials, stitching, reinforcement, zipper feel, and carry comfort.
Key customer action: lock material system and major construction rules.
Lead time control tip: request photos/videos of stress points (handle roots, strap anchors, zipper ends) so you can approve without waiting for shipping the sample in some cases.
T2 (Branding and PP Direction)
Purpose: confirm logo method, placement, artwork scale, packaging rules, and final details.
Key customer action: freeze artwork and tolerances.
Lead time control tip: Confirm a “golden sample” standard and stop changing after PP.

Production Scheduling: Capacity, SKU Mix, WIP
Customers often assume factories run like a single machine: order comes in, factory starts making it. Real scheduling is more like an airport runway. Many projects compete for the same resources: cutting tables, sewing lines, hardware assembly, and QC.
What Changes Production Time Most
- SKU Count and Variations: One style in one color is faster than five styles with five logos and different packaging. Mixed orders are possible, but they require strong planning.
- Material Handling ComplexityCoated fabrics, thick padding, EVA laminations, or clear PVC require different handling and can slow throughput.
- New Patterns vs Repeat Orders. Repeat programs are faster because patterns, BOM, and QC rules are already proven.
The Spec Freeze Date Is Your Real Start Date
Production cannot be scheduled reliably until:
- materials are confirmed and ordered
- artwork is final
- packaging rules are approved
- PP sample standard is agreed. If your team keeps changing details, the factory cannot book a stable slot.
How to Control Mixed SKUs Without Losing Time
If you need mixed SKUs, use these controls:
- Choose one reference SKU as the standard for materials and construction rules.
- Keep hardware and zipper types consistent across SKUs when possible.
- Use a shared packaging system (same carton mark structure, same barcode rules).
- Request a production plan that shows how SKUs will be grouped into batches.
Staged Shipment: A Buyer Tool for Launch Deadlines
If your launch date is fixed, consider staged shipment:
First, batch ships earlier to support the launch
remaining batches ship after, using the same locked standard. This reduces pressure that leads to rushed errors.
QC for Lead Time: Checkpoints and Tolerances
Most lead-time delays blamed on “factory lateness” are actually caused by rework. Rework happens when the product standard is unclear, or inspection happens too late.
QC Checkpoints That Protect the Schedule
A practical checkpoint system looks like this:
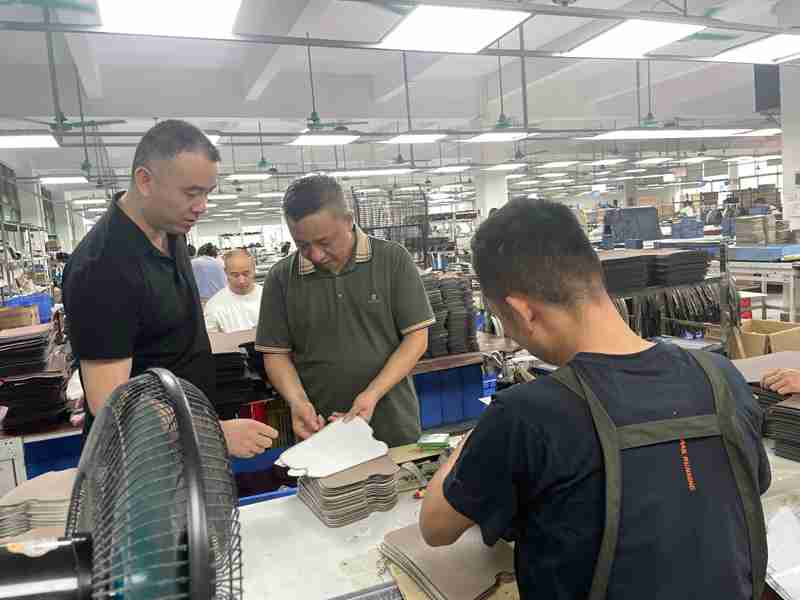
1. Incoming Material Check (Before Cutting)
fabric defects, color consistency, coating scratches
zipper function and chain alignment
hardware plating quality and strength
Why it matters: if bad materials enter the line, the whole batch is at risk.
2. Cutting and Panel Check
panel size accuracy, orientation, and grain direction
EVA/PVC cut edge quality
Why it matters: cutting errors multiply across every unit.
3. In-Line Sewing Check (Stress Points)
Focus on: handle roots, strap anchors, base corners, zipper ends.
Define reinforcement rules: bartack count, stitch length, seam allowance.
Why it matters: These are the failure points that trigger returns.
4. Logo and Branding Check
placement tolerance (example: center ±3mm), color match, and print quality
embroidery density and thread breaks
Why it matters: branding mistakes often require rework or scrap.
5. Final Function Check and AQL
zipper smoothness under load
strap strength test (basic pull simulation)
pocket alignment, symmetry
Why it matters: the final check is your last filter before packing.
Tolerance: The Customer’s Best Friend
Customers often say, “Make it aligned.” A factory needs numbers. Define tolerances for:
logo placement
stitching distance
size variance
color acceptance (Pantone match method)
Clear tolerances reduce disputes and speed approvals.
How In-House QC Supports Lead Time
A factory that maintains a dedicated inspection team and equipment can place QC gates without waiting for third-party scheduling. That shortens feedback loops: problems are found earlier, fixed earlier, and don’t explode at the final stage.
If your program includes multiple SKUs, ask the factory how they prevent mixing and how they track SKU-level pass rates. These operational details often decide whether your shipment leaves on time.


Packing and Shipping: Carton Marks, Barcodes
Packing is not “simple.” Packing is operations. It includes labeling, inserts, carton mark formatting, and sometimes retail compliance. A small error here can delay shipment because it creates rework across every carton.
Pack-Out Rules to Lock Early
- individual bagging type and thickness
- hangtag style and attachment location
- insert cards and language versions
- barcode size, placement, and scan test
- master carton limits (size and gross weight)
- carton mark layout (SKU code, qty, PO, destination)
A Simple Barcode & Carton Mark Workflow
- Buyer sends barcode files (PDF) and SKU coding rules
- Factory outputs a carton mark layout proof
- Buyer confirms within 24–48 hours
- The factory runs a scan test and photo confirmation
- Packing starts only after confirmation
This sounds basic, but skipping step 3 is one of the most common causes of last-week delays.
Shipping Mode: Decide Early, Not After Production
Air shipping can save time but can multiply costs. Sea shipping reduces cost but adds variability. Lead time control means matching the shipping mode to the launch risk:
- fixed launch, high penalty for missing date → plan air or staged shipment
- flexible replenishment → plan sea with buffer
If you need a mixed strategy, split the order: a small initial air batch, the rest sea. That protects the launch without paying the full air cost.
Consolidation and Destination Planning
If you consolidate with other suppliers, you need to plan the handoff time. A factory can ship on time, but the container might wait for another supplier. Build that into your schedule and assign an owner for consolidation.
Lead Time Risks: Top Delays and Fixes
Lead time risk is predictable. Most delays come from the same patterns. The difference between a smooth project and a messy one is whether the team sees the risk early and acts fast.
Lead Time Risk Register:
| Risk Trigger | Early Warning Signal | Impact | Customer Action | Factory Action |
|---|---|---|---|---|
| Specs not frozen | new requests after T2 | schedule resets | set freeze date | Issue change order impact |
| Custom color drift | Labt dips keep changing | +7–14 days | approve fast, avoid micro-tweaks | propose the closest stock match |
| Special hardware delay | tooling/plating not confirmed | +10–25 days | Pick standard options | confirm supplier’s lead time early |
| Too many sample rounds | feedback scattered | +5–20 days | single change list | align pattern + sewing routing |
| Packaging file late | barcode not ready | +2–7 days | Send files early | proof + scan test |
| QC rework | unclear tolerance | +3–15 days | define tolerances | in-line checkpoints |
| Shipping mode change | Air requested late | cost spike, chaos | decide by a deadline | offer a staged shipment plan |
Control Lead Time: 14-Day Plan FAQs
A 14-Day Buyer Action Plan
Day 1–2: Build a Complete RFQ
finalize size, structure, and use case
Select target materials or confirm the “stock first” strategy.
Confirm logo method and provide vector files
Output: a single RFQ document, not scattered messages.
Day 3–5: Confirm Timeline and Risk Items
Ask the factory for a phase map (Module 2 table)
Identify the schedule risk item: color, hardware, or SKU mix.
Confirm shipping mode preference.
Output: a timeline with exit conditions.
Day 6–9: Sampling Round With Fast Approval
Set feedback format: measurable changes only
Assign an internal approver and approval deadline
agree on the stop rule and freeze dates
Output: controlled sampling, no endless loops.
Day 10–14: Lock PP Direction and Packing Files
approve final artwork size and placement tolerance
confirm packing rules, barcode files, carton marks
agree on staged shipment if launch date is fixed
Output: production slot protection.

Lead time is not one number. It’s a chain: materials ready, sample approvals, production booking, QC, and packing compliance—each one can shift your final ship date.
To keep schedules stable, we lock the critical inputs early: BOM and color standard, logo method, SKU plan, and pack-out rules, then run sampling with clear revision limits.
Send your RFQ pack and target window. We’ll reply with a practical timeline, key risk points, and next-step options that protect delivery without last-minute surprises.
Custom Bag Lead Time Control FAQs
How do custom colors (Pantone) affect lead time, and how can we speed up color approval without risking batch inconsistency?
Pantone/custom color adds lead time because it creates an extra mini-project—lab dip approval + dyeing/batching + consistency control—so the fastest path is to set a clear color acceptance rule and avoid late “small tweaks” that restart the loop.
Custom bags often look simple on screen, but color is one of the easiest ways to lose weeks. A typical delay pattern is: buyer asks for Pantone match → lab dip comes back → “slightly warmer/cooler” request → second dip → third dip → bulk dye starts late. The risk is not only time; it’s also color drift between batches if the acceptance rule is vague.
To keep both lead time and consistency under control, use these buyer-side controls:
- Provide Pantone code + material type (canvas vs polyester vs PU can look different under the same code).
- Agree on the viewing standard: light source (D65/daylight), and whether you accept a close match.
- Set a “two-dip maximum” rule unless you accept a schedule reset.
- Approve lab dips within 24–48 hours; slow approvals are a hidden timeline killer.
- If the deadline is tight, choose the closest stock color for the outer fabric or webbing, then keep only one element custom (example: custom logo + stock fabric).
For bulk stability, ask for a simple lot control practice:
- Confirm the dye lot for bulk, avoid mixing lots in one PO when possible
- Keep a reference swatch from the approved dip as the production standard
- require a pre-cut photo check showing color under consistent light
A supplier who understands lead time control will warn you early: “This fabric + this color needs extra days,” and propose alternatives that protect your deadline without losing the brand look.
How many sample rounds should we plan for, and how do we stop sampling from eating the production window?
Plan sampling as a controlled loop—T0 validates structure, T1 locks the material system, T2 confirms branding + PP direction—and use a written stop rule so changes don’t silently reset your schedule.
Sampling delays usually come from two issues: feedback is not measurable, and the project has no definition of “done.” If each round triggers new ideas (“add a pocket,” “change the zipper,” “try another logo”), sampling becomes open-ended. Then production starts late, and everyone blames the factory.
A lead-time-friendly sampling plan sets three boundaries:
- Scope boundary: what can change in T0/T1/T2
- Approval boundary: who approves and in how many hours
- Change boundary: what changes trigger a timeline reset
A practical stop rule looks like this:
- After T1: no material changes unless you accept a new material lead time.
- After T2: no structure changes; only minor cosmetics allowed.
- After PP sample approval: no changes without a formal change order.
To speed sampling without losing control, use “single change list” feedback. Each request should include: exact change, reason, priority (must-have vs nice-to-have), and whether it impacts schedule/cost. Examples of good feedback:
- “Move logo up 10mm; center tolerance ±3mm.”
- “Increase handle webbing from 25mm to 38mm; keep same color.”
- “Add bartack at strap anchor: 4 rows, 2cm length.”
Also, decide what can be approved remotely: detailed photos of stress points (handle roots, zipper ends, base corners) and short functional videos can reduce waiting time when shipping samples takes too long.
If you want sampling to stay inside the schedule, treat approvals as part of your timeline responsibility, not the supplier’s responsibility. A simple internal SLA of 48-hour feedback saves more days than any “rush production” request.
We have mixed SKUs and different packaging/labels. How do we control lead time and avoid last-week shipping delays?
Mixed SKUs stay on schedule when you standardize what can be shared (materials, hardware, carton mark structure) and lock what must be different (barcode files, inserts, SKU coding) early—because most last-week delays come from packing file mistakes, not from production.
Mixed SKU programs are common in B2B: multiple colors, different logos, or several bag styles in one PO. The schedule risk is not “too many bags.” The risk is operational complexity: picking, packing, labeling, and preventing SKU mixing. If packing files arrive late or SKU rules are unclear, the factory may finish production but still miss the ship date due to rework across cartons.
To control lead time, use these procurement rules:
- Choose one reference SKU to lock the construction standard and QC checkpoints.
- Keep zipper type, hardware finish, and webbing spec consistent across SKUs when possible.
- Standardize carton mark layout: same template, only SKU code/qty changes.
- Send barcode files early and require a scan test photo before mass packing.
A practical file timeline:
- Before sampling ends: confirm SKU coding logic and carton mark template.
- Before PP approval: finalize barcode size/placement and insert languages.
- Before bulk packing starts: approve carton marks within 24–48 hours.
Also, ask the supplier how they prevent mixing:
- SKU-level bundling or color-coded bins
- batch packing per SKU, not “random mixing.”
- QC sign-off per SKU batch
If your launch date is fixed, consider staged shipment: ship the highest-priority SKU first, then the rest. It protects launch dates and reduces the temptation to rush packing, which is where mistakes happen.
OEM vs ODM: Which approach is faster for lead time, and what information must buyers provide to avoid delays?
OEM can be faster when your tech pack is complete; ODM can be faster when you accept proven structures and stock materials. Both become slow if buyers lack a “single source of truth” for specs, artwork, and packaging.
OEM means you bring a design, and the factory executes. ODM means the factory develops based on your concept. Lead time is not decided by the label; it’s decided by how many unknowns remain.
OEM is faster when you provide:
- exact dimensions and construction drawings (or a clear reference sample)
- material system (outer/lining/webbing/zipper/hardware)
- artwork files (vector + Pantone) and logo placement rules
- packaging/labeling rules (barcode, carton marks, inserts)
ODM is faster when you are flexible:
- accept a proven pattern base (less pattern trial)
- use stock materials or standard components
- keep changes within defined boundaries (cosmetic first, structure last)
What slows both models is “spec drift”: different people in your team send conflicting instructions. The fix is simple: one controlled document—your tech pack—and all changes go through one change list.
A procurement-friendly way to prevent delays is to set “freeze milestones”:
- Freeze structure after T0 or early T1
- Freeze materials after T1
- Freeze branding/packaging after T2
- Freeze everything after PP sample
If your company needs to move quickly but lacks a complete tech pack, a hybrid is often best: start with ODM using a proven base, then convert to OEM after the first bulk run locks the standard.
Ask suppliers a direct question: “What is missing today that prevents you from confirming a ship date?” A good supplier will answer with a short list—not vague statements. That list becomes your action plan.
How do peak seasons, holidays, and shipping congestion impact lead time, and what buffers should buyers plan?
Peak seasons extend lead time mainly through material supplier queues, capacity competition, and shipping volatility, so buyers should plan buffers at the right points: materials + production slot booking + shipping mode, not just “add extra days at the end.”
In custom bags, peak season risk is predictable: more orders compete for the same suppliers and logistics lanes. The most common buyer mistake is waiting until production finishes to think about shipping. In peak periods, that’s when costs spike, and schedules slip.
Plan buffers in three places:
Materials buffer
Custom colors, coated fabrics, and special hardware are the first to slip in peak season. If you need brand-matched colors, confirm lab dips earlier and avoid late tweaks. If time is tight, switch to stock colors and keep only one element custom.
Capacity booking buffer
Production lines are scheduled weeks ahead. The most reliable way to protect your slot is to freeze specs by a date and request a written plan: “PP approval → line start date.” If you keep changing details, your order loses priority.
Shipping mode buffer
Sea lanes may face congestion, and air freight costs may jump. For fixed launch dates, staged shipment is practical: a small batch by air for launch, the rest by sea for cost control.
A simple rule for buyers:
- For a normal season: build a 10–15% schedule buffer.
- For peak season programs: build a 20–30% buffer, but allocate it mostly to materials and shipping, not sewing.
Also assign ownership: one person must own approvals (samples, carton marks, barcodes). In peak season, approval delays inside the buyer’s team become the biggest hidden risk.
How do compliance tests (REACH/Prop 65/CPSIA, etc.) affect lead time, and when should we test?
Compliance impacts lead time when it is treated as an afterthought; the fastest approach is to decide market requirements early, choose compliant materials from the start, and schedule testing at the right milestone (often before bulk or at PP stage) so you don’t block shipment later.
Testing is not always required for every bag, but if your program sells into regulated markets or uses sensitive materials (PVC, coatings, inks, metal parts), you should plan compliance as part of the timeline. The delay risk comes from two situations: (1) discovering a material issue after production, or (2) waiting to start testing until the order is packed.
A lead-time-friendly approach uses a simple decision workflow:
- Confirm target market(s) and what standards apply
- Choose materials and processes that can meet those standards
- Decide who bears the testing cost and which lab method is used
- Test at the milestone that protects shipping—often at material confirmation or PP sample stage
Testing should not be “one final step.” It should be a gate that prevents bad material from entering the bulk. If you need speed, use pre-compliant material options and avoid late changes to inks, coatings, or hardware plating.
Procurement questions to ask:
- “Which materials are the compliance risk items?”
- “Can we use proven materials to reduce test uncertainty?”
- “Do you recommend testing the PP sample or the first bulk batch?”
- “What happens if we change a material after approval?”
When managed early, compliance does not need to delay the project. When managed late, it can stop shipment entirely.
How can we verify a factory’s real capacity and timeline reliability before placing a custom bag order?
You verify timeline reliability by asking for evidence of capacity planning, not by trusting a fast quote—look for a supplier who can provide a phase plan, confirm a spec freeze date, and explain how they prevent sample-to-bulk drift and last-minute rework.
Many buyers get burned because a factory says “Yes, we can do it,” but can’t explain how they will protect the ship date. The fastest way to screen suppliers is to request three items in writing:
Phase-based timeline
Ask: “Show sample, material, production, QC, packing, shipping blocks with ranges.” A factory that can only give “30 days” without structure is guessing.
Capacity booking logic
Ask: “After PP approval, what is the earliest line start date you can book?” Reliable suppliers can explain line booking, daily output assumptions, and how SKU mix affects throughput.
Risk item identification
Ask: “What is the schedule risk item in my project—custom color, special hardware, SKU complexity, or packaging files?” Trust the supplier who names the risk early and proposes alternatives (stock colors, standard hardware, staged shipment).
Then verify with practical proof:
- Request recent production photos of similar bag complexity (stress-point finishing, zipper end reinforcement, logo placement control).
- Ask for a QC checkpoint list (incoming materials, in-line, final) and tolerances (logo ±mm, size variance).
- Ask how they prevent SKU mixing for multi-SKU orders (batch packing, bin separation, SKU sign-off per batch).
Finally, test communication discipline: give one small instruction change and see whether the supplier responds with a clear impact statement (“no schedule impact” vs “adds X days”). That is the difference between a real project manager and a sales-only promise.
A supplier who runs with a coordinated workflow (sales + development + production + QC) will be more stable because scheduling and inspection move under one plan instead of separate handoffs.
What should we put in the PO/contract to control lead time—milestones, SLAs, penalties, and change control?
A good PO protects lead time by locking milestones, approval SLAs, change-control rules, and a clear definition of “ready to start production,” so delays don’t turn into endless arguments.
Contracts don’t need to be aggressive to be effective. They need to be specific. Use milestone language that matches how custom bag projects actually run.
Here’s a procurement-friendly milestone structure:
- T1 sample due date (structure + function)
- T2 sample due date (branding + packaging direction)
- PP sample due date (final standard)
- Bulk start date (triggered by PP approval + material readiness)
- Ship window (earliest/latest ship date)
Define “production-ready” clearly:
- approved PP sample
- frozen BOM (materials/hardware/zipper)
- final artwork files received
- packing files approved (barcode + carton marks)
Set buyer-side approval SLAs to avoid internal delays:
sample feedback within 48 hours
artwork/carton mark approval within 24 hours
If the buyer misses SLA, the schedule shifts accordingly (fair and realistic).
Add change control rules:
- after T1, material changes reset the material lead time
- after T2, structure changes reset sampling and timeline
- after PP, any change requires a written schedule/cost impact confirmation
Penalties are optional, but milestone incentives often work better:
- bonus for on-time shipment within the window
- shared cost rules for buyer-caused vs factory-caused delays
This structure makes it easy for both sides to track progress and reduces “he said, she said” disputes. It also signals you are a professional buyer, which improves supplier attention and planning discipline.
How do we reduce “approved sample vs bulk drift” so we don’t lose time on rework and replacement?
You prevent sample-to-bulk drift by converting the approved sample into a measurable production standard: locked BOM, defined tolerances, stress-point construction rules, and QC gates that catch deviation early—because rework is the biggest hidden lead-time killer.
Bulk drift happens when “approved” is a feeling, not a standard. The sample may look good, but if seam allowance, stitching tension, reinforcement method, or logo placement tolerance is not documented, operators will produce variations under speed pressure.
A reliable prevention system includes:
Golden sample + spec pack
Keep one approved sample as the “golden reference.” Build a spec pack with: key dimensions, stitching distances, reinforcement map, logo placement tolerance (±mm), and material list with exact codes.
Locked BOM and component batching
Use the same zipper model, webbing width, hardware finish, and lining spec across the bulk run. Mixing components creates an inconsistent appearance and function.
Stress-point reinforcement rules
Define exact rules for handling roots, strap anchors, base corners, and zipper ends. Example: bartack length, number of stitches, seam binding method. These are the failure points that cause returns and rework.
In-line QC gates
Incoming material checks, in-line checks at stress points, and final function checks. If a deviation is found early, you fix a small batch, not the whole order.
PP sample as the “start gun”
Treat PP approval as the official production standard. After PP, changes require change control and schedule impact review.
This system reduces rework, stabilizes delivery, and protects your brand consistency. It also makes supplier communication easier because “pass/fail” is not subjective.
Air vs sea vs rail: How do we choose shipping mode without blowing the timeline or budget?
Choose shipping mode by mapping deadline sensitivity and cost tolerance; the strongest tactic is often split shipping—air for the launch batch, sea for the remainder—so you protect dates without paying full air cost.
Shipping decisions work best when made early. Late switches cause chaos: carton dimensions change, freight quotes jump, and consolidation plans break. Procurement should decide the mode using two questions:
- “What is the penalty if we miss the date?”
- “What is the maximum freight cost we can accept per unit?”
Use this decision grid:
| Goal | Best fit | Notes |
|---|---|---|
| fixed launch date | air or split shipping | reduces date risk |
| stable replenishment | sea | lower cost, more variability |
| mid-speed lane (region-dependent) | rail / fast sea | depends on the route |
To reduce surprises, lock these shipping inputs before bulk packing starts:
- destination(s) and incoterms (FOB/CIF/DDP)
- carton size limit and gross weight limit
- whether consolidation is needed
- documentation needs (labels, carton marks, PO info)
For many buyers, split shipping is the cleanest solution:
Batch A (priority SKUs) ships earlier by air
Batch B ships by sea later, using the same locked standard
This method also reduces packing mistakes because the factory can focus on one priority batch first.
One more tip: shipping mode is tied to packaging. If you change the the inner packaging thickness or add inserts late, carton count changes, which changes freight. Keep packaging stable early, especially for air freight programs.
Sample shipping delays: How can buyers approve faster when international courier takes too long?
If courier time is slow, use a remote approval package (high-resolution photos + short function videos + measurement sheet) and reserve a physical courier for the PP sample only—this cuts waiting days without lowering control.
International sample delivery can consume more time than making the sample. Procurement can shorten the loop by deciding what can be approved remotely and what must be approved physically.
Remote approval works well for:
- logo size/placement within tolerance
- stitch quality and reinforcement visibility
- zipper smoothness demonstration
- pocket layout and internal structure
- carton mark and barcode placement proofs
Ask the factory to provide a standard remote package:
- measurement sheet with key dimensions
- photos of stress points (handle roots, strap anchors, zipper ends, base corners)
- 30–60s videos: zipper open/close, strap load simulation, pocket fit test
- color photo under consistent light (state the light condition)
Then set a rule: T0/T1 can be remote-approved, while the PP sample must be physically reviewed if your brand needs that control. This keeps speed while protecting final standards.
Buyers should also centralize feedback: one change list file, not multiple channels. Remote approval fails when feedback becomes vague.
Carton marks and barcode errors: What is the simplest workflow to prevent last-week packing rework?
The simplest protection is a three-proof workflow: file proof → photo proof → scan proof, with a 24–48h approval SLA, so packing doesn’t start on unconfirmed labels.
Packing delays often come from tiny errors: wrong SKU code, incorrect destination line, barcode that fails scanning, carton marks formatted inconsistently. Fixing it late means rework across cartons.
Use this minimal workflow:
- File proof: factory sends carton mark layout + barcode placement diagram.
- Photo proof: factory prints one set and photos the placement on an actual bag/carton.
- Scan proof: The factory scans the printed barcode and records the result (photo or short video).
Add one rule that saves time: packing starts only after step 2 is approved, and mass printing starts only after step 3 passes.
Also standardize your inputs:
- one SKU coding rule sheet
- one carton mark template
- one barcode format specification (size, quiet zone, placement)
If you run mixed SKUs, request batch-level sign-off: each SKU batch has its own packing QC sign. That reduces mix-ups.
Everything You Need to Know Before Customizing Your Bags
Custom bag sourcing decisions are rarely based on appearance alone. For procurement teams, a dependable supplier is the one who can give clear, evidence-based answers on lead time, not optimistic promises. Real lead time depends on material readiness, sample revision cycles, production booking, QC checkpoints, and packaging compliance. If any of these are unclear, projects slip late and cost more to fix.
We recommend qualifying suppliers using lead-time control triggers: what information is required to start sampling, how approvals are managed (with stop rules), how material risks are handled (stock vs custom color vs special hardware), how multi-SKU orders are scheduled without mixing, and which checkpoints prevent rework. These questions also match common search intent such as “custom bag lead time,” “OEM bag factory timeline,” “bag sampling schedule,” or “bulk bag production lead time.”
For a fast evaluation, share your bag type, target quantity, SKU count, fabric and color requirements, logo method, and packaging rules. We’ll respond with a practical timeline plan, critical-path risks, and a controlled route from sample to bulk that protects your delivery date.
