 Skip to content


How Tactical Bags Work for Emergency, Rescue, and Preparedness Kits
A tactical bag becomes valuable during an emergency when its layout reduces wasted movement. The most important difference is not camouflage fabric, MOLLE webbing, or a rugged appearance. It is whether the person carrying the bag can move with the intended load, locate critical equipment quickly, open the right compartment without disturbing everything else, and return used or replacement items to a predictable position.
In rescue work, those details become more important as the equipment list grows. A 3-liter IFAK, a 25-liter medical backpack, a 40-liter preparedness pack, and a 55-liter search-and-rescue load carrier may all be called tactical bags, but they solve very different problems.
Tactical bags support emergency, rescue, and preparedness kits by matching the bag structure to the mission. Capacity determines what can be carried, internal organization controls how quickly equipment can be identified, external modules extend the system, and the harness manages the loaded weight. The most effective design starts with the equipment list, access priority, carrying distance, operating environment, and expected response duration rather than with the outer appearance of the bag.
Imagine two responders arriving with backpacks of almost identical size. One opens a narrow top zipper and begins removing equipment to reach a medical pouch buried underneath. The other lays the pack open, sees clearly separated modules, removes one pouch, and leaves the remaining equipment undisturbed. Both bags carried the same volume. Only one was designed around what happens after the zipper opens.
Jundong’s documented product capability includes Tactical Bags, MOLLE Bags, Emergency Bags, First Aid Bags, and related safety products. Emergency projects are expected to consider functional reliability, material strength, structure, labels, documentation, risk control, and bulk consistency rather than treating the bag as ordinary storage.
What Type of Tactical Bag Fits Each Emergency Mission?
The right tactical bag depends on what must be carried, how quickly specific items need to be reached, how far the load will travel, and where the kit will be used. An IFAK, EMS backpack, search-and-rescue pack, 72-hour evacuation pack, vehicle kit, and tactical duffel may all use durable fabrics and modular storage, but their internal structure should be very different.
Capacity alone is a poor selection method. Two 35-liter bags can behave completely differently once loaded. One may carry lightweight survival supplies, while another holds dense medical equipment, batteries, tools, fluids, or rigid devices. The same volume can therefore require a very different harness, reinforcement system, opening method, and internal layout.
A more practical selection method is to define six things first: equipment volume, loaded weight, access priority, carry distance, operating environment, and number of people the kit is intended to support.
| Mission | Common Format | Practical Capacity Direction | Main Design Priority |
|---|---|---|---|
| Individual trauma response | IFAK / detachable pouch | Very compact | Immediate access |
| Compact medical response | Slim backpack | 10–25 L | Mobility and organized essentials |
| EMS / rescue | Structured backpack | 20–40 L | Modular access and load control |
| High-load medical response | Framed backpack | 35–50 L+ | Weight distribution and equipment retention |
| 72-hour preparedness | Backpack | Usually 30–50 L | Carry comfort and survival organization |
| Vehicle emergency kit | Rectangular bag / duffel / backpack | Gear-driven | Wide access and stable storage |
| Search and rescue | Technical backpack | Mission-driven | Mobility, compression and durability |
These capacities are planning references, not fixed rules. The equipment should determine the final size.
What Is an Emergency Tactical Bag?
An emergency tactical bag is a purpose-built carrying system designed to keep critical equipment organized, protected, stable during movement, and accessible in a predictable order.
The useful features are functional rather than visual.
MOLLE webbing, compression straps, reinforced handles, hook-and-loop identification panels, removable inserts, clamshell openings, reflective trim, padded shoulder straps, and internal dividers all make sense when they solve a specific problem.
A well-designed emergency bag should let the user quickly understand:
- where immediate-use items are located;
- which compartments contain secondary equipment;
- where the heaviest items are positioned;
- which modules can be removed;
- how the bag should be carried;
- how it can be inspected and restocked.
A bag can look highly tactical and still perform poorly if it has a dark interior, identical zipper pulls, unstable heavy equipment, narrow access, or weak load-bearing attachments.
The strongest design is usually the one that makes equipment placement feel obvious.
Which Tactical Bag Types Are Used for Rescue?
Rescue operations commonly use several bag formats because one shape cannot handle every mission efficiently.
Medical backpacks are useful when the kit must travel away from a vehicle and both hands need to remain free.
Trauma packs usually focus on organized medical equipment with faster internal access than ordinary backpacks.
IFAK pouches carry a small group of immediate-use medical supplies on a belt, vest, MOLLE panel, or larger pack.
Tactical duffels are useful for bulky equipment, staging areas, vehicle response, PPE, or supplies shared by several people.
Modular pouches allow parts of a larger kit to be handed to another team member without moving the entire pack.
Equipment-specific carriers can be developed for oxygen cylinders, communication equipment, rescue tools, or other rigid devices.
The most effective systems often combine several of these formats instead of relying on one large backpack.
For example, a 35-liter rescue pack might contain four removable modules plus a detachable exterior IFAK. The pack moves the entire load, while individual modules can be distributed at the scene.
EMS Backpack vs IFAK: What Is the Difference?
An IFAK is designed for a small, concentrated group of immediate medical supplies. An EMS backpack is designed for a broader equipment load and usually contains several functional sections.
The structural differences are significant.
| Design Area | IFAK | EMS Backpack |
|---|---|---|
| Carry method | Belt, vest, MOLLE, larger pack | Backpack harness |
| Opening | Compact clamshell / pull-out | Full or near-full opening |
| Organization | Elastic loops and small sleeves | Dividers, modules, pouches |
| Loaded weight | Low | Medium to high |
| Structural support | Minimal | Foam, PE board or frame may be needed |
| External expansion | Limited | Often extensive |
| Identification | Pull tab or patch | Labels, colors, clear windows |
| Main priority | Immediate compact access | Broader organized response |
An IFAK should remain compact enough that it does not interfere with movement.
An EMS backpack needs more attention to shoulder geometry, back support, handles, zipper strength, weight distribution, and internal stability.
Simply enlarging an IFAK layout rarely produces a good medical backpack because larger loads create completely different structural demands.
Which Bag Works Best for a 72-Hour Kit?
A backpack is usually the most practical format for a portable 72-hour emergency kit because it keeps both hands free and distributes weight better than a hand-carried bag.
The critical issue is not how much the backpack can hold. It is how much the fully packed kit will weigh.
Water illustrates the problem clearly. Three U.S. gallons of water weigh roughly 25 lb, or about 11.3 kg, before food, clothing, lighting, first aid supplies, batteries, hygiene items, and personal documents are added.
That means a serious evacuation pack may require more than ordinary backpack construction.
Useful features include:
- wide padded shoulder straps;
- sternum strap;
- waist support where the load justifies it;
- dense items positioned close to the back;
- compression straps;
- easily reached water storage;
- fast access to lighting and first aid;
- contrasting interior lining;
- large enough opening for inspection.
Oversizing can create another problem. A 60-liter pack may encourage more gear to be added until the finished kit becomes difficult to carry.
The better goal is sufficient capacity with a controlled working weight.
What Type of Bag Fits Search and Rescue?
Search-and-rescue work usually favors a technical backpack because the user may need both hands while walking, climbing, crossing uneven terrain, entering buildings, or moving through debris.
The pack should remain close to the body rather than swinging as the user moves.
Important features often include:
- strong shoulder anchors;
- sternum strap;
- optional waist belt;
- structured back panel;
- compression straps;
- reinforced lower panels;
- multiple grab handles;
- external attachment areas;
- visible identification;
- controlled drainage where required.
Weight placement is especially important.
Heavy equipment positioned on the outer front panel creates leverage that can make the pack feel less stable. Dense items are better placed close to the back whenever the equipment layout allows it.
Search-and-rescue packs also benefit from restrained internal organization. Too many small pockets can slow access. Clearly defined modules and large functional zones are often easier to operate while wearing gloves.
Which Bags Work for Vehicle Emergency Kits?
Vehicle kits benefit from a low, stable format that uses trunk, cabinet, or cargo space efficiently.
Rectangular responder bags, structured duffels, compact backpacks, and modular cases can all work well depending on how often the equipment needs to leave the vehicle.
A good vehicle kit should be easy to:
- identify;
- lift from several directions;
- open in limited space;
- inspect;
- restock;
- return to the same storage position.
Large top and side handles are particularly useful because the bag may be packed tightly beside other equipment.
Wide-opening lids are also valuable. They allow most of the contents to be seen without unloading the entire bag.
For fleet programs, consistent layout matters. If 30 vehicles carry identical emergency kits, the same module should occupy the same location in every bag.
That makes inspection and replenishment faster and reduces variation between vehicles.
When Is a Tactical Duffel Better Than a Backpack?
A tactical duffel is usually the better choice when equipment is bulky, carrying distance is short, and wide-open access is more important than long-duration comfort.
This makes duffels useful for:
- vehicle-based response;
- staging areas;
- PPE;
- large medical modules;
- rescue tools;
- industrial emergency equipment;
- shared team supplies.
The main advantage is horizontal access.
A rectangular duffel can expose several compartments at once without stacking equipment vertically.
Its disadvantage appears when the loaded bag must be carried for long distances. One-hand or single-shoulder carry concentrates the load and can become tiring quickly.
Convertible designs can combine:
- reinforced top handles;
- side handles;
- removable shoulder strap;
- stowable backpack straps;
- structured base;
- compression.
If the kit normally travels ten meters from a vehicle, a duffel may be excellent.
If it must travel several kilometers over uneven ground, a backpack usually becomes more practical.
Which Tactical Bag Capacity Is Best for Disaster Response?
There is no single ideal disaster-response capacity.
The correct size depends on whether the bag supports one responder, several casualties, a specific medical function, or a longer-duration mission.
A practical planning guide is:
| Capacity | Suitable Direction | Main Concern |
|---|---|---|
| Under 15 L | Compact individual response | Limited supplies |
| 15–25 L | Fast-response medical kit | Equipment prioritization |
| 25–35 L | General rescue / EMS | Balance between capacity and mobility |
| 35–45 L | Larger medical response | Harness and internal stability |
| 45–55 L+ | High-load or extended response | Weight and structural support |
Volume becomes increasingly important as equipment density rises.
A 45-liter pack filled with clothing and blankets may be manageable.
The same pack filled with medical equipment, batteries, tools, fluids, and rigid devices may require a much stronger back panel, shoulder harness, handle structure, and internal retention.
For larger rescue packs, the loaded weight should therefore be written into the design brief alongside capacity.
Do Professional Rescue Kits Need Different Bag Designs?
Yes. Professional rescue kits normally require more deliberate construction because the bag may be carried, opened, closed, dragged, placed on wet or dirty surfaces, loaded into vehicles, cleaned, restocked, and used by different team members repeatedly.
That creates requirements rarely found in ordinary backpacks.
Professional designs may need:
- full-opening access;
- removable internal modules;
- clear viewing windows;
- reflective identification;
- reinforced base panels;
- multiple grab handles;
- stable load-bearing harnesses;
- abrasion-resistant outer materials;
- wipeable interior surfaces;
- consistent label positions;
- replaceable internal pouches.
The design should also reflect how the bag is used after the incident.
A rescue kit has to be restored.
That means internal organization should make missing items visible and allow modules to return to the same positions.
For multi-unit programs, repeatability becomes especially important. The first sample may work perfectly, but the real test is whether hundreds or thousands of bags can preserve the same pocket positions, divider dimensions, webbing locations, zipper directions, labels, and carrying structure.
Before structure is frozen, the following information should be clear:
| Requirement | What to Define |
|---|---|
| Mission | Medical, rescue, vehicle, evacuation, industrial |
| Equipment | Full item list and dimensions |
| Loaded weight | Normal and maximum planned load |
| Access order | Immediate, frequent, secondary, reserve |
| Carry distance | Short vehicle transfer or extended movement |
| User equipment | Uniform, winter clothing, vest or PPE |
| Cleaning | Wipe-down, removable modules, contamination exposure |
| Visibility | High-visibility or subdued |
| Deployment | Individual or team use |
| Storage | Vehicle, station, warehouse or wearable carry |
| Restocking | Loose items or replaceable modules |
The strongest tactical bag is not the one with the most pockets or the heaviest fabric. It is the one whose size, opening, organization, reinforcement, and carry system match the mission closely enough that the equipment remains easy to locate, stable to transport, and practical to restore after use.
How Should Tactical Bags Organize Emergency Gear?
Emergency gear should be organized by access priority, function, item size, weight, replenishment frequency, and deployment sequence. The fastest-needed items should sit behind the fewest closures, while dense equipment should remain close to the back or center of the bag. Clear pouches, elastic retention, removable modules, contrasting interiors, dividers, and consistent compartment positions help teams locate and restore equipment with less searching.
A rescue pack should not be judged by how many pockets it contains. The more useful test is whether someone can open the bag, identify the required module, remove it, use it, and return the remaining equipment without disturbing the entire load.
A practical internal layout usually separates equipment into four access levels:
| Access Level | Typical Position | Suitable Storage | Main Purpose |
|---|---|---|---|
| Immediate | Top flap, outer front, tear-away section | Elastic retention, dedicated pouch | Reach without opening the complete pack |
| Frequent | Upper main section | Clear pouch, mesh pocket, removable module | Repeated access during an operation |
| Secondary | Main interior | Dividers, labeled modules | Organized treatment or rescue equipment |
| Reserve | Lower or protected section | Zippered pouch, enclosed compartment | Refill stock and less frequently used items |
Dense equipment deserves another rule: keep it as close as practical to the back panel or structural center. Heavy items mounted on the outer face create leverage, movement, and greater strain on shoulder straps.
Why Does Quick Access Matter in an Emergency?
Quick access is not simply about opening a zipper faster. It is about reducing unnecessary actions between recognizing a need and reaching the correct equipment.
Consider two packs carrying the same contents.
Pack A requires the main zipper to be opened, two modules removed, and a lower compartment searched before a frequently used item can be reached.
Pack B places that same item in an identified section with one opening action.
The difference may involve only a few seconds, but repeated across multiple retrievals it also affects concentration, equipment control, and how much of the kit becomes exposed.
A useful access review records each action required:
| Retrieval Sequence | Better Configuration |
|---|---|
| Remove pack → open main zipper → remove module → open pouch → locate item | Suitable for secondary supplies |
| Remove pack → open identified compartment → retrieve item | Suitable for frequently used supplies |
| Pull tab → remove dedicated item | Suitable where immediate access is required |
Quick-access features should also work with gloves. Small metal zipper sliders, hidden pullers, narrow pockets, and closures requiring precise finger movement may work perfectly during sample inspection but become awkward during field use.
For frequently accessed areas, larger cord pulls, predictable opening direction, sufficient finger clearance, and a clear visual or tactile identifier can make a meaningful difference.
The goal is not to make every compartment instantly accessible. If everything receives equal priority, the layout loses hierarchy.
How Should Medical Gear Be Organized?
Medical equipment is easier to control when related items are grouped into clearly defined modules rather than scattered throughout the pack.
The actual grouping should follow the approved medical protocol used by the organization. Once those categories are established, the bag can provide suitable pouch dimensions, labels, colors, retention systems, and locations.
A useful equipment worksheet can include:
| Item Information | Why It Matters |
|---|---|
| Item dimensions | Determines pouch and loop dimensions |
| Quantity | Determines module volume |
| Approximate weight | Influences placement |
| Frequency of access | Determines location |
| Functional category | Defines module grouping |
| Required orientation | Prevents unsuitable storage |
| Replacement frequency | Affects restocking method |
| Sensitive or rigid item | May require padding or separation |
This avoids a common problem: making several identical internal pouches first and trying to force completely different equipment groups into them afterward.
For repeated institutional use, each pack should follow the same internal arrangement. If five identical rescue bags are placed in different vehicles, the same module should not appear in five different locations.
Consistency becomes part of usability.
What Is a Full-Opening Tactical Bag?
A full-opening bag allows most of the main compartment to be exposed at once. Clamshell and book-style constructions are commonly used because they provide much better visual access than a narrow top-loading opening.
This layout is particularly useful when the interior contains several medical or rescue modules.
Instead of reaching downward through equipment, the pack can be laid flat and opened so multiple sections remain visible at the same time.
However, a large opening creates additional structural demands.
A clamshell pack may need:
- longer and stronger zipper chains;
- reinforced zipper termination areas;
- internal retention so contents do not fall outward;
- sufficient panel stiffness;
- stable hinges or fabric folds;
- dividers that remain upright when the pack changes orientation.
The interior should be tested both horizontally and vertically.
A layout that looks excellent when the backpack lies flat may become disorganized when carried upright for thirty minutes. Pouches can sag, heavy modules can migrate downward, and loosely retained supplies can collect along the lowest edge.
Full opening works best when visibility and retention are developed together.
Which Compartments Need Fast Access?
Fast-access positions should be reserved for equipment that is intentionally prioritized by the operating team.
This may include certain immediate-use supplies, lighting, PPE, communication accessories, identification equipment, or items frequently checked during restocking.
A practical method is to assign each item an access class:
| Class | Access Expectation | Recommended Location |
|---|---|---|
| A | Immediate | External or direct-opening section |
| B | Frequent | Upper internal section |
| C | Normal | Main organized compartment |
| D | Reserve | Lower or protected storage |
This classification can prevent overcomplicated exteriors.
Not every item benefits from an outer pocket. External storage adds seams, zippers, projection from the pack, and possible snagging. It can also move weight farther from the body.
Fast access should therefore be earned by operational importance.
It is also useful to differentiate major compartments through pull-tab shape, zipper direction, color accents, or position. Ten identical black zipper pulls can turn an otherwise organized pack into a visual search exercise.
How Do Internal Dividers Improve Trauma Kit Deployment Speed?
Dividers improve organization by preventing bulky equipment from collapsing into one unrestricted cavity.
They are particularly useful for items that are too large for individual pouches but still need fixed positions.
Good dividers should control:
- lateral movement;
- vertical shifting;
- contact between rigid items;
- pressure against zippers;
- interference with removable modules.
Adjustable hook-and-loop dividers provide flexibility, but their attachment area must be strong enough to resist loaded movement. A narrow strip may hold an empty divider perfectly and still separate once several kilograms of equipment press against it.
Divider height also matters.
A very low divider does little to control tall equipment. An excessively high divider can block access across the compartment.
For sample approval, the pack should be loaded, carried, turned onto its side, placed upright, opened again, and inspected.
If the equipment layout changes significantly after this movement, stronger retention is needed.
Are Transparent Pouches Better for Medical Kits?
Transparent windows are valuable when several modules have similar dimensions because the contents can be identified without opening every pouch.
They can also make replenishment easier because missing items may be visible during inspection.
However, transparent construction should be applied selectively.
A fully clear pouch may be unnecessary if only one viewing panel is needed. Combining a durable textile body with a clear lid or window can provide better abrasion resistance while retaining visibility.
Several details should be checked:
| Area | What to Review |
|---|---|
| Clear panel thickness | Flexibility versus structure |
| Edge sewing | Risk of tearing around needle holes |
| Abrasion | Contact with hard equipment |
| Long-term folding | Whitening or permanent creasing |
| Cleaning | Compatibility with intended procedure |
| Visibility | Whether labels are still needed |
| Replacement | Whether modules can be changed independently |
Transparent material should help identify contents. It should not become a decorative feature that introduces unnecessary weakness.
How Do Elastic Loops Secure Trauma Supplies?
Elastic loops are useful for narrow or individually accessed equipment because they give each item a predictable position.
Common applications include packaged supplies, small tools, cylindrical items, or other components that should not fall into the bottom of a pouch.
Loop dimensions should be developed around real item measurements.
Important variables include:
- elastic width;
- thickness;
- installed tension;
- stitch spacing;
- item circumference;
- removal direction;
- glove use;
- long-term stretch recovery.
If the elastic is too loose, items move during transport. If it is too tight, removal becomes difficult.
A sample should therefore be tested while fully loaded.
It is also useful to leave the equipment installed for several days before a second review. This can reveal whether elastic loses recovery or remains excessively compressed.
A visually neat empty organizer is not enough.
What Is a Rip-Away IFAK Pouch?
A rip-away IFAK uses a detachable working pouch attached to a fixed mounting panel.
The mounting panel can remain on a belt, vest, MOLLE surface, backpack, or vehicle system while the medical pouch is pulled away and moved to a more convenient working position.
This construction needs two contradictory qualities:
It must stay secure during movement.
It must also release intentionally without excessive effort.
Common retention systems may combine hook-and-loop engagement with a secondary strap or buckle to reduce accidental release.
During development, three conditions should be checked:
- walking, running, bending, and equipment contact should not detach the pouch;
- intentional removal should remain practical while wearing gloves;
- the pouch should be easy to return to the mount in the correct orientation.
Release direction matters as well.
A pouch mounted behind the hip behaves differently from one mounted on the front of a backpack. Testing only on a workbench can hide ergonomic problems.
How Does Color Coding Improve Gear Identification?
Color coding can reduce visual searching when multiple internal modules share similar shapes.
The color does not need to cover the entire pouch.
Identification can be added through:
- zipper pulls;
- binding;
- hook-and-loop patches;
- woven tabs;
- printed labels;
- snaps;
- small fabric panels.
The strongest system usually combines several signals.
For example:
red zipper pull + printed category + fixed compartment position.
This remains easier to recognize than relying on color alone.
The operating organization should define the meaning of each color because medical, rescue, industrial, and regional systems may use different conventions.
Once a color system has been approved, production consistency matters. Changing one module from red to burgundy or moving its identification tab to another position may look minor but can weaken the logic of a standardized kit.
How Does MOLLE/PALS Expand a Tactical Kit?
MOLLE/PALS allows compatible modules to be attached to a base pack instead of permanently sewing every accessory into the shell.
This can make one core backpack adaptable to several mission configurations.
Potential attachments include:
- compact first-aid pouches;
- utility modules;
- radio accessories;
- identification panels;
- tourniquet holders;
- equipment-specific carriers.
MOLLE should still be treated as load-bearing structure.
Every attached pouch has three dimensions after loading, not when empty. Its weight also creates leverage.
Before final approval, create an attachment map showing:
| Item | Position | Loaded Weight | Filled Depth | Removal Frequency |
|---|---|---|---|---|
| Medical pouch | Front upper | Project-specific | Actual filled size | Frequent |
| Utility pouch | Side | Project-specific | Actual filled size | Normal |
| Identification panel | Front | Very low | Minimal | Rare |
| Equipment carrier | Side/lower | Project-specific | Actual filled size | Mission-dependent |
This quickly reveals whether too much weight is being moved away from the body.
MOLLE Webbing vs Laser-Cut MOLLE: Which Is Better?
Traditional MOLLE uses sewn webbing. Laser-cut MOLLE uses slots cut into a suitable laminated or reinforced panel.
Neither option is universally stronger.
| Feature | Sewn Webbing MOLLE | Laser-Cut MOLLE |
|---|---|---|
| External profile | More pronounced | Flatter |
| Material use | Webbing plus base fabric | Reinforced laminate/panel |
| Sewing operations | Higher | Lower on visible face |
| Appearance | Traditional tactical | Cleaner technical look |
| Structural dependence | Webbing, bartacks and backing | Laminate integrity and slot structure |
| Repair method | Familiar sewing construction | Depends on panel construction |
| Weight | Often higher | Can be reduced |
| Best use | Proven heavy-duty layouts | Low-profile systems with validated material |
A weak base fabric can compromise traditional MOLLE even if the webbing itself is strong.
Laser-cut construction can also fail when the laminate is too thin, too soft, or inadequately supported.
The correct comparison therefore requires a loaded attachment test rather than judging only the empty panel.
Where Should External Pouches Be Positioned?
External modules should be placed according to access priority, body clearance, weight balance, pack opening, and snag risk.
Heavy equipment should generally remain close to the body. Large outer modules can move the center of mass backward, increase sway, and make a pack feel heavier than its measured weight suggests.
Side modules must be checked for arm interference.
Front modules must be checked to ensure they do not prevent a clamshell pack from lying flat.
Lower modules should not interfere with waist belts, sitting, vehicle storage, or ground placement.
A final exterior review should be completed in at least four conditions:
| Test Condition | What It Reveals |
|---|---|
| Empty | Basic dimensions and workmanship |
| Main compartment fully loaded | Actual pack shape |
| External modules fully loaded | Balance and interference |
| Pack worn with intended clothing or PPE | Body clearance and access |
Then walk, bend, kneel, lift the bag by every handle, open every major zipper, place it inside the intended storage area, and remove each external module.
A professional rescue pack should not try to carry the greatest possible number of attachments. It should keep every item stable, identifiable, reachable, and positioned where it contributes to the mission rather than getting in the way.
Which Materials and Carry Systems Work Best?
A rescue pack should not be specified by fabric denier alone. Its real durability comes from the complete load path: outer textile, coating, lining, reinforcement, thread, seams, zipper size, webbing, buckles, shoulder anchors, back support, and the way heavy equipment sits inside the pack.
For tactical and emergency bags, commonly used materials include Oxford fabric, nylon, polyester, PVC-coated fabric, webbing, mesh, foam padding, metal hardware, and buckles. Load-bearing, abrasion resistance, pocket layout, reinforcement, zipper construction, shoulder structure, and long-term use are all part of the same product decision.
A strong material plan should begin with five practical facts: expected loaded weight, carry duration, abrasion exposure, weather exposure, and cleaning method. Once those are known, fabric and carry-system choices become much easier to justify.
How Do You Choose the Right Fabric for Rescue Packs?
Choose fabric according to the conditions the bag will actually face.
A pack stored mainly inside an ambulance may need frequent cleaning and strong floor-abrasion resistance. A search-and-rescue backpack may experience rock, concrete, branches, vehicle interiors, rain, and repeated shoulder loading. A preparedness pack may spend long periods in storage but still needs dependable zippers, coatings, and reinforcement when finally used.
The fabric specification should normally record:
- fiber type;
- denier;
- fabric construction;
- finished weight;
- backing or coating;
- abrasion performance;
- tear strength;
- breaking strength;
- water-repellency requirement;
- colorfastness;
- cleaning compatibility.
“600D Oxford” is not enough information by itself. Two fabrics carrying the same commercial description can differ substantially in yarn quality, coating weight, density, hand feel, and long-term performance.
For emergency packs, the most heavily exposed zones are often the bottom panel, lower corners, front outer surface, and shoulder-strap connection area. These locations may justify stronger fabric or extra reinforcement even when the rest of the pack uses a lighter textile.
This selective approach can control finished weight without sacrificing durability.
500D vs 1000D Nylon: Which Should You Choose?
500D nylon is often a strong choice when lower weight, flexibility, and reduced bulk matter. 1000D nylon is more suitable when abrasion exposure is severe and the additional material weight is acceptable.
The important decision is not “Which number is larger?” but “Where does the pack need extra resistance?”
| Design Factor | 500D Nylon | 1000D Nylon |
|---|---|---|
| Finished pack weight | Lower | Higher |
| Flexibility | Better | Stiffer |
| Folding and shaping | Easier | Less compact |
| Internal modules | Very suitable | Can become bulky |
| High-abrasion outer zones | Suitable with reinforcement | Strong option |
| Long-distance carry | Helps reduce dead weight | Additional shell weight must be justified |
| Vehicle-based heavy use | Often sufficient | Useful where repeated abrasion is severe |
A mixed-material construction is often more efficient than using one heavy textile everywhere.
For example, a pack may use 500D nylon through most of the body while increasing reinforcement at the base, lower corners, handle anchors, MOLLE sections, or other high-load locations.
That can produce a more balanced bag than simply specifying 1000D for every panel.
Oxford vs Nylon: Which Works Better?
Oxford and nylon should not be treated as direct opposites.
Oxford refers to a weave construction. Nylon refers to the fiber. Oxford can be made from polyester or nylon.
For this reason, a more useful comparison is:
polyester Oxford vs nylon fabric with known construction and coating.
Polyester Oxford is widely used in tactical and work bags because it can offer good structure, practical abrasion performance, broad color availability, and controlled cost.
Nylon is often selected when higher strength-to-weight performance, abrasion resistance, and reduced finished weight are more important.
A proper comparison should include:
| Property | What Should Be Confirmed |
|---|---|
| Fiber | Polyester or nylon |
| Denier | 500D, 600D, 900D, 1000D, etc. |
| Fabric weight | g/m² or oz/yd² |
| Backing | PU, PVC, laminate or other |
| Abrasion | Agreed test method |
| Tear strength | Warp and fill |
| Breaking strength | Warp and fill |
| Water resistance | Defined according to intended use |
| Cleaning | Compatibility with required procedure |
The fiber and finish often matter more than the product name printed on the swatch card.
Is Higher Denier Always More Durable?
No.
Denier describes yarn linear density. It does not describe the durability of the entire backpack.
A heavier textile can still fail early when combined with poor coating, weak thread, badly positioned seams, insufficient reinforcement, low-quality webbing, or under-specified hardware.
A lighter textile can perform very well when the structure distributes force correctly.
For heavy emergency packs, durability should be considered through this relationship:
fabric strength + seam strength + reinforcement + hardware + load distribution.
Shoulder straps are a good example.
A 1000D body fabric does little if the shoulder strap is attached through a small unsupported seam. Once the loaded pack is lifted repeatedly, the stress concentrates at that connection.
The same principle applies to top handles, compression straps, waist belts, D-rings, and MOLLE attachments.
Higher denier can be useful. It is not a substitute for structural design.
What Durability Standards Apply to Emergency Medical Bags?
Durability testing should reflect the stated performance requirement rather than rely on one universal backpack test.
Common areas for evaluation include:
- fabric breaking strength;
- tear resistance;
- abrasion resistance;
- seam strength;
- webbing strength;
- buckle performance;
- zipper cycling;
- handle loading;
- shoulder-strap loading;
- surface wetting;
- colorfastness.
ASTM D5034 is commonly used for textile breaking strength, while ASTM D1683/D1683M can be used for sewn-seam behavior. Other methods may be selected according to the textile, destination, and project specification.
The test method alone is incomplete.
A usable requirement needs three elements:
test method + specimen requirement + acceptance value.
For example, stating “abrasion test required” does not define an acceptable result.
For institutional or government-linked projects, acceptance values should be confirmed before sample approval rather than added after production has started.
What Makes a Tactical Bag Fully Weather-Resistant?
Weather protection comes from the entire bag construction, not only the fabric coating.
A coated outer textile may resist water well, while moisture still enters through:
- stitching holes;
- uncovered zipper chains;
- zipper ends;
- bound seams;
- panel joins;
- external pocket openings;
- attachment stitching.
It is therefore important to define the intended protection level clearly.
A project may require:
- light-rain resistance;
- sustained-rain resistance;
- splash protection;
- wet-ground protection;
- protection during vehicle transport;
- much stronger water exclusion.
These performance levels require different construction.
A conventional sewn rescue backpack can provide strong rain resistance, but it should not automatically be described as watertight.
The wording should match the tested construction.
How Do Coatings, Seams, and Zippers Affect Weather Protection?
The outer coating is only the first barrier.
PU and PVC backing can reduce water penetration through the textile body, but every stitch creates small perforations. Long zipper openings add additional paths where moisture can enter.
Useful weather-protection features can include:
- coated exterior fabric;
- reverse-coil zipper construction;
- water-repellent zipper options;
- storm flaps;
- protected zipper positioning;
- reduced unnecessary exterior seams;
- carefully designed bottom structure.
Water-repellent zippers should still be described accurately. They can improve protection but do not make the entire pack waterproof.
If the contents include electronics, sensitive medical devices, or documents that cannot tolerate moisture, separate internal dry protection may also be worth considering.
That can be more dependable than asking the entire sewn backpack to perform like a sealed dry bag.
Why Are Reinforced Stress Areas Important?
Most tactical bags do not fail in the middle of a large fabric panel.
They fail where forces concentrate.
Common high-stress locations include:
| Area | Main Stress |
|---|---|
| Top handle | Repeated vertical lifting |
| Shoulder-strap top anchor | Continuous loaded pull |
| Lower shoulder connection | Pull plus body movement |
| Waist-belt anchor | Horizontal load transfer |
| Compression strap | Outward pressure |
| MOLLE field | External pouch load |
| Bottom corner | Abrasion and impact |
| Main zipper end | Opening force |
| D-ring tab | Concentrated accessory load |
These areas may require backing fabric, webbing, additional stitch rows, bartacks, or larger reinforcement patches.
Reinforcement should extend beyond the visible stitch area so the load can spread into the surrounding panel.
This is especially important on rescue packs carrying dense gear.
Where Should Bar Tacks Be Used?
Bar tacks work well where narrow webbing or straps transfer concentrated force.
Common locations include:
- shoulder-strap anchors;
- grab handles;
- compression straps;
- waist-belt webbing;
- sternum-strap attachments;
- MOLLE rows;
- D-ring tabs;
- buckle anchors;
- external equipment loops.
But adding more bartacks everywhere is not automatically stronger.
A dense stitch cluster can weaken thin fabric if there is no reinforcement underneath.
The better structure is:
outer material + reinforcement layer + correctly positioned webbing + suitable thread + controlled bartack.
The base material must be able to accept the concentrated stitching.
For important load-bearing areas, sample inspection should look behind the visible exterior panel to confirm how the load is actually supported.
Which Zippers and Buckles Work Best?
Main compartments on heavily loaded packs normally need stronger zipper construction than small internal pockets.
The zipper specification should consider:
- zipper size;
- coil or tooth type;
- slider quantity;
- slider strength;
- opening direction;
- puller size;
- glove use;
- curved opening sections;
- rain protection.
Large clamshell openings place considerable demand on the zipper because equipment can push outward against the panels.
Double sliders can improve access, but both should move smoothly under load.
Buckles should be selected according to:
- webbing width;
- load;
- release force;
- impact exposure;
- repeated cycling;
- temperature requirements;
- glove operation.
Jundong’s own bag specification guidance emphasizes that zipper type, size, slider, puller, opening direction, and weather-resistant requirements should be confirmed because they affect durability, appearance, cost, and long-term use.
How Should Shoulder Straps Carry Heavy Loads?
Shoulder straps should distribute pressure without forcing the pack away from the body.
Important dimensions include:
- strap width;
- foam density;
- foam thickness;
- curvature;
- spacing at the neck;
- upper anchor angle;
- lower anchor position;
- adjustment length;
- sternum-strap location.
A very thick shoulder pad is not automatically comfortable.
Soft foam can collapse under a dense load, leaving the webbing and seam structure to carry most of the pressure.
For heavier rescue packs, higher-density foam and a stable back panel often perform better than excessive softness.
The harness must also match intended clothing. A strap that works well over a T-shirt may behave differently over a winter jacket, protective vest, or other equipment.
Webbing, handles, and shoulder straps directly affect load-bearing, comfort, and long-term performance, and they should be treated as structural components rather than decoration.
When Does a Waist Belt Improve Load Transfer?
A waist belt becomes more useful as loaded weight and carry duration increase.
Its job is to help stabilize the pack and transfer part of the load toward the pelvis rather than leaving the shoulders to carry everything.
A useful waist belt needs:
- correct vertical position;
- adequate width;
- appropriate foam density;
- strong connection to the pack;
- stable webbing adjustment;
- sufficient forward pull.
A narrow decorative strap adds little load-transfer value.
Vehicle-based emergency bags may not need a substantial waist system because carry distances are short.
Search-and-rescue packs intended for prolonged movement may benefit much more.
This feature should therefore be matched to the actual mission rather than added automatically.
How Should Heavy Gear Be Positioned?
Dense equipment should generally sit close to the back and near the vertical center of the pack.
Moving heavy gear outward increases leverage and can make the backpack feel less stable even when the total weight does not change.
Heavy modules should also be prevented from dropping to the bottom during movement.
Useful retention methods include:
- adjustable dividers;
- hook-and-loop straps;
- compression webbing;
- dedicated cradles;
- foam blocks;
- PE or HDPE panels;
- semi-rigid internal structures.
A heavy accessory should not automatically be placed on the outer MOLLE surface simply because an attachment position is available.
A 2 kg pouch mounted several centimeters away from the back changes how the pack moves.
Keep dense loads close. Use outer surfaces for lighter equipment whenever the operating plan permits.
Are High-Visibility Colors Better for Rescue Bags?
High-visibility colors can improve equipment recognition during roadside response, industrial incidents, vehicle operations, low-light scenes, and crowded treatment areas.
Useful choices include red, orange, yellow, neon tones, or selected high-visibility panels.
However, not every tactical application needs a bright outer shell.
Some projects may require black, olive, coyote, navy, or other subdued colors while still using:
- reflective strips;
- bright zipper pulls;
- contrasting internal lining;
- removable identification patches.
The inner color is often overlooked.
A light gray, yellow, orange, or other contrasting lining can make dark equipment easier to locate than a black-on-black interior.
Visibility should therefore be designed both outside and inside the pack.
Do Reflective Details Matter for Emergency Teams?
Reflective detailing can make a meaningful difference in darkness, rain, roadside environments, warehouses, and vehicle areas.
Useful positions include the front panel, sides, upper sections, and large identification areas.
Reflective material should be checked for:
- nighttime visibility;
- stitch or bonding quality;
- flex resistance;
- abrasion;
- cleaning compatibility;
- long-term adhesion.
It is also important to distinguish visibility enhancement from compliance with a formal occupational standard.
If a project requires a defined reflective-performance specification, that requirement should be provided before material approval.
A decorative reflective strip should not be treated as certification.
How Should Rescue Bags Be Cleaned After Use?
Cleaning requirements should be considered before the final textile is selected.
A rescue bag exposed to medical environments, wet ground, vehicle floors, dust, or industrial sites may require very different maintenance from a preparedness bag kept in a closet.
Useful design features can include:
- wipeable outer surfaces;
- removable internal modules;
- limited exposed absorbent foam;
- replaceable clear pouches;
- smooth lining;
- removable dividers;
- accessible corners;
- controlled drainage where appropriate.
Avoid creating deep narrow pockets that are difficult to inspect or clean.
The cleaning agent also matters.
Coatings, reflective films, printed labels, clear PVC/TPU, hook-and-loop, foam, and hardware finishes can react differently to chemicals.
For this reason, the intended cleaning procedure should be established before final approval whenever frequent decontamination is expected.
A durable emergency pack is not simply one that resists tearing. It should remain structurally stable, easy to carry, identifiable, serviceable, and practical to maintain throughout repeated use.
How Does the Custom Tactical Bag Process Work?
A custom tactical bag should move from mission definition to gear mapping, structural design, material selection, sampling, loaded testing, revision, specification lock, pre-production approval, bulk production, and staged inspection. The most reliable projects do not begin with exterior styling. They begin with what the bag must carry, how fast each item must be reached, how much the completed load will weigh, and how the pack will be used in the field.
What Should a Tactical Bag Brief Include?
A useful brief should describe the working conditions of the bag, not simply provide an exterior reference image.
At minimum, define:
| Information | Why It Matters |
|---|---|
| Intended use | Determines structure and organization |
| Equipment list | Determines internal dimensions |
| Target loaded weight | Affects harness and reinforcement |
| Carry duration | Influences shoulder and waist support |
| Opening method | Controls access speed |
| Outer material | Affects durability, weight and cost |
| Internal modules | Defines organization and sewing complexity |
| MOLLE layout | Controls external expansion |
| Visibility requirements | Affects color and reflective details |
| Logo and identification | Affects process and placement |
| Packing method | Affects final dimensions and delivery preparation |
| Quantity | Influences material planning and unit cost |
| Required completion date | Influences development and production schedule |
A reference photo can start the discussion, but final quotation and sampling still require clearer information such as size, material, logo, quantity, packing, and timing.
Who Should Define the Emergency Gear List?
The rescue, medical, safety, or operational team using the kit should determine what equipment belongs inside it.
The bag-development team should then convert that list into compartments, elastic retention, dividers, removable modules, padding, access zones, and load-bearing structure.
A useful gear file should record:
- item name;
- quantity;
- length, width, and thickness;
- approximate weight;
- access priority;
- required orientation;
- functional category;
- whether it needs padding;
- whether it must be removable as a complete module.
Photographs showing all equipment laid out together are also extremely useful.
This division of responsibility matters. Bag development can solve how equipment is carried, but medical or rescue protocols should determine what equipment is carried and how it is operationally grouped.
How Does the Gear List Affect Bag Structure?
The gear list drives almost every major structural decision.
Long equipment may require a vertical compartment. Dense equipment may need a position close to the back panel. Small packaged items may need clear modules or elastic retention. A rigid device may need foam separation. Cylindrical equipment may require a dedicated cradle.
The gear list therefore influences:
- overall dimensions;
- bag depth;
- opening direction;
- pocket size;
- divider position;
- elastic spacing;
- external attachment areas;
- foam thickness;
- PE or HDPE support;
- handle construction;
- shoulder-strap strength;
- compression layout.
One of the most common mistakes is choosing a 30 L, 40 L, or 50 L shell first and trying to fit the equipment afterward.
A better method is to arrange the equipment into functional groups, determine the packed dimensions, define the access sequence, and then build the shell around those groups.
What Should a Tactical Bag Tech Pack Include?
A tactical bag tech pack should give cutting, sewing, assembly, and inspection teams enough information to reproduce the approved design without relying on memory.
It should normally include:
- finished dimensions and tolerances;
- panel measurements;
- material codes;
- fabric composition and denier;
- coating;
- lining;
- foam density and thickness;
- structural board thickness;
- zipper size and type;
- slider and puller;
- webbing width;
- buckle and hardware codes;
- MOLLE dimensions;
- stitch construction;
- reinforcement locations;
- bartack locations;
- pocket and pouch dimensions;
- shoulder-strap construction;
- logo dimensions and coordinates;
- reflective details;
- labels;
- color references;
- individual packing;
- carton packing.
A physical sample shows the result. A detailed technical file explains how that result should be repeated.
How Are Custom MOLLE Layouts Developed?
MOLLE should be planned around actual attached equipment rather than filling every available panel with webbing.
Start by listing every planned external and internal module. Record its filled dimensions, loaded weight, removal frequency, and preferred location.
Then check whether each module interferes with:
- main zippers;
- compression straps;
- handles;
- reflective zones;
- neighboring pouches;
- shoulder movement;
- vehicle storage.
Traditional MOLLE also requires controlled webbing width, row spacing, stitch divisions, backing reinforcement, and bartack location.
Laser-cut systems require suitable laminated materials, consistent slot geometry, strong backing, and careful edge quality.
The final sample should be tested with the planned modules attached and loaded. Empty MOLLE tells very little about how the pack will behave once equipment creates outward weight and leverage.
Can a Factory Develop From a Reference Sample?
Yes. A physical reference sample can be one of the most efficient starting materials for tactical bag development.
However, it should be evaluated rather than copied blindly.
The review should identify:
- which dimensions should remain;
- which pockets work well;
- which access problems need correction;
- whether the fabric suits the new use;
- whether the shoulder system supports the intended load;
- whether the MOLLE layout matches the new equipment;
- whether the interior needs different modules;
- whether the zipper grade is sufficient;
- whether visibility or cleaning requirements have changed.
Jundong can begin project review from a reference sample, product image, design file, sketch, logo file, or other partial material. More accurate development still depends on size, material, quantity, packing, and use requirements.
Can Custom Tactical Bags Meet Strict Military-Grade Specifications?
They can be developed against strict technical requirements when those requirements are clearly measurable.
“Military-grade” alone is too vague.
A serious specification may define:
- exact fabric;
- fiber;
- denier;
- color standard;
- webbing;
- thread;
- zipper;
- buckles;
- hardware;
- seam construction;
- stitch density;
- dimensions;
- tolerances;
- abrasion performance;
- breaking strength;
- load requirements;
- labeling;
- packing;
- documentation.
Some projects may also specify country-of-origin, approved material sources, or restricted component requirements.
These details should be disclosed before quotation because they can change material availability, cost, lead time, and the entire sourcing plan.
The stronger the specification, the less room there is for uncontrolled substitution.
How Does the Tactical Bag Sample Process Work?
A practical tactical bag sample normally develops through several connected stages:
- Review mission, equipment, size, and load.
- Confirm material direction.
- Arrange compartments and access zones.
- Plan MOLLE and removable modules.
- Select zipper, webbing, buckle, foam, and reinforcement.
- Prepare patterns.
- Cut materials.
- Complete logo or identification processes.
- Sew the first sample.
- Load representative equipment.
- Check dimensions and fit.
- Test carry, opening, retrieval, and stability.
- Record revisions.
- Produce the revised version when required.
The sample is not only for appearance. Jundong’s own sampling rules treat it as a method to confirm size, material, structure, logo, accessories, packing, function, and production feasibility.
How Long Does Tactical Bag Sampling Take?
Jundong’s standard bag sampling time is usually about 5–7 days once the essential design direction and materials are sufficiently clear.
Complex tactical projects can require additional time when they involve:
- multiple removable modules;
- extensive MOLLE;
- custom-dyed materials;
- uncommon hardware;
- special reflective components;
- molded EVA;
- internal frames;
- several logo processes;
- specialized weather protection.
It is useful to separate actual sample sewing time from total development time.
Material sourcing, hardware preparation, logo setup, equipment-fit review, and revision approval may take longer than sewing itself.
A fast first sample is only valuable when it tests the correct structure.
What Should Be Tested on a Sample?
The sample should be tested while loaded.
A practical evaluation includes:
| Area | What to Check |
|---|---|
| Dimensions | Overall and compartment sizes |
| Equipment fit | Every planned item fits |
| Pack shape | No excessive distortion under load |
| Shoulder system | Comfort and stability |
| Handles | Lift from every intended position |
| Zippers | Smooth operation when packed |
| Access | Priority equipment can be reached cleanly |
| MOLLE | Modules mount correctly |
| Dividers | Stay in position during movement |
| Elastic | Holds items without excessive force |
| Buckles | Lock and release consistently |
| Reinforcement | No visible stress concentration |
| Identification | Labels and colors remain easy to locate |
An empty sample can look excellent while hiding serious problems that appear only after 10–15 kg is loaded inside.
How Do You Test Load-Bearing Capacity for Mass-Casualty Rescue Bags?
Start with the intended working load rather than choosing an arbitrary kilogram claim.
The test should simulate how weight is actually distributed inside the pack.
Useful checks may include:
- static loaded hanging;
- repeated lifting by the main handle;
- repeated shoulder-strap loading;
- walking trials;
- loaded placement and drop simulation where appropriate;
- compression-strap loading;
- repeated opening and closing.
After testing, inspect:
- shoulder anchors;
- handle bases;
- bartacks;
- seam opening;
- fabric tearing;
- webbing slippage;
- buckle deformation;
- zipper separation;
- back-panel distortion.
If a formal load requirement exists, the method, load, cycle count, and acceptance criteria should be agreed before final approval.
How Do You Test Zippers and Quick-Access Features?
Zippers should be tested when the pack is full because panel pressure can change how smoothly they operate.
Check:
- opening and closing under load;
- glove operation;
- double-slider alignment;
- curved zipper sections;
- puller size;
- zipper-end reinforcement;
- access while external modules are attached;
- interaction with compression straps.
Quick-access areas should also be tested without carefully looking at the pack.
If the correct zipper can only be found after visually searching several identical pulls, the identification system is weak.
Different pull shapes, colors, positions, or opening directions can help distinguish critical compartments.
The objective is not simply smooth zipper movement. It is predictable access during real use.
When Should Materials and Hardware Be Locked?
Materials and hardware should be locked after the approved sample has confirmed function and before full production is released.
The final BOM should identify:
- fabric code;
- color;
- coating;
- lining;
- foam;
- board;
- zipper;
- slider;
- puller;
- webbing;
- elastic;
- buckles;
- D-rings;
- hook-and-loop;
- reflective material;
- thread;
- logo process;
- labels;
- packing components.
Substitutions should be reviewed before use.
Two black buckles can look almost identical but behave differently under load. Two 500D fabrics may have different coatings, weights, or stiffness.
Visual similarity is not sufficient for critical components.
How Does a PP Sample Control Bulk Production?
A PP sample establishes the final physical reference before bulk work proceeds.
It should reflect the approved:
- textile;
- colors;
- dimensions;
- structure;
- modules;
- MOLLE;
- hardware;
- logo;
- labels;
- reflective details;
- packing.
Its value increases when it is paired with controlled drawings, measurements, BOM information, and inspection criteria.
Jundong’s production guidance uses approved samples and production details as inspection references during bulk production.
The PP sample should therefore remain connected to the production and inspection teams rather than functioning only as a visual showroom sample.
How Is Sample-to-Bulk Consistency Checked?
Consistency is stronger when every important sample feature becomes a measurable production checkpoint.
A practical control sequence is:
approved sample → BOM → pattern → first-piece confirmation → in-process inspection → finished inspection → packing inspection.
Critical tactical-bag checks may include:
- finished dimensions;
- pocket coordinates;
- MOLLE spacing;
- shoulder symmetry;
- webbing length;
- bartack position;
- zipper direction;
- module dimensions;
- buckle specification;
- reflective placement;
- logo size;
- labels;
- individual packing.
Jundong’s QC structure uses multi-stage inspection and approved references rather than relying only on final inspection.
The earlier a deviation is found, the fewer finished bags need correction.
Which QC Steps Matter Most?
For tactical emergency bags, the most important inspections protect material accuracy, structural strength, access, and consistency.
Incoming inspection should confirm fabric, coating, lining, foam, webbing, zipper, hardware, buckles, labels, and packing components.
Jundong’s incoming-material checks include fabric thickness and texture, coating condition, zipper specification, webbing width, hardware color and quantity, buckles, D-rings, and label materials.
During sewing, inspection should concentrate on:
- handle reinforcement;
- shoulder anchors;
- MOLLE alignment;
- zipper installation;
- divider positions;
- bartacks;
- hardware orientation.
Finished inspection then verifies dimensions, appearance, function, module layout, identification, and packing.
For complex rescue programs, the checklist should be written specifically for the approved design rather than adapted from a simple backpack.
How Should Labels and Kit Identification Be Planned?
Identification should be developed together with internal organization.
Useful elements may include:
- removable hook-and-loop patches;
- equipment category labels;
- unit identification;
- internal module names;
- color tabs;
- SKU codes;
- barcodes;
- batch identification;
- carton labels;
- destination marks.
For repeated programs, position consistency is as important as label content.
If one module is always located in the upper-left section, that position should remain consistent across the approved production layout unless the operating team requests otherwise.
Label material also needs practical review.
A printed label may need resistance to abrasion and cleaning. A removable patch needs sufficient attachment area. A barcode must remain readable after packing.
Good identification should make inspection, replenishment, deployment, and storage easier without adding unnecessary visual clutter.
How Do You Choose the Best Tactical Bag Manufacturer?
Choosing the right tactical bag factory is less about who shows the largest catalog and more about who can control structure, materials, load-bearing, access, sampling, production consistency, and final inspection as one connected project. Emergency packs, EMS backpacks, IFAK pouches, MOLLE systems, and rescue bags carry more functional risk than ordinary promotional bags because small construction errors can affect access, comfort, durability, and equipment organization.
A serious evaluation should therefore compare actual development capability rather than price alone.
| Evaluation Area | Suggested Weight | Evidence Worth Checking |
|---|---|---|
| Product development | 15% | Drawings, patterns, structural revisions |
| Tactical construction | 15% | MOLLE, reinforcement, harnesses, modular interiors |
| Sample execution | 15% | Loaded prototype, dimensions, workmanship |
| Material control | 10% | Fabric, webbing, zipper, buckle specifications |
| Load-bearing construction | 10% | Strap anchors, handles, bottom reinforcement |
| Quality control | 15% | Incoming, in-process, finished and packing checks |
| Sample-to-bulk control | 10% | Approved sample, BOM, measurements, inspection references |
| Capacity and scheduling | 5% | Production planning for required quantity |
| Packing and identification | 5% | SKU, labels, modules, cartons |
The strongest option is usually the factory that can explain why the bag is built a certain way, not simply show that it can sew one.
What Should You Check in a Tactical Bag Factory?
Start with development and production capability rather than certificates displayed on a wall.
Check whether the team can handle pattern development, material selection, MOLLE construction, reinforced shoulder systems, multiple internal modules, foam and board structures, heavy-duty webbing, hardware, full-opening zippers, reflective details, and project-specific packing.
Ask how a design moves from drawing to sample and from approved sample into production.
For a serious tactical project, useful evidence includes a sample room, material records, technical drawings, production instructions, in-process inspection, finished-product checks, and packing control.
Jundong’s operation includes product development, design, sampling, production, and quality teams, supported by more than 600 employees, approximately 18,000 m² of production space, and 80 QC inspectors.
Factory size alone is not enough, but it becomes valuable when supported by structured development and inspection.
Does the Factory’s History of Tactical Bags Matter?
Yes, especially when the project involves dense equipment loads, full-opening structures, multiple removable pouches, MOLLE, reinforced handles, or complex harness systems.
Experience helps identify problems that are difficult to see on drawings.
Typical problems include shoulder straps pulling the back panel out of shape, loaded modules blocking main zippers, external pouches interfering with arm movement, MOLLE rows becoming difficult to thread, or heavy equipment collapsing internal dividers.
Relevant experience does not have to mean producing exactly the same bag before.
Experience with tactical backpacks, outdoor packs, heavy-duty tool bags, rescue bags, load-bearing backpacks, EVA reinforcement, complex webbing, and structured interiors can all contribute valuable construction knowledge.
The key issue is whether the factory has repeatedly solved functional bag problems rather than only produced simple fashion or promotional styles.
Which Tactical Bag Capabilities Matter Most?
The most valuable capabilities are those that affect how the bag works when fully loaded.
These include structural pattern development, material selection, reinforced sewing, MOLLE accuracy, compartment engineering, removable modules, zipper selection, hardware control, shoulder-harness construction, and loaded-sample testing.
A strong tactical project also requires control of details that look minor individually:
| Detail | Why It Matters |
|---|---|
| MOLLE spacing | Determines accessory compatibility |
| Zipper size | Affects loaded opening performance |
| Webbing width | Affects hardware fit and strength |
| Foam density | Affects long-term carry comfort |
| Divider stiffness | Controls equipment movement |
| Bartack position | Affects concentrated load |
| Hardware specification | Affects release and retention |
| Reflective placement | Affects identification |
| Internal lining color | Affects equipment visibility |
Logo execution and appearance matter, but they should come after structural performance has been established.
OEM vs ODM: Which Is Better for Tactical Bags?
OEM works well when the design, dimensions, material specification, internal arrangement, hardware, and construction are already defined.
ODM-style development is more useful when the project starts from an equipment list, concept, reference sample, or incomplete drawing and still needs technical development.
Many tactical projects sit between the two.
A brand may already know the exterior appearance, color, intended capacity, and equipment list but still need assistance with pocket dimensions, MOLLE placement, reinforcement, shoulder geometry, zipper selection, or removable modules.
In that situation, the most efficient process is often collaborative development: preserve the approved product concept while improving the construction required to make it practical for repeated production.
Can the Factory Develop EMS and IFAK Products?
The development team should be able to build the textile carrying system around an approved medical equipment configuration.
For an IFAK, that may involve a compact clamshell structure, elastic retention, tear-away mounting, MOLLE compatibility, belt attachment, and controlled pull direction.
An EMS backpack may require much more:
| IFAK | EMS Backpack |
|---|---|
| Compact opening | Full or near-full opening |
| Elastic loops | Multiple removable modules |
| Belt/MOLLE mounting | Shoulder, chest and optional waist support |
| Low-profile structure | Structured load management |
| Limited equipment groups | Multiple functional categories |
| Simple identification | Labels, colors, clear windows |
| Minimal support structure | Foam, board or frame may be required |
The medical or rescue organization should define clinical contents. The bag team should translate those contents into reliable storage and carry structure.
How Should You Compare Tactical Bag Samples?
Compare samples while they contain the same equipment and the same working weight.
An empty backpack can hide structural differences that become obvious after loading.
A practical comparison can use weighted scoring:
| Test | Weight |
|---|---|
| Equipment fit | 15% |
| Access efficiency | 15% |
| Loaded carry comfort | 15% |
| Reinforcement | 15% |
| Internal organization | 10% |
| Zipper and hardware performance | 10% |
| MOLLE accuracy | 5% |
| Dimensions | 5% |
| Workmanship | 5% |
| Cleaning and serviceability | 5% |
Wear each sample, open every compartment, remove every module, lift every handle, attach intended MOLLE accessories, and inspect how the interior looks after movement.
A sample that looks slightly better on a table may perform much worse once loaded.
What Determines Tactical Bag Price?
Price is driven by construction complexity as much as material.
Two 35-liter tactical backpacks can have very different costs if one contains three compartments while the other uses fourteen removable modules, long clamshell zippers, extensive MOLLE, reinforced shoulder systems, multiple grab handles, clear windows, reflective trim, and structural board.
Major cost drivers include fabric, size, number of pattern pieces, zipper length, hardware, MOLLE quantity, foam, board, removable modules, reinforcement, labor time, logo process, packing, quantity, and required testing.
A meaningful quotation therefore needs a reasonably stable specification.
Comparing prices only by outer dimensions often produces misleading results.
How Do Materials Affect the Price?
Fabric price is influenced by fiber, denier, coating, weight, finish, color requirement, order quantity, and technical performance.
A premium 500D high-tenacity nylon can cost more than a heavier basic polyester Oxford. The larger denier number does not automatically indicate the higher-cost textile.
Material consumption also matters.
A larger clamshell pack uses more shell fabric, lining, foam, binding, and zipper than a compact top-opening design.
Additional cost can also come from premium webbing, reflective material, coated textiles, transparent panels, structural boards, specialty mesh, and custom-colored components.
Cost should therefore be calculated from the full BOM rather than fabric price alone.
How Does MOLLE Complexity Affect Cost?
MOLLE increases cost through material consumption, positioning, stitching, reinforcement, and inspection.
Traditional systems use repeated webbing rows and stitch divisions. Large panels may require many repeated sewing operations.
Laser-cut systems remove much of the external webbing but introduce laminated materials, cutting operations, precise slot geometry, and backing requirements.
Complexity rises when MOLLE is used on the front, sides, waist belt, interior, and removable modules at the same time.
A more efficient design places attachment areas only where equipment is expected to be mounted.
This reduces weight and unnecessary labor while keeping the pack functional.
What Are the Bulk Pricing Tiers for Emergency Preparedness Bags?
Instead of relying on a generic price chart, request quotations at several quantities using exactly the same specification.
A useful comparison might include 500, 1,000, 3,000, and 5,000 pieces.
| Quantity | What It Helps Reveal |
|---|---|
| 500 pcs | Base production cost |
| 1,000 pcs | Better distribution of setup and material preparation |
| 3,000 pcs | Larger program economics |
| 5,000 pcs | Greater purchasing and production efficiency |
The specification must remain unchanged during comparison.
If a 500-piece quotation uses premium nylon and a 3,000-piece quotation switches to polyester, the difference no longer reflects quantity alone.
What Is the MOQ for Custom Tactical Bags?
Jundong’s standard MOQ is 500 pieces per design.
The final MOQ can be higher when a project requires special fabrics, custom colors, unique components, molded parts, dedicated hardware, premium packing, multiple configurations, or other specifications that create separate material or setup requirements.
MOQ is influenced by material purchasing, logo setup, cutting, sewing, packing, QC, and production scheduling.
For multi-SKU programs, total quantity should not be considered alone.
Five thousand pieces split across ten structures, several colors, different internal modules, and separate packing instructions creates a very different production plan from one 5,000-piece design.
How Long Does Bulk Production Take?
A custom tactical bag program should normally allow approximately 25–45 days for bulk production after final specifications, approved sample, artwork, materials, hardware, and packing requirements have been confirmed.
Complex structures may require more time when they involve custom fabrics, multiple modules, molded components, special hardware, many SKUs, or detailed packing.
The shipment schedule should be planned separately.
A safer timeline works backward from the required arrival date:
delivery date → transport → packing and final inspection → production → material preparation → final sample approval.
This prevents a common planning mistake: allowing enough time to sew the bags but not enough time to approve materials, complete inspection, pack the order, and transport it.
Which Quality Evidence Should a Factory Provide?
Quality evidence should connect directly to the product being ordered.
Useful records include approved samples, BOM information, measurement sheets, material specifications, first-piece checks, in-process inspection, finished inspection, and packing verification.
For tactical bags, inspection should cover more than appearance.
Important areas include MOLLE spacing, shoulder symmetry, handle reinforcement, zipper direction, hardware, module dimensions, reflective placement, labels, and packing.
Jundong’s QC system begins with materials and continues through production, finished goods, packing, and shipment preparation.
The important issue is not simply whether inspection exists, but whether inspectors have clear standards to inspect against.
Are Material Test Reports Important?
Yes, when specific material performance is required.
Reports may be relevant for abrasion, breaking strength, tear strength, water repellency, colorfastness, coating performance, restricted substances, or another requirement defined for the project.
Not every tactical bag needs every test.
A vehicle preparedness bag and a technical rescue backpack may require very different evidence.
The required method and acceptance value should ideally be agreed before production begins.
A fabric report also should not be treated as proof of every property of the finished bag. Strong fabric cannot compensate for weak seams, under-specified webbing, poor hardware, or incorrect load distribution.
How Should Sample-to-Bulk Control Be Verified?
Ask what production will follow after the final sample is approved.
A strong system should include:
approved sample + current drawing + BOM + measurements + material codes + hardware codes + logo file + packing instructions + inspection criteria.
Revision control matters.
If Sample V1 used one zipper, V2 changed the shoulder strap, and V3 revised the internal modules, production must clearly follow the latest approved combination.
Jundong uses approved samples and production details as inspection references during bulk production.
The more complex the tactical pack, the more important controlled specifications become.
What Should Be Included in a Tactical Bag RFQ?
A strong RFQ should include enough information to evaluate structure rather than only appearance.
Include the product type, reference photos or drawings, intended use, dimensions, equipment list, expected loaded weight, preferred material, internal layout, MOLLE configuration, removable modules, zippers, hardware, colors, reflective details, logo, quantity, packing, labels, destination, required completion date, and any testing requirements.
Even incomplete projects can start from a reference image or physical sample. However, accurate development still depends on confirmed dimensions, material direction, logo, quantity, packing, and timing.
Which Details Help a Factory Quote Accurately?
The details with the greatest influence are dimensions, material, internal complexity, MOLLE coverage, hardware, logo, quantity, and packing.
For tactical packs, also specify whether the design includes:
- removable medical modules;
- clear windows;
- internal frame or board;
- waist belt;
- heavy-duty shoulder system;
- reflective components;
- custom hardware;
- special weather protection;
- individual identification.
Two backpacks with nearly identical exterior photographs can require completely different amounts of material and sewing time.
Internal photos, equipment dimensions, and a rough compartment sketch often improve quotation accuracy far more than additional exterior images.
How Can a Sourcing Guide Reduce Project Risk?
A disciplined sourcing process reduces expensive changes by locking decisions in the correct order.
| Stage | Lock Before Moving Forward |
|---|---|
| Mission | Intended use and equipment |
| Structure | Dimensions, access and compartments |
| Carry | Working load, shoulder system and waist support |
| Materials | Fabric, webbing, hardware and reinforcement |
| Sample | Equipment fit and loaded performance |
| Production file | BOM, measurements and tolerances |
| Bulk work | First-piece and in-process checks |
| Delivery | Labels, packing and carton rules |
The goal is not simply to find the lowest unit price.
A stronger decision is the factory that can make the design easier to define, test, reproduce, inspect, and deliver consistently.
For a new EMS backpack, IFAK, rescue pack, vehicle emergency bag, or modular tactical system, sending Jundong the intended equipment list, reference design, dimensions, working load, preferred material, quantity, logo, packing requirements, and delivery schedule is enough to begin a practical project review.
Let's work together
With over 10 years of OEM/ODM bag industry experience, I would be happy to share with you the valuable knowledge related to leather products from the perspective of a leading supplier in China.

Factory catalogue
Table of Contents
Latest blogs


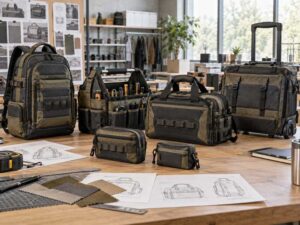
Make A Sample First?
If you have your own artwork, logo design files, or just an idea, please provide details about your project requirements, including preferred fabric, color, and customization options, we’re excited to assist you in bringing your custom bag designs to life through our sample production process.