Skip to content

Custom Tactical Waist Bags and Pouches
Develop tactical waist bags, MOLLE pouches and EDC carry systems with controlled structure, materials, hardware, branding and bulk-production standards.
- Review carry method, intended contents, pocket layout, MOLLE placement, strap geometry and access before pattern development.
- Select Oxford, nylon, polyester, webbing, buckles, zippers, mesh and reinforcement according to actual use and required structure.
- Verify waist fit, crossbody carry, attachment stability, logo placement and function through physical sampling before bulk production.
- 20+ years of OEM/ODM bag experience, 600+ employees, 18,000㎡ of production space and 80 QC inspectors support structured development, production, inspection, packing and delivery for global brand programs.

Six Tactical Waist Bag and Pouch Directions for Brand Programs
Match product type to carry method, gear size, access speed, attachment system and brand positioning before detailed materials, hardware and sample specifications are approved.
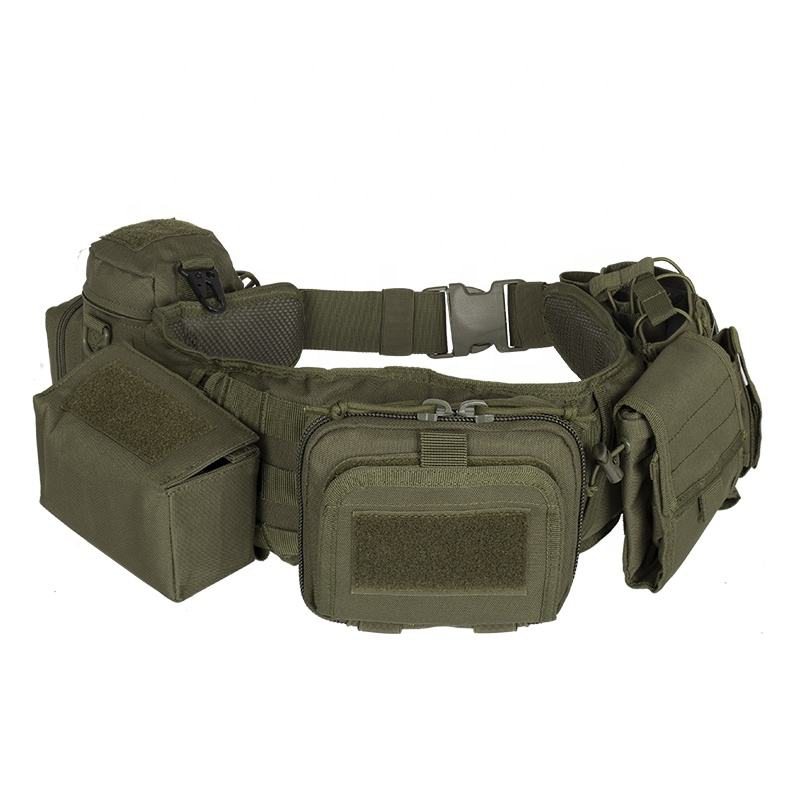
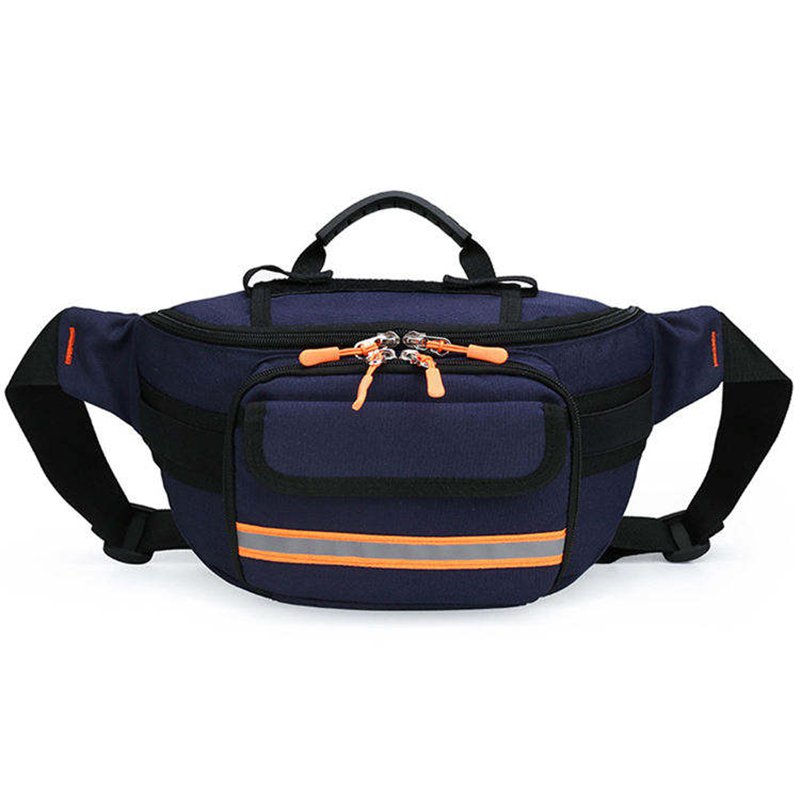
Tactical Waist Pack
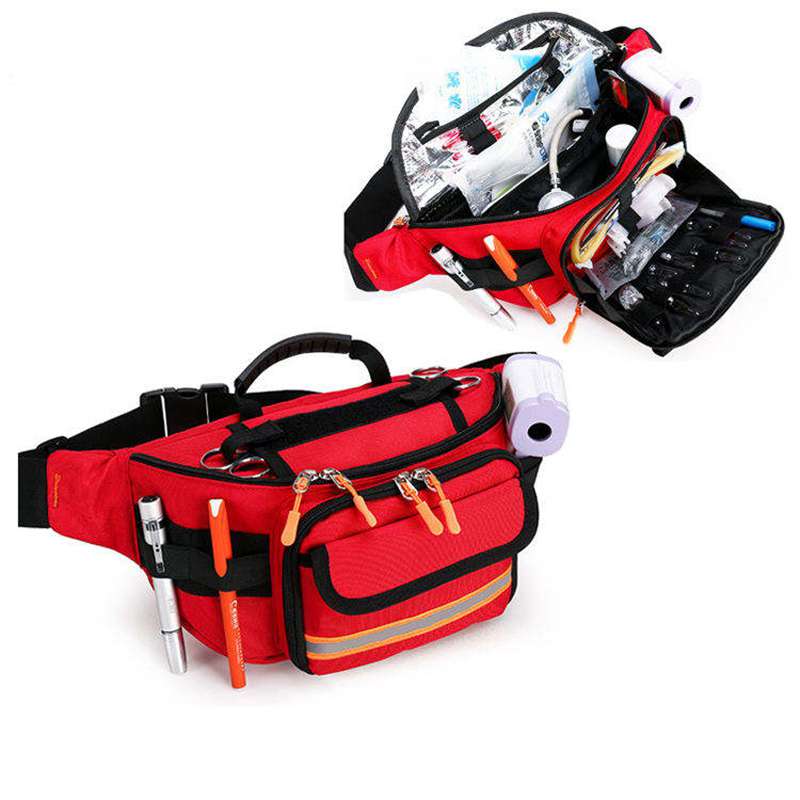
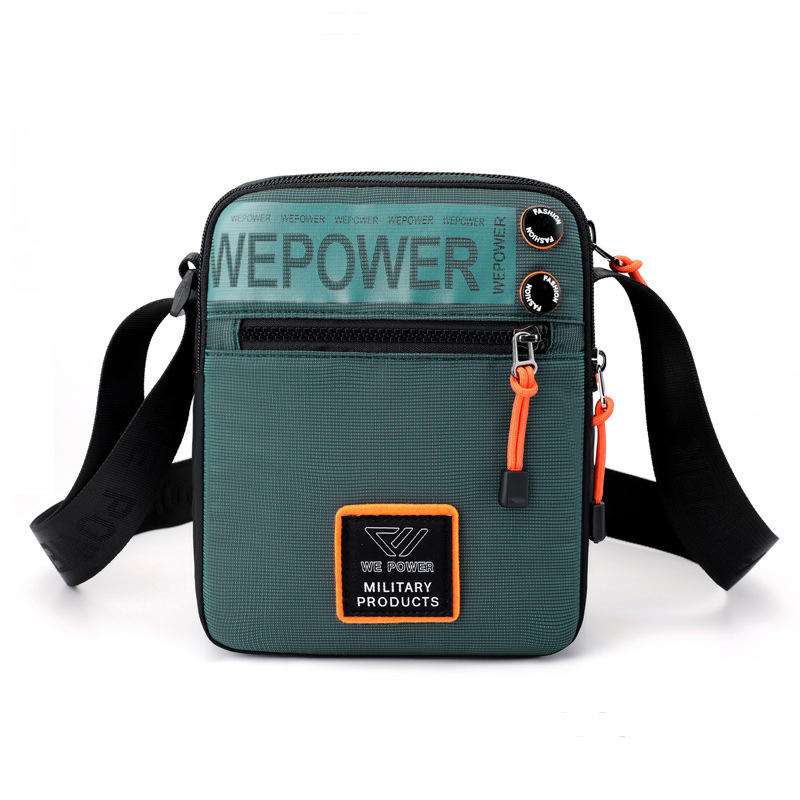
Built for waist, hip or crossbody carry, this format suits outdoor, EDC and field-oriented collections that need organized storage without a full backpack. Development should review overall dimensions, strap width, buckle position, rear-panel contact, zipper path and loaded balance before the silhouette is finalized.
Best for: Outdoor, EDC and urban tactical programs.
Development focus: Carry stability, access and internal organization.
MOLLE Utility Pouch
A modular pouch should attach cleanly to compatible webbing platforms while keeping the loaded contents stable. MOLLE spacing, rear attachment, bartack positions, opening direction and pouch depth need to work as one system. Extra webbing without attachment logic adds visual weight but does not improve function.
Best for: Modular gear collections and outdoor systems.
Development focus: MOLLE layout, attachment stability and reinforcement.

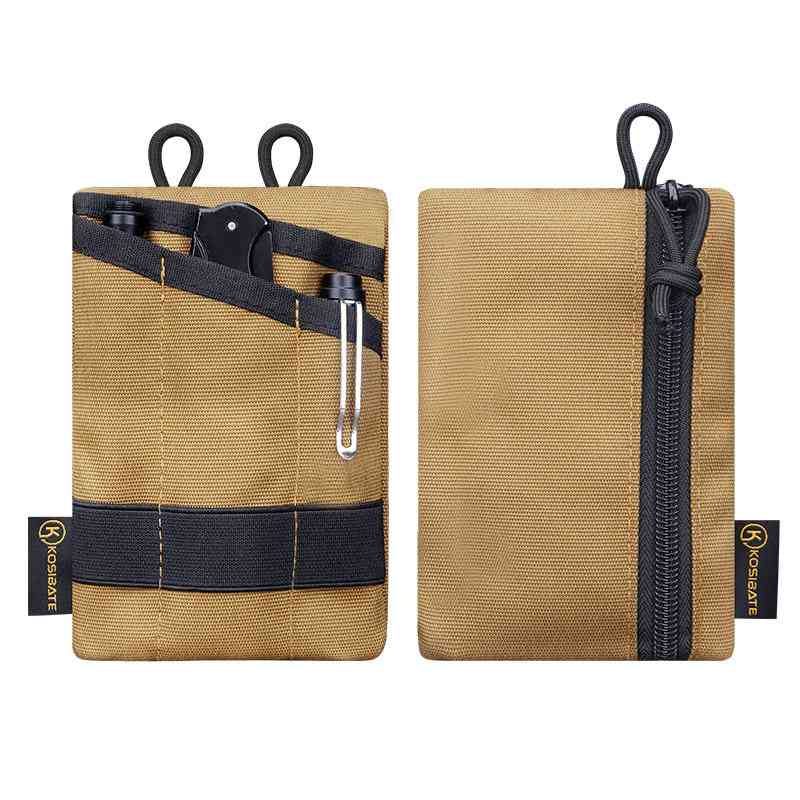
EDC Organizer Pouch
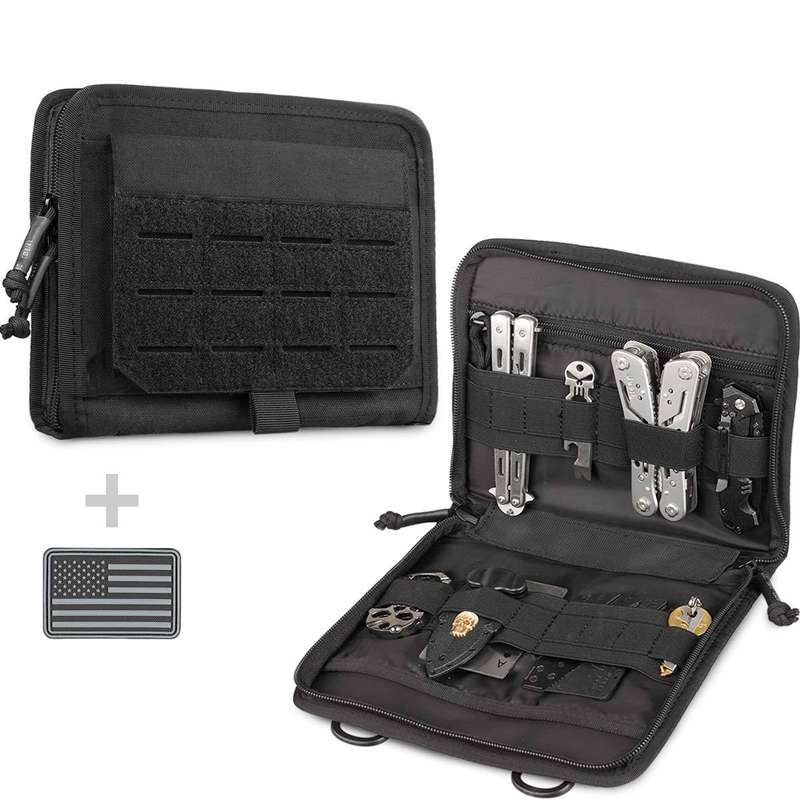
EDC pouches are usually small, but their internal planning is demanding. Phone dimensions, tools, cables, keys, lights or daily essentials can define pocket depth, elastic-loop spacing, mesh sections and zipper access. Good organization reduces wasted volume and keeps frequently used items easier to find.
Best for: Everyday carry and compact accessory collections.
Development focus: Gear-specific layout, visibility and quick access.
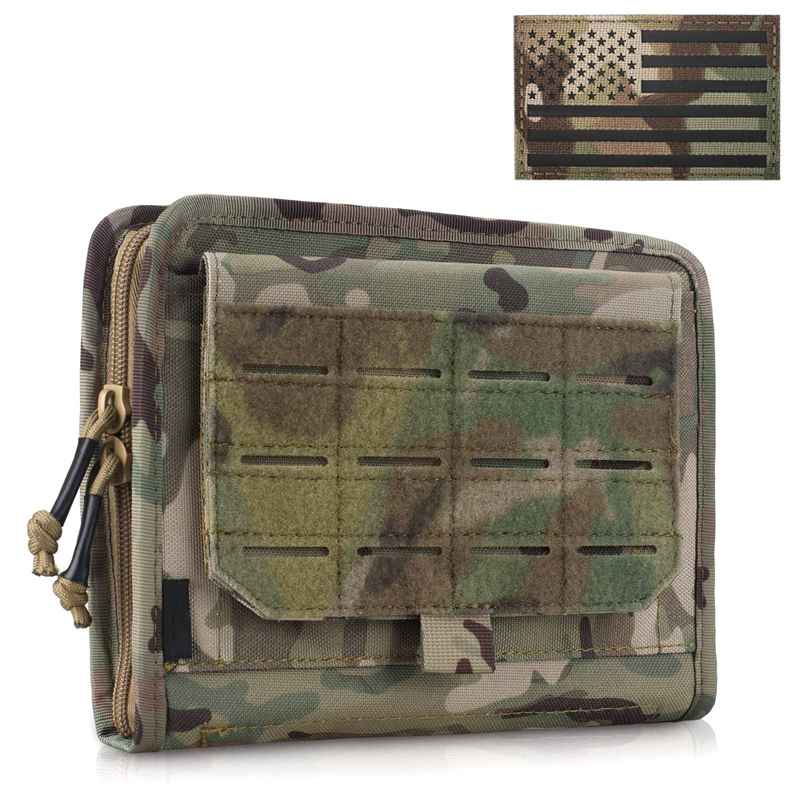
Admin Pouch
Admin pouches work best when compact storage is divided around defined contents rather than filled with generic pockets. Flat sections, elastic retainers, mesh compartments, hook-and-loop areas and external attachment details can be arranged according to intended equipment. Opening angle also matters when access is needed while the pouch remains attached.
Best for: Organized utility and field accessory programs.
Development focus: Internal zoning, retention and opening control.

Belt Attachment Pouch
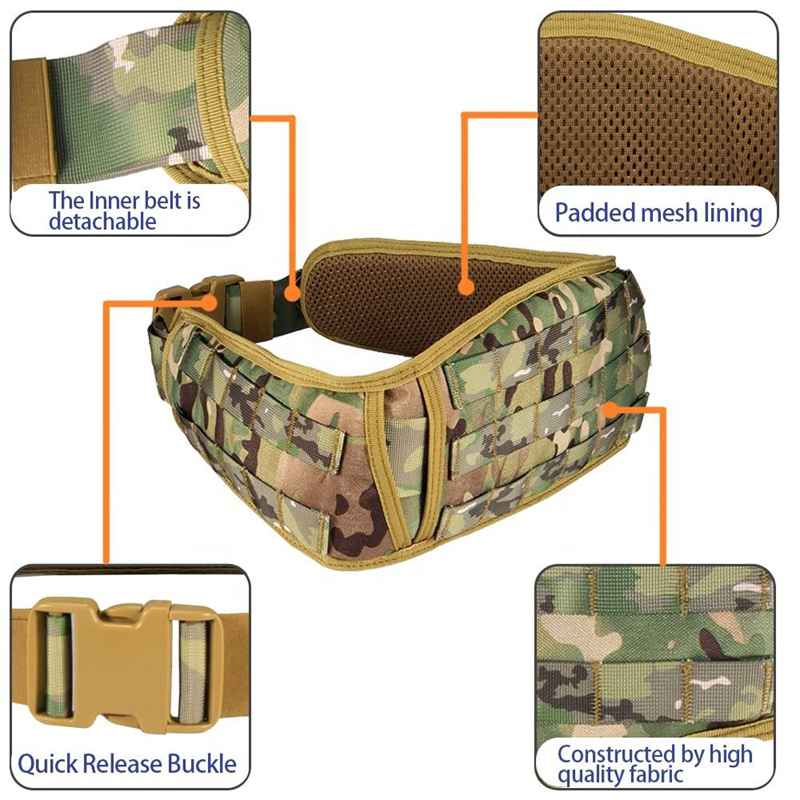
Belt-mounted pouches place more stress on the rear connection than ordinary small bags. Belt-loop width, webbing layers, clips, hooks, stitch locations and pouch depth should match the intended belt and carried weight. The attachment should also avoid creating uncomfortable pressure where hardware contacts the body.
Best for: Utility belts, work gear and compact field carry.
Development focus: Rear attachment, stress distribution and wearing comfort.

Outdoor Utility Pouch
Outdoor and security-oriented utility pouches may need abrasion-resistant fabric, reinforced attachment areas, reliable zippers and clearly separated storage for small equipment. Capacity should remain proportional to the carry method; making the pouch larger without reviewing its mounting system can create swing, sagging or difficult access during movement.
Best for: Outdoor, rescue, security and equipment programs.
Development focus: Durability, load control and functional access.

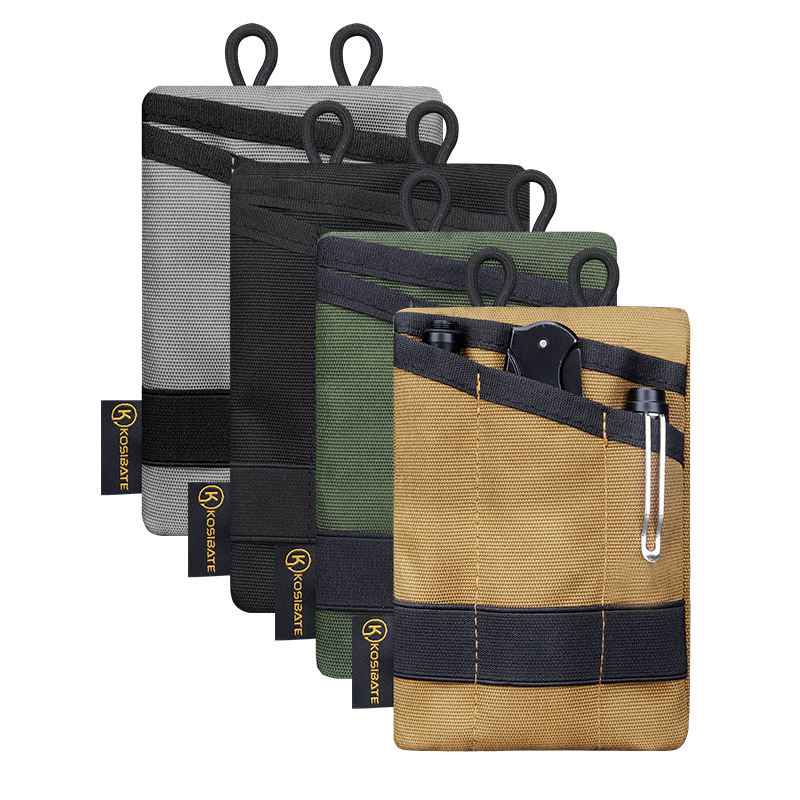
Four Risks That Decide Whether Tactical Gear Performs Reliably
Most failures appear after loading, wearing, attaching or repeating the product at scale, so critical structures should be verified before the main production run begins.

Tactical Look, Weak Function
A pouch can look tactical while offering little real utility. Decorative webbing, oversized pockets or unnecessary hardware may add bulk without improving access or attachment. The design should start from intended contents, carry method and use sequence, then define MOLLE, pocket positions and hardware around those needs.
- Risk: Styling is prioritized over usable structure.
- Control: Review contents, attachment method, opening path and functional layout before sampling.
Poor Fit Under Load
An empty waist pack may sit neatly, then sag or swing once phones, tools or EDC equipment are added. Bag depth, strap angle, anchor spacing, buckle position and load placement influence how weight sits against the body. Crossbody and waist carry can also require different adjustment behavior.
- Risk: Stable appearance disappears after loading.
- Control: Evaluate the physical sample with representative contents and intended carry positions.
Weak Attachment System
MOLLE rows, belt loops, webbing anchors, buckles and D-rings transfer force into the sewn structure. Strong fabric alone cannot compensate for poor stitch placement or unsupported connection areas. Rear-panel construction and reinforcement should be considered together with the expected attachment method.
- Risk: Connection areas become the first failure points.
- Control: Confirm webbing layout, stitch pattern, reinforcement and hardware compatibility during development.
Sample-to-Bulk Drift
A strong prototype loses value if production details are not translated into measurable references. MOLLE alignment, dimensions, pocket position, zipper installation, reinforcement, patch location and hardware should follow the approved version during bulk work. In-process inspection matters because some errors are easier to correct before complete assembly.
- Risk: Small variations accumulate across a large order.
- Control: Convert approved details into production records and stage-specific inspection references.
Design Tactical Waist Bags Around the Way They Are Carried
Waist, hip and crossbody carry place different demands on strap geometry, attachment areas, bag depth and access, especially after real gear is loaded inside.
Project Review

A tactical waist bag should not be evaluated only while it is sitting empty on a table. Once phones, tools, radios, lights, cables or other EDC items are added, the relationship between bag depth, strap position, buckle location and body contact becomes much more important.
Waist carry: The bag should sit close enough to the body to limit unnecessary movement while still allowing the main opening to remain accessible. A deeper body creates more capacity, but it also moves the contents farther away from the wearer. Strap anchors, rear-panel shape and buckle position therefore need to be reviewed together rather than treated as separate details.
Hip carry: When the bag is shifted toward one side, the weight is no longer distributed symmetrically. Pocket placement, strap connection and the location of heavier contents can change how the product feels during walking or repeated movement. A shape that looks balanced from the front may behave differently after being worn on the hip.
Crossbody carry: A waist pack used as a sling needs enough strap adjustment and a connection layout that allows the bag to settle naturally across the torso. Hardware should not create a hard pressure area, while the opening should remain usable without requiring the wearer to remove the bag every time an item is needed.
Development checks:
- Intended carry position
- Strap width and usable adjustment
- Buckle location
- Rear-panel contact area
- Bag depth after loading
- Access while worn
- Pressure created by hardware
- Movement with representative contents
Capacity alone does not define a good tactical waist pack. Two bags with similar external dimensions can feel very different when the internal layout places heavier items in different locations.
Heavier contents positioned far from the body can increase pull on the strap and attachment areas. A very deep front pocket may look useful in product photography but can create forward sag once loaded. Placing dense equipment closer to the rear panel can help keep the load closer to the wearer, while lighter accessories can occupy outer compartments where additional movement matters less.
Pocket depth: Every extra centimeter of depth changes how far the contents project away from the body. Deep pockets may be valuable for bulky gear, but depth should follow real contents rather than simply increasing advertised capacity.
Anchor position: Strap connections transfer the bag load into the waist belt or shoulder strap. Their placement influences how evenly the bag sits and where stress reaches the sewn structure.
Internal organization: Elastic loops, mesh pockets and dividers can help keep small equipment from collecting at the bottom of the pouch. Better organization also reduces the need to make the entire bag larger just to find individual items.
Representative loading: Physical samples should be reviewed with items close in size and weight to the intended equipment. Empty-sample evaluation can confirm appearance and dimensions, but it cannot fully show sagging, movement or access under load.
No fixed carrying-weight claim should be made without a defined product structure and appropriate testing. Fabric thickness is only one part of performance; webbing, stitching, reinforcement, hardware and the complete design also influence how the bag behaves under load.
Load Placement Affects Balance and Movement
Access Should Stay Fast Without Losing Retention

Quick access is valuable only when contents remain organized and secure during movement. Tactical pouches often need a balance between opening speed, item retention and compact structure.
A wide zipper opening can improve visibility and allow larger items to be removed easily, but opening angle should match the contents and carry position. If a pouch opens too far while worn, smaller items may become harder to retain. If it opens too little, internal capacity may exist on paper but remain difficult to use.
Main compartment: Should provide enough opening width for the largest intended item.
Quick-access pocket: Best used for equipment that needs frequent retrieval rather than simply adding another external compartment.
Elastic retention: Useful for narrow tools, cables, lights or other compact items that benefit from fixed positions.
Mesh sections: Allow smaller accessories to remain visible without adding heavy structure.
Zippered internal pockets: Better for loose items that should stay separated during movement.
Opening direction: Should consider whether the pouch will be accessed at the waist, on the hip, across the chest or while attached to another piece of equipment.
The most useful layout usually begins with a list of intended contents. Once the actual gear is known, pocket dimensions, elastic spacing, zipper paths and retention methods can be designed around real objects instead of generic storage assumptions.
Build MOLLE and Pocket Systems Around Real Equipment
MOLLE webbing, rear attachments, internal divisions and access routes should work as one system, with each feature tied to an actual carrying or storage requirement.
| Functional Need | Structure to Review | Why It Matters | Sample Verification |
|---|---|---|---|
| MOLLE Webbing | Webbing width, row layout, spacing, stitch position and panel location | Determines whether external attachments sit in the intended position and remain stable during use | Check alignment, stitching and attachment behavior on the physical sample |
| Rear Attachment | MOLLE straps, belt loops, webbing tabs, clips or suitable hook systems | Transfers the pouch load into a belt, bag or compatible platform | Review fit with the intended attachment method and representative load |
| Belt Loops | Loop width, reinforcement layers, spacing and stitch area | Affects compatibility with the intended belt and stability during movement | Fit the sample to the planned belt width and inspect connection areas |
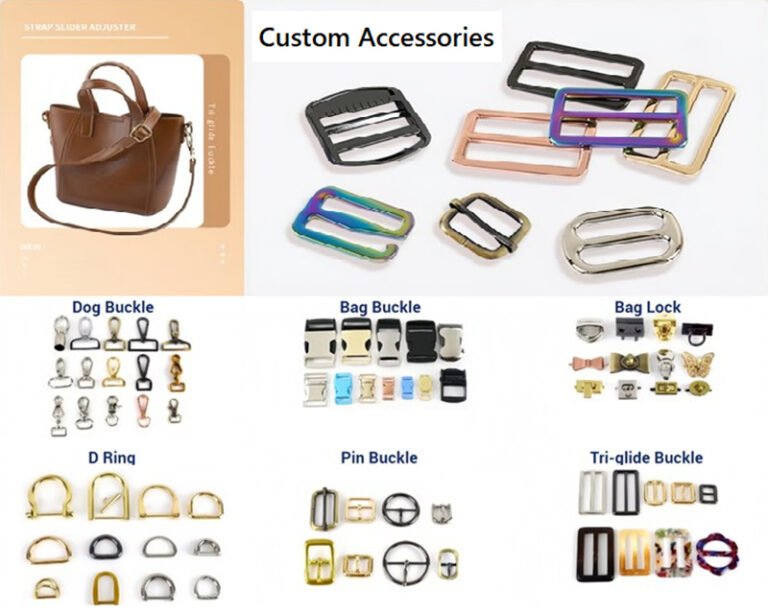
| Attachment Points | D-rings, loops, hooks, webbing anchors or other selected hardware | Provides modular connection for straps or accessories while introducing additional stress areas | Confirm position, hardware compatibility and reinforcement around the connection |
| Quick-Access Pocket | Opening direction, zipper route, pocket depth and closure | Controls how quickly frequently used equipment can be reached while the pouch remains worn or attached | Load representative items and test access from the intended carry position |
| Main Compartment | Opening width, usable depth, lining and internal shape | Determines whether core equipment fits and can be removed without obstruction | Check the largest intended item against finished internal dimensions |
| Internal Organization | Elastic loops, mesh pockets, dividers, hook-and-loop sections and zipper pockets | Keeps small gear separated, visible and easier to retrieve | Verify actual contents rather than judging empty compartment appearance |
| Retention Structure | Elastic tension, zipper closure, pocket height and internal restraint | Helps reduce unwanted movement or loose items during walking and active use | Review the loaded pouch while moving, opening and closing it |
| Patch Area | Hook-and-loop field, embroidery area, label position or other brand location | Supports identity without blocking MOLLE rows, pockets or working hardware | Confirm finished dimensions, placement and interference with nearby functions |
| Stress Areas | MOLLE stitching, belt loops, strap anchors, corners, zipper ends and hardware connections | These locations receive repeated force and require structure beyond fabric thickness alone | Inspect reinforcement, stitch placement and assembly against the approved sample |
A tactical pouch should not be judged by the number of external webbing rows or pockets. Added features can increase weight, sewing work and bulk without improving use. The stronger design begins with intended equipment, carry method and attachment platform, then builds the MOLLE layout, compartment sizes and reinforcement around those requirements.
No fixed load capacity or attachment strength should be stated without an agreed structure and relevant test method.
Materials and Hardware Must Work as One Carry System
Fabric thickness alone does not define a tactical bag. Webbing, zippers, buckles, reinforcement and sewn connections determine how the complete structure behaves in daily use.


Tactical Outer Materials
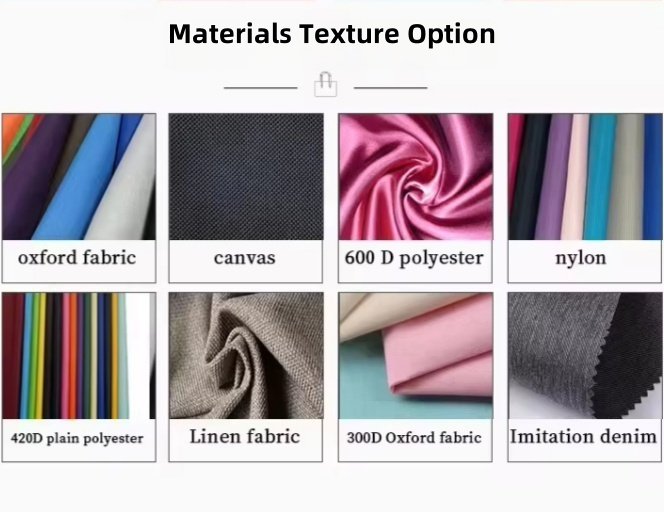
600D, 900D and 1000D Oxford, nylon, polyester and other suitable fabrics can be reviewed according to product size, abrasion exposure, structure, appearance and cost level. A heavier fabric is not automatically the better choice; additional weight and stiffness may be unnecessary for a compact EDC pouch. Material should support the intended function and construction.
- Review: Fabric type, denier, hand feel, coating, color and required structure.
- Consider: Wear areas, finished weight, sewing difficulty and brand appearance.
- Confirm: Physical material sample before final product approval.
Webbing and Buckle System
Webbing and buckles form the working connection between the bag, wearer and external attachment system. Selection should consider webbing width, thickness, hand feel, buckle compatibility, adjustment behavior and expected use. Side-release buckles, adjustment components, D-rings, hooks and selected metal hardware can serve different roles, so one hardware specification should not be applied automatically across every pouch.
- Review: Webbing width, buckle type, attachment location and adjustment path.
- Consider: Repeated opening, load direction, wearing comfort and hardware weight.
- Confirm: Physical operation together with the finished strap structure.
Zippers and Access Hardware
Zipper specification influences opening speed, access area and finished appearance. The correct choice depends on pouch size, zipper route, opening frequency, fabric thickness and the type of equipment stored inside. Pullers can also be reviewed for grip and operation according to the intended use. Smooth operation matters more than simply describing a zipper as “heavy duty.”
- Review: Zipper size, route, slider, puller and opening width.
- Consider: Corner movement, repeated access, glove use when relevant and surrounding fabric structure.
- Confirm: Opening and closing on the finished sample with representative contents inside.
Reinforced Stress Areas
Stress control comes from the complete connection between fabric, webbing, stitching, reinforcement and hardware. Typical review areas include MOLLE webbing, belt loops, waist-belt anchors, D-rings, buckles, zipper ends, side connections and loaded corners. Bartack or other reinforcement may be applied where suitable, but stitch type should follow the specific structure rather than being added as decoration.
- Review: Stress direction, reinforcement position, stitching and underlying material layers.
- Consider: Carry method, attachment system and actual contents.
- Confirm: Approved sample construction and agreed inspection criteria before bulk work.
Branding Should Support Function, Not Compete With It
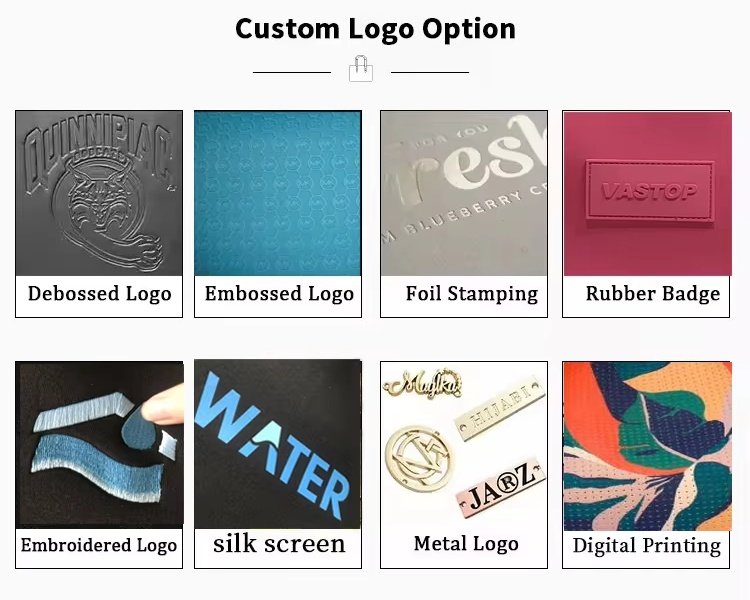
Rubber and PVC Patches
Rubber and PVC patches suit tactical bags because they create a defined brand area without requiring the artwork to be printed directly across textured Oxford, webbing or heavily structured surfaces. Patch thickness, edge shape, backing method, size and location should be reviewed against nearby pockets and MOLLE rows so branding does not interfere with use.
Embroidered Brand Marks
Embroidery adds a stitched, integrated appearance to selected Oxford, polyester and similar fabric panels. It works especially well for clear text, badges and simpler logo shapes. Stitch count, thread colors, panel thickness and placement affect the finished result, so embroidery should be tested on the intended panel rather than approved only from a digital artwork preview.
Woven Private Labels
Woven labels provide a controlled option for brand names, collection marks and understated private-label identity. They can be positioned on outer panels, seam areas, internal sections or selected packaging according to the design. Label dimensions and placement should remain proportionate to the pouch and avoid covering working areas such as zippers, attachment webbing or high-stress seams.
Reflective and Printed Details
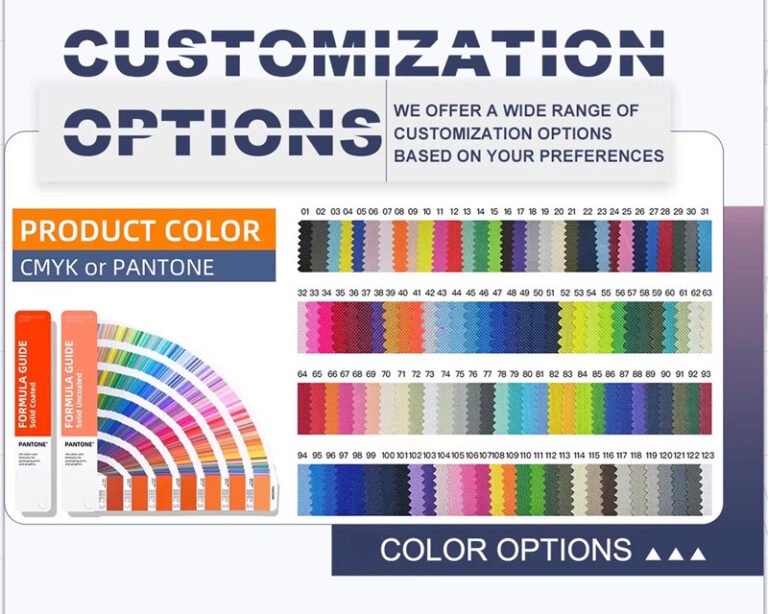
Reflective printing or suitable printed branding can be reviewed when the collection needs stronger visibility, graphic detail or a lighter decoration than a patch. Heat transfer may suit selected waist-bag materials, while reflective applications can support outdoor-oriented visual identity. Artwork, Pantone references, placement and final scale should be confirmed on a physical sample before volume production.
Turn Functional Requirements Into an Approved Tactical Sample
A useful sample should prove carry method, equipment fit, MOLLE layout, materials, hardware and branding before the approved construction moves into volume production.
Start With the Gear and Carry Requirements

Development can begin from a technical drawing, reference product, existing sample, design file, photograph or defined product idea. The most valuable information, however, is not always the appearance reference. For a custom tactical waist bag or modular pouch, the intended contents and carry method often determine the structure more accurately than a front-view image.
Define what goes inside:
Phone dimensions, tools, lights, cables, radios, medical accessories or other EDC items influence usable capacity, compartment depth, elastic spacing and opening width. A list of representative contents prevents the product from becoming larger simply because storage requirements were never defined.
Confirm how it will be carried:
Waist, hip, crossbody, belt-mounted and MOLLE-mounted use create different requirements for straps, rear attachments, buckle position and body contact. The primary carry position should be established before the pattern is finalized.
Map working features:
MOLLE rows, belt loops, D-rings, hooks, quick-access pockets, internal mesh, elastic retainers and hook-and-loop areas should each have a purpose. Extra features may increase sewing work, weight and cost without making the pouch more useful.
Set material and hardware direction:
Oxford, nylon, polyester, webbing, buckles, zippers, mesh, padding and selected metal hardware should be reviewed together with the structure. Material decisions affect hand feel, stiffness, finished weight and sewing behavior; hardware affects adjustment, attachment and access.
Once these inputs are clear, pattern making turns the product concept into workable panels for cutting, sewing and assembly. Pattern details influence proportions, capacity, material consumption and later production consistency, so the development stage should resolve structure before cosmetic details are treated as final.
The first physical sample should answer questions that a drawing cannot. Does the bag sit correctly when loaded? Can the largest intended item enter the main compartment without forcing the zipper? Are elastic loops too tight or too loose? Does the rear attachment match the intended belt or MOLLE platform? Does the buckle sit against the body in an uncomfortable position?
Sample making normally brings together material preparation, pattern making, cutting, logo application, sewing, assembly, finishing and inspection. For tactical waist bags and pouches, the review should go beyond appearance.
Carry review:
Wear the sample in the intended position and use representative contents. Check sagging, movement, strap adjustment, rear-panel contact and access while the bag remains worn.
MOLLE and attachment review:
Check row placement, alignment, rear straps, belt loops and the relationship between attachment areas and the loaded pouch.
Internal layout review:
Confirm actual pocket dimensions, divider positions, elastic spacing, mesh sections and the route used to remove frequently carried gear.
Hardware review:
Operate the zipper, slider, puller, buckle, adjuster, hooks or D-rings in the finished construction. Components that look suitable individually may behave differently after they are sewn into the product.
Brand review:
Check patch size, embroidery position, woven label location, Pantone reference, clarity and the relationship between branding and functional structures.
Use the First Sample to Test the Real Product

Revise the Structure, Then Lock the Approved Version

A revision should solve a defined issue rather than change details without a clear reason. Common adjustments can include dimensions, material, color, pocket position, zipper route, strap length, hardware, logo placement, reinforcement, lining or packing. Structural changes may also influence material use, sewing work, sampling time and final cost, so feedback should be specific.
Marked photographs, measurements and written comments create a clearer revision trail than general instructions such as “make it more tactical” or “make the pocket better.” For example:
- Move the front zipper 20 mm upward to clear the loaded contents.
- Reduce pouch depth to keep the load closer to the body.
- Increase belt-loop width to match the intended belt.
- Relocate the patch area so it does not cover working MOLLE rows.
- Change elastic spacing according to the real tools carried inside.
After the final version is accepted, approval should cover more than the overall appearance. Important records may include product photos, dimensions, material information, color references, logo artwork, logo position, zipper and hardware details, webbing and straps, pocket layout, reinforcement, packaging, labels and the final revision version.
For larger brand programs or multi-SKU orders, a pre-production sample can provide one more confirmation before the main run. Once approved, the final sample and confirmed production details should become working references for production and inspection.
The strongest approval is therefore not simply a message saying “looks good.” It is a physical product supported by enough confirmed detail for the same construction to be understood and checked again during volume production.
Carry Approved Tactical Standards Into Bulk Production
Jundong’s 80 QC inspectors support staged checks from incoming materials through packing, using approved samples and confirmed production details as working references.
Incoming Material Control
Bulk consistency begins before any tactical pouch reaches a sewing line. Oxford or nylon fabric, webbing, mesh, zippers, buckles, D-rings, padding and other selected components should correspond with the confirmed production information. Color, hand feel, thickness, coating and hardware specification can influence the finished product even when the pattern remains unchanged.
- Check: Material, color, surface, webbing and hardware specification.
- Reference: Approved sample and confirmed material information.
- Purpose: Stop incorrect components before they enter later production stages.
Cutting and Preparation
Accurate cut pieces create the base for dimensions, pocket positions and later MOLLE alignment. Directional fabric, visible defects, incorrect panel size or missing reinforcement pieces are easier to correct before assembly. Tactical constructions also require the correct webbing, backing layers, loops and pocket components to reach the sewing operation together.
- Check: Panel dimensions, direction, quantity and reinforcement pieces.
- Reference: Approved pattern and confirmed measurements.
- Purpose: Reduce dimensional drift and prevent assembly errors from being built into the product.
MOLLE and Branding Control
MOLLE rows and brand elements are highly visible when several pieces are compared side by side. Webbing position, alignment, stitching, patch location, embroidery size or reflective detail should follow the approved version. Branding also needs to remain clear of working pockets, zipper routes and attachment areas.
- Check: MOLLE alignment, stitch position, logo size, color and placement.
- Reference: Approved sample and approved branding result.
- Purpose: Keep modular structure and visual identity aligned across the order.
Sewing and Reinforcement
Tactical construction depends on more than neat seams. Waist-belt anchors, belt loops, MOLLE webbing, D-rings, buckle connections, zipper ends, loaded corners and other stress areas need the correct stitching and reinforcement for the approved structure. In-process inspection helps identify misplaced seams or incomplete reinforcement before the bag is fully assembled.
- Check: Stitching, reinforcement, anchors, loops, zipper installation and hardware connections.
- Reference: Approved construction and production details.
- Purpose: Correct structural issues while rework remains manageable.
Function and Finished Goods
Completed tactical waist bags and pouches should be reviewed as working products, not only visual pieces. Zippers should operate smoothly, buckles should open and adjust correctly, pockets should match the confirmed layout, and dimensions should remain within the agreed product requirements. Representative loading may also be used when the project defines specific functional checks.
- Check: Appearance, dimensions, access, zipper, buckle, pockets and attachment function.
- Reference: Approved sample and agreed inspection criteria.
- Purpose: Verify the finished construction before packing begins.
Packing and Pre-Shipment
Quality continues after the product passes its functional review. SKU labels, barcodes, hangtags, private-label details, individual packing, carton quantity and carton marks should match the confirmed files. Multi-color or multi-SKU tactical collections need especially clear separation because a correct pouch packed under the wrong SKU can still create receiving and distribution problems.
- Check: SKU, labels, packing quantity, carton marks and shipment information.
- Reference: Approved packing files and order allocation.
- Purpose: Reduce avoidable receiving, sorting and shipment errors.
Factory Capacity for Complex Tactical Waist Bag Programs
Large tactical programs need connected development, sampling, production and packing resources so approved structures, materials, hardware and brand details remain controlled through execution.

Development Before Production
Jundong combines product development, design support and a professional sample room before a custom tactical waist bag or pouch enters volume production. Drawings, reference samples, dimensions and functional requirements can be translated into workable patterns, material selections and physical samples. For complex designs, early review can cover MOLLE placement, pocket depth, belt attachment, hardware and reinforcement before the construction is finalized.
Scale for Structured Programs
With 20+ years of OEM/ODM bag experience, 600+ employees and an 18,000㎡ production area, Jundong is organized for custom programs that involve more than one sewing operation or one product version. Development, cutting, branding, sewing, assembly, inspection and packing can be coordinated around confirmed order information rather than treating each stage as an isolated task.
Teams Around One Specification
A tactical program may involve artwork, material references, pattern files, approved hardware, MOLLE layouts, packing instructions and several SKU versions. Jundong’s foreign-trade sales, development, design, sample-room, production and quality teams work from confirmed project information so changes made during development can be carried into later production stages without relying only on verbal instructions.
Representative Project Configuration
A 1,500-piece tactical waist bag program can illustrate how order control should be structured: one approved construction, three colors at 500 pieces each, confirmed MOLLE layout, rubber-patch branding, individual packing and SKU-separated cartons. If different warehouses receive different colors, carton marks and quantity allocation should be prepared before packing begins rather than reorganizing finished cartons afterward.
Keep Tactical SKUs Organized Beyond the Sewing Line
A well-made pouch can still create receiving problems when colors, labels, cartons or destination allocations are wrong, especially across coordinated tactical product collections.
Multi-SKU Separation
A tactical collection may combine several colors, pouch formats, logo versions or internal configurations. Black, Coyote, OD Green and other selected colors can quickly multiply into several SKUs once waist packs and modular pouches are ordered together. Clear SKU records help keep production and packing separated before cartons are closed.
- Confirm: Style number, color, quantity and logo version.
- Separate: Finished goods by SKU before final packing.
- Match: Product, label and carton information to the same SKU record.
Retail and E-Commerce Labels
Hangtags, care labels, barcode labels, SKU labels and selected channel-specific labels can be incorporated according to the confirmed packing requirements. Label files should be reviewed early because a correct tactical pouch with an incorrect barcode or SKU identification can still create warehouse, retail or fulfillment problems after arrival.
- Prepare: Final barcode, SKU and label artwork.
- Check: Placement, readability and product matching.
Carton and Destination Control
Orders divided across warehouses, distributors or regional offices need carton information that supports receiving without unnecessary resorting. Carton marks can identify style, color, quantity, PO information or destination according to the confirmed shipping arrangement. Quantity-per-carton rules should also be decided before bulk packing when different allocations are required.
- Plan: Destination and quantity allocation.
- Confirm: Carton mark format and carton quantity.
- Verify: Outer-carton information before shipment preparation.
Repeat-Order Records
Repeat orders become easier when the approved product is supported by usable records rather than memory alone. Material information, logo files, approved sample references, dimensions, hardware details, SKU tables and packing rules can help future orders follow the established direction. Any requested change should be separated from the previous approved version so old and new specifications do not become mixed.
- Retain: Approved sample and confirmed files.
- Identify: Product version and SKU clearly.
- Update: Changed materials, logos, hardware or packing as a new revision.
Plan MOQ, Sampling, Cost and Production Timing Clearly
Commercial terms become easier to evaluate when structure, materials, hardware, branding, SKU quantity and packing are defined before the final quotation and production schedule.
| Planning Item | Jundong Reference | What Influences It | What to Confirm |
|---|---|---|---|
| Standard MOQ | Usually 500 pcs per design | Product structure, material purchasing, logo setup, hardware, color quantity and packing | Product design, total quantity and quantity per color |
| Selected Simple Styles | 200–300 pcs may be reviewed case by case | Simpler construction, customization level, available materials, production schedule and project fit | Reference image, material, logo and target quantity |
| Multi-SKU Orders | Reviewed by style, color and production requirement | Number of versions, fabric colors, logo versions, material MOQ and packing rules | SKU table and quantity for each version |
| Sample Lead Time | Normally 5–7 days after key details are confirmed | Pattern complexity, materials, MOLLE structure, logo method, special hardware and packaging | Size, materials, hardware, artwork and functional requirements |
| Simple Samples | Selected simple styles may take 2–3 days | Material availability and uncomplicated construction | Final sample scope before development |
| Sample Fee | Reviewed by project; sample fee can be refunded or deducted when bulk reaches 2,000 pcs | Development work, materials, logo setup, patches, special hardware, revisions, packing samples and courier | Sample specification and required development scope |
| Bulk Production | Usually 20–30 days after final details are confirmed | Order quantity, materials, structure, branding, production schedule, SKU complexity and packing | Approved sample, final quantities and packing instructions |
| Product Cost | Quoted from confirmed specifications | Fabric, panels, MOLLE webbing, pocket quantity, lining, zippers, buckles, hardware, reinforcement, branding and labor | Detailed product requirements rather than appearance alone |
| Color Quantity | Can affect MOQ and unit cost | Material purchasing quantities, dye or available stock, SKU split and setup | Quantity required for each color |
| Custom Packaging | Reviewed separately with the order | Hangtags, labels, barcodes, individual packing, color boxes, gift boxes and packaging-material MOQ | Packing reference and final label files |
| Target Delivery Date | Production and freight timing are planned separately | Sample approval, material preparation, production, packing, destination and freight method | Required in-hand date and delivery destination |
Plan Compliance and Global Delivery Before Shipment Begins
Destination requirements, testing, export documents and freight terms should be clarified early so product specifications, packing and shipment information remain aligned.

Target-Market Requirements
Tactical waist bags and pouches may face different material, labeling, packaging or testing expectations depending on destination, sales channel and intended use. Requirements should be identified before final production specifications are locked. If a brand has its own restricted-material rules, labeling standards or inspection criteria, those documents should be reviewed early enough to influence material selection, samples and packaging.
Testing and Documentation
Third-party testing can be coordinated when a project requires defined material or finished-product checks. Test scope, laboratory, sample quantity, timing and responsibility should be agreed before production planning is finalized. Compliance should be based on real project requirements and supporting documents rather than broad claims that one tactical bag automatically meets every regulation in the United States, Europe or other destinations.
Export and Forwarder Support
Shipment preparation may include Commercial Invoice, Packing List, carton marks, shipping marks, HS Code coordination, product descriptions, carton quantity, gross and net weight, SKU information and destination details. If your logistics team already works with an appointed forwarder, Jundong can coordinate cargo handover, carton information and required documents according to the agreed trade term and shipping arrangement.
Freight and Trade Terms
Express courier, air freight, sea freight, rail freight and appointed-forwarder delivery can be reviewed according to cargo volume, weight, deadline and destination. Samples are commonly sent by courier, urgent volume orders may justify air freight, and larger shipments are often more economical by sea. EXW, FOB, CIF and selected DDP arrangements can be discussed; DDP and customs clearance are not automatically available for every destination.
Make A Tactical Bag Sample First?
A practical tactical waist bag should match more than a logo. It should fit the equipment it carries, the way users access each compartment, the required attachment system, and the conditions in which it will be used. When pocket layout, MOLLE webbing, materials, hardware, reinforcement, sizing, and packing requirements are confirmed early, the entire project becomes easier to quote, sample, inspect, produce, and deliver consistently.
Client Testimonials
800+ brand Clients Trust Jundong



Frequently Asked Questions About Tactical Waist Bags
Before approving a tactical waist bag or MOLLE pouch program, brands usually want clear answers about quantity, structure, materials, sampling and bulk execution.

What is the MOQ for custom tactical waist bags?
The standard MOQ is usually 500 pieces per design. Quantity may be influenced by fabric, hardware, color split, logo process, packaging and the number of versions involved. Selected simple constructions can be reviewed at 200–300 pieces case by case, but that is not the standard starting quantity. For several colors or SKUs, provide the total quantity and quantity per version so production feasibility can be evaluated correctly.
Can you develop from a tech pack or existing sample?
Certainly — development can start from a tech pack, drawing, reference photo, physical sample or early product concept. The strongest brief also explains what the pouch will carry and how it will be worn. Those details help determine dimensions, pocket layout, belt or MOLLE attachment, materials, hardware and reinforcement. Missing production information can be clarified before pattern making rather than forcing the design into an unsuitable existing construction.
Which materials work best for tactical waist bags?
The best material depends on use, structure, finished weight and expected wear. Common directions include 600D, 900D or 1000D Oxford, nylon and polyester, combined with suitable webbing, mesh, zippers, buckles and reinforcement. A higher denier is not automatically the better solution for every pouch. Compact EDC designs may benefit from lower weight, while more structured products may require stronger support in selected areas.
Can you customize MOLLE layouts and attachment systems?
Absolutely — MOLLE layout can be developed around the intended attachment platform and pouch function. Review normally covers webbing rows, spacing, stitch position, rear straps, belt loops, clips and reinforcement. A useful MOLLE system is more than extra webbing sewn onto the surface. The attachment needs to match the equipment, bag or belt where the pouch will actually be used, then be verified on the physical sample.
Can pockets be designed around specific EDC equipment?
Definitely — pocket architecture works best when it starts with the actual gear list. Send dimensions or samples of phones, lights, tools, cables, radios or other items that need dedicated positions. Main-compartment depth, elastic loops, mesh sections, zipper pockets and quick-access areas can then be planned around real objects. This often creates a smaller, better-organized pouch than simply adding more generic pockets.
Can we specify zippers, buckles and webbing?
Of course — hardware and webbing can be reviewed as part of the complete carry structure. Useful information includes preferred zipper type, buckle style, webbing width, adjustment method, attachment location and intended use. Components should work with the surrounding fabric, stitching and load direction. If your brand already has approved hardware specifications or nominated components, include them with the project files before sampling.
How long does tactical bag sampling normally take?
Standard sampling usually takes 5–7 days after the key specifications are confirmed. Simple constructions may take 2–3 days, while complicated MOLLE layouts, special materials, patches, custom hardware or packaging can require additional time. Sampling is used to confirm structure, materials, logo, hardware and function before volume production. Sample fees can be refunded or deducted when the final bulk order reaches 2,000 pieces.
How do you control approved samples during bulk production?
Approved samples become working references for production and inspection. Dimensions, materials, colors, MOLLE positions, pockets, logo treatment, hardware, reinforcement and packing details are converted into production information before the main run. Jundong has 80 QC inspectors supporting checks across incoming materials, cutting, branding, sewing, function, finished goods and packing. Inspection reduces avoidable variation, although no responsible quality system should be described as absolute zero-risk.
Can you manage multiple colors, SKUs and carton allocations?
Sure — multi-SKU tactical programs can be organized around a confirmed allocation plan. Style number, color, logo version, quantity, barcode, label and carton mark should be tied to the same SKU record. This becomes especially important when one collection includes waist packs, utility pouches and different colorways going to separate warehouses. Clear packing rules reduce unnecessary sorting and receiving problems after the shipment arrives.
What information do you need for an accurate quotation?
A useful quotation starts with product details, not only a front-view image. Send the reference design, size, intended contents, carry method, material preference, MOLLE or pocket requirements, hardware direction, logo artwork, quantity per color or SKU, packaging and destination. If timing matters, include the required in-hand date. Testing requirements and a target cost can also be useful when material or construction choices need to be compared.
Send Your Tactical Waist Bag Project for Technical Review
A useful project review starts with how the product will be used. Send your tech pack, reference photo, existing sample or design file together with the information already available. Include the intended contents and primary carry method whenever possible, because those details influence dimensions, pocket depth, strap geometry, MOLLE placement and reinforcement.
For a more accurate quotation and sample plan, provide:
- Product reference, drawing or tech pack
- Target dimensions and intended contents
- Waist, hip, crossbody, belt or MOLLE carry method
- Preferred fabric and color
- Pocket and internal organization requirements
- MOLLE, belt-loop or attachment details
- Zipper, buckle, webbing or nominated hardware
- Logo artwork and Pantone references
- Quantity per design, color and SKU
- Packing, labels and carton requirements
- Required in-hand date and destination
- Testing requirements, if applicable
Incomplete specifications are welcome. Available information can be reviewed first, then missing production details can be clarified before sampling. For confidential unreleased programs, NDA requirements may also be discussed before sensitive files are shared.
Upload your files through the form or email info@jundongfactory.com.