Skip to content
Custom Heavy-Duty Tool Bag Construction
Develop load-bearing tool bags around real tool dimensions, target weight, worksite conditions, access needs, and controlled bulk production.
- Review real tool sizes, individual weights, total load, carrying method, and access frequency before defining bag dimensions, opening, pockets, and reinforcement.
- Match abrasion-resistant fabric, lining, webbing, bottom support, zippers, hardware, and stitching to the intended worksite rather than a generic bag pattern.
- Validate handle attachment, load transfer, shape retention, pocket security, opening function, and packed presentation through sampling before bulk approval.
- Support OEM, ODM, private-label, multi-color, and repeat-order programs with documented specifications, multi-stage QC, packaging, labeling, and delivery coordination.

What Makes A Tool Bag Truly Heavy Duty?
Heavy-duty performance comes from coordinated materials, load paths, reinforcement, access, bottom support, and hardware designed around real tools and worksite conditions.

A heavy-duty tool bag is a coordinated load system. A genuine heavy-duty tool bag is not defined by fabric denier alone. Durable construction comes from several parts working together so weight moves through the bag without concentrating on one seam, pocket, fitting, or panel.
Outer material: Abrasion-resistant polyester, nylon, canvas, or coated fabric protects the shell from scraping, dust, tools, and repeated handling. Material strength still depends on backing, coating, seam placement, cutting direction, and compatibility with thick-layer sewing. A strong shell cannot compensate for weak handle attachment or an unsupported bottom.
Load path: Handle webbing should transfer lifting force into larger body areas, side panels, or the base rather than ending in a small upper patch. Shoulder-strap anchors, D-rings, and grab handles need backing layers and stitch patterns aligned with the direction of force. Box stitching, cross stitching, bartacks, and multiple stitch rows serve different stress areas; extra thread without a clear load path adds little value.
Bottom structure: Heavy tools create concentrated pressure, impact, and abrasion. Multi-layer fabric bases, support boards, molded bottoms, wear panels, or feet should be selected according to tool shape, ground contact, moisture, standing stability, and packing volume. Bottom-to-body seams require enough overlap, binding, and reinforcement to prevent separation.
Opening and storage: Wide zipper openings, metal frames, open-tote structures, deep pockets, elastic loops, and removable dividers should follow tool size and access frequency. Too many shallow pockets can create poor balance, while overfilled exterior sections may pull the body out of shape. Zipper strength also depends on route, end reinforcement, curve radius, and tension after loading.
Validation: Load expectations should be defined from the actual tool set, total weight, carrying method, and working environment. Sampling should review lifting, shape retention, pocket security, zipper operation, bottom behavior, shoulder balance, and packed transport. “Heavy duty” becomes credible when materials, construction records, and defined checks support the claim.
Who Needs Engineered Heavy-Duty Tool Bag Construction?
Professional Tool Brands
Tool brands often develop coordinated families such as open totes, zippered tool bags, backpacks, waist pouches, and rolling models. Construction must support a clear product tier, repeatable pocket logic, recognizable exterior design, retail presentation, and dependable replenishment. Tool dimensions, weight distribution, handle structure, bottom support, hardware, labels, and carton rules should remain controlled across every related style.
Industrial Equipment Programs
Industrial equipment companies may supply tools, service parts, meters, manuals, and protective accessories with machinery or maintenance systems. The bag must keep each item secure, visible, and ready for field use while surviving vehicle storage and repeated transport. Internal retention, shaped compartments, reinforced bases, document areas, traceable labels, and specification records matter as much as the exterior fabric.
Construction Trade Teams
Electricians, HVAC crews, plumbers, carpenters, installers, and building contractors work around dust, rough floors, moisture, sharp tools, and frequent opening. Their bags need fast access, stable standing, reinforced pocket ends, protected zipper routes, dependable handles, and controlled shoulder balance. Construction should follow the tools carried each day rather than adding many pockets without a clear working sequence.
Field Service Operations
Maintenance, energy, facility, automotive, telecommunications, and mobile repair teams move tools between vehicles, plants, workshops, and service sites. A suitable structure should reduce search time, prevent tools from shifting, support repeated lifting, and keep high-use items accessible. Multi-location programs also benefit from clear SKU identification, standardized packing, documented revisions, and stable follow-up production across teams and service regions.
Where Heavy Tool Bags Usually Fail First
Most early failures begin at concentrated stress areas where tool weight, repeated movement, abrasion, opening pressure, and weak reinforcement meet during daily field use.

Handle Attachment Failure
A strong handle can still tear away when the webbing ends within a small upper panel or depends on only one short seam. Lifting force should travel through larger body sections, reinforced side panels, or the base. Handle construction must be reviewed with the intended loaded weight, carrying frequency, webbing width, stitch pattern, backing layers, and the distance between attachment areas.
- Check where the handle webbing ends.
- Review force direction during lifting.
- Add suitable backing behind attachment zones.
- Inspect first-piece stitch placement and symmetry.
Bottom Wear And Puncture
Heavy sockets, drills, meters, wrenches, and sharp hand tools create concentrated pressure against the base. Repeated placement on concrete, metal floors, wet ground, and vehicle surfaces can abrade the outer layer or push tools through weak internal support. Bottom performance depends on outer material, protective panels, support boards, seam construction, moisture exposure, and how weight transfers from the main compartment into the side walls.
- Identify sharp and concentrated tool loads.
- Review ground-contact conditions.
- Protect bottom-to-side seam areas.
- Check support movement after loading.
Zipper Route Stress
Zipper failure often comes from bag tension rather than the zipper alone. When a tool bag is overfilled or loses shape, the opening can pull sideways against the chain, slider, curves, and end stops. Tight turns, weak end reinforcement, insufficient seam allowance, and hard tools pressing under the zipper route can increase strain. Opening design should be checked in both empty and fully loaded conditions.
- Review zipper tension after loading.
- Avoid unnecessarily sharp route changes.
- Reinforce both zipper ends.
- Keep hard tools away from the opening line.
Pocket Tear-Out
External pockets receive repeated pulling when long or heavy tools are inserted and removed. Shallow pockets, narrow seams, weak pocket bottoms, and unsupported openings may stretch, sag, or tear away from the body. Pocket depth and width should match the tool profile, while the lower attachment must carry downward force. Reinforced opening ends and controlled stitch placement reduce stress during frequent access.
- Match pocket depth to tool length.
- Support heavy pocket bottoms.
- Reinforce both opening ends.
- Check tool access while wearing gloves.
Body Collapse And Imbalance
A tool bag may look structured when empty but collapse after uneven loading. Heavy tools positioned on one side can twist the opening, pull exterior pockets downward, and make the bag uncomfortable to carry. Body panels, internal supports, pocket positions, and bottom construction should work together to control shape. Weight planning should keep dense tools low and close to the center whenever the working sequence allows.
- Map heavy tools before setting pockets.
- Keep dense items near the center.
- Check half-load and full-load shape.
- Review standing stability on the floor.
Hardware Anchor Pull-Out
Metal hooks, D-rings, buckles, rivets, and shoulder-strap fittings can appear strong while the surrounding fabric remains under-supported. Failure commonly occurs around the anchor rather than inside the fitting. Hardware strength must be matched with webbing, backing material, stitch area, placement, and load direction. Metal components also add weight and may damage nearby surfaces when packing protection is inadequate.
- Reinforce behind every load-bearing fitting.
- Match hardware size to webbing width.
- Check twisting and pulling directions.
- Protect plated parts during unit packing.
Start Construction Planning From The Real Tool Load
Record tool dimensions, weight, quantity, access frequency, and work conditions before defining bag size, pockets, reinforcement, handles, bottom support, and opening construction.
| Tool And Use Information | What Should Be Recorded | Why It Matters | Construction Decision |
|---|---|---|---|
| Tool Type | Drill, meter, wrench, pliers, driver, socket set, battery, fastener box, cable, or spare part. | Different profiles require different retention and protection methods. | Main compartment, fitted pocket, sleeve, elastic loop, divider, or protected section. |
| Individual Dimensions | Length × width × depth in millimeters or inches, including handles, guards, and protruding parts. | Overall size alone does not show whether a tool can enter, sit flat, or remain below the opening. | Bag height, opening width, pocket depth, divider spacing, and closure clearance. |
| Individual Weight | Unit weight for every large or dense tool, battery, meter, and boxed component. | Local weight determines where pocket bottoms, attachment zones, and support layers need reinforcement. | Pocket backing, lower placement, stronger seams, local panels, or main-compartment storage. |
| Total Loaded Weight | Combined tool weight plus expected consumables, documents, batteries, and the bag itself. | Total load guides the complete carrying system rather than one isolated material choice. | Shell construction, webbing path, handle design, shoulder system, base support, and hardware. |
| Quantity Per Tool | Number of repeated drivers, sockets, batteries, cables, fittings, or small parts. | Repeated items can create hidden bulk and shift the center of gravity. | Loop count, removable organizers, parts boxes, zip sections, and balanced left-right placement. |
| Access Frequency | Every few minutes, several times per shift, occasionally, or emergency use only. | High-use tools should remain visible and reachable without opening several layers. | Exterior access, top placement, open pockets, dedicated sleeves, or protected internal storage. |
| Sharp Or Abrasive Areas | Blades, drill bits, metal corners, threaded fittings, rough housings, and exposed edges. | Sharp or rough parts can puncture lining, wear through pocket bottoms, or damage nearby tools. | Wear panels, sleeves, reinforced lining, hard inserts, protective caps, or separate compartments. |
| Work Environment | Concrete floor, workshop, vehicle, outdoor site, wet area, dust, oil, heat, or frequent stairs. | Ground, moisture, contamination, carrying distance, and cleaning needs change the suitable construction. | Molded base, coated fabric, removable board, easy-clean lining, backpack straps, or rolling system. |
| Carrying Method | Hand carry, shoulder carry, backpack carry, trolley movement, vehicle storage, or mixed use. | Each carrying method creates a different force direction and balance requirement. | Handle position, shoulder anchors, back panel, wheels, trolley frame, and load-distribution path. |
| Storage And Transport | Retail carton, service vehicle, workshop rack, equipment crate, pallet, or parcel shipment. | Packed size and hardware shape affect freight, stacking, surface protection, and receiving. | Foldability, removable components, box dimensions, protective packing, labels, and carton quantity. |
A useful construction brief should list every major tool separately rather than describing the load only as “electrician tools” or “maintenance equipment.” Record the longest tool, widest tool, heaviest single item, total packed weight, and the items requiring the fastest access.
Tool placement should follow a clear sequence:
Tool list → physical dimensions → unit weight → total load → access order → working environment → carrying method → construction layout.
The heaviest items normally require lower and more central placement. Frequently used hand tools can remain near the upper opening or exterior access zones, provided their pocket structure does not pull the body out of shape. Sharp components may need local protection even when their weight is low.
A reference bag can support the discussion, but its dimensions and pocket positions should not be copied without checking the real tools. A structure developed around measured contents is easier to sample, inspect, pack, and reproduce during later orders.
Choose The Right Construction System For The Load
Soft bases, support boards, molded bottoms, and rolling systems solve different load, ground-contact, mobility, packing, and cost requirements across professional tool programs.


Reinforced Soft Base
A reinforced soft base suits tool bags requiring lower product weight, flexible storage, and more efficient carton packing. Construction may combine abrasion-resistant outer fabric, a secondary wear layer, internal lining, local reinforcement, binding, and controlled seam overlap. It works best when tools are organized to avoid sharp pressure directly against the base. Soft construction should still be checked for standing stability, sagging, bottom wear, and seam distortion under the intended load.
- Suitable for moderate mobile tool sets.
- Supports more compact shipment packing.
- Requires controlled sharp-tool placement.
- Check base shape after repeated lifting.
Board-Supported Base
A PE, PP, or other suitable support board can distribute weight, improve standing shape, and reduce concentrated pressure without adding a complete molded shell. The board may be fixed inside the construction or designed for removal, depending on cleaning, packing, and maintenance needs. Corners, board movement, material compatibility, and the connection between the base and side panels need careful review. A board that shifts during use can create uneven wear or hard-pressure edges.
- Improves shape and weight distribution.
- Can remain removable when required.
- Protect board corners and side seams.
- Verify movement after impact and transport.
Molded Hard Base
A molded plastic or rubberized base provides stronger ground separation, standing stability, moisture resistance, and protection from rough surfaces. It can suit electrical, HVAC, construction, and field-service bags placed repeatedly on concrete, dirt, or wet floors. Performance depends on shell material, wall thickness, shape, connection method, and how the textile body attaches to the base. Molded construction also increases tooling, product weight, packed dimensions, and development requirements.
- Stronger isolation from wet ground.
- Easier cleaning after site use.
- Requires secure textile-to-base attachment.
- Review impact, temperature, and packing needs.
Rolling Load System
Rolling construction supports heavy tool combinations moved over longer distances, airports, plants, warehouses, or large service sites. A complete system may include wheels, axle or wheel housings, trolley tubes, handle grip, molded support, frame reinforcement, and protective panels. Added components increase weight and carton volume, while stairs and uneven ground may still require lifting. The hand-carry points must therefore remain suitable for the completed loaded bag.
- Suitable for high total loads and distance.
- Reduces prolonged shoulder carrying.
- Adds frame, wheel, and packing complexity.
- Keep reinforced lifting handles available.
Match Materials To Load, Abrasion, and Worksite Conditions
Material selection should follow tool weight, wear areas, moisture, carrying method, structure, cleaning needs, packed volume, brand position, and planned service conditions.


| Material Area | Possible Specification Direction | Main Function | What Requires Review | Risk From Incorrect Selection |
|---|---|---|---|---|
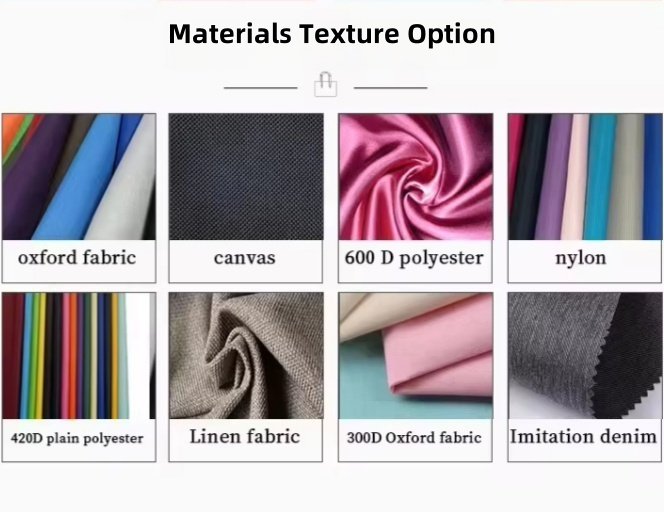
| Outer Shell | 600D, 900D, 1200D, or 1680D polyester or nylon; heavy canvas; coated fabric | Forms the main body and resists surface abrasion, scraping, dust, and repeated handling. | Fiber type, weave, backing, coating, weight, stiffness, tear behavior, seam performance, color stability, and available quantity. | A high-denier shell can still split around seams, lose coating, become too stiff, or add unnecessary product weight. |
| High-Wear Panels | Double-layer Oxford, PVC-coated fabric, rubberized panel, ballistic-style weave, or replaceable wear section | Protects the base, lower side walls, corners, vehicle-contact surfaces, and exposed areas. | Abrasion location, material compatibility, stitch penetration, folding behavior, coating adhesion, edge treatment, and cleaning. | A wear panel placed in the wrong area adds cost and weight without protecting the real contact zone. |
| Internal Lining | 210D or 420D polyester, coated lining, high-visibility lining, or reinforced pocket lining | Separates tools from the outer shell, improves visibility, protects internal seams, and supports cleaning. | Tool edges, oil or dust exposure, color, coating, seam coverage, pocket construction, and compatibility with adhesives. | Thin lining may puncture or wear through; overly stiff lining may distort pockets and make repair difficult. |
| Local Reinforcement | PE, PP, EVA, dense woven fabric, nonwoven support, or layered reinforcement panel | Adds shape, spreads pressure, supports hardware, strengthens pocket bases, and protects high-stress zones. | Thickness, position, edge shape, movement, moisture behavior, bonding, sewing method, and effect on folding. | Reinforcement can create hard pressure lines, trap moisture, shift during use, or make the bag unnecessarily rigid. |
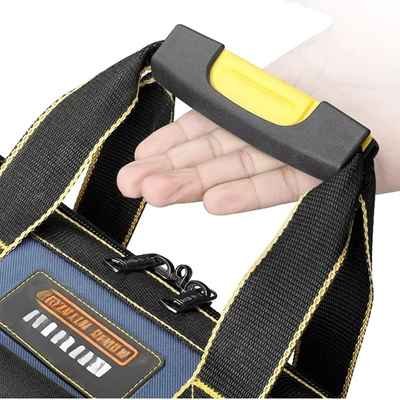
| Handle Webbing | Nylon or PP webbing in a width matched to the intended carrying system | Transfers lifting force through the handle, side wall, body panel, or bottom structure. | Width, thickness, weave, hand feel, extension length, turning method, stitch pattern, and compatibility with hardware. | Strong webbing attached to a small unsupported area can tear the surrounding fabric rather than protect the bag. |
| Shoulder Components | Woven strap, padded shoulder section, adjustment buckle, swivel hook, D-ring, and backing panel | Supports shoulder carrying, adjustment, movement, and load balance. | Strap width, padding length, anchor spacing, hook rotation, webbing direction, loaded angle, and corrosion exposure. | Narrow straps, weak anchors, or poorly positioned D-rings can create discomfort, twisting, and local pull-out. |
| Binding And Seam Cover | Nylon or polyester binding tape selected for thickness and abrasion exposure | Covers raw edges, secures layered seams, improves internal finish, and limits fraying. | Tape width, fold coverage, corner handling, stitch position, layer thickness, and repeated tool contact. | Narrow or loosely applied binding may expose raw edges, miss thick layers, or wear through at corners. |
| Bottom Support | Layered fabric, removable PE or PP board, EVA support, molded plastic base, rubberized base, or feet | Spreads concentrated weight, improves standing shape, protects against ground contact, and supports the main compartment. | Tool profile, total load, impact, moisture, cleaning, standing stability, attachment, product weight, and carton size. | An unsuitable base can crack, shift, sag, separate from the body, or create excessive freight volume. |
| Zipper System | Coil or tooth zipper selected by opening shape, product size, loading tension, and work environment | Controls access, closure, dust exposure, and security of tools during movement. | Zipper size, tape strength, slider, puller, route, curve radius, end stops, seam allowance, and loaded tension. | A large zipper cannot compensate for a distorted opening, sharp turns, weak ends, or tools pressing against the chain. |
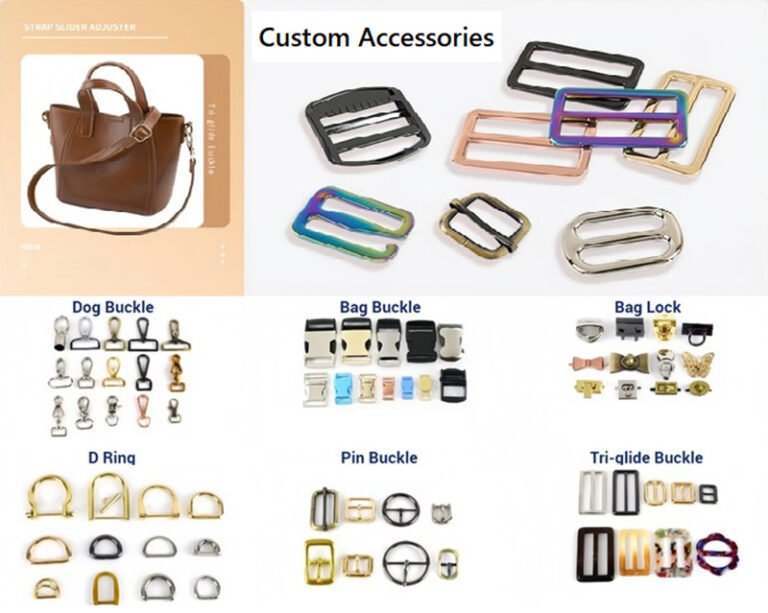
| Hardware | Plastic or metal hooks, buckles, D-rings, rivets, snaps, feet, pullers, frames, and trolley components | Connects carrying systems, closures, adjustable sections, frames, wheels, and reinforced areas. | Material, size, weight, plating, corrosion exposure, attachment method, backing, movement direction, and packing protection. | Overspecified hardware raises weight and cost; undersupported hardware may pull out even when the fitting remains intact. |
A suitable heavy-duty structure rarely depends on one premium material. Performance comes from compatible layers placed according to the real load. A 1680D outer shell may protect against abrasion, yet handle areas can still fail when webbing ends too high. A molded bottom may resist wet ground, yet poor textile-to-base attachment can become the weakest area.
Material planning should begin with five conditions:
- What is being carried? Record dimensions, sharp areas, surface texture, individual weight, and total load.
- Where does wear occur? Identify the base, lower walls, pocket openings, vehicle-contact areas, and hardware anchors.
- How is the bag moved? Hand carry, shoulder carry, backpack carry, rolling movement, and vehicle storage create different force directions.
- Where is the bag used? Dust, moisture, oil, concrete, heat, outdoor exposure, and cleaning methods influence suitable materials.
- How must the product ship? Stiff bases, frames, wheels, and thick padding affect carton dimensions, storage, and freight.
The highest denier or heaviest component is not automatically the best choice. Materials should create enough strength and protection without making the empty bag too heavy, difficult to sew, uncomfortable to carry, or inefficient to pack.
Build a continuous load path through the tool bag
Heavy tool weight should travel through handles, webbing, body panels, side walls, seams, reinforcement, and the base without stopping at one weak connection.
Transfer Handle Force Into The Bag Body

A handle should not behave like a separate accessory sewn onto the top of a finished bag. Handle webbing becomes part of the load-bearing structure when lifting force is transferred into a broad section of the body.
Short webbing tabs attached near the upper edge may work for light contents, yet dense tools can concentrate force around the final stitch line. Repeated lifting may stretch the shell, open needle holes, distort the upper panel, or tear the attachment away. Increasing the number of bartacks cannot fully correct a webbing path ending in a weak area.
A stronger direction may extend webbing down the side panels, wrap under the base, connect with a lower reinforcement panel, or distribute force through a larger stitched area. The correct route depends on bag size, intended load, opening type, exterior pockets, bottom system, and visual requirements. Full wraparound webbing is not required for every project, but the force should have a clear route beyond the handle base.
The attachment construction can combine:
- Wide webbing selected for the loaded bag
- Folded or padded grip sections
- Hidden backing beneath the outer shell
- Box stitching with diagonal cross lines
- Multiple stitch rows following the webbing direction
- Bartacks positioned at defined stress transitions
- Wider seam overlap around the upper body
- Reinforced transitions near pockets or zipper openings
Stitching should follow force direction. A bartack placed across the webbing can stop local movement, while long stitch rows can distribute force along the webbing route. Too many needle penetrations in a narrow area may weaken some coated or tightly woven fabrics, so stitch density and pattern size need to match the material layers.
The first assembled handle section should be checked before complete production. Left and right attachment height, webbing extension, stitch position, hidden backing, grip alignment, and loaded symmetry should match the approved specification. A handle may appear correct when empty but pull the opening inward or tilt the bag after tools are added.
Tool weight does not remain only at the bottom. Dense contents press downward, push against side panels, pull pockets, distort the opening, and create tension around the base seam. The side walls and bottom must therefore act as one structure.
A weak bottom connection often occurs when a heavy base panel is joined to lighter side material with limited overlap or a narrow seam. The bottom material may remain intact while the connecting seam, binding, or side wall begins to separate. Concentrated tools can also push a support board toward one corner, creating a hard edge against the seam.
A controlled body-to-bottom structure may use:
- Wider seam allowances around the base
- Double or multiple stitch rows
- Bound seams covering all material layers
- Corner reinforcement where several panels meet
- Wear panels extending upward from the ground-contact area
- A support board shaped with protected corners
- Internal retaining sleeves preventing board movement
- Webbing routes crossing or supporting the base
- Local reinforcement under dense tool positions
- A molded-base attachment designed around the shell edge
Panel shape matters. Sharp square corners can concentrate folding and sewing difficulty, while a controlled radius may allow smoother joining and load distribution. The selected shape still needs to fit the tools, standing requirements, and brand appearance.
Support boards should not float freely unless removal is an intentional feature. A removable board can sit inside a fitted sleeve with enough clearance for insertion but limited room for movement. A fixed board requires protection around its edges and compatibility with adhesives, stitches, and moisture conditions.
Molded bases require attention at the textile-to-shell transition. Rivets, stitching, binding, molded channels, adhesive, or combined attachment methods may be used according to the design. The connection should be examined after loading, lifting, floor contact, and packing because rigid and flexible materials move differently.
Transfer Body Load Into The Bottom

Reinforce High-Stress Transitions

Most structural failures appear at transitions where material thickness, movement, or force direction changes. Common locations include handle ends, shoulder anchors, zipper ends, pocket corners, divider attachments, frame ends, wheel housings, and bottom corners.
Reinforcement should be shaped around the real stress instead of added as a decorative patch. A square backing piece behind a D-ring may provide little value when the pull direction concentrates on one narrow edge. A longer backing panel aligned with the webbing can spread force over a larger area.
Typical reinforcement directions include the following:
- Handle roots: Extended webbing, hidden backing, box-and-cross stitching, and bartacks at controlled transitions.
- Shoulder anchors: Webbing connected into body seams or large internal support panels rather than a small outer patch.
- Pocket ends: Bartacks or reinforced seam endings positioned where tools pull the opening outward.
- Pocket bases: Double layers or local inserts under heavy tools, with enough attachment area to carry downward force.
- Zipper ends: Reinforced stops, suitable seam allowance, and protection from hard tools pressing beneath the end.
- Bottom corners: Wider overlap, bound multilayer seams, curved transitions, and protection from support-board edges.
- Frames and trolley parts: Backing structures distributing force beyond screw, rivet, or attachment holes.
- Molded-base joints: Controlled connection between rigid and textile materials, allowing different movement without separation.
Reinforcement layers should not interfere with tool access, folding, zipper movement, or sewing clearance. Thick material stacks can cause skipped stitches, uneven seam height, blunt corners, or poor binding coverage. Pattern development should calculate the full layer count before sewing begins.
First-piece review should include visible and hidden details. Internal backing, seam overlap, webbing continuation, hardware support, and board-retention components may not be visible after final assembly, yet they strongly influence long-term performance. Production instructions should identify each hidden part through diagrams, material codes, dimensions, and placement references.
Design The Bottom For Weight, Ground And Impact
The bottom must manage concentrated tools, repeated floor contact, moisture, impact, standing shape, body connection, product weight, cleaning, and packed transport.
Multi-Layer Fabric Base
A flexible base can combine abrasion-resistant shell fabric, a second wear panel, local reinforcement, internal support, lining, bound seams, and wider seam overlap. The structure suits professional tool bags requiring lower empty weight and compact carton packing. Dense or sharp tools should not rest directly against one fabric layer. Pocket layout, internal sleeves, and local inserts should keep damaging items away from vulnerable seams.
- Review every material layer.
- Extend wear protection into lower side walls.
- Protect the bottom seam from sharp tools.
- Check sagging under full load.
Removable Support Board
A removable PE, PP, or suitable board can spread weight and improve standing shape while allowing cleaning, replacement, or flatter shipment. The board should fit inside a controlled sleeve or compartment so it cannot slide freely into corners. Rounded or protected board edges help prevent pressure against the lining and base seam. Thickness should support the intended load without making the bottom overly rigid.
- Define the board dimensions precisely.
- Protect corners and cut edges.
- Limit movement inside the base.
- Inspect after impact and transport.
Molded Waterproof Base
A molded plastic or rubberized base can isolate tools from wet ground, improve standing stability, resist rough surfaces, and simplify cleaning after site use. Development must review shell material, wall thickness, rib structure, temperature exposure, impact, mold requirements, and textile attachment. A strong molded shell still requires a reliable connection to the flexible bag body, especially around corners and high-lift areas.
- Match shell design to tool weight.
- Review rigid-to-textile attachment.
- Check floor stability when loaded.
- Calculate packed dimensions before approval.
Wear Panels And Feet
Local wear panels, rubberized strips, plastic feet, or raised contact zones can protect frequent floor-contact areas without adding a complete hard shell. The positions should follow actual standing and dragging behavior rather than visual symmetry alone. Feet require backing and enough attachment area, while wear panels need suitable edge finishing. Local protection works best when the base already distributes weight evenly.
- Map the real contact areas.
- Reinforce behind attached feet.
- Avoid hard edges under tool pressure.
- Check dragging and standing behavior.
Control Tool Access Without Weakening The Opening
Opening construction must provide fast access while controlling zipper tension, body shape, tool retention, glove use, site exposure, and stability under the intended load.
Wide Zipper Opening

A wide zipper opening gives technicians a clear view of the main compartment and allows drills, meters, batteries, and hand tools to enter without difficult angles. Opening width must still match body support. When the bag is fully loaded, side panels can pull outward and place horizontal tension on the zipper chain, slider, end stops, and surrounding seams. A structured rim, suitable curve radius, reinforced zipper ends, and enough clearance beneath the opening help preserve smooth operation.
Metal Frame Opening
A metal frame opening keeps the mouth expanded during repeated tool access, making it useful for electricians, installers, maintenance crews, and workshop programs. Frame length, profile, end shape, fabric sleeve, hinge movement, and surrounding reinforcement must suit the bag dimensions and load. An oversized frame can add weight and create hard pressure near the corners, while insufficient body support may allow the frame to twist. The sample should be checked empty, half loaded, and fully loaded.

Open Tote Construction

An open tote structure provides immediate access without operating a zipper, making tools visible during fast-paced installation and repair work. The design needs enough standing stability to prevent collapse when one side is loaded more heavily. Deep central storage, divided exterior pockets, rigid or semi-rigid walls, and balanced handle placement help control movement. Tool retention also needs consideration during vehicle transport, stair carrying, or site relocation because an uncovered opening offers less containment than a closed structure.
Roll-Top Or Flap Closure
Roll-top and flap closures can protect the contents from dust, light weather exposure, or loose items while avoiding a long zipper route. The closure should not block frequent tool access or create excessive material above the working compartment. Buckles, hook-and-loop sections, straps, and reinforcement need to remain clear of sharp tools and high-wear edges. A loaded sample should confirm closing speed, glove operation, usable opening size, and packed height.

Organize Tools By Size, Weight, and Access Frequency
A useful pocket layout reduces search time, controls tool movement, distributes weight, protects sharp items, and keeps frequent tools accessible without overcrowding the bag.
Deep Vertical Pockets
Deep vertical pockets suit pliers, long drivers, adjustable wrenches, pry tools, and similar items that need upright storage. Depth should hold enough of the tool to prevent tipping while leaving the grip visible. Pocket width must allow removal with work gloves without letting heavy tools lean excessively. Lower pocket construction needs enough support to carry repeated downward pressure without sagging or pulling away from the body.
- Measure the complete tool length.
- Define the required visible grip height.
- Reinforce the pocket base and opening ends.
- Check neighboring tools for interference.
Short Tool Slots
Short slots work well for screwdrivers, markers, punches, bits, small pliers, testers, and narrow accessories requiring fast identification. Slot spacing should follow real handle widths rather than an evenly divided decorative pattern. Openings that are too narrow slow removal, while oversized slots allow tools to lean, collide, or fall out. The slot panel also needs enough body support to avoid curling after several positions are filled.
- Measure the widest part of each handle.
- Group tools with similar access frequency.
- Keep sharp tips away from exposed seams.
- Test every position with the planned contents.
Elastic Tool Loops
Elastic loops secure irregular or narrow tools while allowing some size flexibility. They are useful for drivers, sockets, cables, meters, and accessories, but elastic should not carry concentrated heavy weight without another supporting surface. Loop width, stretch, spacing, stitch length, and replacement expectations need review. Overstretched elastic loses retention, while excessive tension can make frequent access frustrating during field work.
- Select loop size from the real tool diameter.
- Support heavy items from below.
- Avoid stretching every loop to its limit.
- Check access after repeated use simulation.
Removable Dividers
Removable dividers allow one main compartment to accommodate drills, batteries, meters, parts boxes, and changing tool combinations. Divider height, stiffness, attachment area, and adjustment positions should prevent dense items from shifting into lighter equipment. Hook-and-loop systems need enough contact area and protection from dust or debris. A divider layout should remain easy to understand so field teams can restore the intended arrangement after cleaning or reconfiguration.
- Map the largest equipment first.
- Keep batteries and metal tools separated.
- Provide enough divider attachment length.
- Confirm the layout with a loaded prototype.
Exterior Quick Access
Exterior access zones are suitable for frequently used pliers, tapes, testers, gloves, fasteners, or documents that should be reached without opening the main compartment. Positioning must avoid excessive weight on one side and prevent long tools from interfering with handles or shoulder straps. Pocket openings also need enough retention for vehicle movement and site relocation. Quick access should improve workflow without turning the exterior into an unbalanced wall of pockets.
- Rank tools by daily access frequency.
- Balance exterior weight across the bag.
- Keep pockets clear of carrying hardware.
- Review retention during walking and transport.
Protected Main Compartment
The main compartment should hold dense, valuable, oversized, or sensitive items that need support beyond an exterior pocket. Drills, meters, battery packs, parts boxes, and specialist equipment may require padding, base support, sleeves, straps, or fitted dividers. Heavy contents should remain low and near the center to improve carrying balance. Sharp tools need separation from electronics, documents, and the outer shell.
- Place the densest items near the center.
- Separate sharp tools from sensitive equipment.
- Confirm clearance below the opening.
- Check movement during lifting and transport.
Match Carrying Components To The Working Load
Handles, shoulder straps, anchors, hooks, buckles, and reinforcement must work as one carrying system under the real load and movement pattern.
Build Handles Around Repeated Lifting And Load Transfer

Load-bearing handles must be developed around the completed bag weight, grip position, lifting frequency, carrying distance, opening structure, and webbing path. A padded grip may improve comfort, but padding cannot correct weak attachment below the handle.
Webbing route: Short handle tabs concentrate force around the upper body. Longer webbing paths can spread lifting force through side panels, reinforced seams, or the base. Full wraparound construction may suit heavier programs, while a partial extension may be sufficient when the load, body material, and supporting panels are clearly defined. Exterior pockets and zipper routes must not interrupt the intended force path.
Grip design: Handle length should allow comfortable hand access without making the bag swing excessively. A wrap, padded sleeve, molded grip, or folded webbing section can reduce concentrated pressure on the hand. Grip thickness still needs to suit gloved use and the finished loaded weight. Two handles should meet evenly so one side does not carry more force.
Attachment construction: Hidden backing, wider stitch areas, box-and-cross patterns, longitudinal stitch rows, and bartacks can be combined according to material layers and force direction. More stitching is not automatically stronger. Excessive needle penetration in a narrow coated panel can weaken the shell, while poorly positioned bartacks may only stiffen an area without transferring the load.
Approval checks: The first assembled handle structure should be checked for webbing length, extension, left-right symmetry, stitch position, backing placement, grip alignment, and clearance from the opening. A loaded prototype should then be lifted from the floor, carried, set down, and inspected for upper-panel distortion, seam movement, webbing slip, and uneven balance.
Procurement decision: Handle construction should be listed in the approved specification rather than described only as “reinforced.” Webbing material, width, route, backing, stitch pattern, grip construction, and connection areas need visible records for bulk inspection and later replenishment.
A shoulder strap is only as reliable as the full system connecting the shoulder to the bag body. Strap width, shoulder padding, adjustment hardware, hooks, D-rings, anchor spacing, body reinforcement, and the loaded center of gravity all influence comfort and structural performance.
Strap position: Anchor spacing should keep the bag stable rather than allowing it to rotate or tip toward the heaviest side. A long tool bag may need wider anchor separation, while a compact bag may require carefully positioned fittings to keep the opening level. Exterior pockets, tall tools, and hard frames can change the center of gravity after loading.
Shoulder comfort: Padding length and shape should remain under the shoulder during normal movement. A pad that slides away from the contact area offers little benefit. The strap surface should manage friction without becoming excessively rigid. Wider construction may distribute pressure, yet extra width also adds material and can interfere with movement in narrow work areas.
Hooks and anchors: Swivel hooks can reduce strap twisting, but rotation does not eliminate stress at the anchor. D-rings and webbing loops need backing aligned with the pull direction. A metal hook attached to a small unsupported fabric patch can remain intact while the anchor tears away. Connection areas should be reviewed under vertical lifting, angled shoulder carry, and the movement created while walking.
Adjustment and removal: Adjustment hardware should hold the selected length without slipping. Removable straps can simplify packing or allow alternate carry methods, but hooks need enough clearance for gloved attachment. Loose straps should not catch on tools, vehicle interiors, or site structures.
Loaded review: The sample should be carried with the planned contents, not only filled with soft material. Check shoulder pressure, bag angle, opening distortion, hook rotation, anchor movement, strap slip, and contact against the body. Heavy items may need repositioning before changing the shoulder system.
Balance Shoulder Carrying Across The Loaded Bag

Select Hardware By Strength, Weight And Attachment

Hardware selection should begin with function and load direction rather than the assumption that metal is always stronger or more professional. Plastic and metal components can both perform well when the material, dimensions, attachment, environment, and surrounding reinforcement match the intended use.
Plastic components: Quality engineering plastics can reduce weight, avoid plating wear, and remain suitable for adjustment buckles, side-release buckles, feet, handles, or certain hooks. Suitability depends on part geometry, wall thickness, temperature exposure, impact, chemical contact, and the expected load. A larger plastic component is not automatically stronger when the design creates a thin hinge or narrow stress area.
Metal components: Steel, alloy, or other metal fittings may suit D-rings, hooks, frames, rivets, zipper pulls, and heavily used connectors. Metal adds weight and may require corrosion, plating, sharp-edge, and packing review. A polished fitting can lose surface finish through site abrasion, while an untreated edge may damage webbing or adjacent fabric.
Attachment method: Rivets, screws, stitching, webbing loops, molded channels, and backing plates transfer force differently. The surrounding structure often fails before the fitting. Every load-bearing component needs enough webbing, backing, seam overlap, or body-panel area to distribute force beyond a small attachment hole.
Movement and compatibility: Swivel hooks, moving buckles, frames, and trolley parts require clearance and should not grind against zipper lines, pockets, or tool surfaces. Hardware size must match webbing width so the strap does not bunch, slide sideways, or wear against a narrow edge.
Packing and replenishment: Raised metal parts can create pressure marks or scratches during shipment. Protective film, tissue placement, fitted cartons, or component covers may be needed. Hardware material, size, finish, and attachment should remain recorded because a visually similar replacement can change weight, movement, corrosion behavior, and long-term consistency.
Workmanship Details Behind Durable Heavy-Duty Tool Bag Construction
Reliable performance depends on controlled cutting, layered sewing, reinforcement placement, clean seam finishing, first-piece approval, and consistent execution across the full order.
Webbing Box Stitch
Box-and-cross stitching spreads handle or shoulder-anchor force across a wider area than one short seam. The stitch shape should match webbing width, backing size, fabric layers, and pull direction. Corners need enough clearance from webbing edges to avoid cutting into the material. First-piece review should confirm stitch position, diagonal alignment, thread tension, backing coverage, and left-right symmetry before repeated production begins.
Bartack Reinforcement
Bartacks strengthen controlled stress transitions such as handle roots, pocket openings, zipper ends, webbing joints, and shoulder-strap anchors. Placement matters more than quantity. A bartack located outside the main force route adds stiffness but may not protect the weak area. Length, stitch density, thread, needle, material layers, and distance from cut edges should be confirmed on the first assembled section.
Bound Internal Seams
Internal binding covers raw edges, secures layered materials, reduces fraying, and creates a cleaner interior around tools. Binding width must cover the full seam stack, including outer shell, lining, reinforcement, and pocket layers. Corners and thick transitions require controlled folding so the tape does not narrow or expose edges. Inspect coverage, stitch position, skipped areas, puckering, and abrasion points before final assembly.
Reinforced Pocket Ends
Pocket openings experience repeated outward pulling when pliers, drivers, meters, and long tools are inserted or removed. Reinforcement should extend beyond the final opening edge and connect into a supported body area. Pocket depth, seam allowance, bartack position, bottom construction, and tool angle should be checked together. A strong opening cannot compensate for a weak pocket base carrying concentrated downward weight.
Controlled Zipper Ends
Zipper ends often receive high local pressure when the bag is full, the opening bends, or hard tools sit below the stop. End construction should include suitable seam allowance, backing, clean tape control, protected slider clearance, and enough space for the opening to move. First-piece checks should cover alignment, end symmetry, chain tension, slider travel, surrounding stitches, and operation with the intended contents loaded.
Clean Bottom Assembly
Bottom assembly joins high-wear materials, support layers, side panels, webbing, binding, boards, feet, or molded components. Layer order must remain controlled so reinforcement does not shift and hard edges do not press against seams. Check base dimensions, corner shape, seam overlap, stitch access, board location, foot backing, standing balance, and textile-to-base attachment before the completed bag enters final inspection.
Develop And Correct The Construction Before Bulk Production
Sampling converts real tool data into a measurable structure, reveals weak assumptions, and allows reinforcement, access, balance, packing, and workmanship to be corrected before volume production.

Review The Tools, Load And Working Routine
Development should begin with the actual contents rather than an existing bag outline. Record each major tool’s length, width, depth, weight, sharp areas, handle shape, access frequency, and storage position. Add batteries, meters, parts boxes, cables, documents, safety equipment, and consumables that may be carried during normal work. The total should include the empty bag because heavier materials, molded bases, frames, padding, and metal fittings also contribute to carrying weight.
The working routine affects the construction as strongly as the tool list. A service technician moving between a vehicle and indoor equipment needs a different opening and carrying system from a construction crew placing the bag on concrete throughout the day. Record whether the bag will be lifted frequently, carried upstairs, moved by trolley, stored in a vehicle, exposed to dust or moisture, or opened while wearing gloves.
The initial development brief should confirm:
- Required external dimensions or available storage space
- Longest, widest, and heaviest tools
- Total expected working load
- High-frequency access items
- Sharp or abrasive components
- Preferred hand, shoulder, backpack, or rolling carry
- Floor, vehicle, and storage conditions
- Logo, labels, packing, quantity, and required arrival date
A damaged existing bag can provide valuable evidence. Torn handle roots, worn pocket bottoms, distorted openings, cracked bases, and pulled hardware show where the current structure does not match the real use. The aim is not to copy the failed product more neatly. The aim is to identify why it failed and decide which parts require a different load path, material layer, pocket depth, or attachment method.
A clear brief reduces unnecessary sampling changes and produces a more useful quotation because dimensions, materials, operations, hardware, and packing can be reviewed against one defined load.
Build The First Construction Around Measured Contents
The first prototype translates the tool brief into bag dimensions, pattern pieces, pocket positions, opening shape, handle routes, bottom support, hardware anchors, and packing size. Every visible feature should connect to a working requirement. Extra pockets, decorative panels, and heavy components should not be added without a clear purpose.
Pattern development should allow enough clearance for loading and removal. A tool may fit inside the bag yet remain difficult to reach because the opening is too narrow, the grip sits below a nearby pocket, or another item blocks the path. Pocket depth should secure the tool while preserving access. Dense items normally sit lower and closer to the center, while frequent hand tools can remain near the upper opening or exterior zones.
The first structure should define:
- Open and closed bag dimensions
- Main-compartment width and usable depth
- Pocket dimensions and opening heights
- Divider positions and adjustment areas
- Handle-webbing route and grip length
- Shoulder-anchor spacing and reinforcement
- Bottom layers, board, feet, or molded base
- Zipper route, frame, flap, or open-tote system
- Hardware type and attachment method
- Material layers at every major stress area
- Unit packing and carton direction
Hidden construction deserves equal attention. Backing behind D-rings, webbing continuation beneath pockets, reinforcement under pocket bases, support-board sleeves, zipper-end layers, and bottom seam overlap may not appear in product photography, but they determine whether the structure can support the intended work.
For a standard soft tool bag using available materials and clear specifications, normal sample development is approximately 5–7 working days after the required details are complete. Molded bases, custom frames, exclusive hardware, unusual materials, specialized packaging, or additional testing may require more time.
The first sample should be treated as a working prototype rather than a display piece. Its purpose is to prove dimensions, access, balance, construction feasibility, and workmanship direction before the structure is locked.
Load The Prototype With Real Tools Or Equivalent Weights
A heavy-duty sample cannot be assessed accurately with soft filler alone. Use the actual tool set whenever available. Equivalent test weights may be used when tools cannot be sent, but their size, weight distribution, and contact areas should resemble the planned contents.
Start with fit and access. Insert every tool into its assigned position and confirm whether the opening remains usable. Check if handles, zippers, flaps, dividers, and exterior pockets interfere with removal. Operators wearing normal work gloves should be able to reach high-use items without pulling several tools out first.
Next, review loaded shape and balance:
- Does the base remain flat and stable?
- Does the bag lean toward one side?
- Do exterior pockets pull the body outward?
- Does the opening twist or narrow?
- Does the support board move?
- Do long tools extend into the zipper route?
- Does the shoulder strap keep the bag level?
- Do handles meet evenly under load?
The prototype should then be lifted, carried, set down, opened, closed, and moved between realistic storage positions. Inspect handle roots, webbing ends, shoulder anchors, pocket bases, zipper stops, bottom seams, molded-base connections, and hardware backing after use. Early movement does not always mean immediate failure, but it may reveal insufficient support or an incorrect force path.
Packing also needs review. Frames, hard bases, wheels, protruding pockets, and metal fittings can increase carton size or create pressure against adjacent products. A fully packed prototype shows whether handles need folding instructions, shoulder straps should be removed, metal parts need protection, or the carton layout requires adjustment.
Photographs and written observations should identify each issue by location. “Make it stronger” is too broad. Useful comments describe the exact component, movement, and required result, such as extending handle webbing 80 millimeters farther down the side panel, raising a pocket opening for glove clearance, or widening the support-board sleeve to prevent corner pressure.
Correct, Approve, and Lock The Production Details
Sample corrections should solve observed problems without adding unnecessary weight, cost, or complexity. When the bag leans, the right solution may be changing tool placement rather than adding a heavier bottom. When a pocket sags, the correction may involve depth, backing, or lower attachment instead of using thicker outer fabric across the whole bag.
Common revisions include:
- Moving dense tools toward the center
- Increasing or reducing pocket depth
- Changing slot width for gloved access
- Extending handle webbing into lower panels
- Enlarging backing behind D-rings
- Adjusting shoulder-anchor spacing
- Adding local pocket-base reinforcement
- Protecting support-board corners
- Smoothing the zipper route
- Strengthening zipper-end construction
- Revising bottom seam overlap
- Changing the packing method around hard fittings
Every approved revision should appear in the specification, pattern version, bill of materials, construction drawing, hardware list, packing instruction, and inspection checklist. The production reference should identify outer fabric, lining, reinforcement, webbing, thread, binding, zippers, hardware, bottom components, Logo, labels, dimensions, pocket positions, and hidden support pieces.
A final sample or pre-production sample should reflect the approved construction. Procurement and product teams should compare it with the tool list, target load, work routine, brand appearance, packed dimensions, and agreed cost before releasing the order.
Once approved, the structure becomes the basis for material purchasing, cutting, first-piece sewing, inline inspection, finished-product review, and later replenishment. Normal bulk production is generally around 20–30 days after final materials, quantity, branding, packing, and production details are confirmed. Structure complexity, material preparation, color allocation, inspection requirements, and schedule can affect the final timing.
A controlled approval process does not remove every possible field risk. It creates a clear, inspectable standard so the confirmed construction can be reproduced and checked consistently.
Validate Construction With Defined Load And Use Checks
Load checks should match the actual tool set, target weight, carrying method, work environment, opening structure, pocket layout, and expected handling routine.
| Validation Check | How To Run The Check | What It Reveals | Decision Before Bulk Production |
|---|---|---|---|
| Static Loaded Shape | Fill the sample with actual tools or equivalent weights in the approved positions. Leave the loaded bag standing for the agreed review period. | Base sagging, side-wall collapse, support-board movement, pocket distortion, leaning, and opening deformation. | Confirm whether tool placement, body support, pocket construction, or bottom layers require adjustment. |
| Repeated Hand Lifting | Lift the loaded bag from the floor, carry it a defined distance, place it down, and repeat according to the agreed project method. | Handle-root movement, webbing slip, stitch opening, upper-panel distortion, uneven grip loading, and bottom-seam stress. | Approve or revise webbing route, backing, stitch area, grip structure, and body-to-bottom load transfer. |
| Shoulder Carry Review | Carry the approved load using the intended strap length and normal work movement, including turning, stairs, or vehicle access where relevant. | Bag tilt, anchor movement, hook twisting, strap slip, shoulder-pad displacement, opening distortion, and contact discomfort. | Adjust anchor spacing, strap width, padding, hardware, tool position, or reinforcement before approval. |
| Bottom Impact Review | Set down or lower the loaded sample onto the intended floor surface using an agreed height and handling method. Inspect after each defined sequence. | Board movement, corner pressure, molded-base damage, seam pulling, foot movement, internal tool impact, and standing instability. | Revise bottom support, edge protection, attachment, local reinforcement, or tool separation when needed. |
| Abrasion Area Review | Place, slide, or handle the sample against representative floor, vehicle, or workbench surfaces according to the expected use. | Wear concentration, coating damage, exposed yarns, edge lifting, foot abrasion, and incorrect wear-panel placement. | Confirm protective materials are located at real contact areas and remain compatible with surrounding seams. |
| Zipper And Opening Cycling | Open and close the fully loaded bag using the planned hand position and glove condition. Include curves, frame movement, flap operation, or roll-top fastening. | Chain tension, slider resistance, sharp route changes, end-stop pressure, opening collapse, and hardware interference. | Adjust zipper route, clearance, end reinforcement, frame support, closure length, or tool position. |
| Pocket Retention Review | Load every pocket with the approved tool and move the bag through lifting, carrying, vehicle placement, and normal access actions. | Tool slipping, opening stretch, pocket sagging, bottom pull-out, neighboring-tool interference, and glove-access problems. | Revise pocket dimensions, opening reinforcement, base support, retention, spacing, or access order. |
| Hardware And Anchor Review | Apply the intended carrying and adjustment actions to hooks, D-rings, buckles, rivets, frames, feet, and trolley components while loaded. | Anchor pull-out, webbing bunching, plating wear, hook twisting, buckle slip, sharp-edge contact, and local panel distortion. | Confirm fitting size, webbing compatibility, backing, attachment, movement clearance, and surface protection. |
| Packed Transport Review | Pack the completed sample according to the proposed unit and carton method, then handle, stack, and move the carton as agreed. | Surface pressure, metal impressions, distorted frames, crushed pockets, loose components, poor carton fit, and label damage. | Revise tissue, component protection, folding instructions, removable parts, carton dimensions, and internal arrangement. |
| Post-Check Inspection | Remove the tools and compare the sample with approved measurements, photographs, material references, and construction details. | Permanent deformation, seam movement, coating marks, loose stitches, edge damage, hardware changes, and dimensional shift. | Record acceptance, required correction, revised sample need, and the inspection references for bulk production. |
Define The Check Before Making A Performance Claim
A credible validation plan states:
- The actual tools or equivalent weights used
- Total loaded weight and weight distribution
- Carrying method and strap position
- Review duration or repeat sequence
- Floor and environmental conditions
- Sample quantity
- Inspection locations
- Acceptance criteria
- Photographs and recorded results
There is no universal load figure suitable for every custom heavy-duty tool bag. A compact electrician bag, rolling service case, molded-base tote, and industrial equipment kit create different stress patterns. Load targets should follow the planned contents and handling routine rather than a headline number selected for promotion.
Statements such as “supports 40 kilograms,” “tested for 100,000 cycles,” “never tears,” or “zero failure” should only appear when a defined method, sample record, acceptance criteria, and supporting evidence exist. Without those details, the number offers little help during product approval or later inspection.
Turn Validation Findings Into Production Controls
Any issue found during review should lead to a specific action:
- Update the pattern or pocket dimension
- Change tool placement
- Extend webbing
- Increase backing area
- Revise stitch location
- Protect a board edge
- Smooth a zipper route
- Strengthen an anchor
- Change a wear-panel position
- Modify the packing arrangement
The approved result should be transferred into the final sample, material list, construction drawing, workmanship standard, packing instruction, and QC checklist. Production teams can then compare materials, first pieces, inline work, finished bags, and packed cartons against the same agreed requirements.
Validation does not replace production inspection. It establishes what the structure must achieve and gives later checks a clear reference.
Representative Heavy-Duty Tool Bag Development Scenario
A 1,500-piece electrician tool bag scenario shows how load data, structural revisions, sample checks, packing rules, and bulk controls work together.

Program Brief And Initial Construction Risks
The following representative scenario illustrates a typical development route rather than a disclosed client order. The planned product was an 18-inch wide-opening electrician tool bag for professional retail and field-service use.
The order brief included:
- 1,500 pieces
- Two colors: 900 black and 600 dark blue
- Working load direction: approximately 12–15 kg
- Main use: electrical tools, meters, battery packs, pliers, drivers, and small parts
- Wide zipper opening
- Detachable shoulder strap
- Exterior quick-access pockets
- Reinforced soft bottom
- Woven label, hangtag, barcode, and individual protective packing
The reference bag provided useful styling and dimensions, but several structural risks appeared after the planned tools were reviewed.
Short handle attachment: The handle webbing ended near the upper seam. Dense tools would place most lifting force around a small stitched area instead of transferring weight through the side walls.
Shallow exterior pockets: Ten exterior pockets looked organized when empty, yet several openings were too low for long pliers and drivers. Heavy tools could lean outward and pull the pocket panel away from the body.
Unsupported base: The original bottom used one flexible fabric layer without a controlled support board. Battery packs and metal tools would create concentrated pressure and reduce standing stability.
Loaded zipper tension: The opening was wide, but several tall tools sat directly beneath the zipper route. Once filled, the side walls could pull outward and increase pressure around the chain and end stops.
The commercial requirement was not simply to make every part thicker. The product needed a professional appearance, manageable empty weight, controlled carton size, and a structure suitable for later replenishment. Development therefore focused on correcting the real stress areas rather than adding reinforcement everywhere.
Construction Revision And Cost Control
The revised construction protected the main working requirements while avoiding unnecessary materials and decorative complexity.
Outer structure: A 1680D polyester direction was selected for the main shell, combined with a lighter internal lining and local reinforcement. High-wear material was concentrated around the lower side walls and base instead of covering the entire bag with additional heavy layers.
Handle system: The 38 mm webbing route was extended farther down the side panels and connected into a lower reinforcement area. Hidden backing increased the stitched surface behind each handle root. Box-and-cross stitching and controlled bartacks followed the lifting direction rather than clustering excessive needle holes in one small area.
Bottom construction: The base combined the outer shell, a secondary wear panel, internal lining, and a removable 2.0 mm PP support board. The board sat inside a fitted sleeve with protected corners to limit movement and reduce hard pressure against the bottom seam.
Pocket layout: Two decorative pockets with limited working value were removed. The remaining exterior sections were resized around the actual tools. Long pliers received deeper vertical pockets, high-use drivers remained near the upper opening, and dense accessories moved toward the center.
Zipper route: A No. 10 main zipper direction was reviewed with a smoother corner route, reinforced ends, and more clearance beneath the opening. Tall tools were repositioned so they would not push directly against the chain.
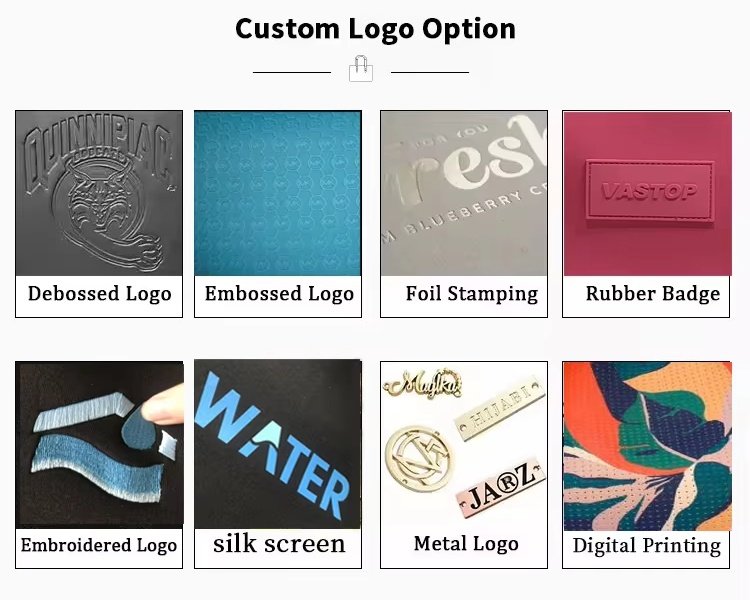
Hardware and branding: Standardized hooks, D-rings, and adjustment parts were used instead of exclusive molds. One clear exterior logo position replaced multiple small branding areas. Both colors shared the same lining, webbing, zipper, shoulder strap, labels, and packing method.
Cost control came from fewer low-value components, shared materials, standard hardware, and a clearer production route. Load-bearing areas, visible workmanship, tool access, and retail identification remained protected.
Loaded Sample Review And Corrections
After the specification and available materials were confirmed, the first working sample followed the normal development direction of approximately 5–7 working days.
The prototype was loaded to 13.5 kg using representative electrical tools and equivalent weighted items. Tool positions matched the proposed pocket and main-compartment layout. The review covered fit, access, carrying balance, standing shape, opening operation, and packing.
Fit and access: Long pliers remained secure, but two exterior openings sat too low for comfortable glove access. The openings were raised by 20 mm while maintaining enough depth to control tool movement.
Handle balance: Both handles met evenly under load, although the upper side panels pulled inward slightly. The webbing extension and hidden backing were retained, while the stitch area was lengthened to spread force more gradually.
Bottom behavior: The support board improved standing shape. Initial handling showed limited board movement toward one corner, so the internal sleeve was widened and fitted with a more controlled closing section.
Shoulder carry: The original D-ring position caused the loaded bag to lean toward the front. Moving each anchor slightly lower and farther apart improved balance without adding larger metal fittings.
Zipper access: The main opening remained functional when loaded, but one meter pocket sat too close to the zipper end. The pocket moved inward to protect slider clearance and reduce local pressure.
Pocket retention: High-use drivers remained accessible, while dense batteries stayed low and central. A pocket intended for a small parts box required a wider opening and shorter front wall so the box could be removed without catching.
Packing review: The detachable shoulder strap was placed inside the main compartment with protective tissue around the hooks. Handle folding direction was added to the packing instruction to reduce carton height and avoid pressure on the zipper frame.
Every correction was identified by measurement and component location. Broad comments such as “make it stronger” were avoided. The revised sample could therefore be checked against clear changes rather than personal interpretation.
Bulk Production And Packing Control
The approved direction was translated into a production reference before the 1,500-piece order scenario moved forward.
The controlled record included:
- Pattern version and open/closed dimensions
- Outer shell, lining, wear panels, and reinforcement materials
- 38 mm handle-webbing route
- Hidden backing dimensions
- Box-stitch and bartack locations
- Pocket dimensions and tool positions
- 2.0 mm PP board and internal sleeve
- Main zipper route and end construction
- Shoulder-strap anchors and hardware
- Logo artwork and placement
- Hangtag and barcode files
- Color allocation: 900 black and 600 dark blue
- Six pieces per carton
- 250 planned cartons
- Carton assortment and marks
- Inspection references and packing sequence
Material review was completed before cutting. First cut pieces confirmed dimensions and grain direction. Initial logo work, handle sections, pocket assembly, zipper ends, and bottom construction were checked before repeated sewing.
Inline checks focused on handle-webbing continuation, pocket depth, zipper clearance, board-sleeve dimensions, shoulder anchors, body symmetry, and bottom seams. Finished-product review covered dimensions, loaded shape, access, carrying components, hardware, stitching, cleanliness, labels, and packed presentation.
Packaging checks confirmed the correct color, barcode, hangtag, shoulder strap, carton quantity, and carton marks. Six units per carton created a planned total of 250 cartons, allowing receiving teams to reconcile quantities more easily.
Normal bulk production is generally around 20–30 days after materials, quantity, branding, packing, and production details are fully confirmed. The final schedule still depends on material preparation, order complexity, inspection requirements, and production planning.
The scenario shows why a heavy-duty tool bag cannot move from styling approval directly into sewing. Load data, hidden reinforcement, sample corrections, component records, and packing controls must remain connected through the entire order.
From Approved Construction To Controlled Bulk Production
Jundong connects tool data, approved samples, hidden reinforcement, production instructions, QC checks, packing rules, and replenishment records through one controlled project route.
Development Control

With 20+ years of OEM/ODM bag experience, Jundong can begin from a tool inventory, drawing, damaged reference bag, physical sample, or early product concept. Development reviews dimensions, target load, access order, pocket structure, webbing routes, bottom support, zippers, hardware, Logo, packing, and cost. Approved revisions are transferred into patterns, material lists, construction diagrams, and sample references before bulk preparation.
- Start from real tools and working conditions.
- Record hidden reinforcement, not only exterior appearance.
- Compare original and revised construction.
- Confirm the selected route through sampling.
Organized Production

More than 600 employees and an 18,000㎡ factory area support material handling, cutting, branding, sewing, assembly, inspection, packing, and order coordination. Organized capacity is important when one program contains multiple sizes, colors, tool layouts, barcode files, or phased deliveries. Production planning links confirmed materials, pattern versions, component lists, workmanship requirements, packing instructions, and required timing before repeated work begins.
- Coordinate multiple colors and related SKUs.
- Separate materials and cut components clearly.
- Approve first work before repeated operations.
- Plan packing space and delivery sequence early.
Multi-Stage QC

A team of 80 QC inspectors supports checks from incoming materials to shipment preparation. Tool bag inspection can cover fabric, lining, webbing, cut pieces, Logo, handle roots, pocket ends, zipper routes, bottom assembly, shoulder anchors, hardware, finished dimensions, loaded function, unit packing, labels, carton quantity, and carton marks. Approved samples and recorded construction requirements provide the inspection reference.
- Inspect materials before cutting.
- Review first Logo, sewing, and bottom work.
- Check structural details during production.
- Verify finished bags, packing, and cartons.
Repeat-Order Control

Repeat production depends on more than keeping one physical sample. Pattern versions, material references, webbing widths, reinforcement dimensions, hardware specifications, Logo files, packing artwork, carton rules, and approved revisions should remain traceable. Clear records make later replenishment easier to evaluate when materials, quantities, colors, tools, or packaging change. Testing and destination documents are reviewed according to the final use and project requirements.
- Preserve approved construction records.
- Recheck material batches and color references.
- Control substitutions before use.
- Update specifications when the tool set changes.
Custom Heavy Duty Tool Bag Construction
A reliable heavy duty tool bag requires more than strong fabric. It needs a well-planned structure, reinforced stress points, durable stitching, practical compartments, and protective features that support daily use. From material selection to handle reinforcement, zipper installation, and final inspection, every detail is developed to create tool bags that perform in demanding working environments.
Client Testimonials
800+ brand Clients Trust Jundong



FAQs About Heavy-Duty Tool Bags
The following answers address common decisions around materials, load, handles, bottoms, pockets, samples, MOQ, timing, QC, and repeat production.

What makes a custom tool bag genuinely heavy duty?
A heavy-duty tool bag uses a complete load-bearing system, not only thick fabric. Outer material, handle webbing, body panels, pocket bases, bottom support, seams, zippers, hardware, and hidden reinforcement must work around the real tool set. The structure should be reviewed under the intended load, carrying method, ground conditions, and access routine. A high-denier shell alone cannot compensate for short handle tabs, weak anchors, unsupported pockets, or poor bottom connections.
Is 1680D always the best tool bag fabric?
No—1680D can provide strong abrasion resistance, but it is not automatically the best choice for every custom tool bag. Product weight, backing, coating, tear behavior, sewing difficulty, flexibility, cost, and packed volume also matter. A 600D or 900D shell with correct reinforcement may suit one program better, while 1680D may be valuable around high-wear areas. Material selection should follow the actual load and work environment rather than the denier number alone.
How should the target load be defined?
Define target load from the complete tool inventory, including tools, batteries, parts boxes, consumables, documents, and the empty bag. Record the heaviest single item, total working weight, tool positions, carrying method, and lifting frequency. Weight distribution matters as much as the total number. A 15 kg load concentrated on one pocket creates a different structure requirement from the same weight distributed through a supported main compartment.
How are handles reinforced for heavy tools?
Certainly. Reliable handle reinforcement uses a clear webbing path, sufficient backing, suitable stitch area, and force transfer into the bag body or base. Common methods include extended webbing, box-and-cross stitching, multiple longitudinal stitch rows, and bartacks at stress transitions. More stitches are not automatically stronger. Webbing width, material layers, needle penetration, handle spacing, and loaded balance must be reviewed together and recorded in the approved specification.
Which bottom construction suits heavy tools?
The correct bottom depends on tool shape, total weight, floor contact, moisture, impact, cleaning, standing needs, and shipping volume. Reinforced soft bases reduce empty weight and carton size. Removable boards improve shape and weight distribution. Molded bases provide stronger ground isolation and easier cleaning. Local wear panels or feet protect selected contact areas. No bottom system is universally superior; the decision should follow the planned use and loaded sample review.
Can development start from our tools or damaged bag?
Absolutely. A tool inventory, damaged bag, reference sample, sketch, or photographs can all begin development. Torn handles, worn pocket bottoms, distorted openings, cracked bases, and pulled hardware provide direct evidence of structural weakness. Jundong can compare those failure areas with the tool dimensions, total load, carrying routine, and work environment before proposing a revised pocket layout, webbing route, bottom system, zipper structure, or hardware attachment.
How is a heavy-duty tool bag sample checked?
Of course—a useful sample check uses real tools or equivalent weights arranged in their approved positions. Review fit, glove access, standing balance, handle lifting, shoulder carry, pocket retention, zipper operation, bottom movement, hardware anchors, and packed transport. Comments should identify exact locations and measurable changes. For example, extend webbing farther down a side panel or raise a pocket opening, rather than writing only “make the bag stronger.”
What is the standard MOQ for custom tool bags?
The standard MOQ usually starts from 500 pieces per design. Final feasibility depends on fabric availability, colors, structure, Logo versions, molded components, custom hardware, packaging, and production planning. A 1,500-piece order divided across several structures and colors operates differently from 1,500 identical bags. Share quantity by design and color so material minimums, setup work, packing, and production allocation can be reviewed accurately.
How long do sampling and bulk production take?
Standard sampling usually takes about 5–7 working days after complete specifications and available materials are confirmed. Molded bases, custom frames, exclusive hardware, unusual materials, specialized packaging, or load-review revisions may require longer. Bulk production is generally around 20–30 days after final materials, quantity, branding, packing, and construction details are approved. Shipping transit time is separate and depends on destination and transport method.
How is bulk construction kept consistent?
Consistency comes from controlled references rather than relying on one visual sample. Pattern versions, material specifications, webbing routes, hidden backing, pocket dimensions, stitch locations, bottom components, hardware, Logo, labels, and packing rules should be documented before production. Checks can cover incoming materials, cut pieces, first Logo work, first sewing, inline construction, finished function, unit packing, and cartons. Proposed substitutions should be reviewed and recorded before use.
Send Your Tool Load And Construction Requirements
A construction review can begin before every specification is complete. Send a tool list, photographs, a damaged reference bag, drawing, or early layout together with the estimated quantity and working conditions. Jundong will review the available information across dimensions, target load, access order, fabric, webbing, handles, pockets, opening, bottom support, hardware, Logo, packing, sampling, and bulk feasibility.
Please include:
- Tool dimensions and individual weights
- Estimated total working load
- Frequent-access and sharp tools
- Preferred bag size and carrying method
- Worksite, floor, moisture, and transport conditions
- Reference photo, drawing, or physical sample
- Quantity by design and color
- Logo artwork and label requirements
- Unit packing, barcode, and carton needs
- Target price, required arrival date, and destination
- Testing or retailer protocols
- Available technical files
Incomplete files are acceptable for an initial review. Final quotation, MOQ, sample timing, production schedule, testing, and shipping arrangements are confirmed after the main requirements are checked.
Upload files through the form or send them to info@jundongfactory.com.