Skip to content
Custom Electrician Tool Bags
OEM and private label tool bags engineered around real electrician tools, field use, brand standards, and repeat production.
- Develop from a tool list, reference sample, technical drawing, or existing model, with pocket positions planned around actual tool dimensions and access frequency.
- Select 600D, 900D, 1000D, or 1680D Oxford, nylon, canvas, PVC-coated fabric, reinforcement boards, webbing, zippers, and metal fittings according to use conditions.
- Control approved materials, measurements, stitching, logo placement, packing rules, and QC checkpoints before bulk production.
- Supported by 20+ years of OEM/ODM experience, 600+ employees, an 18,000 m² facility, and 80 QC inspectors for global programs.

Custom Electrician Tool Bags for Professional Brand Programs
Tool and Hardware Brands
Product teams developing private label electrician tool bags need more than a logo change. Pocket count, opening method, bottom support, webbing, zipper grade, trim colors, packaging, and price position must work as one specification. A structured development process also helps create coordinated totes, backpacks, pouches, and organizer bags under one product family.
Industrial Distribution Programs
Industrial distributors need stable specifications that can be reordered without reinterpreting every detail. Clear SKU separation, barcode placement, carton quantities, color records, and approved component references reduce warehouse errors and replacement disputes. Construction also needs to suit professional use while maintaining a cost level appropriate for dealer networks, catalogs, and regional stock programs.
Electrical Contractor Teams
Electrical contractors often issue tool bags to service crews, installers, maintenance teams, or apprentices. Tool access, balanced carrying, visible identification, and resistance at high-wear areas matter more than decorative styling. Development should begin with the tools carried, daily movement, vehicle storage, assignment rules, and expected replacement cycle across the workforce.
Private Label Collections
Private label programs require brand control across materials, Pantone colors, logo execution, hangtags, instructions, individual packing, and outer cartons. A bag may also need several capacities or pocket layouts for different technician roles. Version records and approved samples keep later orders aligned when colors, quantities, destinations, or packaging formats change.
Six Risks That Weaken Electrician Tool Bag Orders
Tool bag failures usually begin before sewing: incomplete tool data, weak load planning, vague approvals, and uncontrolled substitutions create costly problems later during bulk production.

Wrong Tool Layout
Pocket plans based only on a reference photo often fail during real use. Pliers may sit too deep, screwdriver sleeves may be loose, and meters may collide with heavier tools. Before pattern work, confirm:
- tool name and quantity
- length, width, and thickness
- access frequency
- preferred carrying position
A layout review should protect visibility, retrieval speed, weight balance, and enough clearance for gloved hands.
Concentrated Load Stress
Heavy tools transfer force through handles, shoulder anchors, seams, pocket bases, and the bottom panel. Decorative bartacks cannot correct a weak load path. Review:
- total packed weight
- heaviest individual item
- lifting and carrying method
- reinforcement layer and webbing extension
- agreed test setup
Load claims should follow the approved structure and test method rather than a generic kilogram statement under repeated daily use.
Material Performance Mismatch
A heavy-looking fabric does not guarantee suitable field performance. Coating, weave density, backing, abrasion exposure, edge finishing, and seam construction all affect service life. Compare:
- 600D to 1680D Oxford options
- nylon, canvas, or PVC-coated surfaces
- lining and reinforcement boards
- zipper, webbing, and hardware grades
Material approval should include color, hand feel, thickness, coating condition, and intended cleaning method during daily field work.
Sample-to-Bulk Drift
An attractive sample has limited value when production records are incomplete. Small changes in foam, webbing width, zipper tape, pocket depth, stitch placement, or logo position can alter function and appearance. Control:
- sealed approval sample
- confirmed material references
- measurement sheet and pattern version
- first bulk piece comparison
- recorded packaging standard
Every approved revision needs a dated record before production continues.
Branding and Packing Errors
Logo and packaging mistakes can delay launches even when the bag construction is acceptable. Distorted embroidery, weak rubber patches, incorrect barcode placement, mixed SKUs, or wrong carton marks create avoidable rework. Confirm:
- artwork size and placement
- color reference and finish
- label content and barcode
- unit packing method
- carton quantity and marks
Approval should cover both product branding and shipment identification.
Weak Quality Control
Final inspection alone cannot protect a functional tool bag order. Problems should be found while materials, panels, reinforcement parts, and first assembled pieces can still be corrected. Establish:
- incoming material checks
- cutting and measurement review
- inline stitching and reinforcement checks
- tool loading verification
- final appearance and packing inspection
Reports should identify the issue, affected quantity, correction, and approval status before carton sealing.
Design the Bag Around Real Electrician Tools
A useful layout begins with measured tools, packed weight, access frequency, and movement during work—not a generic pocket count or an empty reference photograph.
| Tool Group | Information Required | Layout Direction | Risk to Prevent |
|---|---|---|---|
| Multimeters and Testers | Overall dimensions, protective case, display orientation, cable set, and access frequency | Use a padded or separated pocket with enough opening clearance. Place the instrument where heavier tools cannot press against the screen or controls. | Screen damage, difficult removal, tangled leads, unstable instrument position, or excessive pressure from adjacent tools |
| Pliers and Cutters | Quantity, closed length, handle width, head width, and whether tools are insulated | Use vertical sleeves or divided pockets with suitable depth. Keep insulated handles visible and prevent metal heads from rubbing against meters or electronics. | Tools sinking too deeply, loose movement, damaged insulation, difficult identification, or excessive weight on one side |
| Screwdrivers and Nut Drivers | Quantity, shaft length, handle diameter, and preferred sequence | Use individual sleeves, elastic control, or stepped pockets. Allow enough space around larger handles and maintain visibility for quick selection. | Loose tools, torn pocket edges, handles blocking the opening, or slow identification during repetitive tasks |
| Electrical Tape and Small Rolls | Roll diameter, quantity, attachment preference, and frequency of use | Use external loops, covered pockets, clips, or dedicated internal sections according to working conditions and loss risk. | Tape falling from open loops, overcrowded pockets, poor access with gloves, or loose rolls moving through the main compartment |
| Terminals and Small Parts | Storage box size, loose-part use, number of categories, and refill method | Use zippered pockets, transparent sections, removable organizers, or divided boxes that remain separated from heavy tools. | Mixed components, punctured packaging, spilled parts, incorrect stock selection, or damage caused by heavy equipment |
| Drills and Batteries | Tool dimensions, battery count, individual weight, charger requirement, and carrying frequency | Position heavy items near the lower center with bottom support. Separate batteries from sharp tools and leave clearance around switches or terminals. | Bottom deformation, uneven carrying, damaged battery contacts, pressure on lighter tools, or excessive strain on handles |
| Test Leads and Cables | Coiled dimensions, cable length, connector type, and separation requirements | Provide a larger pocket, elastic restraint, removable pouch, or cable section that prevents twisting around hand tools and zipper paths. | Tangled leads, damaged connectors, cables caught in zippers, or long setup time during field work |
| Documents and Identification | Document size, inspection forms, manuals, ID cards, and labeling needs | Use a flat protected pocket away from sharp tools, liquids, and heavily loaded sections. Add an external identification window when team allocation requires it. | Torn paperwork, unreadable labels, mixed crew assignments, moisture exposure, or documents bending against tools |
Electrician Tool Bag Styles for Different Workflows
Service calls, installations, maintenance rounds, and equipment testing require different capacities, access methods, carrying systems, and tool organization rather than one universal bag design.
Open-Top Tool Tote
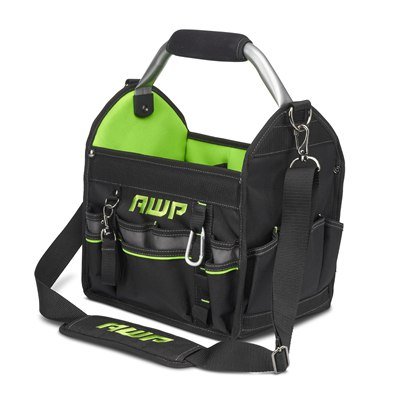
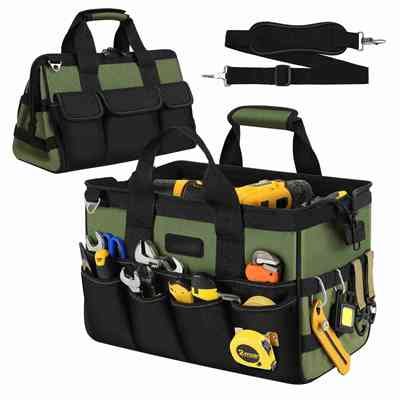
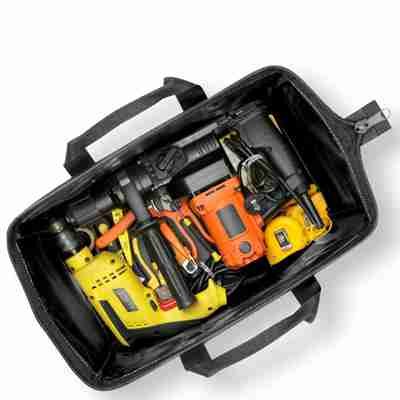
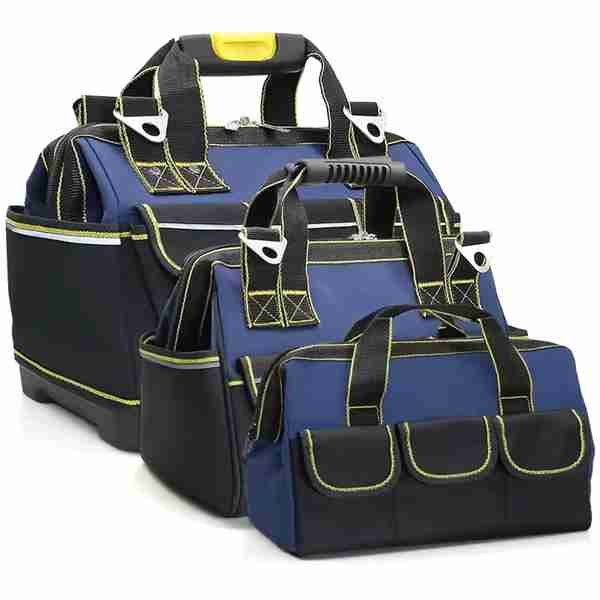
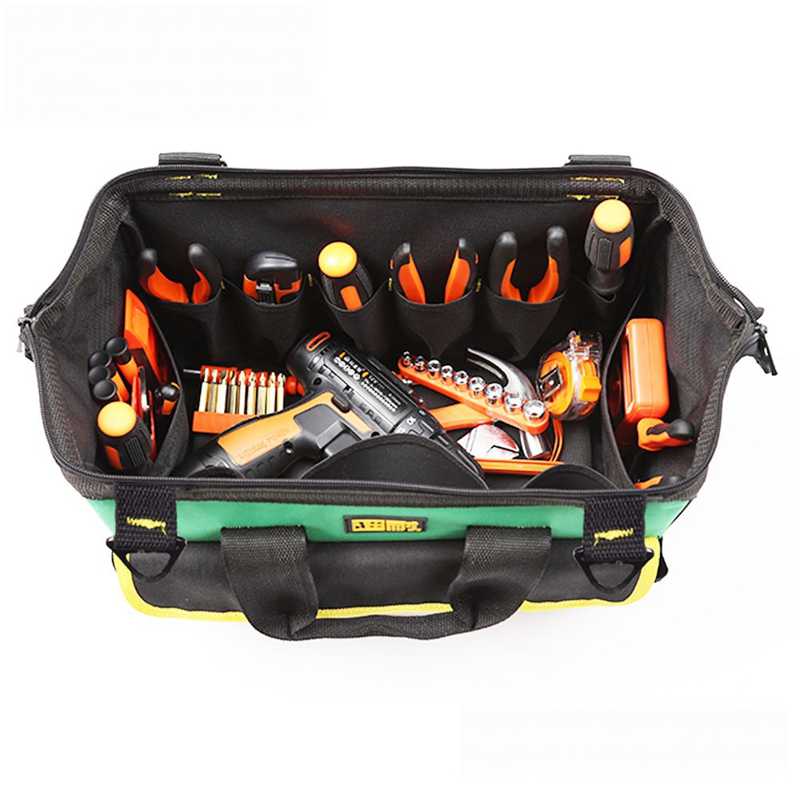
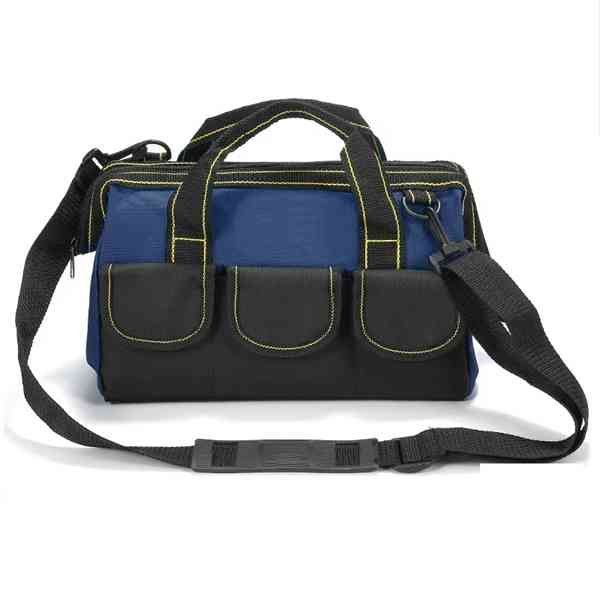
An open-top electrician tool tote keeps pliers, cutters, screwdrivers, tape, meters, and small hand tools visible during repeated tasks. The wide opening supports fast access without opening several zippers. Development should review opening stability, center balance, handle reinforcement, pocket depth, bottom support, and protection against tools tipping out during vehicle transport.
Tool Waist Pouch
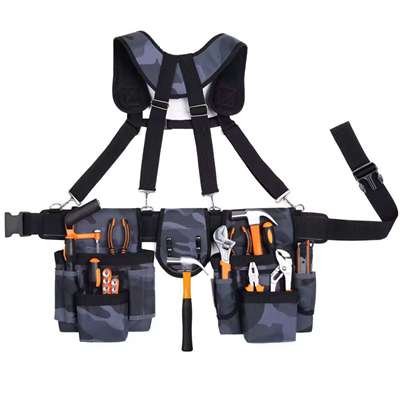
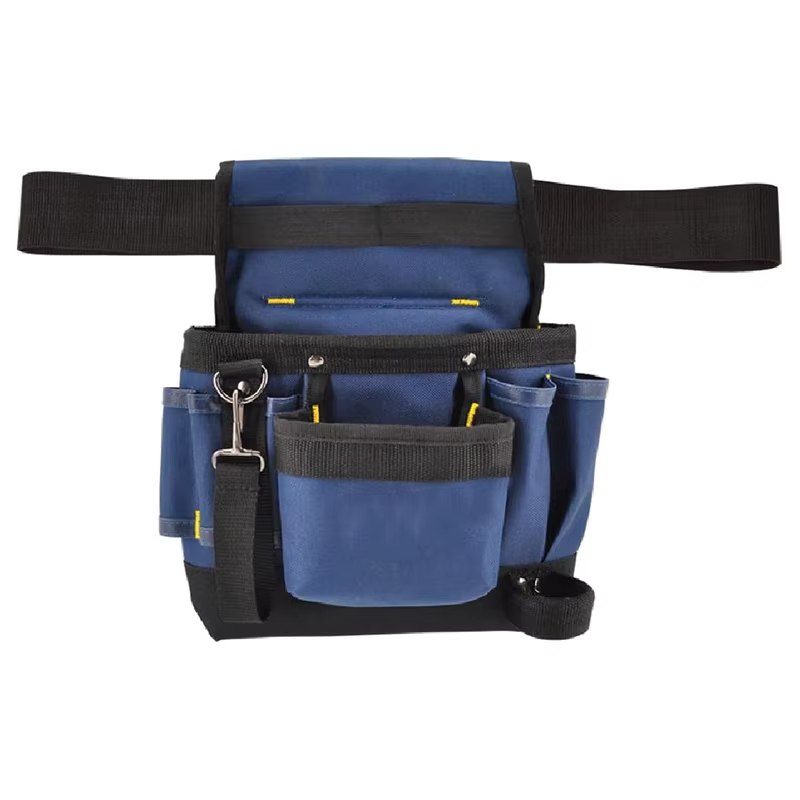
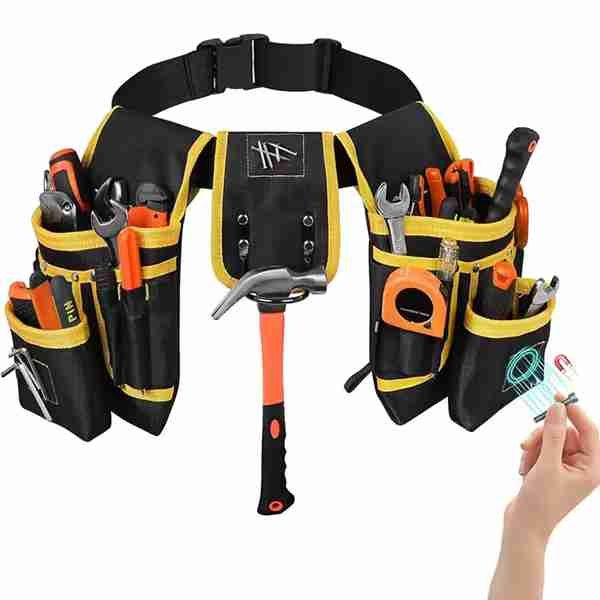
A compact waist pouch suits electricians who carry a selected group of high-frequency tools during installation, ladder work, inspection, or short service visits. Pocket depth should prevent screwdrivers and pliers from falling while allowing one-handed access. Belt width, attachment stability, edge reinforcement, hammer or tape loops, and the position of sharp tool ends require careful development.
Equipment Carry Bag

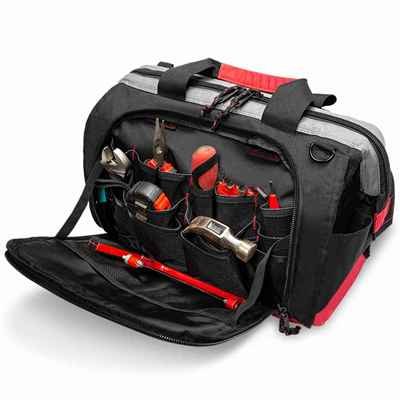
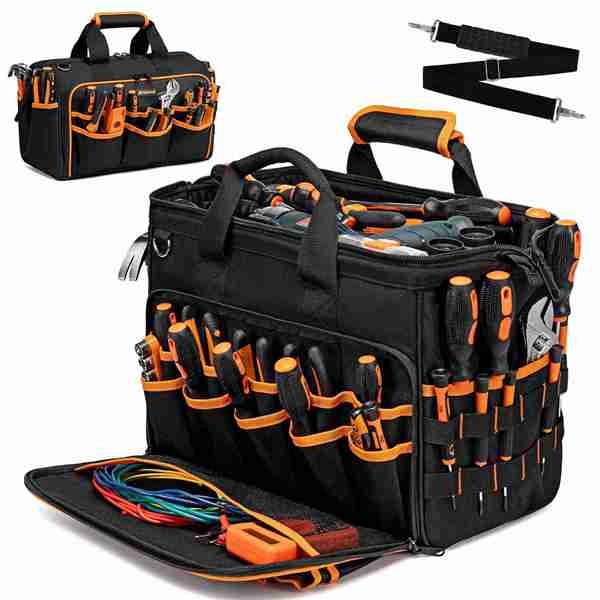
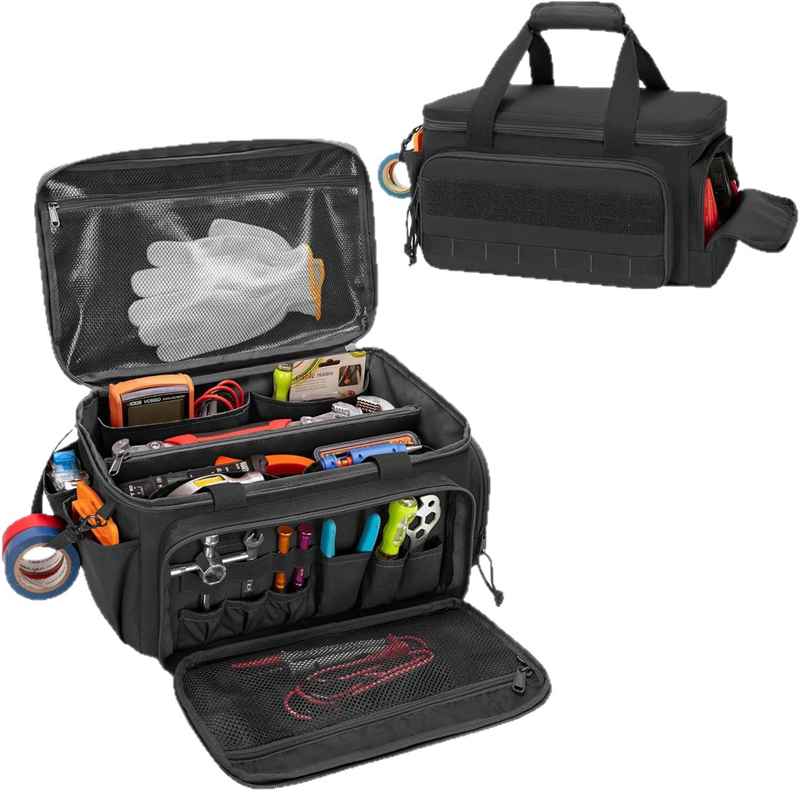
An equipment carry bag protects multimeters, thermal devices, diagnostic instruments, cable testers, and related accessories that need more separation than ordinary hand tools. Foam padding, adjustable dividers, restrained movement, cable storage, document pockets, and a stable base can be reviewed according to equipment dimensions. Protection requirements should be confirmed before material and construction decisions are finalized.
Tool Organizer Pouch
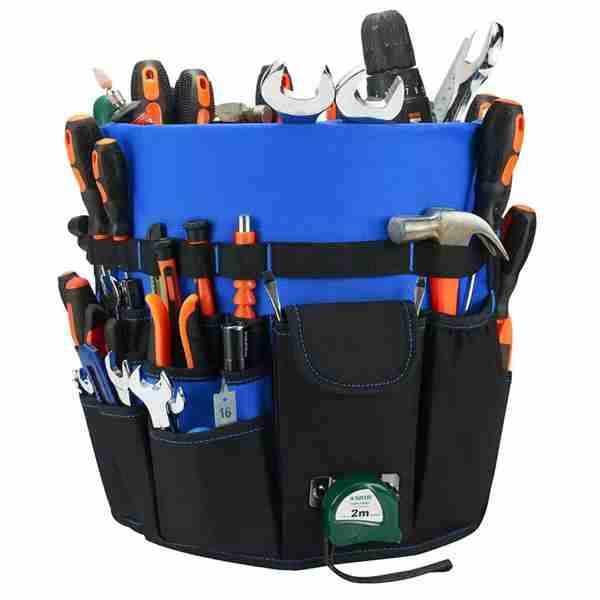
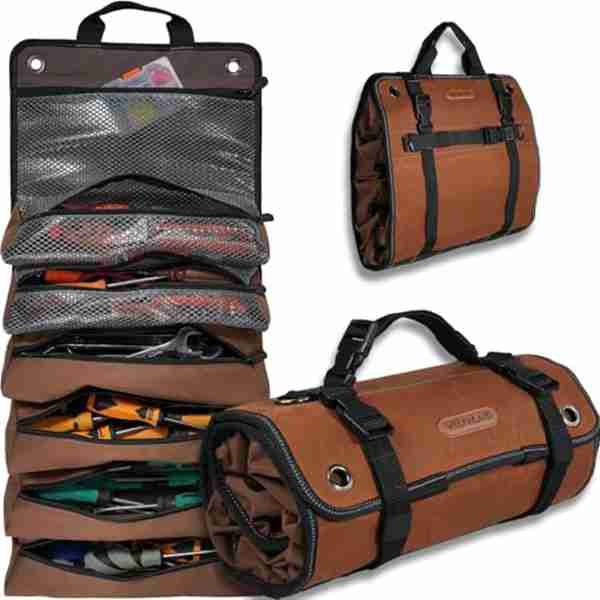
Organizer pouches separate meters, test leads, terminals, connectors, drill bits, fasteners, and electrical accessories from heavier hand tools. They can be sold individually or included in a coordinated tool bag collection. Clear internal grouping, suitable zipper access, labeled sections, removable inserts, and dimensions matched to component boxes help reduce mixing and improve stock control in service vehicles.
Electrician Tool Backpack

A tool backpack helps technicians keep both hands available while climbing stairs, moving through large facilities, or carrying equipment over longer distances. Heavy items should sit close to the back panel and lower center. Shoulder straps, back padding, handle anchoring, zipper access, tool separation, and weight distribution must be planned around the expected packed load.
Zippered Tool Bag
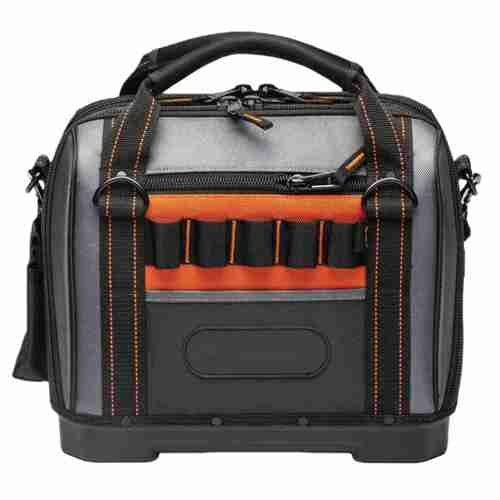
A zippered electrician tool bag provides more controlled storage when tools move between workshops, service vehicles, buildings, and project sites. The top opening should remain wide enough for larger equipment while closing without pressure from overfilled pockets. Zipper size, pullers, seam allowance, panel support, inner dividers, and end-pocket construction require review before the pattern is approved.

Pocket Layouts That Speed Up Electrician Tool Access
Vertical Tool Slots
Vertical sleeves work well for pliers, cutters, insulated screwdrivers, and nut drivers when depth follows measured tool length rather than a standard pocket template. The opening should stay visible after the main compartment is loaded, and the tool head should not press against meters or cables.
- Record overall length, head width, and handle diameter
- Set enough exposed handle for gloved access
- Reinforce the pocket base where metal heads rest
- Separate sharp edges from electronic equipment
External Quick Pockets
External pockets support repeated access to tape, markers, voltage pens, small pliers, and frequently used fittings without opening the main compartment. Pocket height, closure, and position should match the movement of the technician, especially during ladder work or narrow-space servicing.
- Place high-frequency items within natural hand reach
- Prevent open pockets from releasing tools during transport
- Keep heavy items away from one-sided load concentration
- Add closure only where retention is more important than speed
Elastic Tool Control
Elastic loops can hold slim tools in visible positions, but elastic tension, width, stitch anchoring, and tool diameter must be reviewed together. Loose elastic allows movement, while excessive tension slows removal and may mark insulated handles. Elastic should support organization rather than carry the full weight of heavy tools.
- Match loop width to each handle group
- Test removal with bare and gloved hands
- Anchor elastic into reinforced fabric
- Keep cutting edges away from elastic contact
Wide Opening Access
A wide opening improves visibility and reduces time spent moving tools aside, yet the opening also affects zipper length, top-panel stability, frame behavior, and packed-bag shape. Open-top totes and zippered models need different control methods. The opening should remain useful after pockets, dividers, and equipment are fully loaded.
- Check clear opening width with the bag packed
- Review zipper paths around bulky tools
- Support top edges against collapse
- Confirm access from the normal working position
Small Parts Separation
Terminals, connectors, screws, drill bits, fuses, and small electrical fittings should not move freely beside heavy hand tools. Zipper pockets, removable pouches, divided boxes, or transparent sections can support faster selection and cleaner stock control. The chosen method should reflect refill routines and whether parts move between technicians or vehicles.
- Separate delicate components from tool pressure
- Label sections for repeated replenishment
- Keep loose parts away from zipper tracks
- Review pouch removal and return during service work
Balanced Load Placement
Pocket placement changes carrying balance even when total capacity remains unchanged. Batteries, meters, and heavier tools should sit close to the center or lower section, while lighter accessories can occupy outer pockets. Left-right imbalance increases shoulder strain and may cause the bag to lean, twist, or fall during loading.
- Weigh the intended packed tool set
- Identify the three heaviest items
- Place dense items near structural support
- Test standing, lifting, shoulder carry, and vehicle storage
Select Materials for Strength, Weight, and Cost
Fabric names alone do not define performance. Structure, coating, reinforcement, stitching, tool weight, cleaning needs, appearance, and price position must be reviewed together.
Match Main Fabric to Use Conditions and Product Position

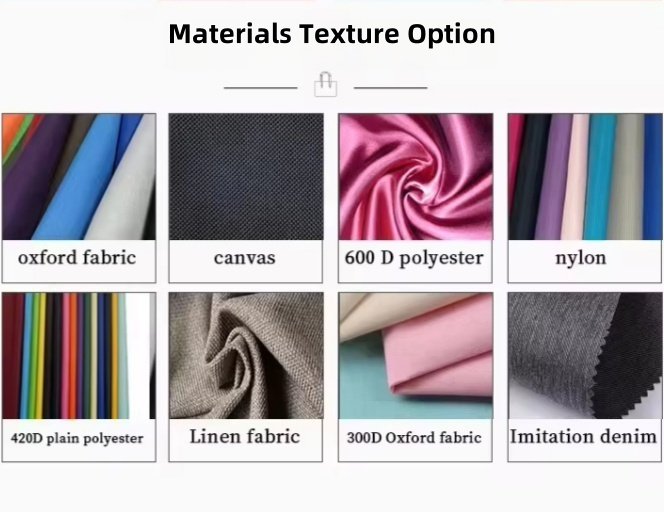
The main fabric affects abrasion resistance, bag weight, appearance, hand feel, sewing control, coating performance, and cost. Jundong commonly works with 600D, 900D, 1000D, and 1680D Oxford fabric, polyester, nylon, canvas, and PVC-coated fabric for tool and worksite bag projects. A material should be selected according to the intended program rather than by denier alone.
600D Oxford: Often considered for controlled-cost models, accessory pouches, lighter tool loads, or programs where unit weight and price need tighter control. Reinforcement can still be added around handles, pocket bases, and high-wear areas instead of increasing fabric weight across the entire bag.
900D and 1000D Oxford: Suitable for projects seeking a firmer construction and more substantial appearance without automatically moving to the heaviest available option. Coating, backing, weave quality, color consistency, and sewing performance should be checked on the actual material sample.
1680D Oxford: Frequently reviewed for premium-looking or heavier-duty tool bags. The fabric can create a dense, structured appearance, but extra thickness also affects folded seams, binding, pocket construction, needle selection, weight, and cost. A thicker fabric does not remove the need for correct reinforcement.
Nylon or polyester: Fiber selection can influence surface feel, abrasion behavior, color appearance, price, and availability. Material specifications should clearly state fiber type rather than using “Oxford” as the only description.
Canvas: Supports a traditional workwear appearance and can suit selected hardware or heritage-style collections. Surface marking, moisture exposure, weight, edge finishing, and cleaning expectations should be considered.
PVC-coated fabric: Can be reviewed for wipe-clean surfaces, bottom panels, or areas exposed to damp floors. Coating thickness, flexibility, odor, folding marks, stitching holes, and long-term use conditions still require sample confirmation.
Final approval should cover the fabric face, backing, thickness, color reference, coating condition, hand feel, and the exact area where each material will be used.
The visible fabric is only one part of a reliable electrician tool bag. Internal materials determine whether panels hold their shape, pockets stay open, equipment remains separated, and heavy items transfer force toward the intended load areas. Jundong can review EVA, PE board, foam padding, lining, reinforcement layers, heavy-duty webbing, and metal hardware according to the tool list and target construction.
EVA and foam padding: Padding may protect meters, electronic instruments, batteries, or body-contact areas. Thickness and firmness should match the equipment rather than being added uniformly. Soft foam can improve cushioning, while firmer material may help support shape. Excess padding can reduce usable capacity or make pocket access too tight.
PE board: Board reinforcement can support the bottom, back panel, side panels, dividers, or handle connection areas. Board thickness and shape should allow the bag to stand or resist deformation without creating sharp edges inside the construction. Large boards may also affect folding, packaging volume, and sewing sequence.
Lining and divider materials: A lining helps cover internal seams and separate tools from support layers. Dividers may require padding, board, hook-and-loop adjustment, or fixed stitching depending on the equipment. Light lining should not be expected to resist sharp tool ends without added protection.
Heavy-duty webbing: Webbing can distribute force from handles and shoulder anchors into a wider section of the bag. The most useful arrangement often extends beyond the visible attachment area and connects with reinforced panels. Webbing width, thickness, weave, color, edge feel, and stitch pattern should be confirmed.
Metal hardware and plastic fittings: D-rings, hooks, buckles, rivets, and adjusters must suit the strap width and intended load. Surface finish, corrosion exposure, thickness, movement, noise, and cost all affect selection.
Internal support should follow a clear load path. Adding more layers without understanding where the weight travels may increase cost and bag weight while leaving the main failure area unchanged.
Build Internal Support Around Weight and Tool Movement

Reinforce the Bottom Without Making Unsupported Claims

The bottom receives concentrated pressure from drill batteries, meters, hand tools, small equipment, and repeated contact with vehicles, concrete floors, workshops, and outdoor surfaces. Suitable bottom development should consider stability, wear, moisture exposure, cleaning, internal tool pressure, and the way the bag is lifted.
Layered fabric bottom: A second fabric layer or abrasion-resistant overlay can strengthen selected areas while keeping the bag flexible. Corners, piping lines, folded seams, and the points where internal dividers meet the bottom deserve extra attention because wear rarely occurs evenly across the whole panel.
PE board support: A removable or enclosed board can spread concentrated pressure and improve standing stability. Board dimensions should fit the internal seam line without pushing against corners or becoming visible from outside. Access for replacement or cleaning may be considered when required by the product design.
EVA or foam layer: EVA can provide cushioning between heavy tools and a support board, reduce hard contact, and help the bottom retain shape. Density and thickness need to match the packed equipment; excessive softness may still allow heavy tools to lean or create pressure marks.
PVC-coated reinforcement: A coated panel may support wipe cleaning and improve resistance to damp surfaces. The construction still needs suitable seam protection, because needle holes and joined edges can behave differently from the coated face. “Waterproof” should not be used without a defined structure and agreed test method.
Corner and seam protection: Binding, piping, doubled seam allowance, webbing reinforcement, or additional patches can be applied where drag and impact are expected. Reinforcement should not create bulky intersections that become difficult to sew consistently during bulk production.
Structure review: Plastic molded bases, special frames, or unusually high target loads need separate confirmation before quotation and sampling. Load capability should be evaluated from actual tool weight, bag dimensions, material combination, stitching, handle connection, and the agreed testing method. A generic kilogram claim does not represent every tool bag structure.
Reinforcement Details Behind Reliable Tool Bag Performance
Load performance comes from connected materials and seams. Every force path should be reviewed from packed tools through handles, straps, panels, pockets, hardware, and bottom support.
| Structure Area | Load or Wear Source | Construction Review | Inspection Method | Failure Risk |
|---|---|---|---|---|
| Handle Connection | Repeated lifting and sudden force when a fully packed bag leaves the floor or vehicle | Review webbing width, extension length, reinforcement layer, box stitching, cross stitching, bartacks, grip construction, and connection with the main body | Compare both handle sides, inspect stitch placement, load the approved tool set, lift repeatedly, and check panel distortion | Torn face fabric, loose stitches, uneven handles, local deformation, or separation at the connection |
| Shoulder Strap Anchor | Concentrated force during walking, climbing, and one-shoulder carrying | Extend the anchor into reinforced side panels. Match D-rings, hooks, webbing width, padding, and stitch pattern with the expected carrying method | Inspect hardware movement, strap adjustment, anchor symmetry, loaded shoulder carry, and twisting under movement | Damaged side panels, rotating hardware, slipped adjustment, uncomfortable load concentration, or anchor separation |
| Main Seams and Panels | Continuous outward pressure from tools, dividers, and overfilled pockets | Review seam allowance, stitch density, double stitching, binding, panel grain direction, reinforcement tape, and intersections between loaded sections | Check panel measurements, seam alignment, stitch consistency, internal finishing, and shape after full loading | Open seams, panel distortion, exposed raw edges, uneven shape, or progressive tearing near overloaded sections |
| Pocket Bases and Edges | Metal tool heads, sharp corners, repeated removal, and downward pressure | Add double layers, binding, reinforcement patches, suitable pocket depth, controlled edge shape, and stronger anchoring where required | Load the intended tools, inspect contact areas, remove tools repeatedly, and check for abrasion, puncture, or edge rolling | Punctured pockets, torn openings, tools sinking too deeply, damaged insulation, or detached pocket bases |
| Bottom Assembly | Concentrated weight, floor contact, vehicle storage, dragging, moisture, and impact | Review PE board, EVA, layered fabric, coated reinforcement, corner protection, seam position, and connection with side panels | Check standing stability, internal pressure marks, bottom shape, seam condition, loaded placement, and agreed drop or contact review | Sagging, unstable standing, worn corners, board movement, seam failure, or visible pressure marks |
| Zipper and Opening | Repeated opening, overloaded pockets, bulky equipment, and pressure across the top | Select zipper size, tape, slider, puller, opening shape, seam allowance, end reinforcement, and top-panel support according to structure | Open and close under the approved load, inspect alignment, check slider movement, and confirm tools do not obstruct the zipper path | Jammed sliders, separated teeth, torn zipper tape, distorted openings, or incomplete closure |
| D-Rings and Buckles | Strap movement, directional pulling, repeated adjustment, and exposure to work environments | Match metal or plastic components with webbing width, target use, surface finish, thickness, attachment method, and corrosion conditions | Inspect dimensions, finish, edge smoothness, movement, attachment, loaded operation, and any surface change after handling | Bent rings, cracked buckles, sharp edges, coating wear, excessive movement, or strap release |
| Webbing and Binding | Load transfer, edge abrasion, folded seams, and repeated contact with tools or clothing | Review fiber type, weave, width, thickness, edge feel, color, folding method, stitch rows, and connection with reinforced panels | Compare approved samples, measure width, inspect fraying, check stitch penetration, and review loaded contact areas | Frayed edges, webbing slippage, weak load transfer, uncomfortable contact, or inconsistent bulk appearance |
Target load should come from the actual packed tool set. Before sampling, record total weight, the heaviest item, lifting method, carrying style, and expected working conditions. During sample review, repeat lifting, shoulder carrying, standing, zipper access, and tool removal under the agreed load. Any capacity statement should apply only to the approved structure and confirmed review method.
Develop Samples From Tool List to Final Approval
Sampling should verify tool fit, load balance, access, structure, branding, and repeatability before materials and production capacity are committed to a bulk order.
Turn Project Information Into a Clear Development Brief

Reliable sample work begins with complete information rather than an unmarked reference photograph. The project brief should explain what the bag carries, how it moves between locations, which tools require immediate access, and how the finished product will be sold or issued.
Useful starting information includes:
- reference photographs, drawings, or an existing sample
- target outer dimensions and expected packed weight
- tool names, quantities, dimensions, and access frequency
- preferred tote, backpack, pouch, or zippered structure
- material, lining, webbing, zipper, and hardware preferences
- required logo method, Pantone colors, labels, and packing
- order quantity, destination, and required delivery date
Before the first pattern begins, the development team should identify missing information and construction conflicts. A large meter pocket may reduce space for plier sleeves. A wider opening may require stronger top support. Extra external pockets may change balance or increase carton volume. These relationships should be discussed before sewing begins.
Material suggestions should connect directly with product use. A controlled-cost 600D version may need targeted reinforcement at handles and pocket bases. A 1680D model may create a firmer appearance but require different seam handling. Foam, EVA, PE board, and webbing should be placed where they serve protection or load transfer, not added without a defined purpose.
A written development brief creates one reference for design, pattern, sampling, costing, and later approval. It also reduces repeated interpretation when several departments review the same model.
The first sample should test structure before visual perfection. Pattern accuracy, pocket depth, opening width, handle placement, bottom support, and tool movement need attention before final colors, labels, or retail packing receive full approval.
Real electrician tools, or dimensionally accurate substitutes, should be loaded into the sample. The review should include:
- visibility and removal of high-frequency tools
- clearance around meters, batteries, and test equipment
- pocket retention during walking and vehicle transport
- left-right weight distribution
- standing stability after full loading
- handle comfort and shoulder-strap position
- zipper access under the agreed load
- pressure created by tool heads and sharp corners
Several small changes may be required. A plier pocket may need to become 15 mm shallower. A meter divider may require firmer foam. A shoulder anchor may need a longer webbing extension. A bottom board may need reshaping to avoid pushing against the corner seam. Each change should be recorded rather than communicated only through photographs or informal messages.
Visual review follows functional adjustment. Logo size, rubber-patch thickness, embroidery density, woven-label position, trim color, piping, pullers, and hardware finish should be checked on the actual material. Approval on a digital drawing alone cannot show how a logo behaves on thick Oxford fabric, curved pockets, coated surfaces, or reinforced seams.
The revised sample should represent the intended bulk construction, not a presentation model made with unavailable materials or time-consuming methods that cannot be repeated efficiently.
Build and Test the First Functional Sample

Seal the Final Sample and Approval Records

Final approval should create a controlled reference for production, QC, packing, and repeat orders. Verbal approval or a group of scattered photographs is not enough for a multi-pocket electrician tool bag.
The approval set should include:
- one sealed physical sample
- final measurement sheet with tolerances
- material and color references
- zipper, webbing, lining, board, foam, and hardware details
- pocket map and reinforcement description
- stitch construction and bartack positions
- logo artwork, size, color, and placement
- label, barcode, unit packing, and carton instructions
- dated revision record
The sealed sample should be checked under the agreed tool load before approval. Zippers should close without forced pressure. Handles should remain aligned. Shoulder carrying should not pull the bag sharply to one side. Tools should stay within their planned sections. The bottom should retain the intended shape when the bag is lifted and placed down.
When several sizes, colors, or role-specific layouts are included in one program, each version needs a clear model name or SKU. Shared materials can be recorded once, while differences in dimensions, pockets, logos, labels, or packing must remain easy to identify.
Sample approval is also the correct stage to confirm cost and timing. Any change to fabric weight, pocket count, reinforcement, hardware, logo method, or packaging may affect unit price, material minimums, sample revision time, and production schedule.
Protect Approved Details During Bulk Production
Sealed Approval Sample
The approved physical sample provides the clearest reference for shape, pocket position, opening behavior, reinforcement, logo appearance, and packing presentation. It should remain protected and identified with the model, version, approval date, and related specification. Production pieces should be compared with the sealed sample whenever appearance or construction is unclear.
Material Reference Control
Main fabric, lining, webbing, zipper tape, foam, board, binding, elastic, thread, and hardware should be recorded before cutting begins. Color names alone are not sufficient. Material codes, approved swatches, Pantone references, thickness, width, finish, and component photographs help prevent silent substitutions between sampling, bulk production, and later repeat orders.
Pattern and Measurement Records
Final patterns and measurement sheets should carry the approved version date. Critical dimensions include outer size, opening width, pocket depth, tool-slot width, handle position, shoulder-anchor location, and bottom-board shape. Pattern changes made after approval require written review because a small adjustment can influence tool fit, appearance, sewing sequence, and packed volume.
Pre-Production Review
Before bulk cutting, development, production, QC, and packing teams should review the approved sample and order details together. The review covers material allocation, sewing sequence, reinforcement positions, Logo method, inspection focus, SKU differences, labels, unit packing, carton quantity, and delivery schedule. Unresolved details should be closed before large quantities enter production.
First Bulk Piece Approval
The first complete production piece should be compared with the sealed sample before normal output increases. Review measurements, tool loading, pocket access, stitching, handle symmetry, zipper movement, bottom shape, Logo placement, labels, and packing. Any difference should be corrected at the earliest stage, with the approved result recorded for the production line and inspection team.
Inline Production Follow-Up
Inline checks should focus on operations that become difficult to repair later, including pocket assembly, reinforcement layers, handle attachment, shoulder anchors, zipper installation, bottom construction, and Logo application. Inspection findings should record the affected quantity, correction method, responsible process, and follow-up result. Early control reduces rework after final assembly and packing.
OEM, ODM, and Private Label Development for Tool Bag Programs
Different starting materials require different development routes, but every route should end with confirmed specifications, an approved sample, controlled branding, and repeatable order records.
OEM Specification Control
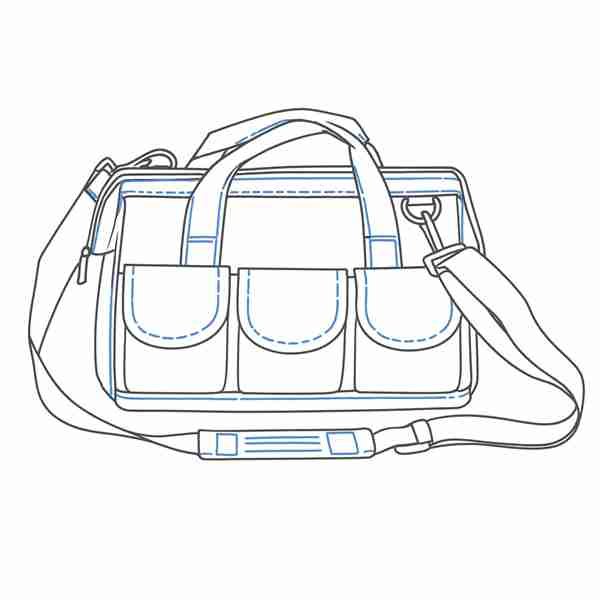
OEM development starts from a technical drawing, approved sample, measurement sheet, bill of materials, or defined product specification. The goal is not to reinterpret the design during every order, but to translate approved details into repeatable production records.
- Confirm dimensions, tolerances, materials, and components
- Record pocket position, reinforcement, and stitch construction
- Lock logo size, color, and placement
- Align packing, labeling, and carton requirements with the final sample
ODM Product Development
ODM work suits programs beginning with a reference image, tool list, use scenario, price position, or product-family plan rather than a finished specification. Development should convert the concept into a workable structure before visual details dominate the process.
- Review tool dimensions, packed weight, and access frequency
- Propose bag type, material, opening, and pocket arrangement
- Prepare the first pattern and functional sample
- Revise recorded details before final approval
Private Label Execution
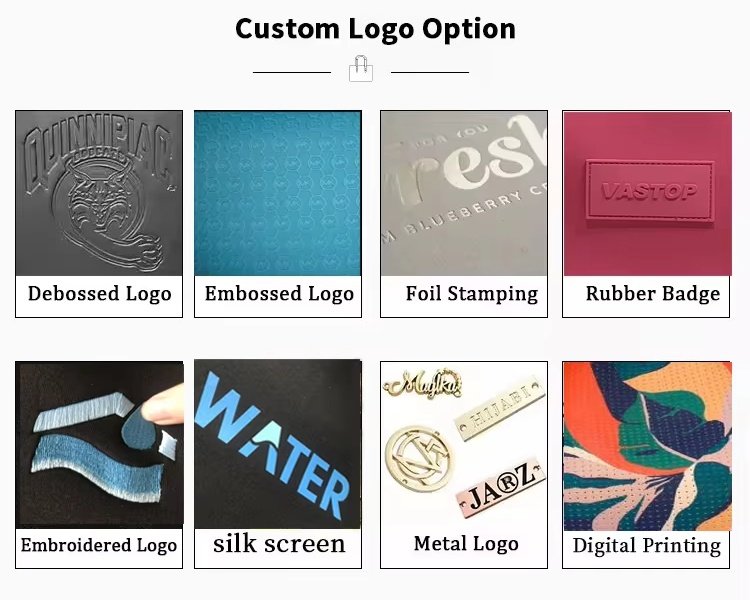
=Private label work connects the bag structure with recognizable brand presentation. Logo method, color, trim, label content, and packaging should be selected as one coordinated system. For tool bags, rubber patches, embroidery, woven labels, and screen printing are common options, subject to material and placement review.
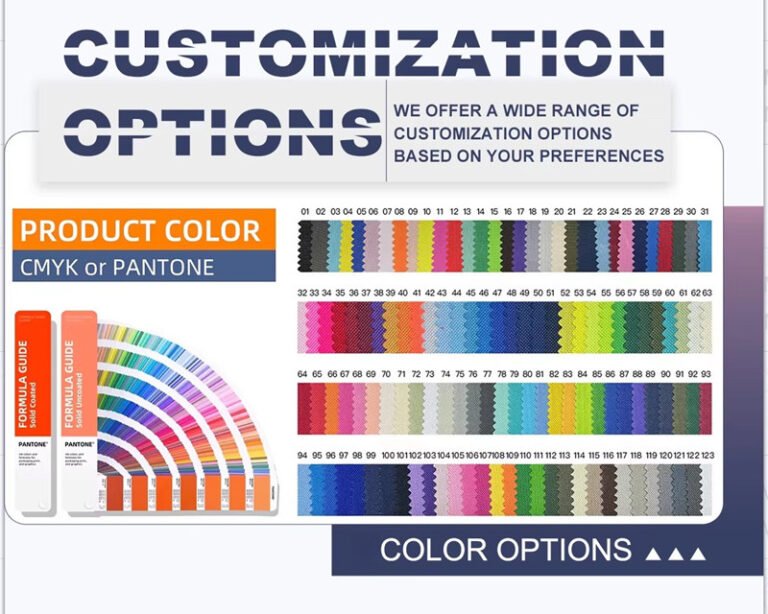
- Provide editable vector artwork and Pantone references
- Confirm logo proportion, edge clarity, and attachment
- Approve the result on the actual fabric
- Use the approved sample as the bulk standard
Collection and SKU Planning
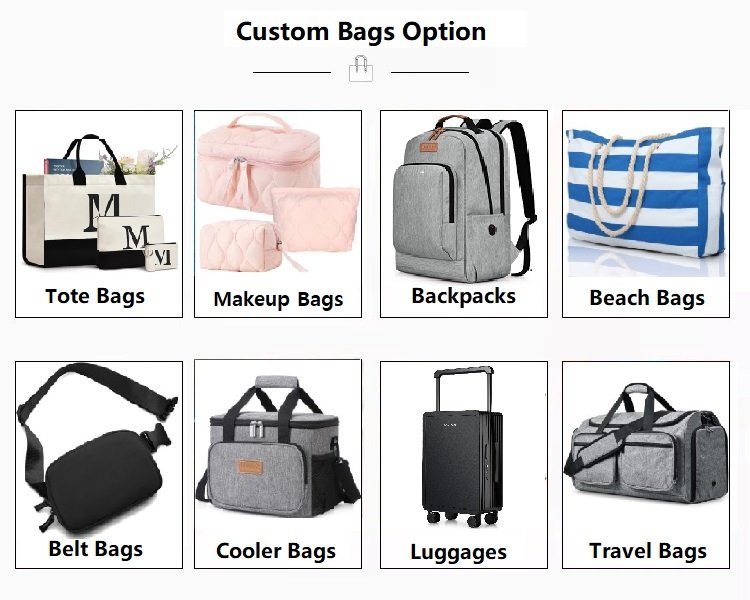
A single electrician tool bag can develop into coordinated totes, backpacks, waist pouches, organizer bags, and equipment cases. Product-family planning helps keep materials, trim colors, logo scale, label content, and packaging language consistent while allowing each style to suit a different tool load.
- Define model names and SKU logic
- Separate sizes, colors, and role-specific layouts
- Record shared and style-specific components
- Keep repeat-order versions linked to final approvals
Quality Checks for Electrician Tool Bag Orders
Inspection should protect tool fit, load structure, daily access, brand presentation, SKU accuracy, and shipment readiness across materials, production, final assembly, and packing.
| QC Area | Inspection Details | Control Stage | Risk Reduced |
|---|---|---|---|
| Main Fabric and Lining | Verify material type, color, coating, width, thickness, surface defects, backing, hand feel, and approved use position | Incoming material inspection before cutting | Incorrect fabric, color variation, coating problems, visible defects, or unapproved substitution |
| Webbing, Zippers, and Hardware | Check webbing width and thickness, zipper size and movement, slider finish, D-rings, hooks, buckles, rivets, elastic, and binding | Incoming inspection and first assembly review | Weak components, incorrect sizing, rough edges, poor movement, color mismatch, or attachment problems |
| Cutting and Panel Measurements | Confirm outer panels, pocket pieces, reinforcement parts, openings, tool slots, handle positions, and bottom components against approved patterns | Cutting inspection and pre-sewing review | Incorrect size, misaligned pockets, reduced capacity, uneven appearance, or assembly difficulties |
| Stitching and Reinforcement | Inspect stitch density, seam allowance, double stitching, box stitching, cross stitching, bartacks, binding, internal finishing, and reinforcement placement | Inline inspection during sewing | Open seams, loose stitching, weak handles, detached pockets, fraying, or inconsistent bulk construction |
| Handles and Shoulder Straps | Check alignment, webbing extension, padding, anchor position, hardware connection, adjustment, comfort, and movement under the agreed load | First-piece review and final functional check | Uneven carrying, concentrated pressure, strap slippage, damaged side panels, or connection failure |
| Pocket Layout and Tool Fit | Load the approved tool set and confirm pocket depth, handle visibility, tool retention, gloved access, instrument separation, and small-parts storage | Sample approval, first bulk piece, and final random inspection | Poor access, loose tools, damaged equipment, mixed components, imbalance, or unsuitable pocket dimensions |
| Bottom Structure | Check board dimensions, EVA or foam placement, layered fabric, coated reinforcement, corners, seams, standing shape, and internal pressure areas | Inline assembly and final loaded review | Sagging, unstable standing, visible board edges, worn corners, pressure marks, or seam damage |
| Zipper and Opening Function | Operate zippers under the approved load, check slider movement, teeth alignment, pullers, end stops, opening clearance, and obstruction from tools | Inline inspection and final functional check | Jammed zippers, incomplete closure, torn tape, separated teeth, distorted openings, or slow access |
| Logo and Brand Details | Verify artwork, size, color, position, embroidery quality, rubber-patch surface, woven-label text, print clarity, and attachment | First logo approval, inline branding check, and final inspection | Incorrect branding, weak attachment, distorted artwork, color deviation, unreadable text, or inconsistent placement |
| Measurements and Appearance | Measure approved control dimensions and inspect bag shape, symmetry, cleanliness, loose threads, marks, wrinkles, panel alignment, and trim finish | First-piece approval and final inspection | Size variation, poor presentation, uneven panels, visible defects, or differences from the sealed sample |
| Labels, Barcodes, and SKU | Check model name, color, size, barcode, hangtag, care label, country information, SKU separation, and unit quantity | Packing-line inspection before sealing | Mixed products, wrong barcode, missing labels, incorrect warehouse identification, or retail receiving delays |
| Unit Packing and Cartons | Verify bag folding, protective materials, individual packing, carton quantity, carton dimensions, gross weight, shipping marks, and destination information | Final packing and pre-shipment review | Deformation, surface damage, incorrect quantities, overweight cartons, wrong marks, or destination errors |
Inspection records should show more than “pass” or “fail.” Useful records identify the model, order reference, inspection stage, sample quantity, issue description, affected quantity, correction method, follow-up result, and approval status. Photographs should focus on the measured or inspected area and remain linked to the relevant SKU.
Jundong’s quality team includes 80 QC inspectors across the facility. Inspection allocation, checkpoints, and reporting depth are arranged according to product complexity, order quantity, packaging, and agreed project requirements.
Factory Qualification Evidence for Electrician Tool Bag Programs
A reliable factory should prove development depth, structural understanding, production control, QC capability, packing accuracy, and repeat-order discipline through records, processes, and physical samples.
Verify Product Development Before Reviewing Production Capacity

Large production capacity has limited value when the development team cannot translate real electrician tools into a workable bag structure. Initial qualification should therefore begin with technical understanding rather than factory size alone.
A capable development team should be able to review:
- actual tool names, dimensions, quantities, and packed weight
- pocket depth, opening width, tool visibility, and access frequency
- handle and shoulder-strap load paths
- bottom support and high-wear areas
- meter protection and separation from metal tools
- material, zipper, webbing, hardware, and reinforcement options
- logo placement, packaging, SKU rules, and repeat-order records
The strongest evidence comes from physical work. Pattern files should show how pocket dimensions relate to the approved tools. Loaded samples should demonstrate whether pliers remain visible, test equipment stays protected, and the bag retains balance after lifting. Reinforcement should be visible in cutaway samples, unfinished components, or sewing-stage photographs rather than described only with general terms.
Technical communication also matters. When a requested structure creates a conflict, the team should explain it before sampling. A deeper external pocket may reduce internal capacity. A wider zippered opening may require stronger top support. Thick 1680D fabric may improve appearance while increasing seam bulk and finished weight. A plastic base or special frame may require separate tooling and construction confirmation.
Development records should connect the original brief, pattern version, sample changes, material approval, cost revision, and final sample. A factory able to show this connection is better prepared to repeat an approved product than one relying on memory, informal messages, or isolated photographs.
Qualification should therefore ask not only, “Can the bag be made?” A stronger review asks, “Can the approved structure be explained, recorded, inspected, and repeated across the intended order?”
Jundong is a Guangdong custom bag factory with more than 20 years of OEM and ODM experience. The facility covers approximately 18,000 square meters, employs more than 600 people, and includes 80 QC inspectors across its operations. These figures are most useful when connected with specific order responsibilities.
20+ years of experience: Long-term development work supports earlier identification of material, pattern, sewing, branding, packing, and production risks. Experience does not replace sample approval, but it helps the team raise relevant issues before large quantities are committed.
600+ employees: A larger workforce supports pattern making, sampling, cutting, sewing, logo application, assembly, inspection, packing, export coordination, and order follow-up. Capacity planning still depends on current schedules, product complexity, quantity, and delivery requirements.
18,000 m² facility: Production space supports material handling, cutting, assembly, inspection, packing, carton storage, and order movement. For multi-SKU programs, separated materials, labels, finished goods, and cartons help reduce mixing during production and packing.
80 QC inspectors: QC personnel support checks from materials and logo details through sewing, finished products, labels, and cartons. The number does not represent a guarantee of defect-free output. Its value lies in arranging inspection responsibilities at several stages instead of relying only on a final check.
Factory evidence should include current production photographs, sample-room activity, tool bag sewing details, measurement checks, loaded-product inspection, label verification, and carton review. Audit reports, certificates, or material documents should be supplied only when relevant and valid for the specific project.
For an electrician tool bag program, scale should result in clearer control of patterns, materials, approved samples, first production pieces, inspection records, packaging instructions, and repeat-order versions. Numbers become credible when they explain how project risks are managed.
Connect Jundong’s Factory Data With Project Control

Representative 1,500-Piece Planning Model

The following planning model illustrates how a three-SKU electrician tool bag program could be organized. It is provided as a development example rather than a published named-client order.
SKU 01 — 500 Open-Top Tool Totes: A 1680D Oxford tote with visible vertical tool sleeves, external tape and tester pockets, reinforced handle webbing, PE board bottom support, a rubber logo patch, hangtag, barcode label, and individual polybag.
SKU 02 — 500 Zippered Service Bags: A 1000D Oxford model with a wide zippered opening, padded meter section, divided plier pockets, test-lead storage, shoulder strap, screen-printed internal identification, woven label, and retail-ready unit packing.
SKU 03 — 500 Electrician Tool Backpacks: A structured backpack with a lower heavy-tool compartment, internal screwdriver sleeves, protected meter pocket, reinforced shoulder anchors, padded back panel, embroidered logo, SKU label, and separate carton marks.
Planning would begin with a shared tool list, design language, Pantone colors, logo proportions, zipper finish, label format, and packaging rules. Each model would then receive its own dimensions, pocket map, load review, material list, pattern version, sample approval, and carton instruction.
Shared components could include the main trim color, webbing family, zipper finish, logo artwork, care-label format, and hangtag design. Style-specific records would cover pocket dimensions, board shape, padding, strap construction, tool capacity, and packing size.
Before bulk cutting, the three approved samples and SKU files would be reviewed together. Packing instructions would separate model numbers, barcode data, carton quantities, and destination marks. First production pieces would be checked against their own sealed samples rather than one general collection standard.
Such planning helps a 1,500-piece program remain organized while giving each 500-piece design the structure required for its intended tool load and working method.
Plan MOQ, Cost, Samples, and Production Timing
Clear commercial planning begins after size, materials, structure, branding, quantity, packing, testing, and delivery requirements have been reviewed as one complete specification.
| Commercial Item | Jundong Position | Main Influencing Factors | Information to Confirm |
|---|---|---|---|
| Standard MOQ | MOQ usually starts from 500 pieces per design. Selected simple styles may be reviewed at 200–300 pieces case by case. Some basic low-unit-value items may require 1,000 pieces or more. | Material minimums, custom colors, pocket complexity, hardware, logo process, packing, production setup, and number of versions | Design quantity, color quantity, SKU list, required materials, Logo method, packing format, and annual volume estimate |
| Unit Cost | Accurate pricing is prepared after the structure and order conditions are clear. Jundong focuses on balancing material performance, workmanship, brand presentation, cost control, and delivery reliability rather than competing through unsupported lowest-price claims. | Bag dimensions, main fabric, lining, pocket count, EVA or PE board, reinforcement, webbing, zippers, hardware, Logo, labels, packing, quantity, testing, and delivery terms | Reference image, dimensions, tool list, expected load, material preference, Logo artwork, quantity, target packing, destination, and required timing |
| Sample Fee | Sample fees are reviewed according to pattern work, materials, components, Logo setup, construction complexity, and required revisions. When the bulk order reaches 2,000 pieces, the sample fee can be refunded or deducted according to the confirmed quotation terms. | Number of sample versions, special materials, custom hardware, printing or embroidery setup, molded components, packaging samples, and courier requirements | Final sample quantity, color versions, Logo process, packing sample needs, delivery address, and whether several designs are developed together |
| Sample Time | Sampling usually takes 5–7 days after essential details and suitable materials are confirmed. Some simple styles may take 2–3 days. Complex structures, special components, repeated revisions, or custom packaging require additional review time. | Pattern complexity, material availability, pocket quantity, reinforcement, special hardware, Logo process, sample revisions, and packing development | Complete development brief, approved materials, tool measurements, Logo file, sample quantity, revision expectations, and sample delivery date |
| Bulk Production | Standard bulk production time is usually 20–30 days after sample approval, deposit, material confirmation, and order details are complete. More complex constructions, large quantities, special materials, multi-SKU packing, or testing requirements may require a longer schedule. | Order quantity, material preparation, production capacity, pocket complexity, Logo process, QC requirements, packing workload, and current production schedule | Approved sample, final quantity, SKU breakdown, packaging files, testing plan, delivery deadline, and required inspection arrangement |
| Production and Transit | Production lead time and shipping transit time should be planned separately. Completion at the factory does not represent arrival at the destination. Shipping arrangements are reviewed according to order size, weight, volume, deadline, destination, budget, and trade terms. | Courier, air, sea, rail, appointed forwarder, carton volume, gross weight, customs requirements, destination, and seasonal logistics conditions | Delivery address, port or airport, requested trade term, appointed forwarder details, required arrival date, and preferred shipping method |
| Cost Optimization | Cost control should remove unnecessary complexity without weakening the main load structure. More stable savings often come from shared materials, controlled color choices, standardized hardware, coordinated SKUs, efficient packing, and clear order planning. | Material utilization, number of unique components, custom colors, pocket count, hardware variety, packaging volume, carton efficiency, and repeat-order planning | Critical functions that cannot change, optional features, expected retail position, annual program size, shared components, and acceptable packing adjustments |
A reliable quotation cannot be prepared from one unmarked photograph alone. Send the product type, outer size, tool list, expected packed weight, material preference, pocket requirements, Logo artwork, quantity, packaging, destination, and deadline. Jundong can then review the structure, MOQ, sample route, cost factors, production timing, and delivery options with clearer boundaries.
Packaging and SKU Control for Tool Bag Programs
Packing instructions should protect product shape, identify every version, support warehouse receiving, and keep models, labels, quantities, and destinations correctly separated.

Individual Product Protection
Heavy tool bags may contain rigid boards, thick webbing, metal fittings, coated panels, padded dividers, or structured pockets that can press against one another during storage and transport. Unit packing should protect the product without forcing permanent folds into reinforced areas.
- Confirm folding position before bulk packing
- Protect metal fittings and logo surfaces from rubbing
- Keep shoulder straps, inserts, and removable parts together
- Use OPP bags, polybags, sleeves, or other agreed materials
- Add instruction cards or accessory lists when required
Packing dimensions should be reviewed against carton volume, product shape, unit weight, and presentation requirements.
Labels and Barcodes
Hangtags, care labels, woven labels, barcode stickers, price-label areas, instruction cards, and product identification should be approved before packing begins. Barcode information must be supplied or confirmed by the brand team rather than created from assumptions.
- Match model name, color, size, and SKU
- Confirm barcode format, number, size, and placement
- Check country information and required label wording
- Protect scan areas from folds, curves, and textured surfaces
- Compare first packed units with the approved reference
Label control helps retail, distribution, and warehouse teams identify the correct product without opening every package.
Multi-SKU Separation
Programs with several bag styles, colors, pocket layouts, logo versions, or destinations require clear separation throughout packing. A correct bag placed in the wrong package or carton can still create warehouse delays and inventory errors.
- Assign a unique SKU to every required version
- Use separate packing areas, bins, or visible identifiers
- Match product, hangtag, barcode, and unit package
- Record packed quantities by SKU
- Check mixed-carton rules before sealing
- Keep revision changes linked to the latest packing file
Final counts should reconcile production quantities, packed units, carton totals, and any approved spare pieces.
Cartons and Destinations
Outer cartons should support handling, storage, transport, receiving, and destination identification. Tool bags can create high carton weight even when carton dimensions appear moderate, so quantity per carton should be reviewed from the packed product rather than copied from another style.
- Confirm carton dimensions and packed quantity
- Check gross and net weight where required
- Apply PO number, style number, SKU, color, and destination marks
- Separate cartons for different warehouses or delivery locations
- Use protective inserts when hardware or structured bottoms may move
- Verify carton labels before loading
Shipping marks and destination data should follow approved instructions and remain consistent with commercial and packing documents.
Prepare Destination, Documents, and Delivery Before Production
Destination rules, shipment documents, carton data, and transport plans should be confirmed early so production, packing, freight handover, and required arrival timing remain aligned.
Destination Requirements
Material, label, packaging, and testing needs can differ according to product use, destination country, sales channel, retailer instructions, and internal brand standards. Orders entering the United States, European Union, United Kingdom, Australia, Japan, or other regions may require different document or labeling reviews.
- Confirm the destination country and sales channel
- Provide required chemical, material, or performance standards
- Identify retailer, distributor, or platform packing rules
- Confirm warning text, origin labels, barcodes, and care information
- Raise third-party testing needs before material approval
Jundong can review supplied requirements and coordinate related materials, labels, documents, or testing discussions. Compliance should be confirmed according to the specific product, material, order, and document scope rather than assumed from a general certificate.
Export Documents
Shipment documents should reflect the final product, quantity, packing, trade term, and freight instructions. Jundong can assist with commercial invoices, packing lists, carton details, shipping marks, destination information, and HS Code coordination according to order and forwarder requirements.
- Confirm company and delivery information
- Provide PO numbers, style numbers, and SKU references
- Review carton quantity, dimensions, gross weight, and net weight
- Align shipping marks with approved packing instructions
- Confirm documents required by the appointed forwarder
- Review HS classification with the relevant import or logistics parties
Final import classification and clearance requirements may depend on destination authorities, the appointed forwarder, and importer-side documentation. Export files should therefore be checked before shipment rather than corrected after cargo handover.
Shipping Coordination
Transport should be selected according to quantity, packed volume, gross weight, deadline, destination, budget, and delivery responsibilities. Samples and urgent units may move by express courier or air freight, while larger orders often use sea freight. Rail freight or an appointed forwarder may also be considered for suitable routes.
- Separate production time from transit time
- Confirm the required arrival date, not only the factory completion date
- Review carton volume before choosing the freight method
- Provide the forwarder contact and booking instructions early
- Confirm the handover port, warehouse, airport, or delivery address
- Review FOB, CIF, DDP, or other terms case by case
Jundong can coordinate shipment information and freight handover according to the agreed arrangement. Customs clearance results cannot be guaranteed because destination rules, import documents, forwarder handling, and local authorities remain outside factory control.
Make a Tool Bag Sample First?
A reliable custom electrician tool bag should do more than hold tools. It should match the tool sizes, pocket layout, carrying weight, technician workflow, jobsite conditions, vehicle storage, and branding requirements. Sampling helps confirm capacity, reinforced stress areas, handle comfort, zipper access, and internal organization before bulk production. Once these details are approved, pricing, production, inspection, packing, and delivery become easier to control.
Client Testimonials
800+ brand Clients Trust Jundong



FAQs About Electrician Tool Bags
The following information covers MOQ, materials, structure, sampling, branding, production control, QC, and project details commonly reviewed before custom development begins.

What is the MOQ for custom electrician tool bags?
The standard MOQ usually starts from 500 pieces per design. Selected simple constructions using available materials and straightforward branding may be reviewed at 200–300 pieces case by case. Basic products with a low unit value or special material minimums may require 1,000 pieces or more. Final MOQ depends on fabric, color, structure, hardware, logo process, packing, and SKU quantity.
Can pockets be developed around our exact tool list?
Yes. Send the tool names, quantities, dimensions, photographs, packed weight, and access frequency. Pocket depth, tool-slot width, opening position, meter protection, small-parts storage, and weight distribution can then be reviewed around the actual equipment. Real tools or dimensionally accurate substitutes should be loaded into the sample before final approval.
Which fabrics suit heavy electrician tool bags?
Common options include 600D, 900D, 1000D, and 1680D Oxford fabric, polyester, nylon, canvas, and PVC-coated materials. Selection depends on abrasion exposure, tool weight, appearance, coating, cleaning, sewing construction, and cost position. A thicker fabric does not replace correct reinforcement at handles, pocket bases, shoulder anchors, seams, and the bottom.
Can the bottom and handles receive extra reinforcement?
Yes. Bottom options may include layered fabric, PE board, EVA, foam, coated panels, corner patches, binding, and reinforced seams. Handle strength can be improved through extended webbing, reinforcement layers, box stitching, cross stitching, and bartacks. Plastic molded bases, special frames, or unusually high loads require separate structural confirmation before quotation and sampling.
How is target load reviewed before bulk production?
Target load should come from the actual packed tool set rather than a general kilogram claim. Record total weight, the heaviest items, lifting method, shoulder-carry use, and working conditions. The sample can then be checked through repeated lifting, carrying, standing, zipper operation, and tool removal under the agreed load. Results apply only to the approved structure and review method.
How long does custom sampling normally take?
Regular custom bag samples usually take 5–7 days after key details and suitable materials are confirmed. Selected simple styles may take 2–3 days. Complex pocket layouts, reinforced structures, special hardware, molded parts, logo development, packing samples, or repeated revisions require additional time. Sample courier transit is separate from sample production time.
Which logo and private label options are available?
Common options include rubber patches, embroidery, woven labels, screen printing, printed labels, hangtags, and customized packing. The suitable method depends on fabric texture, logo detail, size, position, required durability, and brand appearance. Editable vector artwork and Pantone references help control proportion, color, edge clarity, and placement on the actual material.
How are approved sample details protected during production?
The final physical sample is sealed and linked with material references, measurements, paper-pattern versions, pocket maps, reinforcement details, logo specifications, labels, and packing instructions. Before normal production increases, the first complete piece is compared with the approved sample. Inline checks then focus on operations that become difficult to repair after assembly.
What inspections are used for electrician tool bag orders?
Checks may cover incoming materials, panel dimensions, pocket positions, stitching, bartacks, handles, shoulder anchors, bottom support, zippers, hardware, logo details, tool loading, labels, barcodes, unit packing, and cartons. Inspection stages and reporting depth are arranged according to product complexity, quantity, packaging, and agreed project requirements.
What information is needed for project review?
A reference photo, drawing, or sample is a useful starting point. For clearer evaluation, also provide the target size, tool list, expected packed weight, material preference, pocket requirements, logo artwork, quantity, colors, SKU plan, packing method, destination, required delivery date, testing needs, and preferred trade term. Missing details can be discussed before sampling.
Send Your Electrician Tool Bag Project for Review
A complete technical file is not required for the first discussion. A reference photograph, existing sample, drawing, or tool list can provide a starting direction. Clearer information allows Jundong to review product structure, material options, pocket layout, load areas, logo execution, MOQ, sample work, packing, production timing, and delivery arrangements with fewer assumptions.
Please include the available project details:
- reference photo, drawing, or existing sample
- intended bag type and outer dimensions
- tool list, tool sizes, and expected packed weight
- required pockets, dividers, opening, handles, and shoulder straps
- material, lining, bottom support, zipper, webbing, and hardware preferences
- logo artwork, Pantone colors, labels, and branding method
- order quantity, colors, designs, and SKU breakdown
- unit packing, barcodes, hangtags, cartons, and destination marks
- target destination, delivery date, testing needs, and trade terms
Files can also be sent to info@jundongfactory.com. The project team will review the supplied information and identify any missing details before quotation or sampling begins.