 Skip to content
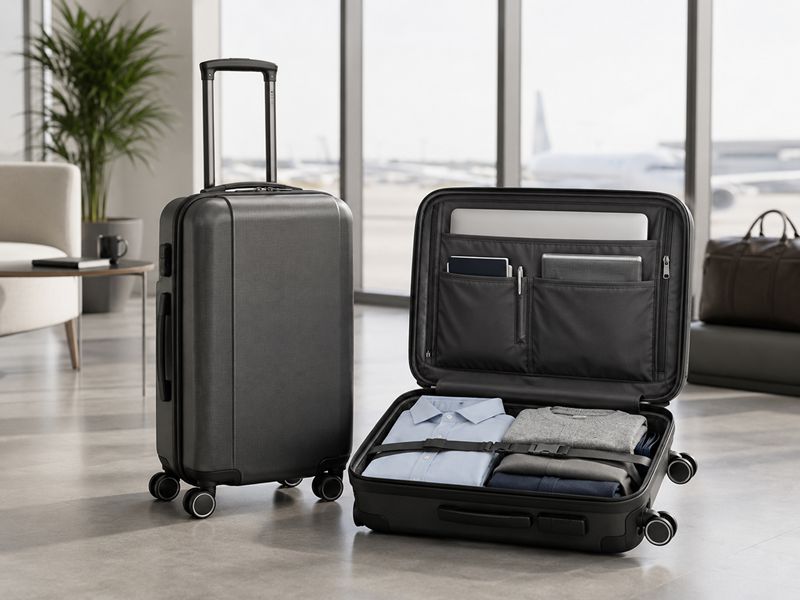
A business carry-on proves its value under pressure, not while standing empty beneath showroom lighting. The real test begins when a traveler has ten minutes to reach another terminal, remove a laptop without opening the clothing compartment, lift a fully packed case into an overhead bin, and arrive with a jacket that still looks ready for a meeting.
A well-developed business carry-on combines accurate external dimensions, sensible empty weight, stable wheels, a rigid trolley, protected device storage, garment control, and efficient internal volume. Every feature must support a real travel task. Large wheels improve movement but use part of the height allowance. A front computer section improves access but reduces clothing space. Expansion adds capacity but may exceed cabin depth limits.
The smallest structural decision can shape the entire trip. A wheel positioned a few millimeters too far inward may reduce stability. A laptop section that is too deep may pull the case forward. A wide trolley grip may prevent a briefcase sleeve from sliding over it. These details are easy to miss in a product photograph, yet they often decide whether a suitcase becomes a long-term travel companion or an item that is replaced after one season.
What Makes Carry-On Luggage Suitable for Business Travel?

Business carry-on luggage should fit the intended airline limits, remain stable when fully packed, protect work devices, control garment movement, and provide quick access to travel essentials. Its performance depends on coordinated dimensions, empty weight, usable capacity, wheel placement, trolley rigidity, opening structure, and internal organization—not on the number of features added.
A suitcase earns its place on repeated business trips through consistency. It should roll smoothly from the airport entrance to the gate, fit into the expected cabin sizer, lift without uncomfortable handle pressure, and open without turning a hotel room into a packing area. Clothing, electronics, documents, footwear, and toiletries should remain separated yet easy to reach.
The word “business” is often reduced to black color, a metal badge, a laptop pocket, and a clean shell. Those details influence appearance, but the more important work happens underneath:
- wheel housings must remain aligned under load;
- trolley tubes must resist twisting during turns;
- the lower shell must support repeated impact;
- the laptop section must protect the device without pulling the case forward;
- garment panels must control movement without creating deep pressure creases;
- zippers must follow curved areas without catching;
- expansion must not be presented as invisible cabin capacity;
- overall dimensions must include every fixed external part.
A useful design begins with a defined travel scenario rather than a list of fashionable features.
| Travel requirement | Structural response | Detail to confirm |
|---|---|---|
| Fast security access | External computer section | Opening angle and device protection |
| Formal clothing | Garment or compression panel | Fold position and pressure distribution |
| Frequent airport movement | Quiet multi-directional casters | Alignment, noise, and housing strength |
| Rough urban travel | Larger or protected rollers | Ground clearance and impact resistance |
| Small hotel rooms | Front or deep-lid opening | Floor space needed to open |
| Cabin compliance | Controlled assembled dimensions | Wheels, handles, guards, and pockets |
| Easy lifting | Top and side grips | Comfort and anchor strength |
| Longer service life | Accessible mobility parts | Replacement method and part continuity |
Who Uses Business Carry-On Luggage?
Business carry-ons serve people who travel with work equipment and personal belongings in one compact case. Consultants, executives, sales teams, exhibition staff, trainers, technicians, designers, photographers, and other professionals may use the same cabin format, yet their loads differ considerably.
A consultant may carry two shirts, one pair of trousers, a lightweight jacket, a laptop, chargers, documents, and toiletries for a two-night visit. An exhibition representative may replace part of the clothing space with samples, brochures, adapters, name cards, and display materials. A technician may need protected areas for instruments or electronic components. A photographer may prioritize adjustable dividers and stronger internal support.
This variation affects the entire structure:
| User profile | Main load | Useful layout |
|---|---|---|
| Consultant | Formal clothing and laptop | Garment panel with padded device section |
| Sales representative | Samples, documents, and clothing | Flexible cavity with front access |
| Exhibition staff | Brochures, equipment, and outfits | Reinforced base with adjustable dividers |
| Technician | Tools and electronic parts | Protective sections and strong attachment areas |
| Creative professional | Large laptop and accessories | 16-inch device fit with cable organization |
| Frequent executive traveler | Clothing and work essentials | Quiet casters, rigid trolley, clean interior |
Before development begins, the intended user should be described through practical details:
- average trip length;
- laptop width, height, and thickness;
- number of outfits;
- formal or casual dress code;
- second-shoe requirement;
- amount of printed material;
- expected packed weight;
- travel frequency;
- main transport conditions;
- preferred opening style.
A suitcase designed for everyone often becomes excellent for no one. The most convincing product usually serves one primary travel pattern while retaining enough flexibility for related use.
Which Trips Need a Business Carry-On?
A business carry-on is especially useful for journeys lasting two to five days, where avoiding checked luggage can reduce airport time and keep clothing, documents, and electronics close at hand. It also suits overnight meetings, conferences, exhibitions, training events, sales visits, and short international travel.
Trip length does not determine capacity by itself. Climate, dress code, footwear, and work equipment can change the load more than an extra night. A two-day formal event may require a jacket, structured shoes, several shirts, and presentation equipment. A four-day casual visit may fit into less space.
| Trip type | Clothing plan | Work items | Useful structure |
|---|---|---|---|
| Overnight meeting | One outfit and one spare shirt | Laptop, charger, documents | Compact cavity with front device access |
| Two-night visit | Two outfits and light toiletries | Laptop and cables | Compression panel with small accessory pockets |
| Three-day conference | Formal clothing and extra shoes | Laptop, notes, adapters | Garment control and shoe separation |
| Four- to five-day trip | Several outfits and sleepwear | Laptop and work accessories | Deeper cavity with adjustable organization |
| Exhibition trip | Reduced clothing volume | Samples, brochures, adapters | Reinforced base and flexible dividers |
| International meeting | Formal clothing and travel documents | Laptop and power adapter | Secure quick-access storage |
The route matters as much as the contents. Smooth airport floors favor four-caster movement beside the body. Railway platforms, curbs, older streets, and uneven pavement place greater stress on tread, axles, and housings. A full clamshell may work well in a large hotel room but feel awkward in a narrow room or railway compartment.
A realistic packing trial should use actual objects rather than empty-volume calculations. The case should be loaded with garments, shoes, toiletries, a laptop, charger, documents, and other expected items. This reveals:
- whether trolley channels interrupt folded clothing;
- whether wheel wells create unusable corners;
- whether the computer section takes too much main-cavity depth;
- whether shoes press against the device section;
- whether the expanded case becomes front-heavy;
- whether pockets remain accessible after the main cavity is full.
Capacity is useful only when the internal shape works with the intended load.
What Details Matter Most to Frequent Travelers?
Frequent travelers value predictable performance. They want the case to roll without pulling sideways, remain upright when the front section is loaded, extend smoothly, lift comfortably, and provide access to essential items without disturbing the clothing compartment.
The most important details usually fall into seven areas.
| Area | Important details | What poor execution causes |
|---|---|---|
| Dimensions | Accurate assembled height, width, and depth | Gate-check risk |
| Mobility | Alignment, tread, bearings, wheelbase | Noise, drift, or difficult steering |
| Trolley | Tube fit, overlap, locks, base mounting | Wobble, sticking, or twisting |
| Carry handles | Grip shape and reinforced anchors | Discomfort or early damage |
| Device storage | Padding, suspension, opening angle | Impact risk or poor balance |
| Garment control | Broad panels and smooth compression | Movement and deep creasing |
| Access | Logical pocket placement | Slow security and hotel use |
Small inconveniences become important through repetition. A puller that is difficult to grip, a computer sleeve that catches the laptop corners, or a trolley that requires two attempts to lock may appear minor during a short inspection. After twenty trips, these details define the experience.
A practical review should include the following actions:
- Pack the suitcase to the intended working load.
- Measure it again after the front and main sections are filled.
- Roll it forward, backward, sideways, and diagonally.
- Move it across tile, low-pile carpet, concrete, and floor joints.
- Turn it through a tight figure-eight route.
- Load the laptop section while leaving the clothing cavity partly empty.
- Extend and retract the trolley at every locking height.
- Place a laptop bag over the trolley and check balance.
- Lift the packed case using the top and side grips.
- Pack formal clothing and inspect it after 12–24 hours.
- Open all quick-access sections while the case is upright.
- Inspect the shell, seams, housings, zippers, and lining afterward.
Appearance still matters because the product travels into offices, hotels, conferences, and formal venues. However, a clean silhouette should not reduce grip comfort, hide an awkward zipper route, or force the caster housings too far inward.
Why Do Weight and Capacity Need Balance?
Low empty weight leaves more of the airline allowance available for clothing and electronics, but excessive reduction can weaken the shell, base, caster housings, trolley supports, handles, corners, or internal boards. The aim is not the lightest possible case; it is the lightest structure that still meets the intended durability and stability requirements.
Capacity can also be misunderstood. Two cases with almost identical exterior dimensions may provide noticeably different usable interiors because of:
- wheel-well depth;
- trolley-channel width;
- shell ribs;
- front computer construction;
- divider thickness;
- expansion structure;
- lining and foam layers;
- lock placement;
- corner reinforcement.
| Measurement | What it reveals |
|---|---|
| Assembled external size | Cabin suitability |
| Empty weight | Remaining allowance for contents |
| Internal cavity dimensions | Practical clothing space |
| Narrowest internal areas | Trolley and caster intrusion |
| Front-section depth | Space taken from the main cavity |
| Loaded center of gravity | Tipping tendency |
| Closed and expanded depth | Travel condition for each mode |
| Packed working load | Real mobility and handle behavior |
A controlled 8–10 kg development load can provide a useful comparison for many cabin cases, even though airline weight rules differ. The purpose is to observe how the suitcase moves and holds its shape under a consistent load.
Weight reduction should focus on parts that do not carry major stress. Possible approaches include:
- lighter lining with sufficient tear strength;
- fewer unnecessary pocket layers;
- controlled foam placement;
- optimized divider boards;
- efficient trolley channels;
- simplified decorative metal parts;
- shared components across several sizes;
- shell geometry that supports stiffness without excessive material.
Reducing material around caster mounts, handle anchors, corners, and the lower shell can create far greater costs through breakage and returns. These areas receive concentrated stress and need suitable reinforcement.
Usable capacity should be evaluated with garments rather than only through liter calculations. A cavity may produce a strong volume figure but still perform poorly if a wide trolley channel prevents trousers from lying flat or if the lid pockets press heavily into shirts.
Is Hard-Shell or Soft-Side Luggage Better?
Hard-shell luggage provides structured protection, a defined silhouette, and resistance to outside compression. Soft-side luggage offers flexible packing, outer pockets, and easier access in limited spaces. Neither construction is universally better; the intended load, route, appearance, and access requirements determine the stronger option.
| Construction | Main strength | Main limitation | Suitable travel direction |
|---|---|---|---|
| Polycarbonate shell | Flexible impact response and refined finish | Higher material cost | Frequent premium travel |
| ABS shell | Defined shape with accessible cost | Greater cracking risk if poorly controlled | Value-focused collections |
| PC/ABS blend | Balance of finish and structural behavior | Formulation consistency matters | Mid-level travel lines |
| Polypropylene shell | Strong flexibility and impact response | Distinct surface feel and tooling needs | Durable lightweight concepts |
| Molded EVA | Light structure with a softer exterior | Less rigid than hard plastic | Hybrid and lightweight luggage |
| Polyester textile | Flexible and easy to organize | Lower crush protection | Functional soft-side cases |
| Nylon textile | Strong abrasion resistance | Higher textile cost | Frequent-use soft luggage |
Hard-shell cases commonly use a clamshell layout. The contents are divided between two halves, which supports organization but requires more space when fully opened. Soft-side upright cases often use one deep cavity and a lid, making them effective for jackets, shoes, folders, or thicker garments.
A front-opening hard-shell design combines a structured body with quick laptop access, but it introduces several compromises:
- the computer section reduces main-cavity depth;
- additional hinges and zippers add weight;
- front loading can increase tipping;
- the opening needs gussets or straps to control contents;
- lock placement becomes more complex;
- shell reinforcement may be required around the opening.
Soft-side luggage makes exterior pockets easier to add, but those sections can bulge when filled. The final depth should be checked under a representative load, not only while empty.
Material name alone does not define quality. Thickness, formulation, fabric density, coating, stitching, reinforcement, hardware, assembly, and testing shape the final performance. A well-developed polyester upright can outlast a poorly constructed plastic case, just as a properly engineered polycarbonate shell can offer stronger protection than a thin textile body.
Why Avoid a Black Suitcase?
A black suitcase does not need to be avoided. It remains suitable for business travel because it looks formal, coordinates with professional clothing, and stays visually relevant over time. Its main disadvantage is limited distinction: an entirely black case can resemble many others when gate-checked, stored in a shared luggage area, or used by a large travel team.
Professional differentiation can be added without using bright colors:
- a distinctive shell texture;
- graphite or navy color variation;
- contrasting caster hubs;
- muted handle inserts;
- recognizable zipper tape;
- molded geometric lines;
- discreet metal or rubber details;
- a personalized luggage tag;
- a controlled accent around the lock or side grip.
Surface finish influences how black ages. A glossy black shell may show fingerprints and fine scratches more clearly. Matte and micro-textured finishes can reduce their visibility, although texture depth, shell material, and color consistency should be reviewed together.
The interior color also affects daily use. A completely black lining can make cables, socks, adapters, and other small items difficult to see in a dim hotel room. Grey, beige, muted blue, or another controlled contrast improves visibility while preserving a professional character.
A coordinated collection may use black as the core color and add navy, graphite, olive, stone, or deep burgundy as supporting options. The color plan should consider:
- recognition from a distance;
- scratch and dust visibility;
- logo contrast;
- hardware coordination;
- lining visibility;
- color consistency across different materials;
- suitability across cabin and checked sizes.
Black remains a practical choice when it is treated as part of the complete design rather than the only signal of business travel.
What Carry-On Size Meets Airline Limits?
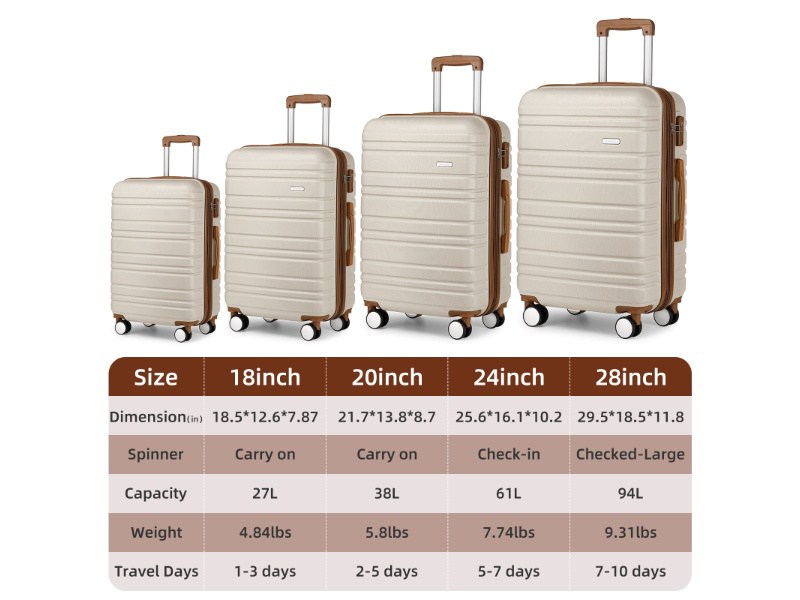
A carry-on suitable for frequent business travel should be measured at approximately 55 × 35 × 23 cm, including wheels, fixed handles, protective feet, side grips, and any other projecting parts. This size corresponds closely to the widely used 22 × 14 × 9-inch limit and offers broad compatibility, though no single suitcase is accepted by every airline. Weight, fare class, aircraft type, and expansion depth must also be checked before departure.
A suitcase can be described as “20-inch” or “21-inch” and still fail an airport sizer. Those labels often refer to the shell or product category rather than the complete external dimensions. The measurement that matters at the gate is the finished suitcase in travel-ready condition.
Which Carry-On Size Is Most Common?
For travel within the United States, 22 × 14 × 9 inches, or approximately 56 × 36 × 23 cm, is one of the most frequently used limits. Delta publishes 22 × 14 × 9 inches and states that handles and wheels are included. American Airlines uses the same inch dimensions and requires the bag to fit in the airport sizer.
Many European and international routes use 55 × 40 × 23 cm. Lufthansa, for example, publishes this size together with an 8 kg weight limit for an eligible cabin case. British Airways permits a larger 56 × 45 × 25 cm cabin bag, but that allowance should not be treated as a universal international standard.
The figures below show why the airline must be checked instead of relying on a general “cabin approved” label.
| Travel situation | Common external limit | Approximate volume of a perfect box | Practical implication |
|---|---|---|---|
| Many US full-service flights | 56 × 36 × 23 cm | 46.4 L | Width is relatively restrictive |
| Many European full-service flights | 55 × 40 × 23 cm | 50.6 L | Weight may become the limiting factor |
| More restrictive cabin policies | About 55 × 35 × 20 cm | 38.5 L | Deep shells and external pockets may fail |
| Generous cabin policies | Up to about 56 × 45 × 25 cm | 63.0 L | Compatibility may disappear on a connecting flight |
| Under-seat personal item | Often around 40 × 30 × 15–20 cm | 18–24 L | Intended for a briefcase, small backpack, or compact travel bag |
The calculated volumes are geometric, not usable capacities. Wheels, handle tubes, curved corners, liners, divider panels, and shell contours consume space. A suitcase with external dimensions of 55 × 35 × 23 cm often provides roughly 35–42 liters of usable packing capacity, depending on its construction.
A sensible cross-airline format is therefore not simply the largest case accepted by one carrier. For mixed domestic and international use, the following finished dimensions are practical design targets:
| Design approach | Finished external dimensions | Best suited to |
|---|---|---|
| Conservative global format | 54.5 × 35 × 22 cm | Multi-airline itineraries and stricter routes |
| US-oriented format | 55.5 × 35.5 × 22.5 cm | Frequent North American travel |
| European-oriented format | 54.5 × 39.5 × 22.5 cm | Routes allowing close to 55 × 40 × 23 cm |
| High-capacity format | 56 × 40–45 × 23–25 cm | Use with selected airlines only |
These figures are design targets, not guaranteed approvals. Ticket conditions and the operating carrier remain decisive.
Is There a New Carry-On Size Now?
There is no single new carry-on size that has replaced every earlier limit. Airlines continue to publish their own dimensional, weight, and quantity rules. What has changed is the level of enforcement and the structure of some fares.
A ticket may now include only a small personal item, even when the airline operates aircraft with full-size overhead bins. A conventional roller may require a higher fare, an added cabin-bag option, or checked handling. This means “carry-on size” and “carry-on entitlement” are separate matters.
Four checks are needed:
- Is a full-size cabin case included in the fare?
- What are the permitted length, width, and depth?
- Does the airline impose a weight limit?
- Is the flight operated by the airline shown on the ticket?
The last check matters on codeshare journeys. A ticket can display one airline’s flight number while another carrier operates the aircraft. The operating carrier’s baggage conditions commonly govern the flight.
Current published examples illustrate the variation:
| Airline example | Published cabin-case limit | Published weight condition | Notable detail |
|---|---|---|---|
| American Airlines | 22 × 14 × 9 in / 56 × 36 × 23 cm | Route conditions may vary | Must fit in the airport sizer |
| Delta Air Lines | 22 × 14 × 9 in / 56 × 35 × 23 cm | No general weight cap on most routes; exceptions apply | Wheels and handles are included |
| Lufthansa | 55 × 40 × 23 cm | 8 kg per eligible cabin case | Some fares may include only a personal item |
| British Airways | 56 × 45 × 25 cm | Traveler must be able to lift it into the overhead bin | Wheels and handles are included |
Policies can change, so dimensions should be confirmed directly with the operating airline before travel. See the current rules from American Airlines, Delta Air Lines, Lufthansa, and British Airways.
How Is Overall Luggage Size Measured?
Measure the suitcase in its fully closed, non-compressed, travel-ready condition. Place it upright on a flat floor and record the greatest external height, width, and depth. Do not measure only the textile body or molded shell.
- Height runs from the floor to the highest fixed part of the case.
- Width runs across the broadest side, including side fittings.
- Depth runs from the frontmost surface to the rearmost surface.
- Wheels, fixed top handles, side grips, feet, corner guards, zipper tracks, locks, and raised pockets count when they project beyond the main body.
- The telescopic trolley should be fully retracted.
- A removable luggage tag or loose shoulder strap is generally not part of the structural size, but it should not prevent the case from entering a sizer.
For a target of 55 × 35 × 23 cm, every finished unit should remain within all three individual limits. A case measuring 54 × 34 × 24 cm is not compliant with a 23 cm depth limit simply because the total of the three dimensions is similar.
This distinction is important because some baggage policies mention both individual measurements and total linear dimensions. Linear size is calculated as:
Height + width + depth = total linear dimension
For example:
55 cm + 35 cm + 23 cm = 113 cm
However, a total of 113 cm does not automatically qualify. A suitcase measuring 58 × 33 × 22 cm also totals 113 cm, yet its 58 cm height exceeds a 55 or 56 cm limit. Unless an airline explicitly permits flexible linear dimensions, each side should stay within its stated maximum.
Measurement variation also deserves attention. Textile panels can bulge after packing, while zipper construction can add several millimeters around the perimeter. Molded cases are more dimensionally stable, but wheel housings, handles, and corner protection may extend beyond the computer drawing.
Useful allowances for product development include:
| Area | Practical allowance |
|---|---|
| Finished height below stated limit | 5–10 mm |
| Finished width below stated limit | 5–10 mm |
| Finished depth below stated limit | 5–10 mm |
| Soft-side packing bulge allowance | About 10–20 mm where feasible |
| Measurement tool resolution | 1 mm |
| Inspection condition | Zippers closed, expander closed, handle retracted |
A zero-clearance design leaves little room for material thickness, assembly variation, wheel movement, or an unusually tight airport sizer. A small dimensional reserve is usually more valuable than a marginal increase in internal space.
Do Airlines Measure Carry-On Wheels?
Yes. Airlines that specify overall external dimensions generally count the wheels and handles. Delta, American Airlines, and British Airways explicitly include them in their published requirements.
The wheels are often responsible for an unexpected size failure. A shell may be only 49–51 cm high, but the completed suitcase can reach 55–57 cm after adding the wheel assemblies and top handle. Spinner wheels usually consume more external height than recessed two-wheel systems.
A simplified height calculation looks like this:
| Component | Example contribution |
|---|---|
| Main case body | 495 mm |
| Bottom structure | 8 mm |
| Exposed spinner height | 42 mm |
| Fixed top handle projection | 7 mm |
| Total external height | 552 mm |
At 552 mm, the case fits a 560 mm limit but exceeds a strict 550 mm limit by 2 mm. Reducing the molded shell alone may not be the best solution. A lower wheel seat, compact wheel housing, shallower fixed grip, or partially recessed assembly can preserve more internal volume.
Wheel placement affects width and depth as well. Double spinner wheels positioned near the corners can project beyond the shell’s sidewall. Side-mounted protective elements may add further width. Measurements should therefore be taken at the widest and deepest projections, not at the center of the case.
Airport checks may involve:
- placing the case inside a metal sizing frame;
- checking it visually at the gate;
- measuring one or more sides with a tape;
- weighing it at check-in or boarding;
- requiring it to fit in the overhead compartment;
- gate-checking it when cabin storage is full.
A slightly oversized soft case might compress into a sizer when lightly packed. That should not be treated as a dependable strategy. A rigid case cannot compress, and a tightly packed textile case may expand beyond its stated depth.
What Is the Difference Between Domestic vs International Sizes?
“Domestic carry-on” and “international carry-on” are useful retail descriptions, but they are not official universal size classes. The practical difference is that many US carriers emphasize a 22 × 14 × 9-inch format, while numerous carriers elsewhere use metric dimensions and may enforce a 7–10 kg weight limit.
The conversion itself can create confusion:
- 22 inches equals 55.88 cm.
- 14 inches equals 35.56 cm.
- 9 inches equals 22.86 cm.
For commercial labeling, these values are often rounded to 56 × 36 × 23 cm. That is close to the original inch dimensions, but it is not the same as 55 × 35 × 23 cm. A case built exactly to 56 × 36 × 23 cm may be too tall and too wide for an airline using 55 × 35 × 23 cm.
| Feature | Many US routes | Many international routes |
|---|---|---|
| Frequent size pattern | 22 × 14 × 9 in | 55 × 40 × 23 cm or similar |
| Weight enforcement | Often less prominent on major domestic services | Frequently 7–10 kg |
| Measurement system | Inches | Centimeters |
| Fare restrictions | Basic fares may have additional conditions | Low-cost and entry fares may exclude a roller |
| Connecting-flight risk | Moderate | Higher when several carriers are involved |
Weight can be more restrictive than volume. Consider a suitcase weighing 3.5 kg empty under an 8 kg allowance:
| Item | Approximate weight |
|---|---|
| Empty suitcase | 3.5 kg |
| Laptop and charger | 2.0 kg |
| Clothing and shoes | 2.2 kg |
| Toiletries and accessories | 0.8 kg |
| Total | 8.5 kg |
The suitcase is already 0.5 kg over the limit, even before adding documents, a power bank, or a jacket. Reducing the empty case from 3.5 kg to 2.8 kg restores 700 g of packing capacity—the approximate weight of several shirts and undergarments.
For frequent international travel, a practical empty-weight target is often:
- 2.2–2.8 kg for lightweight soft-side cases;
- 2.5–3.2 kg for balanced hard-shell cases;
- 3.2–4.0 kg for feature-heavy cases with front compartments, large wheel systems, and reinforced hardware.
Lower weight is useful only when structural performance remains adequate. Extremely thin shells, weak trolley tubes, undersized fasteners, and lightly supported wheel bases can reduce durability. The most effective approach removes weight from low-stress areas while reinforcing the handle mounts, wheel corners, zipper ends, and load-bearing frame.
When Does Expandable Luggage Exceed Cabin Limits?
Expandable luggage exceeds the limit as soon as its loaded external depth passes the airline’s permitted depth. The expander’s advertised value does not show the whole effect because clothing can push the front and rear panels outward beyond the zipper extension.
Suppose a case has these dimensions:
- Closed depth: 22.5 cm
- Zipper expansion: 4 cm
- Packed-panel bulge: 1 cm
- Loaded depth: approximately 27.5 cm
It fits a 23 cm limit when closed and lightly packed, but it is about 4.5 cm too deep when fully expanded. Even an airline allowing 25 cm may reject it in that condition.
| Closed depth | Expander width | Possible packed depth | Result under a 23 cm limit |
|---|---|---|---|
| 21.5 cm | 3 cm | 24.5–25.5 cm | Likely too deep |
| 22.0 cm | 4 cm | 26.0–27.0 cm | Too deep |
| 22.5 cm | 5 cm | 27.5–29.0 cm | Clearly too deep |
| 23.0 cm | None | 23.5–24.0 cm if overfilled | May still fail |
An expander is most useful when the outward journey requires cabin compliance and the return journey allows checked handling. It can also provide temporary space during hotel transfers, rail travel, or road travel. It should not be presented as cabin-safe while open unless the expanded dimensions remain within the specific airline’s allowance.
Several construction details help control depth:
- a clearly visible expansion zipper in a contrasting pull design;
- an expansion panel that opens evenly around the case;
- compression straps that limit outward pressure;
- a firm divider panel that stabilizes packed clothing;
- a recessed front pocket instead of a heavily padded external compartment;
- depth measurements printed for both closed and expanded conditions.
Front laptop compartments need particular care. A 20–25 mm padded compartment added to a shell already near 23 cm can create an oversized finished case. If the compartment shares space with the main packing area, it may avoid adding full external depth, but a laptop inserted into a tightly packed case can still push the front panel outward.
The most reliable product specification records three separate figures:
| Recorded dimension | What it describes |
|---|---|
| Body dimension | Main shell or textile case without projecting fittings |
| Closed external dimension | Complete suitcase with wheels and handles |
| Expanded external dimension | Complete suitcase with the expander fully open |
Only the closed and expanded external dimensions should be used to assess airline compatibility. Body measurements are valuable for engineering but can mislead travelers when shown alone.
Before departure, pack the case normally, close every zipper, retract the trolley, and measure the widest projections with a rigid rule or tape. Weigh the complete packed case as well. If an itinerary includes several carriers, use the smallest permitted dimensions and lowest weight allowance among all flight segments. That simple check is far more dependable than relying on a “20-inch,” “domestic,” “international,” or “cabin approved” label.
Which Wheels and Handles Perform Best?
The most dependable business carry-on combines four recessed double-spinner wheels, replaceable wheel modules, a rigid aluminum trolley, limited handle movement, and a comfortable multi-position grip. Double spinners work well in airports and office buildings, while a well-supported two-wheel system is often better on rough streets. Performance depends less on wheel count than on materials, mounting strength, alignment, trolley rigidity, and compatibility with the fully loaded case.
Wheels and handles carry nearly every force created during travel. A wheel meets floor joints, curbs, carpet, and broken pavement. The trolley is pulled sideways, twisted around corners, and used to lift a case even though it was designed primarily for rolling. Weakness in either system quickly turns a polished suitcase into an awkward object that rattles, leans, or refuses to track straight.
What Is the Best Carry-On Luggage with Wheels?
For frequent travel through airports, hotels, offices, and rail stations, a four-wheel case with double spinner assemblies is usually the most versatile choice. It can roll beside the traveler in narrow aisles, rotate in place, and move forward without requiring much wrist force. Recessed housings and replaceable modules make the design more practical over a longer service life.
A dependable wheel specification should include:
- double wheels rather than one narrow wheel at each corner;
- a tread made from durable thermoplastic rubber or polyurethane;
- low-friction bearings or well-fitted bushings;
- controlled swivel movement without excessive looseness;
- housings anchored to reinforced corner structures;
- wheels positioned to keep the case stable when fully packed;
- accessible fasteners for maintenance or replacement;
- enough floor clearance to prevent the shell from scraping.
Wheel diameter strongly affects rolling behavior. Small wheels protect internal capacity and keep the external height down, but they struggle with deep floor joints and uneven pavement. Larger wheels pass over obstacles more easily, although they consume more of the airline size allowance.
| Wheel diameter | Common behavior | Suitable environment | Main compromise |
|---|---|---|---|
| 40–45 mm | Compact and light | Smooth terminal floors | More vibration on joints and tile gaps |
| 46–50 mm | Balanced rolling performance | Airports, hotels, offices | Moderate external height |
| 51–55 mm | Easier movement over uneven surfaces | Mixed indoor and urban use | Larger housing and reduced packing space |
| Above 55 mm | Strong obstacle clearance | Rougher streets and heavy loads | Difficult to fit within compact cabin dimensions |
The tread should provide grip without feeling sticky. Very hard plastic tends to create more noise and transfers vibration into the shell. Extremely soft material may feel quiet at first but can wear quickly, collect debris, or develop flat areas under prolonged load.
A good wheel is therefore not simply the quietest wheel in a showroom. It must remain aligned, rotate freely under realistic weight, and survive repeated impacts without separating from its hub.
Two Wheels vs Four Wheels: Which Is Better?
Four spinner wheels perform better on smooth surfaces and in crowded indoor spaces. Two inline wheels perform better when the suitcase is pulled across rough pavement, curbs, cobblestones, or damaged sidewalks. The correct format depends on where the case will be used most often.
| Feature | Two-wheel system | Four-wheel spinner system |
|---|---|---|
| Movement | Forward and backward | Multi-directional |
| Airport maneuverability | Good | Excellent |
| Narrow aircraft aisle | Usually pulled behind | Can roll beside the body |
| Rough pavement | Usually better | More vibration and impact |
| Wheel protection | More easily recessed | More exposed at the corners |
| External height use | Efficient | Greater wheel projection |
| Internal packing space | Often slightly higher | Corner housings may reduce space |
| Stability on slopes | Less likely to roll away | May move unless held or braked |
| Wrist effort | Higher when pulling a heavy case | Lower on smooth floors |
| Component count | Simpler | More moving parts |
A two-wheel case transfers part of its weight to the traveler because it rolls at an angle. If a loaded case weighs 10 kg and is tilted at roughly 35 degrees, the hand supports a noticeable portion of the load while also controlling direction. This can become tiring during a long terminal transfer.
A spinner remains upright, so the floor supports almost all its weight. The traveler mainly supplies horizontal force. This is comfortable on polished flooring, but the advantage decreases on thick carpet because eight small tread surfaces create additional rolling resistance.
Double spinners usually feel more stable than single spinners because the load is distributed across a broader footprint. They also resist catching in some floor gaps. However, doubling the wheel count does not automatically double durability. Poor alignment between paired wheels can create drag, noise, and uneven wear.
A two-wheel format remains a strong choice for compact soft luggage intended for rail travel and city streets. A double-spinner format is more suitable when effortless indoor movement, upright rolling, and easy directional changes have priority.
What Type of Wheel Works on Different Surfaces?
Wheel performance changes substantially with the floor. A case that moves silently across polished stone may become difficult to pull over carpet or loud on outdoor tiles.
| Surface | Preferred wheel characteristics | Common failure risk |
|---|---|---|
| Polished airport floor | Medium-soft tread, accurate alignment | Uncontrolled rolling or swivel flutter |
| Carpet | Larger diameter, low-friction rotation | High drag and wrist fatigue |
| Tile joints | Elastic tread, stable bearings | Repeated clicking and vibration |
| Concrete | Abrasion-resistant tread | Rapid surface wear |
| Cobblestone | Large wheels with strong supports | Housing cracks and axle deformation |
| Wet pavement | Textured, non-marking tread | Reduced grip |
| Train platforms | Stable double wheels or recessed inline wheels | Impact damage near platform gaps |
Polyurethane is widely used for premium rolling systems because it can combine abrasion resistance, grip, and lower noise. Thermoplastic rubber can also work well when its hardness and bonding are carefully controlled. Polypropylene and other hard plastics may reduce cost, but they usually transmit more vibration.
Tread hardness can be described using Shore A values. The exact figure alone does not determine performance, since wheel geometry and material formulation also matter, but it provides a useful reference.
| Approximate Shore A hardness | General feel | Likely behavior |
|---|---|---|
| 70–80A | Relatively soft | Quiet and grippy, with greater deformation |
| 80–90A | Medium | Balanced wear, noise, and rolling control |
| 90–95A | Firm | Lower deformation but more vibration |
| Very hard plastic | Rigid | High noise and limited shock absorption |
For a business carry-on, a well-formulated medium-hard tread is often the most balanced option. It should resist visible wear while cushioning the repeated impact of floor joints.
Wheel color also deserves consideration. Pale or translucent treads can show dirt quickly. Very soft dark compounds may leave marks on light floors if the material formulation is poor. A non-marking grey, charcoal, or dark neutral tread is practical for frequent use.
Debris protection matters as well. Hair and threads can wrap around exposed axles and increase rolling resistance. A narrow gap between wheel and fork, combined with a covered axle area, helps reduce entanglement without creating friction against the sidewall.
How Are Luggage Wheels Tested?
Wheel evaluation should reproduce loaded travel rather than rely on unloaded spinning by hand. A wheel can feel smooth when empty and still bind, wobble, or overheat when the suitcase carries 8–12 kg.
Useful checks include loaded rolling, directional tracking, obstacle impact, drop exposure, temperature conditioning, and fastener inspection. The exact settings should match the intended retail claim and product specification rather than being presented as one universal rule.
| Test area | Example evaluation method | What it reveals |
|---|---|---|
| Continuous rolling | Load the case and run it on a rotating drum or belt | Tread wear, heat buildup, bearing resistance |
| Obstacle cycling | Roll repeatedly over raised strips | Axle strength, housing fatigue, impact noise |
| Directional tracking | Pull the loaded case along a marked straight path | Wheel alignment and unwanted drift |
| Spinner rotation | Turn each assembly through repeated swivel cycles | Rotation consistency and housing wear |
| Drop exposure | Drop the loaded case on wheel corners | Mounting strength and corner reinforcement |
| Side impact | Strike or drop the case near the wheel housing | Fork fracture and fastener movement |
| Temperature conditioning | Condition the case in hot or cold environments before operation | Material hardening, softening, or cracking |
| Contamination check | Expose wheels to dust, hair, and fine debris | Axle protection and continued movement |
A practical rolling program may use a loaded case, a textured drum, and repeated obstacle strips. Test distance, speed, load, and obstacle height must be recorded together. A statement such as “tested for 20 kilometers” has limited meaning if the load and test surface are not identified.
After cycling, inspection should cover more than whether the wheels still turn. Examine:
- tread loss and uneven wear;
- cracking around the hub;
- axial side movement;
- spinner looseness;
- housing deformation;
- loose screws or rivets;
- noise increase;
- drift from a straight path;
- contact between the wheel and housing;
- damage to the internal mounting plate.
Noise can be checked under controlled conditions using the same load, floor, pulling speed, and microphone position. Decibel figures from different test setups are not directly comparable. A more useful comparison tests several wheel options on the same case under identical conditions.
Loaded stability is equally important. Pack the case with weight distributed in the upper, lower, front, and rear sections. Poor wheel spacing may allow a front-heavy case to tip, while weak swivel control can cause wheel flutter during fast movement.
What Makes a Trolley Handle Stable?
A stable trolley depends on tube geometry, wall thickness, joint fit, mounting depth, locking accuracy, and internal support. Aluminum tubes offer a useful balance of weight and stiffness, but the alloy name alone does not guarantee a rigid handle. Thin tubes, loose joints, shallow supports, or weak brackets can make even a premium-looking trolley unstable.
Two-tube handles generally resist twisting better than single-post systems and provide a central space for placing a briefcase or personal bag. The tubes should extend far enough into the suitcase to distribute pulling forces across a reinforced structure.
| Trolley feature | Practical effect |
|---|---|
| Wide tube spacing | Better resistance to twisting |
| Multi-stage adjustment | More comfortable for different heights |
| Accurate tube fit | Less rattling and sideways movement |
| Positive locking pins | Prevents unexpected collapse |
| Reinforced lower brackets | Spreads load into the case structure |
| Protected release mechanism | Reduces accidental activation |
| Smooth tube finish | Limits friction and visible scratching |
| Replaceable assembly | Supports easier repair |
Some movement between telescoping stages is necessary. A completely tight fit may bind when tubes flex, collect dust, or experience temperature changes. Excessive clearance, however, creates a loose and inexpensive feel.
Trolley movement should be checked in several directions:
- front-to-back play at the grip;
- side-to-side movement;
- twisting between the two tubes;
- vertical movement at each lock position;
- unequal extension between the left and right sides;
- grip rotation under load.
A handle may also bend because of poor packing habits. Heavy objects placed far from the trolley side move the center of gravity forward, increasing leverage on the tubes. Positioning a laptop and dense items close to the trolley wall improves rolling balance.
The trolley should not be used as the primary lifting handle. Lifting a fully packed case by the extended grip applies forces in a direction the system may not be designed to carry. A separate top handle should support lifting into an overhead bin.
Which Handle Height Is More Comfortable?
The most comfortable trolley height allows the arm to remain relaxed with the elbow slightly bent. If the grip is too low, the traveler may lean or allow the suitcase to strike the heel. If it is too high, the shoulder and wrist must work harder to steer.
The useful height is measured from the floor to the top of the extended grip, not from the top of the suitcase.
| Extended grip height | Likely suitability |
|---|---|
| About 85–90 cm | Shorter travelers or children’s cases |
| About 90–95 cm | Lower intermediate position |
| About 95–100 cm | Comfortable for many adults |
| About 100–105 cm | Taller adults and longer walking stride |
| Above 105 cm | Useful for selected tall users; may reduce rigidity |
A three-stage trolley commonly provides better fit than a single-height design. Practical positions might be approximately 90, 97, and 104 cm from the floor, depending on case height and intended use.
More stages are not always better. Every additional joint introduces another location for movement and wear. A carefully engineered two- or three-position system is usually preferable to numerous closely spaced settings.
Grip geometry also affects comfort. A practical business-case grip should have:
- softly rounded edges;
- enough width for a relaxed hand position;
- a surface that does not become slippery when damp;
- a release button that does not require high pressure;
- adequate clearance above the suitcase;
- no sharp seam beneath the fingers;
- sufficient structure to resist twisting.
A grip width of roughly 100–130 mm often suits adult hands, though its curvature and thickness matter just as much. An overly thick grip can strain smaller hands, while a thin hard grip concentrates pressure in the fingers.
The handle should also work with a personal bag that has a rear luggage sleeve. Tube spacing, grip width, and the space between the grip and suitcase affect whether the second bag sits securely without tilting.
Are Replaceable Wheels and Handles Worth Adding?
Replaceable components are valuable when luggage is expected to remain in service for several years. Wheels and trolley systems experience concentrated wear, yet damage to one module does not necessarily mean the shell, lining, zipper, and interior have reached the end of their useful life.
A serviceable design may add some initial complexity, but it can reduce long-term product returns and unnecessary disposal.
| Component | Service-friendly design |
|---|---|
| Spinner module | Attached with accessible screws rather than permanent rivets |
| Wheel pair | Removable axle or complete module replacement |
| Trolley assembly | Internal fasteners accessible behind a zippered lining |
| Top and side handles | Separate screw-mounted parts |
| Spare parts | Coded by product style, color, and production version |
| Instructions | Clear diagrams showing tool type and replacement order |
Fastener access must be balanced with security. Screws should resist loosening during vibration and should not create sharp areas inside the lining. Thread-locking methods, washers, metal inserts, and correctly specified torque can improve reliability.
Component coding is just as important as physical replacement. A wheel module from a later production run may look similar but use a different hole pattern, housing height, or swivel offset. Each service part should have a stable identification code linked to the suitcase model and production version.
Modularity also needs dimensional discipline. Replacing a 48 mm wheel with a 52 mm version changes the finished height and may make the case lean if only one module is changed. Replacement parts should match the original geometry, tread hardness, color, and mounting structure.
For premium business luggage, the strongest arrangement is usually:
- four individually replaceable double-spinner modules;
- internally accessible wheel fasteners;
- a removable trolley assembly;
- separate top and side carry handles;
- documented spare-part codes;
- retained parts for after-sales service;
- a lining access panel that closes cleanly after repair.
The best wheel-and-handle system is ultimately the one that remains quiet, aligned, stable, and comfortable after repeated loaded use. Smooth showroom movement is only the beginning. Real performance appears after carpet, pavement, floor joints, hurried turns, curb impacts, overhead lifting, and thousands of trolley extensions.
How Should Business Carry-On Luggage Be Organized?
Business carry-on luggage should separate work equipment, clothing, shoes, toiletries, and travel documents into distinct zones. A protected laptop section should remain accessible without opening the clothing compartment, while heavier items should sit close to the wheels and trolley wall. Compression panels, garment sections, and small-item pockets should keep a two-to-five-day load stable without adding unnecessary weight or depth.
Effective organization is not measured by the number of pockets. Every compartment occupies space, adds material, and changes weight distribution. A well-planned interior reduces search time, protects electronics, controls wrinkles, and allows security screening without exposing personal clothing.
Which Laptop Compartment Design Works Best?
A business carry-on works best with a padded laptop section positioned against the trolley side or integrated into a front-opening compartment. It should protect the computer from impact, prevent movement inside the sleeve, and remain accessible while the suitcase is upright.
The compartment must be designed around actual device dimensions rather than a screen-size label alone. Two laptops described as 15.6 inches may have different widths and thicknesses due to screen borders, hinges, ports, and body shape.
| Device category | Approximate device dimensions | Suggested internal sleeve size |
|---|---|---|
| 13-inch laptop | 30.5 × 21.5 × 1.6 cm | 32 × 23 × 2.5 cm |
| 14-inch laptop | 32.5 × 22.5 × 1.8 cm | 34 × 24 × 2.8 cm |
| Slim 15-inch laptop | 34.5 × 24 × 1.8 cm | 36 × 25.5 × 2.8 cm |
| 15.6-inch laptop | 36 × 25 × 2.2 cm | 37.5 × 27 × 3 cm |
| 16-inch workstation | 35.5 × 25 × 2 cm | 37.5 × 27 × 3 cm |
These are planning references; the intended devices should be physically tested before dimensions are fixed.
A secure sleeve needs protection on all six sides:
- 5–10 mm padding on the front and back;
- a raised base so the laptop does not rest directly on the case floor;
- reinforced lower corners;
- a soft lining that will not scratch coated surfaces;
- a closure tab that cannot press hard against the screen;
- enough clearance around zipper teeth and metal fittings.
The raised base is particularly important. When a suitcase is set down, impact travels through the wheels or lower shell into the interior. A laptop sleeve ending 20–30 mm above the structural base reduces direct contact with that impact zone.
Position also affects rolling balance. A computer weighing 1.3–2.5 kg should sit near the trolley wall rather than at the outer front surface. Placing it too far forward moves the center of gravity away from the wheels, making the case more likely to tip when a second bag is attached to the trolley.
A separate tablet sleeve can be useful, but stacking a tablet directly against a laptop creates hard-to-hard contact. A padded divider should separate the devices. Chargers, adapters, and a mouse should have their own pocket so hard components cannot press against the computer lid.
Security access must remain simple. The compartment should open far enough to remove the computer with one hand, yet not so widely that the contents fall out while the suitcase is upright. A three-sided zipper with gussets provides controlled access. Lockable zipper pulls can add reassurance, although the compartment should still be easy to operate at a screening area.
How Do Garment Panels Reduce Wrinkles?
Garment panels reduce wrinkles by limiting movement and keeping folded clothing under even, moderate compression. They are most effective when shirts, trousers, and jackets are folded along natural seams and held flat rather than packed into a loose cavity.
Wrinkles are created by pressure, moisture, heat, and repeated movement. A garment section cannot eliminate every crease, but it can prevent clothing from sliding into the curved corners of the suitcase or being crushed by shoes and chargers.
A practical garment panel should include:
- a broad compression surface rather than thin crossing straps;
- adjustable side straps that apply balanced pressure;
- smooth lining without exposed hook-and-loop material;
- rounded edges that do not leave hard fold lines;
- a zippered mesh pocket for soft, flat items;
- enough flexibility to accommodate different clothing thicknesses.
| Garment feature | Main purpose | Design caution |
|---|---|---|
| Full-width compression panel | Holds folded layers evenly | Heavy boards add unnecessary weight |
| Adjustable straps | Controls movement as the load changes | Narrow straps may mark delicate fabrics |
| Suiter fold section | Supports jackets and trousers | Consumes space in a compact case |
| Removable garment sleeve | Separates formal clothing | Can become bulky when overfilled |
| Mesh divider | Keeps clothing visible and contained | Hard zipper pulls may press into fabric |
| Folding board | Creates consistent shirt folds | Must fit the interior dimensions |
For shirts, button the front, fold the sleeves across the back, and use a folding board if consistent presentation matters. Alternate collar direction between shirts to avoid building a thick stack at one end. Placing tissue paper or a thin dry-cleaning sheet between delicate layers can reduce friction.
Trousers can be folded along the crease and placed across the full width of the case. If the interior is too short, fold them once around a layer of soft clothing rather than creating a sharp unsupported bend.
A jacket needs more room. Turn one shoulder inside out, tuck the opposite shoulder into it, align the lapels, and fold the jacket gently around a soft center layer. This method protects the shoulder structure better than pressing the jacket flat beneath heavy objects.
Compression should be firm enough to stop movement but not so strong that buttons, zippers, and seams emboss the fabric. Dense vacuum compression is unsuitable for tailored garments because it can create deep creases and flatten structured shoulders.
Moisture also matters. Clothing packed immediately after steaming may wrinkle again as it cools. Garments should be completely dry before the case is closed.
What Packing Layout Fits a 2–5 Day Trip?
A practical two-to-five-day layout uses the wheel end for shoes and toiletries, the center for folded garments, the trolley side for dense objects, and the upper section for items needed soon after arrival. Work equipment should remain separate from clothing and liquids.
The following loads provide realistic planning references for a traveler carrying one pair of shoes and wearing the second pair during transit.
| Trip length | Suggested clothing load | Approximate packed weight excluding case and laptop |
|---|---|---|
| 2 days | 2 shirts, 1 trouser, underwear, sleepwear, compact toiletries | 3–4 kg |
| 3 days | 3 shirts, 1–2 trousers, underwear, sleepwear, light layer | 4–5 kg |
| 4 days | 4 shirts, 2 trousers, underwear, sleepwear, light layer | 5–6 kg |
| 5 days | 4–5 shirts, 2 trousers, underwear, sleepwear, extra knitwear | 6–7 kg |
Footwear, climate, garment thickness, and electronic equipment can change these figures considerably.
A balanced suitcase can be divided into five functional zones:
| Zone | Recommended contents | Reason |
|---|---|---|
| Near the wheels | Shoes, toiletry pouch, compact dense items | Keeps the center of gravity low |
| Against the trolley wall | Laptop, documents, folded trousers | Stabilizes heavier flat objects |
| Main center section | Shirts, knitwear, sleepwear | Uses the largest uninterrupted space |
| Lid or divider | Underwear, ties, belts, laundry bag | Keeps small soft items contained |
| Quick-access section | Charger, travel documents, light jacket | Reduces unnecessary opening |
Packing cubes can simplify organization, but too many cubes waste space through duplicated zippers, seams, handles, and fabric walls. Two or three purpose-built cubes are usually enough for a cabin case.
A useful arrangement is:
- one medium cube for shirts and knitwear;
- one small cube for underwear and sleepwear;
- one slim pouch for cables and adapters;
- one washable shoe bag;
- one leak-resistant toiletry pouch.
Rolling soft garments can fill narrow gaps, while folding is better for collared shirts, formal trousers, and structured clothing. Socks can be placed inside clean shoes, but electronic accessories should not be stored there because pressure and residual moisture may damage them.
Weight should be reviewed before the final layout is closed. A 2.8 kg suitcase, 1.8 kg laptop, 0.4 kg charger, and 4 kg of personal items already total 9 kg. This would exceed an 8 kg cabin allowance even though the case may fit the required dimensions.
Do Front-Opening Designs Improve Access?
Front-opening designs improve access when electronics and documents must be removed frequently. They allow the suitcase to remain upright in security lines, hotel lobbies, train compartments, and office reception areas. Their main compromises are reduced internal depth, added weight, and greater pressure on the laptop when the main section is overpacked.
There are three common front-access arrangements:
| Design | Access style | Main advantage | Main limitation |
|---|---|---|---|
| Shallow front pocket | Opens only for devices and documents | Light and simple | Limited protection and capacity |
| Full front compartment | Opens on three sides | Excellent work-item organization | Adds depth, zippers, and structure |
| Front-opening main case | Entire suitcase opens from the front | Works in confined spaces | Packing balance requires care |
A conventional clamshell suitcase needs floor or bed space approximately twice its closed width when opened flat. A front-opening case can operate within a smaller footprint, which is helpful in compact hotel rooms.
A well-designed front compartment should hold:
- a laptop and tablet;
- one or two documents or a slim folder;
- passport and boarding materials;
- charging cable and compact adapter;
- pens and business cards;
- small headphones;
- a phone or power bank.
It should not become a second main compartment. Adding a book, large charger, over-ear headphones, documents, and two devices can push the front outward by several centimeters. This may cause the finished depth to exceed an airline limit even if the empty case is compliant.
Internal pressure is another concern. When the clothing section is tightly packed, the load may press through the divider into the laptop. A semi-rigid separator, controlled compression system, and reserved device depth help prevent this.
The opening direction should also be considered. A front panel that opens downward without side gussets may allow items to fall onto the floor. Gussets or retaining straps should hold it at approximately 45–90 degrees. Zippers should move around corners smoothly without rubbing against the laptop sleeve.
A front compartment is most valuable when it replaces an additional laptop bag. If a separate briefcase will always be carried, the extra structure may add weight without delivering enough benefit.
Where Should Shoes and Toiletries Be Stored?
Shoes and toiletries should be stored near the wheel end of the suitcase, separated from clothing and electronics. This position keeps dense items low, improves rolling stability, and makes efficient use of the case’s deepest lower corners.
Shoes should be placed heel-to-toe or along the sidewall, depending on the interior shape. A pair of men’s dress shoes can occupy 5–8 liters, making footwear one of the largest packing elements in a short-trip case.
| Footwear type | Approximate packed volume | Packing method |
|---|---|---|
| Lightweight loafers | 4–5 L per pair | Heel-to-toe in a slim shoe bag |
| Dress shoes | 5–7 L per pair | Separate bags with soles facing outward |
| Trainers | 6–8 L per pair | Compress laces and fill interiors |
| Ankle boots | 8–12 L per pair | Often unsuitable for a compact carry-on |
Each shoe should be covered to prevent its sole from touching clean garments. Separate shoe sleeves are more flexible than one rigid compartment because they can be positioned around other items. A wipe-clean lining is useful when a dedicated shoe zone is included.
A toiletry pouch should stand upright near the wheels or rest flat against a waterproof divider. It should not sit above a laptop, since a leaking bottle can reach the device through seams and zipper openings.
Useful toiletry features include:
- welded or coated leak-resistant lining;
- easy-to-clean internal surfaces;
- bottle loops that keep containers upright;
- a transparent removable liquids pouch;
- protected zipper ends;
- enough depth for travel-size containers without excessive movement.
For cabin travel, liquids generally require careful packing and may be subject to airport security restrictions. Rules can vary by airport and screening equipment, so current departure and transfer-airport requirements should be checked before travel.
Liquid containers should not be filled completely. Changes in cabin pressure and temperature can push material toward the cap. Screw caps should be tightened, flip-top closures should be secured, and products likely to leak can be placed inside small resealable bags.
A wet pocket may appear useful, but fully waterproof compartments are difficult to achieve when stitched seams and ordinary zippers are involved. “Water-resistant” is usually more accurate unless the pocket uses welded construction and a suitable closure.
How Should Cables and Documents Be Organized?
Cables should be separated by function, lightly secured, and stored away from clothing and laptop screens. Documents should remain flat, dry, and reachable without opening the main packing section. The goal is fast retrieval without creating a dense, tangled pouch.
A cable organizer can include:
- elastic loops for charging leads;
- a mesh pocket for a mouse;
- a padded space for a compact power adapter;
- a closed pocket for small memory devices;
- a section for travel plug adapters;
- a label area for identifying each item.
Cables should be coiled loosely instead of folded sharply. Tight bends near connector heads can damage the internal conductors. Hook-and-loop cable ties are more adjustable than fixed elastic loops, but exposed hook surfaces should not touch delicate fabrics.
Heavy adapters should sit low and close to the trolley wall. If they are placed in the lid, they can strike the laptop or pull the divider out of shape when the case is opened.
| Item | Preferred location | Reason |
|---|---|---|
| Laptop charger | Padded technical pouch near trolley wall | Keeps dense weight stable |
| Phone cable | Small elastic loop in quick-access section | Easy retrieval during transit |
| Power bank | Protected pocket accessible before boarding | Keeps it with cabin belongings |
| Travel adapter | Structured pocket near other electronics | Prevents hard edges pressing into devices |
| Presentation remote | Closed micro-pocket | Reduces loss risk |
| Earbuds | Small lined pocket | Prevents cable tangling and surface damage |
Documents need a different structure. Passports, boarding materials, and frequently handled papers belong in a quick-access pocket. Contracts, printed presentations, and formal documents should sit in a flat sleeve at least slightly larger than A4 or US Letter paper.
An A4 sheet measures 210 × 297 mm, while US Letter measures 216 × 279 mm. An internal document sleeve of approximately 235 × 320 mm can accommodate both formats with usable clearance, provided seams and zipper openings do not reduce the effective size.
The document sleeve should include:
- a firm backing to resist bending;
- a smooth lining;
- protection from the toiletry section;
- no exposed metal fittings;
- an opening wide enough for papers to enter without curling;
- a closure that does not leave a pressure mark.
Passports and credit cards should not be placed in an obvious exposed outer pocket. A concealed zippered pocket within the work compartment is more suitable. An RFID-blocking layer may be included where relevant, but it should not interfere with other functions or be presented as a substitute for secure handling.
How Should Used Clothing Be Separated?
Used clothing should be isolated in a breathable or washable bag positioned away from formal garments and work equipment. The container should expand as the trip progresses without forcing the suitcase beyond its permitted depth.
A removable laundry bag is usually more useful than a fixed internal pocket. It can be taken directly to a laundry area and cleaned separately. A coated bag helps contain moisture, while a breathable textile bag reduces trapped odor when clothing is dry.
A practical laundry bag may measure approximately 35 × 45 cm when flat and weigh less than 100 g. It should have a drawcord or zipper closure, reinforced seams, and a smooth surface that will not catch on shirts.
Wet clothing should not be sealed for long periods. If an item is damp, allow it to dry before packing whenever possible. When immediate packing is unavoidable, use a separate leak-resistant pouch and unpack it promptly after arrival.
Separating worn items also improves repacking efficiency. Clean garments remain arranged under the compression panel, while used clothing moves into the vacated space. This prevents the case from becoming progressively less organized during a multi-day trip.
Which Interior Materials Are Most Practical?
Interior materials should be lightweight, abrasion-resistant, easy to clean, and stable in color. Smooth polyester linings are widely used because they resist snagging and allow clothing to slide into place more easily than coarse fabrics.
| Interior component | Suitable material direction | Important characteristic |
|---|---|---|
| Main lining | 150D–210D polyester | Lightweight and abrasion-resistant |
| Laptop sleeve | Soft polyester, tricot, or brushed knit | Non-scratching contact surface |
| Mesh pockets | Resilient polyester mesh | Visibility without easy stretching |
| Toiletry zone | Coated polyester or TPU-backed textile | Easier cleaning and spill control |
| Compression panel | Light woven textile with internal support | Even pressure without excessive weight |
| Shoe pouch | Coated washable fabric | Dirt separation |
| Zipper tape | Durable polyester tape | Smooth repeated operation |
Very light lining can tear around zipper ends and pocket corners if those areas are not reinforced. Heavy lining may feel substantial but adds weight throughout the entire case. Selective reinforcement is more efficient than increasing the fabric weight everywhere.
Light-colored interiors improve visibility, especially in dark hotel rooms, but pale fabrics show dirt and cosmetic stains. Mid-tone grey, blue, taupe, or muted contrasting colors provide a practical balance. A contrasting pocket edge can make openings easier to locate without filling the interior with decorative details.
The lining should be removable or accessible near major hardware when repair is part of the intended service plan. A zippered maintenance panel can provide access to trolley and wheel fasteners while preserving a clean finished appearance.
The best-organized business carry-on does not attempt to create a compartment for every possible object. It establishes a clear sequence: documents and electronics remain accessible, formal clothing stays flat, dense items sit low, liquids remain isolated, and used garments are separated. Every section earns its space by protecting contents, improving balance, or reducing the time needed to move from airport to meeting.
How Does a Custom Luggage Factory Develop the Product?

A custom carry-on is developed through specification review, structural planning, material selection, pattern or mold preparation, prototype assembly, loaded testing, sample revision, and approved-sample control. The work should confirm external dimensions, empty weight, capacity, wheel alignment, trolley stability, packing layout, appearance, and airline compatibility before volume production begins. A detailed specification and signed sample prevent most costly changes later.
Luggage development is more demanding than adding a logo to an existing shell. The wheels, trolley, case body, lining, zippers, handles, locks, and internal dividers operate as one system. Changing a wheel housing may alter the overall height; increasing padding may reduce packing space; adding a front laptop section may push the depth beyond cabin limits. Each choice must therefore be reviewed against the complete product rather than in isolation.
What Does a Factory Need Before Development?
A clear product brief allows the development team to make accurate structural decisions before materials are cut or molds are prepared. The brief should describe intended travel use, target dimensions, preferred construction, internal layout, appearance, performance expectations, order quantity, testing needs, packaging, and delivery schedule.
Useful reference files include:
- dimensioned drawings or technical sketches;
- front, back, side, top, bottom, and interior views;
- target external dimensions including wheels and handles;
- preferred capacity and empty-weight target;
- laptop and tablet dimensions;
- shell, fabric, lining, and trim preferences;
- Pantone references or approved color swatches;
- logo artwork in vector format;
- zipper, puller, lock, wheel, and trolley requirements;
- packing and carton instructions;
- destination countries and applicable requirements;
- projected order quantity and SKU structure.
A reference suitcase can help communicate appearance and handling, but it should not replace a written specification. A physical sample may show shape and proportions while leaving material grade, performance expectations, tolerances, and packing details undefined.
The most useful starting dimensions distinguish between the case body and complete external size.
| Required measurement | What should be included |
|---|---|
| Overall height | Wheels, bottom structure, body, and fixed top handle |
| Overall width | Shell or fabric body, side handle, feet, and corner protection |
| Overall depth | Front and rear surfaces, pockets, zipper tracks, and projections |
| Body dimensions | Main shell or sewn body without external hardware |
| Closed depth | Complete case with the expander closed |
| Expanded depth | Complete case with the expansion section fully open |
| Interior dimensions | Usable space after lining, trolley channels, and dividers |
| Trolley height | Floor to top of grip at each locking position |
The brief should also identify priorities. A case cannot simultaneously maximize capacity, minimize weight, use oversized wheels, include a deep front compartment, and remain within a restrictive cabin size. Setting priorities early helps resolve these conflicts logically.
A useful priority order for business luggage may be:
- Complete external size
- Empty weight
- Wheel and trolley durability
- Laptop protection
- Packing capacity
- Garment organization
- Replaceable hardware
- Appearance and decorative details
The sequence can change by product concept, but it should be agreed before development begins.
How Does the Custom Design Process Work?
Development usually starts with a product specification and component plan. The structure is then converted into drawings, patterns, or three-dimensional files. Materials and hardware are selected, a prototype is assembled, and the completed case is measured and tested under load. Revisions continue until appearance and function match the approved requirements.
A practical development sequence looks like this:
| Stage | Main work | Approval record |
|---|---|---|
| 1. Requirement review | Confirm use, dimensions, weight, capacity, features, quantity, and deadline | Product brief |
| 2. Structural planning | Define shell type, opening, trolley position, wheel layout, and internal zones | Construction drawing |
| 3. Component selection | Match wheels, trolley, zippers, handles, lining, lock, and trims | Component sheet |
| 4. Color and branding | Confirm body color, lining color, logo method, pullers, and labels | Color and artwork file |
| 5. Pattern or tooling work | Prepare soft-side patterns, shell tooling, or sample molds | Pattern or mold record |
| 6. Prototype assembly | Build the first functional sample | Prototype report |
| 7. Measurement and testing | Check size, weight, capacity, rolling, loading, drops, and hardware | Test record |
| 8. Revision | Correct structure, fit, appearance, or performance | Revision list |
| 9. Approval sample | Produce the final version for confirmation | Signed sample |
| 10. Pre-production setup | Lock materials, dimensions, workmanship, packaging, and inspection criteria | Production specification |
Hard-shell and soft-side luggage require different development routes.
A soft-side case relies on pattern engineering. Fabric panels, foam, reinforcement boards, zipper curves, piping, pockets, and lining must join without distortion. Even small pattern errors can cause a twisted body, uneven zipper line, or front panel that bulges after packing.
A hard-shell case depends more heavily on shell geometry and tooling. Polycarbonate, ABS, polypropylene, or composite sheets behave differently during forming. Draw depth, corner radius, surface texture, wall thickness, and rib design affect stiffness and appearance. A new shell shape may require dedicated molds, while an existing shell platform can shorten development time and reduce tooling investment.
Component selection cannot wait until the end. The wheel base determines corner geometry. The trolley occupies interior space. The lock must align with zipper or frame construction. The top handle needs structural support. These parts should be incorporated into the early drawings.
Which Materials and Components Need Confirmation?
Every visible and structural component should be identified by material, dimensions, color, finish, and performance expectation. Descriptions such as “strong wheel,” “premium lining,” or “high-quality zipper” are too subjective for repeatable production.
A component specification may include:
| Component | Details to confirm |
|---|---|
| Hard shell | Material, thickness, texture, gloss, color, and reinforcement ribs |
| Soft body | Fiber content, denier, weave, coating, color, and backing |
| Lining | Fabric weight, color, printing, hand feel, and abrasion resistance |
| Main zipper | Size, coil type, tape color, puller, and lock compatibility |
| Expansion zipper | Closed and expanded depth, tape, and reinforcement |
| Wheels | Diameter, tread material, color, bearing, housing, and mounting pattern |
| Trolley | Tube material, wall thickness, stages, lock positions, and grip shape |
| Carry handles | Material, padding, return function, and anchoring structure |
| Lock | Combination type, finish, position, and destination requirement |
| Reinforcement | Material, thickness, location, and attachment method |
| Logo | Technique, dimensions, color, location, and artwork |
| Packaging | Dust bag, polybag, tags, protective parts, and carton structure |
Color should be approved through physical swatches rather than screen images alone. Shell gloss, textile weave, coating, and lighting can change how a color appears. A Pantone reference is useful, but it does not remove the need to review the actual material.
Material weight should be considered as part of the full case. Adding 50 g in several different areas can quietly increase the empty weight by hundreds of grams. A component weight sheet helps identify where weight can be reduced without weakening high-stress areas.
| Component group | Possible share of empty weight |
|---|---|
| Body or shell | 30–45% |
| Trolley and carry handles | 15–25% |
| Wheels and housings | 10–18% |
| Lining and dividers | 10–18% |
| Zippers, lock, and fittings | 5–12% |
| Reinforcement and decorative parts | 5–10% |
Actual figures vary by construction. The value of the table is in showing that internal organization and hardware can account for a substantial part of total weight.
What Should a Carry-On Luggage Sample Confirm?
A carry-on sample should confirm more than color and appearance. It must verify complete external dimensions, empty weight, usable capacity, balance, rolling behavior, trolley operation, carry-handle comfort, zipper movement, internal organization, branding, workmanship, and packaging.
The sample review should begin with measurable items:
| Inspection item | Suggested record |
|---|---|
| Overall dimensions | Height × width × depth, including all projections |
| Expanded dimensions | Complete size with expansion zipper open |
| Empty weight | Measured without removable packaging |
| Usable capacity | Practical packed volume rather than body calculation alone |
| Trolley positions | Floor-to-grip height at every lock stage |
| Wheel diameter | Tread diameter and complete housing projection |
| Laptop sleeve | Usable width, height, depth, and raised-base distance |
| Carry handles | Grip clearance and return behavior |
| Carton size | Length × width × height with final packing |
| Gross carton weight | Packed product plus all packaging |
The first sample should be packed with a realistic two-to-five-day business load. This reveals issues that an empty inspection may miss:
- the front panel becomes too deep;
- the case tips when the laptop is inserted;
- compression panels interfere with clothing;
- the trolley channels reduce usable width;
- shoes do not fit the intended lower section;
- zipper corners become difficult to close;
- the laptop receives pressure from the main load;
- the case exceeds its weight target;
- the wheels rub against their housings under load.
Appearance should be inspected upright, lying flat, and fully opened. Check the alignment of shell halves, zipper tracks, logo, handles, wheel housings, lining seams, internal pockets, and divider panels.
For a hard-shell case, examine:
- shell thickness consistency;
- whitening or stress marks at deep corners;
- surface distortion;
- mismatch between front and rear shells;
- uneven trimming;
- gaps around locks and handles;
- loose or poorly seated wheel housings.
For a soft-side case, examine:
- panel symmetry;
- zipper-wave control;
- front-pocket distortion;
- piping consistency;
- seam puckering;
- fabric grain direction;
- reinforcement beneath handles and wheels.
The approved sample should be accompanied by a written specification. A physical case alone cannot reliably communicate internal materials, hidden reinforcements, tolerances, test conditions, or packaging sequence.
How Is Functional Performance Checked?
Functional evaluation should use a loaded case because wheels, handles, seams, and shells behave differently under weight. The chosen load should reflect actual travel use and any intended product claim.
Common luggage checks include:
| Test | What it evaluates |
|---|---|
| Loaded rolling | Wheel wear, alignment, noise, and housing stability |
| Obstacle cycling | Response to joints, bumps, and repeated impact |
| Wheel-corner drop | Strength of wheel mounts and lower corners |
| Face and edge drops | Shell, frame, seam, and zipper protection |
| Trolley cycling | Extension, retraction, locking, and tube wear |
| Trolley pull | Mounting strength under pulling force |
| Carry-handle lifting | Grip attachment and body reinforcement |
| Zipper cycling | Slider movement and tape durability |
| Static loading | Body deformation and handle support |
| Tumbling | Repeated multi-directional impact |
| Color rubbing | Transfer from textile or printed surfaces |
| Carton drop | Protection provided by shipment packaging |
There is no single cycle count or test load suitable for every suitcase. A lightweight cabin case, premium business model, promotional item, and checked-luggage collection may require different settings. The test specification should record load, distance, speed, drop height, cycle count, surface, conditioning, and acceptance criteria.
After testing, inspect for:
- wheels that drift, wobble, or stop rotating freely;
- trolley tubes that bend, scratch excessively, or fail to lock;
- screws, rivets, and brackets that become loose;
- cracked housings or stressed shell corners;
- zipper separation;
- torn lining around hardware access areas;
- handle deformation;
- permanent body distortion;
- increased noise;
- visible logo or finish damage.
Passing a test means meeting defined criteria after the procedure, not simply remaining in one piece. A suitcase that still rolls but leans, rattles heavily, or requires unusual force to move should not be treated as fully acceptable.
How Long Does Sampling and Production Take?
A custom luggage sample commonly takes about 5–7 days when it uses available materials, existing shell platforms, and standard hardware. A more complex case may require 7–15 days, especially when it includes new structural patterns, custom components, special colors, or repeated adjustments.
| Project type | Typical sample timing | Main variables |
|---|---|---|
| Existing structure with custom color and logo | 5–7 days | Material and trim availability |
| Modified soft-side construction | 7–10 days | Pattern changes and sewing complexity |
| New interior organization | 7–15 days | Pocket layout, padding, and fit |
| Modified hard-shell platform | 10–20 days | Shell preparation and component matching |
| Completely new molded shell | Project-specific | Drawing, tooling, forming, and trial corrections |
Timing begins after the specification, artwork, materials, and payment arrangements are confirmed. It does not usually include international sample delivery.
Volume production for standard bag programs commonly takes about 20–30 days after approval and material readiness. Complex luggage may require approximately 25–45 days due to shell preparation, hardware coordination, assembly, testing, and packaging.
A practical schedule should include:
- Requirement and drawing confirmation
- Material and component preparation
- First sample
- Review and consolidated comments
- Revised sample if required
- Final approval
- Material preparation for the order
- Production setup
- Assembly and inline inspection
- Final inspection and packaging
- Shipment
Frequent isolated revisions can extend the schedule. Comments are more efficient when they are consolidated into one marked document with photographs, measurements, and priorities. Statements such as “make it stronger” or “improve the shape” should be replaced by specific changes, such as increasing reinforcement thickness, lowering a wheel seat by 3 mm, or reducing front-pocket depth by 10 mm.
The approved sample should be frozen before volume work begins. Changes made after materials are prepared may affect price, timing, compatibility, and previously approved details.
Which Details Affect the Price?
Luggage cost is shaped by shell or fabric material, hardware grade, trolley structure, wheel system, internal organization, logo method, tooling, testing, packaging, order quantity, and SKU count. Visual complexity matters, but hidden structural components often have a greater effect on durability and cost.
| Cost area | Lower-complexity choice | Higher-complexity choice |
|---|---|---|
| Body | Standard polyester or existing shell | Custom shell, premium PC, specialty textile |
| Wheels | Standard single spinner | Quiet double spinner with replaceable module |
| Trolley | Standard two-stage system | Multi-stage reinforced system |
| Interior | Basic divider and straps | Laptop section, garment panel, multiple organizers |
| Zippers | Standard coil zipper | Premium zipper, expansion section, special pullers |
| Logo | Printed or standard badge | Molded metal plate, custom hardware, multiple placements |
| Color | Available stock color | Custom-dyed textile or custom shell color |
| Packaging | Protective bag and export carton | Dust bag, retail box, inserts, and printed materials |
| Development | Existing structure | New patterns, molds, and custom components |
| Testing | Internal functional checks | Additional laboratory or destination-specific evaluation |
Increasing the number of colors can affect material quantities even when the total order volume stays the same. An order of 2,000 pieces in one color is simpler than the same quantity split across eight colors because each color requires separate materials, setup, tracking, inspection, and packing.
Price comparison should use the same specification. A quotation for a basic wheel, thin lining, standard trolley, and simple interior cannot be compared fairly with one that includes reinforced corners, branded hardware, a laptop compartment, and replaceable components.
The strongest cost control comes from simplifying features that add little travel value while protecting structural items that affect service life. Decorative pockets, excessive internal panels, oversized metal trims, and unnecessary packaging can often be reduced before wheel mounts, trolley supports, zippers, or carry handles are downgraded.
What Is a Practical MOQ for Custom Luggage?
A practical starting quantity for custom luggage is commonly 500 pieces per style. Qualified programs may begin at approximately 200–300 pieces when existing structures, available materials, standard hardware, and limited color splits are suitable.
The workable quantity depends on what is being customized:
| Customization level | Practical quantity consideration |
|---|---|
| Logo on an existing design | Lower entry quantity may be possible |
| Custom body color | Depends on material or shell color minimum |
| Modified pockets or lining | Pattern and setup requirements increase |
| Custom wheel or trolley color | Component minimum may govern |
| New metal hardware | Tooling and plating quantities apply |
| New shell mold | Higher total volume is usually needed |
| Multiple sizes | Each size requires separate components and setup |
| Multiple colors | Quantity is divided by color and SKU |
MOQ should be reviewed by style, size, and color rather than total order quantity alone. For example, 1,200 cases divided across three sizes and four colors creates 12 combinations, averaging only 100 pieces each. This structure is more difficult than 1,200 units in one size and two colors.
A focused first collection might use one cabin size, two colors, and one shared hardware set. Future sizes and colors can then be developed from confirmed performance and travel use.
How Do You Choose the Best Custom Luggage Factory?

A suitable luggage facility should demonstrate control over structural development, sample accuracy, component sourcing, loaded testing, volume consistency, inspection, and spare-part planning. Attractive samples are important, but repeatable dimensions and reliable hardware matter more after months of travel.
Before committing to a program, review:
- experience with hard-shell, soft-side, or hybrid luggage;
- access to suitable shell, wheel, trolley, zipper, lock, and lining options;
- ability to create dimensioned drawings and component records;
- sample development and revision control;
- measurement of completed external size;
- loaded rolling and impact testing capability;
- incoming, inline, and final inspection procedures;
- traceability for materials and components;
- control of color and surface finish;
- replacement-part availability;
- packing and carton-drop evaluation;
- production timing supported by a written schedule.
The sample review should also reveal how the team responds to technical conflicts. If a requested front compartment pushes the case beyond 23 cm, the development team should explain the effect and offer workable alternatives. If a larger wheel improves rough-surface movement but increases height, the tradeoff should be measured before approval.
Jundong supports custom luggage development from initial specification through sampling, component confirmation, production, and inspection. Standard bag programs generally begin at 500 pieces per style, while qualified projects may be assessed at 200–300 pieces. Samples commonly take 5–7 days, with complex designs requiring about 7–15 days.
A useful project inquiry should include the target size, estimated quantity, preferred construction, destination, required features, color plan, logo artwork, and intended delivery date. These details allow the case structure, sampling route, and realistic timing to be evaluated before development begins. Project files can be sent to info@jundongfactory.com.