 Skip to content
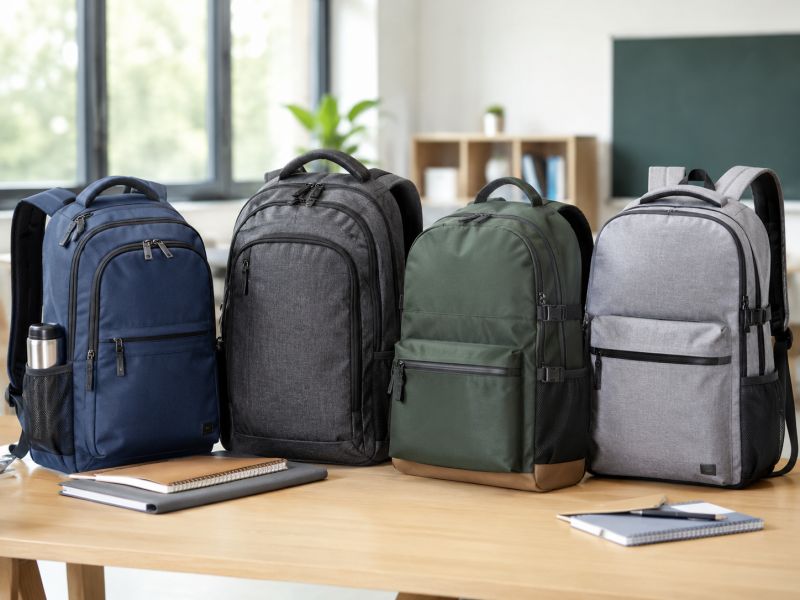
A school backpack can look simple on a table, but real campus use is never simple. Students carry notebooks, laptops, binders, bottles, chargers, hoodies, lunch boxes, sports items, and small personal items in the same bag. The backpack gets placed under desks, pushed into lockers, dropped on floors, pulled by one strap, and opened many times each day. For campus programs, the right backpack is not the one that only looks clean in a photo. It is the one that still feels useful after weeks of daily use.
A strong campus backpack should match the student’s daily load, fit the right device size, spread weight across padded straps, protect key stress areas, and keep its shape after repeated use. For many high school and college programs, a 20–30L backpack with a laptop sleeve, reinforced stitching, durable fabric, smooth zippers, bottle storage, and stable logo placement gives the best balance between cost, comfort, and long-term use.
The real difference appears when the bag is full. A backpack that feels light and neat when empty can become awkward after a laptop and books are added. A logo can look centered before loading but wrinkle after the front panel is stretched. A shoulder strap can feel acceptable for one minute, then dig into the shoulders after a long walk across campus. That is why the best backpack decisions start with use, not decoration. The following checklist turns size, comfort, and durability into practical checks that can be reviewed before sampling, before bulk production, and before students carry the final bag.
What Size Works Best?
The best school backpack size is not the biggest size available. It is the size that fits the student’s daily items, body type, campus schedule, and program purpose without creating unnecessary weight, bulk, or cost. For many high school and college programs, a 20–30L backpack is the most practical zone. Lighter welcome gifts can use 12–18L, while commuter, tech, sports, or full-day campus use may need 25–32L.
Backpack size should be checked from three angles: what students carry, how the bag feels when loaded, and how the size affects the full project. A backpack that is too small may look neat but fail when folders, books, or laptops are added. A backpack that is too large may look generous but become heavy, bulky, and more expensive to ship. The right design gives enough space for daily use while keeping the shape close to the back.
A useful size decision should begin with a load list, not a product photo. Before choosing dimensions, list the items students are expected to carry on a normal day: notebooks, folders, laptop, tablet, charger, bottle, hoodie, lunch box, pens, ID card, headphones, sports clothes, or event materials. Then test whether the backpack can hold those items without forcing the zipper, distorting the front panel, or pulling backward on the shoulders.
For campus programs, size also affects cost. More height, width, and depth means more fabric, lining, padding, zipper length, carton volume, and freight space. A larger backpack can look more valuable, but only if the structure is strong enough. If the main compartment becomes deeper without stronger straps, better back support, and reinforced seams, the extra volume can turn into a comfort problem.
A practical campus backpack size should meet these basic checks:
The largest folder or notebook should fit flat without bent corners.
The laptop sleeve should match the target device size, usually 13–16 inches for college use.
The front pocket should still open when the main compartment is filled.
The bottle pocket should hold a common bottle securely without pulling the side panel out of shape.
The loaded backpack should sit close to the back instead of hanging outward.
The bottom should keep shape instead of sagging under books or tech items.
The logo area should stay smooth after the bag is loaded.
| Campus Use | Practical Capacity | Suggested Size Direction | Common Load | Size Risk |
|---|---|---|---|---|
| Welcome event bag | 12–18L | Compact and light | Brochure, T-shirt, small notebook, bottle | May feel too temporary |
| School supply bag | 18–24L | Medium height, simple depth | Folders, notebooks, pencil case, bottle | Must fit folders flat |
| High school daily bag | 22–30L | Larger main compartment | Books, binder, lunch, bottle, tablet | Too much depth may overload |
| College orientation bag | 20–28L | Laptop sleeve plus daily storage | Laptop, charger, hoodie, campus kit | Needs stable pocket layout |
| Commuter campus bag | 25–32L | Stronger straps and back support | Laptop, books, clothes, bottle | Larger size needs better comfort |
| Sports or activity bag | 28–35L | Deeper body, stronger bottom | Shoes, clothes, towel, bottle | May become too bulky for class use |
A good size is not only about capacity. It is also about proportion. A tall narrow backpack can fit laptops but may feel tight for lunch boxes or hoodies. A short deep backpack may hold more bulky items but may pull away from the back. A wide backpack may hold folders well but may look oversized on smaller students. The safest design often uses moderate height, controlled depth, and a clean compartment layout.
For mixed student groups, a medium size works better than an extreme size. If the backpack is used across different ages, body heights, and school activities, avoid making the back panel too long or the body too deep. A balanced backpack is easier to wear, easier to pack, and easier to distribute.
What Is A Good Size For A School Backpack?
A good school backpack size should hold daily essentials without forcing students to overpack or struggle with the zipper. For many student programs, a practical size is about 40–48 cm high, 28–34 cm wide, and 12–18 cm deep. The exact size should change based on age group, load type, and whether the bag includes a laptop sleeve.
For younger students, the backpack should not be too long. If the bottom of the bag drops far below the waist, the weight shifts downward and backward. This can make the bag feel heavier than it is. A smaller body, lighter fabric, and simpler pocket layout are usually better for lower-grade school programs.
For high school use, the backpack needs more space for folders, notebooks, books, lunch, and tech items. A height around 43–47 cm often works well because it fits standard study materials while still looking balanced. Depth should be reviewed carefully. Too little depth creates a tight main compartment; too much depth encourages overload.
For college use, the size should be planned around laptops and longer daily schedules. Many college students leave their dorm or home for several hours, so the backpack may carry a laptop, charger, notebooks, headphones, bottle, hoodie, and personal items. A size around 45–50 cm high with a 20–30L capacity often feels practical, especially when the inside layout is organized.
| Student Group | Practical Height | Practical Width | Practical Depth | Capacity Direction |
|---|---|---|---|---|
| Younger students | 35–40 cm | 25–30 cm | 10–14 cm | 12–18L |
| Middle school | 38–44 cm | 27–32 cm | 12–16 cm | 16–24L |
| High school | 43–48 cm | 30–34 cm | 14–18 cm | 22–30L |
| College | 45–50 cm | 30–36 cm | 14–20 cm | 20–32L |
| Commuter or tech use | 46–52 cm | 31–37 cm | 16–22 cm | 25–35L |
These numbers should not be treated as fixed rules. They are starting references for sample review. The real test is whether the backpack carries the intended items comfortably. If a 24L backpack has smart pocket placement, it may feel more useful than a poorly arranged 30L backpack. If the main compartment opens wide and the laptop sleeve is well placed, students can pack faster and avoid messy storage.
A strong sample review should include real items. Put folders, books, a bottle, a device, a charger, and a hoodie into the backpack. Then check the zipper, shape, strap angle, back contact, and pocket access. If the bag only looks good when empty, the size still needs adjustment.
Which Capacity Fits Campus Programs?
The right capacity depends on the purpose of the campus program. A welcome gift backpack can be lighter and smaller. A school supply backpack needs enough space for study materials. A college backpack needs device storage and better organization. A sports or commuter backpack may need more volume and stronger structure.
For light events, 12–18L can be enough. This size works when the backpack carries a T-shirt, leaflet, small notebook, and bottle. It keeps material use and carton volume under control. However, it may not be used for long if it feels too small or too thin. If the goal is long-term visibility, the design may need more daily-use value.
For school supply programs, 18–24L is often a practical choice. It can fit notebooks, folders, stationery, and a water bottle without becoming too large. The main compartment should be tall enough for folders, while the front pocket should help separate small items. This size also helps control cost when large quantities are needed.
For high school and college daily use, 22–30L is usually stronger. This capacity gives more room for books, tech items, jackets, lunch, and personal belongings. But capacity alone is not enough. Once the bag reaches this size, padded straps, better back support, and reinforced seams become more important.
For commuter or sports-related campus programs, 28–35L may be useful. This size can fit clothes, shoes, training items, or full-day supplies. The trade-off is bulk. A backpack in this capacity zone should have better shoulder straps, stronger bottom panels, and more careful pocket placement. Without these details, the bag may feel heavy and unstable.
| Program Type | Better Capacity | Useful Features | When To Avoid |
|---|---|---|---|
| One-day campus event | 12–18L | Light body, front pocket, simple logo | Avoid if daily use is expected |
| Donation or school supply kit | 18–24L | Folder space, bottle pocket, strong zipper | Avoid if laptops are required |
| High school daily use | 22–30L | Reinforced straps, deeper main space | Avoid weak bottom structure |
| College welcome program | 20–28L | Laptop sleeve, organizer, clean logo | Avoid oversized promotional look |
| College commuter use | 25–32L | Padded back, tech storage, strong zippers | Avoid thin straps |
| Sports or club program | 28–35L | Bigger depth, bottle pocket, reinforced bottom | Avoid if classroom use is primary |
Capacity should also be reviewed against packing and distribution. A backpack with more padding and deeper compartments may look better, but it also takes more carton space. If the program involves thousands of pieces, even a small increase in carton volume can affect storage and freight planning. A backpack should be large enough to be useful but compact enough to manage efficiently.
What Kind Of Backpacks Do College Students Use?
College students usually use backpacks that can support class, study, commuting, dorm life, café work, gym visits, and short trips. The most common choices are laptop backpacks, clean campus daypacks, commuter backpacks, and multi-pocket backpacks with a simple outside look and practical inside storage.
A college backpack should not look too childish or too much like a cheap event giveaway. Students are more likely to keep using a bag when it fits their daily style. Neutral colors, clean front panels, subtle logo placement, smooth zipper pulls, and organized compartments usually work better than oversized graphics or crowded decoration.
The laptop sleeve is one of the most important features for college use. Many students carry a 13–16 inch laptop or tablet. A sleeve close to the back panel helps keep the heaviest item stable. If the laptop sits in the center of a large open compartment, it can shift, hit books, and make the backpack feel unbalanced.
College students also need quick access. A front organizer pocket can hold pens, cables, earbuds, cards, power banks, and keys. A top or small front pocket can hold items used often. Side pockets should fit common water bottles without becoming loose too quickly. A backpack with good organization saves time during class, travel, and study sessions.
| College Backpack Type | Best Use | Size Direction | Key Detail |
|---|---|---|---|
| Classic campus daypack | Daily class and library | 20–26L | Simple layout and comfortable straps |
| Laptop backpack | Class, study, tech use | 22–30L | Padded sleeve and organized pocket |
| Commuter backpack | Long days away from home | 25–32L | Better back panel and larger storage |
| Minimal backpack | Light class schedule | 16–22L | Clean look and light weight |
| Sports campus backpack | Gym, club, team activity | 28–35L | Stronger bottom and deeper body |
| Retail-style campus bag | Bookstore or school store | 20–28L | Better fabric and refined logo finish |
For college programs, the outside should stay clean and wearable, while the inside should be organized. This design direction makes the backpack useful after orientation week or event day. A bag students keep using gives stronger long-term value than one used only once.
Is A Laptop Pocket Needed?
A laptop pocket is needed when the backpack is designed for college students, high school tech programs, staff use, commuter use, bookstore items, or higher-value campus gifts. It may not be necessary for basic school supply bags, short-term event bags, or programs focused only on light items.
A laptop sleeve adds material, padding, lining, and sewing time. That means it affects cost. But when students carry devices every day, it is often worth it. A sleeve protects the device from books, pens, chargers, and bottle pressure. It also keeps the heaviest item closer to the back, which improves balance.
There are several laptop pocket structures. A simple sleeve gives basic separation. A padded sleeve improves daily protection. A suspended sleeve lifts the device slightly above the bottom seam, helping reduce impact when the bag is placed on the floor. A separate laptop compartment allows faster access but adds more fabric, zipper length, and sewing work.
| Laptop Pocket Type | Suitable Program | Strength | Cost Level |
|---|---|---|---|
| No sleeve | Light event or supply kit | Lower cost and simple build | Low |
| Basic inner sleeve | General high school or light college use | Separates device from books | Low to medium |
| Padded sleeve | College and daily tech use | Better protection and comfort | Medium |
| Suspended padded sleeve | Higher-value tech programs | Reduces bottom impact | Medium to higher |
| Separate laptop compartment | Commuter or retail backpack | Faster access and better organization | Higher |
The laptop pocket should be reviewed with the real device size. A sleeve marked for a laptop may still be too tight for certain models. The opening should allow the laptop to slide in smoothly without scraping the zipper. The top edge should not be exposed too much. The bottom padding should not collapse when the bag is loaded.
A good laptop pocket also needs the right lining. Rough lining can scratch device cases. Thin lining may tear from repeated insertion. Loose stitching inside the sleeve can catch corners. These issues are easy to fix during sampling but difficult to correct after production starts.
School Backpack Size Vs Daily Load
Backpack size and daily load must be reviewed together. A large backpack does not automatically carry better. If the pocket layout is poor, heavy items can shift outward and make the bag feel heavier. A smaller backpack with better structure may feel more comfortable than a larger backpack with weak support.
The daily load should be tested in three levels.
Light load: laptop or tablet, notebook, charger, bottle, small items.
Medium load: laptop, two books, folder, hoodie, bottle, charger, stationery.
Heavy load: laptop, textbooks, binder, lunch, sports clothes, bottle, accessories.
Each load level reveals a different issue. A backpack may look fine with a light load but sag with books. It may close well with notebooks but struggle with a hoodie and bottle. It may carry a laptop well but become unstable when the front pocket is filled with accessories.
| Load Level | Common Items | What To Check |
|---|---|---|
| Light | Laptop, notebook, charger, bottle | Basic fit, sleeve access, zipper smoothness |
| Medium | Laptop, books, folder, hoodie, bottle | Shape stability, strap pressure, front pocket access |
| Heavy | Textbooks, binder, lunch, clothes, bottle | Bottom sagging, seam stress, zipper curve, back pull |
During a loaded test, the backpack should stay close to the body. If it leans outward, the depth may be too large or the heavy items may be placed too far from the back. If the bottom drops heavily, the bottom panel or gusset may need reinforcement. If the zipper bends sharply, the opening pattern or compartment size may need adjustment.
Logo position should also be checked after loading. A logo that looks perfect on an empty front panel may wrinkle when the main compartment expands. If the backpack has a large front pocket, the logo should be placed where it remains visible and stable. This is especially important for school identity, student clubs, campus shops, or event programs.
A practical final check is simple: load the sample as students will use it, wear it for several minutes, open and close each pocket, place it on the floor, pick it up by the handle, and check whether the shape still looks clean. If the backpack passes this test, the size is much more likely to work in real campus life.
How Should Comfort Be Checked?

Comfort should be checked with weight inside the backpack, not with an empty sample. A campus backpack should sit close to the back, spread pressure across both shoulders, keep laptops and books stable, and allow easy strap adjustment. The main areas to review are shoulder straps, back panel, load position, chest strap need, handle strength, and shape stability after packing.
A backpack can look soft, clean, and well shaped when it is empty, but campus use starts when weight is added. The real test begins after books, a laptop, a bottle, a charger, a hoodie, and personal items are packed inside. If the bag pulls backward, digs into the shoulders, traps heat against the back, or swings while walking, students will quickly stop using it.
Comfort is not only a feeling. It comes from measurable details: strap width, padding thickness, foam density, back panel construction, compartment position, adjuster quality, and loaded shape. A backpack with a large capacity but weak shoulder support can feel worse than a smaller backpack with better balance. A padded back panel may help, but only if heavy items sit in the right place.
Campus use also involves different body shapes. The same backpack may be worn by smaller students, taller students, athletes, commuters, and staff. A sample should be tried by several people, then checked while walking, climbing stairs, sitting, picking the bag up by the handle, and placing it on the floor. These simple actions reveal many hidden comfort problems before the full order is produced.
| Comfort Area | What To Check | Practical Target | Risk If Ignored |
|---|---|---|---|
| Shoulder straps | Width, foam, angle, edge feel | 6–8 cm width for many daily campus styles | Shoulder pressure, slipping, neck rubbing |
| Strap padding | Thickness and recovery after pressing | Firm foam that does not flatten too quickly | Padding feels soft at first but weak under load |
| Back panel | Cushion, shape, breathability | Light foam or mesh support for daily use | Books or laptop corners press into the back |
| Laptop position | Sleeve location and stability | Close to the back panel | Heavy item pulls the bag outward |
| Adjusters | Smooth movement and holding strength | Easy to adjust, no slipping while worn | Straps loosen during walking |
| Top handle | Grip and seam strength | Reinforced webbing and firm stitching | Handle seam splits under repeated lifting |
| Bottom shape | Shape after loading | Stays stable without heavy sagging | Load shifts downward and feels heavier |
A comfort review should not rely on one person’s opinion. A better approach is to use a loaded sample and repeat the same checks with different wearers. If the backpack feels acceptable only when lightly packed, the structure may not match real campus life.
Why Do Straps Matter?
Shoulder straps matter because they carry most of the load and directly affect how heavy the backpack feels. Thin straps create pressure lines on the shoulders. Poor strap angle can rub the neck or slide outward. Weak strap seams can open after repeated pulling, especially when books and laptops are carried every day.
A good strap should spread pressure over a wider surface. For many school and college backpacks, a strap width of about 6–8 cm works better than narrow promotional-style straps. The padding should feel firm, not overly soft. Very soft foam can feel comfortable for the first few minutes but may flatten after repeated use. Firm foam keeps support longer and helps the strap hold its shape.
Strap edge finishing also matters. Rough binding can rub against clothing or skin. Curved straps often fit the shoulder better than straight straps, especially when the backpack is larger. The lower webbing and adjuster should allow smooth length changes but stay locked after adjustment.
The strap attachment area deserves special review. The top seam carries stress every time the bag is worn, lifted, pulled, or overloaded. Reinforced stitching, extra backing fabric, and bar tack details can reduce failure risk. During sample checking, the loaded backpack should be lifted by both straps and lightly pulled to see whether the seam stretches, puckers, or shows loose threads.
| Strap Detail | Better Choice | What It Improves |
|---|---|---|
| Width | Around 6–8 cm for daily school and college use | Spreads shoulder pressure |
| Padding | Medium-firm foam | Keeps shape under load |
| Shape | Slight curve or ergonomic angle | Reduces slipping and neck rubbing |
| Edge | Smooth binding or soft edge finish | Improves long-wear comfort |
| Top seam | Reinforced stitch or bar tack | Reduces tearing risk |
| Adjuster | Strong plastic or metal slider | Keeps strap length stable |
Straps should be checked after the backpack is filled. An empty bag cannot show whether the straps will twist, dig in, or slip. A proper test uses the same load students are expected to carry.
What Back Panel Works Best?
The most suitable back panel depends on backpack size, climate, load weight, and daily use time. A simple foam-padded back panel works for many school programs. A breathable mesh panel or channel design is better for warmer climates, long campus walks, sports programs, commuter use, or larger backpacks.
A backpack without back padding may control cost, but it can feel harsh once hard items are inside. Laptop corners, book edges, binders, and chargers can press into the back. Even a thin foam layer can improve comfort by creating a smoother surface between the body and the load.
Back panel design should be matched to the use scene. A basic school supply backpack may only need light foam. A college laptop backpack may need thicker padding near the laptop area. A commuter or sports backpack may benefit from mesh and airflow channels. Too much padding can add weight, bulk, and carton volume, so the goal is not maximum thickness. The goal is support where the back actually touches the bag.
The sample should be loaded before checking the back panel. Pressing an empty panel by hand is not enough. Insert a laptop, books, and a bottle, then wear the bag for several minutes. Check whether hard edges can be felt, whether the panel bends properly, and whether the backpack stays close to the body.
| Back Panel Type | Good For | Watch Carefully |
|---|---|---|
| Flat fabric back | Very light event bags | Low comfort under books or laptops |
| Light foam back | School supply and simple campus use | Foam should not wrinkle or collapse |
| Padded back with lining | Daily school or college use | Needs stable stitching and smooth inner finish |
| Mesh padded back | Warm weather, sports, commuter use | Adds cost and more technical look |
| Channel back panel | Heavier daily load and long walking | Needs proper shape, not just decoration |
A good back panel should make the backpack feel smoother, not heavier. It should support the load without making the bag bulky. For daily campus use, comfort usually improves more from smart padding placement than from simply adding thick foam everywhere.
How Does Weight Balance Work?
Weight balance works by keeping heavy items close to the back and preventing the backpack from pulling outward. In campus use, the heaviest items are usually laptops, books, binders, and bottles. If these items sit too far from the body, the backpack feels heavier even when the total weight is the same.
The laptop sleeve is one of the most important comfort features because it controls where the heaviest item sits. A sleeve placed near the back panel helps stabilize weight. If the laptop floats in a large open compartment, it may shift while walking and pull the bag backward. Books should also sit close to the back, while lighter items can go into front pockets.
Pocket depth affects balance. A deep front pocket may look useful, but if it is filled with chargers, power banks, and small heavy objects, the backpack may lean outward. Side bottle pockets should hold bottles securely without pulling the side panel out of shape. A bottle pocket placed too high or too loose can make the bag swing.
A loaded side-view check is useful. After packing the backpack, look at it from the side while worn. The bag should stay close to the back instead of hanging backward. The bottom should not droop heavily. The straps should lie flat on the shoulders. If the lower back area feels pulled, the design may need better compartment placement, stronger bottom support, or adjusted strap angle.
| Load Item | Better Position | Reason |
|---|---|---|
| Laptop | Closest to back panel | Keeps heavy flat item stable |
| Textbooks | Main compartment near the back | Reduces outward pull |
| Hoodie or clothes | Middle or upper main compartment | Adds volume without hard pressure |
| Charger and power bank | Small organizer pocket, not too far forward | Prevents front-heavy pull |
| Bottle | Side pocket with secure depth | Keeps liquid away from books and laptop |
| Pens and cards | Front organizer | Easy access without affecting balance |
A balanced backpack does not need to feel heavy even when it carries many items. Poor balance makes students feel the weight faster. Good balance keeps the load stable and close, which improves comfort during walking, stairs, and commuting.
Are Chest Straps Needed?
Chest straps are useful when the backpack carries heavier loads, sits on smaller shoulders, or is used for long walking, cycling, sports, outdoor activities, or commuter routes. They are not always needed for light school supply bags or simple campus event backpacks. The decision should come from real use, not from decoration.
A chest strap keeps shoulder straps from sliding outward. It also reduces movement when the wearer walks quickly, climbs stairs, rides a bike, or carries a fuller backpack. For larger backpacks, this small feature can make the load feel more stable. It is especially useful when the backpack has deeper capacity or a taller back panel.
However, chest straps change the look of the backpack. They make the design feel more active, technical, or outdoor-oriented. For a clean college daypack or retail-style campus backpack, shaped shoulder straps and good back balance may be enough. For sports clubs, field trips, student travel, or outdoor programs, a chest strap can add practical value.
Placement matters. A chest strap placed too high can feel uncomfortable. A strap placed too low may not stabilize the backpack. The buckle should be easy to use, not too bulky, and strong enough for repeated opening. If the strap slides on rails, it should move smoothly but stay fixed during use.
| Use Scene | Chest Strap Need | Reason |
|---|---|---|
| Light welcome backpack | Usually not needed | Low load and short wearing time |
| School supply backpack | Optional | Useful if load is heavier |
| College laptop backpack | Optional | Depends on size and commute style |
| Sports program backpack | Often useful | Adds stability during movement |
| Cycling or walking commute | Useful | Reduces strap movement |
| Travel or field program | Useful | Helps with heavier load |
| Clean lifestyle campus bag | Usually avoid | Keeps appearance simpler |
If a chest strap is added, it should be tested on different body heights. A feature that fits only one wearer may not work well across a campus program. The strap should feel supportive without making the backpack look overbuilt for its purpose.
Comfort Design Vs Low Cost
Comfort and cost need to be balanced with care. The goal is not to add every possible comfort feature. The goal is to protect the areas students feel every day: shoulder straps, back panel, strap adjusters, load balance, handle grip, and key stress seams. Removing support from these areas may reduce the first cost but can make the backpack feel weak in daily use.
A low-cost backpack often reduces both visible and hidden comfort. Straps become thinner, foam becomes softer, the back panel loses padding, the zipper becomes lighter, and the bottom structure becomes weaker. These changes may not be obvious in a photo, but they appear quickly when the backpack is loaded.
A smarter cost plan keeps the comfort-critical structure and simplifies less important details. For example, use a standard fabric color instead of custom dyeing, simplify decorative pockets, choose one clean logo process, and reduce unnecessary accessories. At the same time, keep padded straps, reliable adjusters, a stable back panel, and reinforced stress areas.
| Cost-Control Choice | Usually Safe | Use Caution |
|---|---|---|
| Standard fabric color | Helps control fabric cost | Check color consistency |
| Simple front pocket | Reduces sewing time | Do not remove useful storage |
| One logo process | Keeps decoration clean | Choose the right process for fabric |
| Moderate padding | Balances comfort and cost | Avoid foam that flattens too quickly |
| Standard zipper puller | Controls accessory cost | Do not choose weak zipper chain |
| Basic polybag packing | Works for distribution | Retail programs may need labels or hangtags |
A practical way to compare comfort and cost is to make two sample versions. One version can follow the basic structure. The second version can improve straps, back padding, zipper level, or bottom support. Load both with the same items and compare how they feel after several minutes. The better structure is often clear once the backpack is worn, not just viewed.
How To Test Comfort Before Production?
Comfort should be tested with a loaded sample before production begins. The test does not need to be complicated, but it should be consistent. Use the same items, the same wear time, and the same review steps for each sample version. This makes the comparison more reliable.
A practical loaded test can include:
One 13–16 inch laptop or tablet.
Two notebooks or books.
One folder or binder.
One 500–750 ml bottle.
One charger and small accessories.
One hoodie or light clothing item.
After packing these items, wear the backpack for 5–10 minutes. Walk, turn, climb stairs if possible, sit down, stand up, open the zipper, adjust the straps, and lift the bag by the handle. Then check how the shoulders, back, and lower body feel.
| Test Step | What To Watch |
|---|---|
| Wear for several minutes | Shoulder pressure and strap slipping |
| Walk and turn | Swinging, bouncing, side movement |
| Climb stairs | Load stability and strap position |
| Open zipper while loaded | Zipper smoothness and panel tension |
| Adjust straps | Slider strength and ease of use |
| Lift by handle | Handle seam and grip comfort |
| Place on floor | Bottom shape and sagging |
| Remove laptop | Sleeve access and lining smoothness |
A final comfort review should record clear findings: strap too narrow, back padding too thin, laptop sleeve too low, bottle pocket pulling side panel, bottom sagging, front pocket hard to open, or adjuster slipping. These are practical issues that can be corrected before production. Once a full order is finished, comfort problems are much harder to fix.
Which Materials Last Longer?
Longer-lasting school backpacks are not decided by fabric alone. The outer cloth matters, but real durability comes from the full structure: fabric strength, backing quality, lining, zipper chain, slider, webbing, stitching, bottom reinforcement, strap connection, pocket stress, and logo finish. A backpack made with strong cloth can still fail early if the strap seam opens, the zipper jams, or the bottom corners wear through.
Campus use creates repeated stress in predictable areas. Students lift the bag by one strap, drag it across floors, place it under desks, squeeze it into lockers, overload the main compartment, stretch the bottle pocket, and open the zipper many times each day. A backpack for this use should be built around these stress zones, not only around a nice outside appearance.
The outer material should match the use scene. A light welcome backpack may not need the same cloth as a daily college backpack. A sports or commuter backpack needs stronger resistance to rubbing, pulling, and shape distortion. A school supply backpack needs reliable fabric without making the final cost too high. A retail-style campus backpack may need a cleaner texture, better color depth, and a logo process that keeps the bag looking polished after use.
For daily school and college backpacks, 600D polyester is often a practical starting material because it gives a good balance of cost, strength, color options, and logo compatibility. Higher-density polyester, nylon, canvas, and RPET may also be suitable depending on the expected use time, appearance, and sustainability needs. The key is to review the complete structure, not just the fabric name.
Material choice should be checked through real handling:
Rub the fabric surface to see whether it pills, scratches, or shows white marks.
Fold the fabric and check whether the backing cracks or creates visible creases.
Pull the fabric near seams to see whether it stretches too much.
Check whether the coating has strong odor or uneven thickness.
Test whether the chosen logo process stays clear on the fabric surface.
Load the backpack and check whether the bottom fabric sags or wrinkles.
Review side pockets after bottle insertion and removal.
Open and close zippers repeatedly while the backpack is filled.
| Backpack Part | Main Stress In Campus Use | What To Review | Stronger Direction |
|---|---|---|---|
| Outer fabric | Rubbing, folding, dragging, color wear | Denier, weave, coating, hand feel | 600D polyester, higher-density polyester, nylon, reinforced panels |
| Bottom panel | Floor contact, book weight, corner wear | Abrasion, seam strength, sagging | Stronger bottom fabric, PU backing, extra reinforcement |
| Lining | Book corners, laptop edges, daily friction | Thickness, tear resistance, smoothness | Durable polyester lining with stable seams |
| Shoulder straps | Pulling, weight load, twisting | Foam, webbing, stitching, angle | Reinforced strap ends and firm padding |
| Zipper | Repeated opening, overfilled corners | Chain size, slider quality, zipper curve | Smooth chain, proper slider, no sharp turns |
| Side pocket | Bottle stretch, elastic fatigue | Depth, elastic recovery, side seam | Secure opening and stronger edge stitching |
| Logo area | Rubbing, bending, loading distortion | Process match, adhesion, thread tension | Process selected for fabric and panel shape |
A material plan should also consider total weight. A heavier cloth may look stronger, but if the bag becomes too heavy before it is even packed, students may avoid using it. Durability should come from smarter reinforcement, not only thicker material. A well-planned backpack strengthens the high-stress areas while keeping the main body comfortable and manageable.
For campus programs, the most practical durability goal is simple: the backpack should keep a clean shape, carry the expected load, close smoothly, and avoid visible early wear during normal student use. It should not feel disposable after the first week.
What Are The Most Durable School Backpacks?
The most durable school backpacks share several construction traits: abrasion-resistant outer fabric, reinforced strap seams, strong zippers, stable bottom panels, tight stitching, secure bottle pockets, and a well-supported laptop area. Durability is created by how these parts work together under daily load.
A durable backpack should pass a loaded-use check. Fill it with books, laptop, bottle, charger, hoodie, and stationery. Then review whether the bag keeps its shape, whether the zipper closes smoothly, whether the strap seams remain firm, and whether the bottom corners stay stable. A backpack that only looks strong when empty is not ready for real campus life.
Several details have the biggest effect on long-term use:
Reinforced shoulder strap connection. This area carries repeated pulling force. If the strap seam is weak, the whole backpack loses value quickly.
Stronger bottom panel. The bottom touches floors, bus seats, concrete, lockers, and classroom surfaces. Reinforcement here helps reduce rubbing and sagging.
Reliable zipper chain. A backpack may be opened dozens of times in one day. A weak zipper makes the bag feel poor even when the fabric is acceptable.
Stable lining. Lining must resist book corners, laptop edges, and repeated hand movement inside pockets.
Bottle pocket strength. Side pockets often stretch more than expected. Elastic, mesh, or fabric pockets should return to shape after use.
Logo durability. A cracked print or puckered embroidery can make the backpack look worn before the structure fails.
| Durability Level | Suitable Use | Material Direction | Structure Direction |
|---|---|---|---|
| Light use | One-day event, simple welcome kit | 300D–600D polyester depending on budget | Basic straps, simple pocket, clean logo |
| Regular school use | Supply kit, daily student carry | 600D polyester or similar durable fabric | Reinforced straps, bottle pocket, stable zipper |
| Daily college use | Laptop, books, commuter schedule | 600D polyester, nylon, or stronger fabric | Laptop sleeve, padded straps, stronger bottom |
| Heavy campus use | Sports, travel, club activity | Higher-density polyester, nylon, reinforced panels | Stronger webbing, larger zipper, bottom protection |
| Retail-style campus use | Bookstore, alumni item, premium program | Better texture polyester, nylon, canvas, RPET | Refined logo, better lining, neat seam finish |
The most durable school backpack is not always the thickest or most expensive. A balanced 600D polyester backpack with reinforced stitching and good zipper quality can outperform a heavier bag with poor seam construction. For student use, durability must be practical: strong enough for daily handling, still comfortable to wear, and stable enough to keep its shape.
600D Polyester Vs Nylon
600D polyester and nylon are both widely used for school and college backpacks, but they serve different needs. 600D polyester is popular because it offers practical strength, many color choices, good print compatibility, and controlled cost. Nylon often feels smoother, lighter, and more refined, but it usually costs more and needs careful selection.
600D polyester works well for many campus backpack programs because it balances daily durability and project cost. It can be used for school supply backpacks, college welcome backpacks, event backpacks, and daily student bags. It also works with several logo processes, including screen print, heat transfer, embroidery, woven labels, and patches.
Nylon can be a stronger choice when the backpack needs a cleaner finish, lighter hand feel, or higher perceived quality. It is often used for commuter backpacks, tech-style bags, and designs that need a more polished appearance. However, nylon is not automatically better in every case. Fabric construction, denier, weave, coating, and sewing quality still decide the final result.
Canvas gives another direction. It has a natural texture and can suit lifestyle campus bags, bookstore backpacks, and school merchandise. But canvas can be heavier, may absorb moisture more easily, and may need closer review for color consistency and shrinkage. It is not always the best choice for wet-weather daily carrying.
RPET polyester may be considered when recycled material is important. It can give a familiar backpack structure while supporting a sustainability message. The fabric source, color consistency, hand feel, and supporting documents should be reviewed early.
| Material | Strengths | Watch Carefully | Suitable Use |
|---|---|---|---|
| 600D Polyester | Practical cost, daily strength, many colors, good logo compatibility | Coating quality, abrasion level, hand feel | School supply bags, college programs, campus event backpacks |
| 900D/1000D Polyester | Stronger look, better abrasion resistance, more rugged feel | Added weight, higher cost, stiffer body | Sports programs, heavy daily use, activity backpacks |
| Nylon | Smooth feel, lighter options, premium appearance | Cost, exact denier, color consistency | College commuter, laptop backpacks, tech-style designs |
| Canvas | Natural texture, casual lifestyle look | Weight, moisture, shrinkage, dye consistency | Campus shop, lifestyle merchandise, alumni gifts |
| RPET Polyester | Recycled material option, familiar structure | Documentation, hand feel, color matching | Sustainability-focused campus programs |
| Oxford Polyester | Cost-efficient, flexible, common in bags | Thickness and backing differences | Light to regular campus use |
A practical fabric review should not stop at the material name. Two 600D polyester fabrics can feel different if the weave, yarn, and backing are different. Two nylon fabrics can perform differently depending on denier and finishing. Samples should be checked by hand, loaded with real items, and reviewed under expected use conditions.
For most daily campus backpacks, 600D polyester remains a strong starting option. For higher-value laptop or commuter backpacks, nylon or higher-grade polyester may be worth testing. For lifestyle designs, canvas or textured polyester may create a better look. The final choice should match the backpack’s use time, style, load, logo process, and target cost.
Which Zippers Hold Up?
Zippers hold up better when the chain size, slider strength, zipper tape, sewing path, and compartment shape are matched correctly. A strong zipper can still fail if the bag is overfilled or if the zipper turns sharply around tight corners. Zipper durability depends on both material quality and design structure.
For school backpacks, the main compartment zipper receives the most use. Students may open it before class, after class, at lunch, in the library, on the bus, and at home. If the zipper feels rough, catches fabric, or separates under load, the whole backpack feels unreliable.
Zipper size should match the backpack size. A small zipper may be acceptable for a light front pocket, but the main compartment of a daily-use backpack needs stronger support. Larger zipper chains can improve strength and smoothness, especially on backpacks carrying books and laptops. The zipper curve should also be wide enough so the slider does not jam at corners.
Zipper pullers matter more than many people expect. A small or slippery puller is frustrating when students open the bag quickly. A cord puller, molded puller, or metal puller can improve handling. For younger students, easy grip is important. For college backpacks, a clean puller design can improve appearance without adding clutter.
A zipper check should include loaded testing:
Fill the backpack with realistic items.
Open and close the main zipper 30–50 times.
Check whether the slider catches at corners.
Pull the zipper with one hand while the bag is slightly full.
Inspect whether fabric folds into the zipper teeth.
Check whether the zipper tape stitching stays flat.
Review zipper ends where stress often gathers.
| Zipper Area | What Can Go Wrong | Practical Check |
|---|---|---|
| Main chain | Teeth separate or feel rough | Open and close while loaded |
| Slider | Jams, bends, or slips | Test with repeated pulls |
| Zipper curve | Hard to close around corners | Check panel shape and curve space |
| Zipper tape | Stitching loosens | Inspect seam line and tension |
| Puller | Breaks or feels hard to grip | Pull repeatedly from different angles |
| Fabric near zipper | Gets caught in teeth | Check spacing and binding |
A reliable zipper makes the backpack feel better every day. It is one of the easiest parts for students to notice and one of the hardest parts to ignore when it fails. Reducing zipper quality too much can save a small amount but create a large experience problem.
How Strong Should Stitching Be?
Stitching should be strong enough to hold the backpack under repeated load, especially at shoulder straps, top handle, zipper ends, bottom corners, side pockets, front pocket corners, and laptop sleeve seams. Good stitching is not only straight and clean. It must be placed correctly with enough seam allowance, proper thread tension, and reinforcement where stress is highest.
Campus backpacks handle repeated force. Students lift them quickly, pull straps from one side, overpack compartments, hang them on hooks, and drop them next to desks. These actions put stress on seams. If stitching is weak, the first problems often appear at strap joints, zipper ends, pocket corners, and bottom seams.
The strap attachment area needs special attention. It carries the weight of books and tech items. A good design may use extra fabric backing, box stitching, bar tack, or multiple reinforcement lines. The top handle also needs strong stitching because many students lift the backpack by the handle even when it is fully loaded.
Stitch density should be balanced. Too few stitches can reduce strength. Too many stitches in a weak fabric area can perforate the fabric and create a tear line. The best stitching depends on the material, thread, seam type, and load area.
| Stitch Area | Stress Type | What To Review | Better Detail |
|---|---|---|---|
| Shoulder strap top | Constant load and pulling | Seam tension, reinforcement, backing | Bar tack or reinforced box stitch |
| Top handle | Sudden lifting | Webbing strength and seam density | Extra backing and tight stitching |
| Bottom corners | Weight and floor contact | Seam allowance and abrasion area | Reinforced corner seam |
| Zipper ends | Pulling and closure stress | Stitch stability at ends | Bartack or secure end finish |
| Side pocket opening | Stretching from bottles | Elastic seam and edge binding | Stronger edge stitch |
| Front pocket corners | Overfilled small items | Corner seam strength | Reinforced pocket end |
| Laptop sleeve | Device weight and repeated insertion | Lining seam and sleeve support | Extra seam stability |
A loaded pull test is useful. Fill the backpack, hold the straps, lift it several times, and check the seams. Then lift it by the handle and review whether the handle area stretches. Insert and remove a bottle from the side pocket repeatedly. Open and close the front pocket. These simple checks show whether the stitching supports real use.
Neat stitching also affects appearance. Crooked seams, skipped stitches, loose threads, and puckering can make a backpack look less polished. For campus programs where the bag carries a school or program identity, workmanship affects trust as much as material.
Best Durability Details
The best durability details are often small: reinforced strap seams, stronger bottom fabric, smooth zippers, stable lining, secure bottle pockets, protected laptop sleeve, tight edge binding, and logo processes that match the fabric. These details do not always make the backpack look dramatically different, but they strongly affect daily use.
Durability should be planned by stress area. Instead of making the whole backpack heavier, strengthen the places that fail first. This keeps the bag practical, comfortable, and cost-aware.
Important durability details include:
Bar tack reinforcement at strap, handle, pocket, and zipper stress zones.
Bottom reinforcement to reduce abrasion and sagging.
Padded laptop sleeve with secure stitching and smooth lining.
Reliable zipper chain with smooth slider movement.
Side pocket edge stitching strong enough for repeated bottle use.
Inner binding that protects seam edges from fraying.
Webbing with stable thickness and clean edge finish.
Front panel structure that keeps the logo smooth after loading.
Fabric backing that supports shape without cracking.
A durability checklist should also include how the backpack looks after use. A bag may still hold items but look worn if the surface scuffs, the print cracks, the embroidery puckers, or the bottom corners fray. Campus backpacks are seen in classrooms, libraries, dorms, buses, and public spaces. Appearance durability matters.
| Detail | Why It Helps | Where It Matters Most |
|---|---|---|
| Bar tack reinforcement | Adds strength at high-pull zones | Straps, handle, pocket corners |
| Stronger bottom panel | Reduces floor wear and sagging | Book-heavy and commuter use |
| Quality zipper | Improves daily opening and closing | Main compartment and laptop area |
| Padded laptop sleeve | Protects device and stabilizes load | College and tech backpacks |
| Side pocket reinforcement | Keeps bottle pocket from stretching out | Daily student use |
| Inner seam binding | Reduces fraying and improves finish | Main compartment and lining seams |
| Durable logo process | Keeps identity clean after use | Front panel, pocket, label area |
| Stable webbing | Keeps strap adjustment reliable | Shoulder straps and handles |
A practical durability review can be divided into three levels.
Essential durability works for light event bags. The backpack should still have reliable fabric, clean stitching, smooth zipper movement, and basic strap strength.
Daily-use durability works for school and college programs. It should add better shoulder straps, stable back support, bottle pocket strength, stronger bottom corners, and more careful zipper selection.
Heavy-use durability works for sports, commuter, tech, or travel-related campus use. It may require higher-density fabric, stronger zipper chain, reinforced webbing, improved padding, and deeper load testing.
The right durability level should match the real purpose. Overbuilding a light event backpack can increase cost and carton volume unnecessarily. Underbuilding a daily-use backpack can lead to early complaints. A well-planned school backpack feels strong where students need strength most, while still staying comfortable enough for everyday carry.
How To Custom Campus Backpacks?

Custom campus backpacks should begin with real use: who will carry them, what will be packed inside, how long they should last, where the logo should sit, and how the final goods will be distributed. A clear plan should cover size, fabric, pocket layout, laptop protection, strap comfort, logo method, packing, quantity, sample review, and delivery timing.
A campus backpack is rarely just a simple bag with a logo. It may be used for a school supply kit, college orientation, campus shop, education program, sports team, staff gift, student club, or sponsor campaign. Each situation needs a different balance of size, comfort, durability, cost, and appearance.
The safest way to develop a campus backpack is to turn the idea into production-ready details before sampling. A reference photo helps, but it is not enough. A photo cannot show the exact height, depth, fabric thickness, strap foam, lining strength, zipper size, laptop sleeve position, or carton packing method. These details decide whether the finished backpack feels useful in daily life.
A practical custom plan should include these details from the start:
Intended user group: younger students, high school students, college students, staff, athletes, club members, or event attendees.
Main use: daily school use, welcome kit, school supply program, bookstore item, tech program, sports activity, donation project, or travel-related event.
Target load: folders, notebooks, laptop, tablet, charger, bottle, hoodie, lunch box, sportswear, brochures, or gift items.
Size direction: compact, medium daily use, laptop backpack, commuter size, or sports capacity.
Material level: standard polyester, stronger polyester, nylon, canvas, RPET, or mixed materials.
Logo style: printed logo, embroidery, woven label, patch, reflective detail, rubber badge, or leather label.
Comfort level: basic straps, padded straps, padded back, mesh panel, chest strap, or stronger handle.
Packing needs: individual polybag, hangtag, barcode, size label, carton mark, retail tag, or event distribution packing.
Timeline: sample date, revision window, production date, inspection date, and delivery deadline.
The most common mistake is trying to decide everything after the sample is made. That leads to repeated changes, wasted time, unclear cost, and unstable results. A better approach is to decide the major use and structure first, then use the sample to confirm hand feel, size, logo effect, comfort, and stitching.
| Custom Detail | What To Decide Early | Why It Matters |
|---|---|---|
| Size | Height, width, depth, laptop fit | Controls capacity, comfort, material use, carton volume |
| Fabric | Outer cloth, lining, backing | Affects durability, look, logo method, cost |
| Straps | Width, padding, shape, adjuster | Affects shoulder pressure and daily use |
| Back panel | Flat, padded, mesh, channel | Affects comfort and device protection |
| Pockets | Main, front, laptop, bottle, organizer | Affects daily function and sewing time |
| Logo | Position, size, method, color | Affects identity, appearance, and sample approval |
| Zippers | Chain size, slider, puller | Affects smooth use and long-term reliability |
| Packing | Polybag, tag, barcode, carton | Affects distribution, retail handling, and storage |
| Schedule | Sample, revision, production, shipping | Protects event or school launch timing |
The best campus backpack projects are not overdesigned. They are clear. Every feature should have a reason. A bottle pocket should fit a real bottle. A laptop sleeve should fit the target device. A front pocket should still open when the main compartment is full. A logo should stay flat after the backpack is loaded. When each detail has a purpose, the final backpack feels more reliable.
How To Plan A Custom Design?
A custom backpack design should be planned in the order students will experience it: carry comfort first, storage second, appearance third, and packing last. The outside look is important, but daily use decides whether the backpack stays in circulation or ends up unused after the event.
Start with the use scene. A backpack for a one-day welcome event can be lighter and simpler. A daily school backpack needs stronger fabric, better straps, and reliable zippers. A college laptop backpack needs a padded sleeve and smarter organization. A sports backpack may need deeper capacity, stronger bottom panels, and larger side pockets.
Next, define the load. The backpack should be tested against real items, not imagined space. For a school supply program, folders and notebooks are important. For college use, a 13–16 inch laptop, charger, bottle, and hoodie should be included. For sports or club use, clothing and bulky items may need deeper compartments.
A clear design plan can follow this order:
- Select the user group. Age, body size, and daily routine affect backpack height, strap length, and capacity.
- Set the real load. List the items that must fit. Separate “must fit” items from optional items.
- Choose size and shape. Avoid making the backpack too deep unless the use requires bulky items.
- Pick material direction. Choose fabric based on daily wear, appearance, logo method, and cost target.
- Build the pocket layout. Keep pocket count useful. Extra pockets increase sewing time and may not improve the experience.
- Decide comfort level. Choose strap padding, back padding, handle strength, and chest strap only when needed.
- Place the logo. Choose a position that stays smooth when loaded and does not reduce daily wearability.
- Confirm packing. Packing affects how the backpacks are stored, counted, shipped, and distributed.
| Use Scene | Design Priority | Suggested Direction |
|---|---|---|
| Orientation gift | Clean look, practical daily value | Medium size, laptop sleeve optional, neat logo |
| School supply kit | Capacity and cost balance | Folder-friendly height, simple pockets, durable fabric |
| College daily use | Laptop and organization | Padded sleeve, front organizer, bottle pocket |
| Campus retail | Appearance and finish | Better fabric texture, refined logo, hangtag/barcode |
| Sports program | Load strength | Larger capacity, reinforced bottom, stronger straps |
| Staff gift | Cleaner style | Neutral color, subtle logo, better lining |
| Donation program | Practical reliability | Simple structure, strong seams, efficient packing |
The design should avoid unnecessary complexity. A campus backpack with too many pockets, trims, and colors can become expensive and harder to control in production. A clean structure with the right fabric, strong straps, smooth zippers, and a well-placed logo often works better.
Which Logo Process Works?
The right logo method depends on fabric texture, logo detail, color count, size, position, and expected use. The logo should look clear on the sample and stay stable after the backpack is loaded, handled, rubbed, and used daily. A logo that looks attractive on flat fabric may wrinkle or distort when placed on a curved pocket or stretched front panel.
Silk screen printing works well for simple logos with solid colors. It is often suitable for polyester backpacks and event-style designs. Heat transfer works better for multi-color artwork or finer details, but adhesion should be checked carefully on the chosen fabric. Embroidery gives a more textured look and can feel more durable, but tiny letters and gradient artwork may not come out clearly.
Woven labels are useful when the design needs a subtle daily-use look. Rubber patches can suit sports or outdoor-style backpacks. Leather patches work well for lifestyle or campus shop designs. Reflective logos can add function for night commuting, cycling, or safety-related programs.
| Logo Method | Good For | Watch Carefully | Visual Feel |
|---|---|---|---|
| Silk screen | Simple school marks, one to three colors | Ink coverage, fabric texture, rubbing | Clean and direct |
| Heat transfer | Detailed or multi-color artwork | Adhesion, peeling, cracking | Smooth and sharp |
| Embroidery | Simple letters, crest, premium identity | Small text, thread density, puckering | Textured and lasting |
| Woven label | Subtle daily-use style | Label size, edge finish, position | Clean and retail-like |
| Rubber patch | Sports, outdoor, club use | Mold cost, weight, placement | Dimensional and strong |
| Leather patch | Lifestyle, alumni, bookstore items | Emboss clarity, material match | Warm and refined |
| Reflective logo | Commuting, cycling, safety use | Reflective area, durability | Functional and visible |
Logo placement should be checked with the backpack filled. The front panel may look smooth when empty but curve after books and a hoodie are added. If the logo sits across a seam, zipper line, or pocket curve, it may not look straight. A smaller logo in a stable position often looks better than a large logo placed on a stressed area.
A logo review should check:
Logo size in relation to backpack size.
Logo color against fabric color.
Sharpness of small text and thin lines.
Position after the backpack is loaded.
Rubbing resistance for printed logos.
Thread tension and puckering for embroidery.
Patch edge finish and sewing quality.
Consistency between sample and final production.
A strong logo does not need to be oversized. For campus backpacks, students are more likely to keep using a bag when the identity feels balanced and wearable.
What Should A Sample Confirm?
A sample should confirm more than appearance. It should prove that the backpack size, comfort, fabric, pocket layout, laptop sleeve, zipper movement, stitching, logo, color, and packing details can work together. The sample is the main chance to find problems before a full order begins.
A proper sample review should be done with real items inside the backpack. Pack a laptop, books, folders, a bottle, charger, hoodie, and smaller accessories. Then check how the backpack feels, how it closes, how the straps sit, and how the logo looks. An empty sample can hide many issues.
A practical sample review includes these checks:
| Review Area | What To Check | Possible Adjustment |
|---|---|---|
| Size | Fits folders, books, laptop, bottle | Change height, width, or depth |
| Capacity | Holds target load without bulging | Adjust gusset or pocket layout |
| Fabric | Hand feel, thickness, backing, color | Change material or coating |
| Lining | Smoothness, tear strength, inside finish | Use stronger lining or cleaner binding |
| Straps | Width, padding, angle, adjusters | Adjust foam, strap width, or placement |
| Back panel | Comfort with laptop and books | Add padding or change panel structure |
| Zipper | Smooth movement when loaded | Change zipper size, curve, or slider |
| Pockets | Access and storage balance | Adjust depth, opening, or position |
| Logo | Size, clarity, color, placement | Move, resize, or change method |
| Stitching | Straightness, seam strength, reinforcement | Add bar tack or improve seam construction |
| Packing | Polybag, hangtag, barcode, carton | Adjust final packing details |
A sample should also confirm color. Fabric color can look different under indoor light, daylight, and screen display. Logo color may shift depending on fabric texture and printing method. If exact color is important, physical swatches or standard color references should be reviewed early.
Fit and comfort should not be skipped. Have more than one person try the sample. Check whether straps are long enough, whether smaller users can adjust the bag, whether the back panel feels hard, and whether the bag sits too low. A backpack that fits only one body type may create problems across a campus program.
The approved sample should become the reference for production. It should represent the confirmed size, fabric, logo, pocket layout, stitching, accessories, and packing. Without a clear approved sample, details can drift during production.
How Long Does Sampling Take?
Sampling time depends on structure, material availability, logo method, accessory needs, and revision depth. A simple backpack using available fabric and a basic logo may be completed faster. A backpack with custom fabric, special logo patches, multiple compartments, custom zipper pullers, or several revisions will need more time.
For many custom backpack projects, a regular sample may take about 5–7 days after main details are confirmed. Simple designs may take around 2–3 days. More complex backpacks may take 7–14 days or longer, especially when special materials or accessories need to be prepared.
| Sample Type | Approximate Time | Suitable Situation |
|---|---|---|
| Simple structure sample | 2–3 days | Standard fabric, simple pocket layout, basic logo |
| Regular custom sample | 5–7 days | Custom size, logo, fabric selection, laptop sleeve |
| Complex backpack sample | 7–14 days | Multi-pocket design, special padding, custom details |
| Revised sample | 3–7 days | Size, logo, strap, pocket, or material changes |
| Special accessory sample | Case by case | Custom puller, rubber patch, molded part, special label |
Sampling is faster when the brief is complete. Useful details include reference photo, target dimensions, logo file, logo size, color direction, fabric preference, quantity, packing need, and delivery deadline. If these details are missing, the first sample may require more revision.
The sample stage should not be rushed so much that important checks are skipped. A faster sample has little value if the backpack later needs major changes. The goal is not only to receive a sample quickly. The goal is to receive a sample that can be tested and improved before production.
A practical sampling schedule should include time for:
Material confirmation.
Pattern making.
Cutting and sewing.
Logo application.
Internal checking.
Packing mock-up if needed.
Review and feedback.
Revision if needed.
If the backpacks are needed for orientation week, school opening, or a fixed campus event, the sample stage should begin early. Late sampling forces rushed decisions and may increase freight pressure later.
Custom Process With A Factory
A reliable custom backpack project moves step by step: idea review, material choice, sample making, revision, approval, production, inspection, packing, and delivery. Each step should reduce uncertainty. The goal is to make the final backpacks match the approved sample in size, color, logo, structure, and workmanship.
A practical project flow can look like this:
| Step | What Happens | What Should Be Confirmed |
|---|---|---|
| 1. Idea review | Reference photo, use scene, quantity, deadline | Main purpose and product direction |
| 2. Size planning | Height, width, depth, capacity | Fit for books, laptop, bottle, daily load |
| 3. Material choice | Fabric, lining, webbing, zipper | Durability, appearance, cost level |
| 4. Logo review | Artwork, size, method, position | Clarity, color, placement, process fit |
| 5. Sample making | Physical sample is made | Real structure, sewing, logo, feel |
| 6. Sample testing | Loaded use and appearance review | Comfort, zipper, pockets, logo, shape |
| 7. Revision | Adjust details if needed | Updated size, strap, pocket, or logo |
| 8. Approval | Final sample is confirmed | Production reference |
| 9. Production | Cutting, sewing, logo, assembly | Consistency and schedule |
| 10. Inspection | Size, stitching, zipper, logo, packing | Quality before shipment |
| 11. Packing | Polybag, tag, barcode, carton | Distribution or retail needs |
| 12. Delivery | Route based on destination and deadline | Timing, carton volume, shipment plan |
Before starting, the project should provide enough information for an accurate review:
Reference photo or design sketch.
Target dimensions or capacity.
Intended student group.
Laptop size if needed.
Fabric preference or expected look.
Logo artwork in usable format.
Logo size and placement idea.
Quantity per color or design.
Packing requirements.
Delivery deadline.
Destination country or city.
Any testing, labeling, or documentation needs.
A well-run custom project avoids vague decisions. Instead of saying “make it durable,” define the fabric, zipper, strap reinforcement, bottom structure, and load test. Instead of saying “make the logo nice,” define the logo size, method, color, and location. Instead of saying “ship fast,” define the event date, destination, packing volume, and preferred route.
For campus backpacks, the final approval should happen only after the sample is tested with real use. If the backpack carries well, fits the target items, closes smoothly, displays the logo cleanly, and feels suitable for the intended program, production can move forward with much lower risk.
Who Needs A Backpack Manufacturer?

A campus backpack project needs a backpack production partner when the bag must do more than carry a logo. If the design requires a specific size, fabric, pocket layout, laptop sleeve, strap comfort, color match, retail packing, event deadline, or multi-location delivery, a ready-made backpack may not be enough. A custom backpack is most useful when the final product must fit real student use and represent the program clearly.
Campus backpacks are used in many different settings: school supply kits, college orientation, student clubs, campus stores, sports teams, education programs, scholarship events, staff gifts, and donation projects. Each setting has a different daily-use pattern. A backpack for a college welcome kit may need a laptop sleeve and clean front logo. A school supply backpack may need folder-friendly height and efficient carton packing. A sports program may need stronger straps, bottle pockets, and a more durable bottom.
The need usually appears when standard bags create limits. The available size may not fit folders. The front panel may not hold the logo well. The fabric may feel too thin. The laptop sleeve may be missing. The zipper may not match the expected load. The color may not align with the school or program identity. Packing may not work for warehouse, store, or event distribution.
A custom backpack can solve these problems when the project is planned properly. Size, fabric, structure, logo method, packing, and production timing should be decided together. A backpack with the right dimensions but weak straps is not enough. A backpack with good fabric but poor logo placement can still look wrong. A backpack with a strong structure but late delivery can miss the event.
| Project Type | Main Need | Backpack Direction | Details To Review |
|---|---|---|---|
| School supply program | Practical daily storage | Medium size, folder space, durable zipper | Folder fit, carton packing, cost control |
| College orientation | Useful welcome item | Laptop sleeve, clean logo, balanced capacity | Device size, strap comfort, delivery timing |
| Campus store | Retail-ready appearance | Better fabric, hangtag, barcode, refined finish | Color, label, shelf presentation |
| Sports team or camp | Stronger activity use | Larger body, reinforced straps, bottle pockets | Bottom strength, webbing, zipper size |
| Tech program | Device protection | Padded laptop area, organizer pocket | Sleeve size, padding, access opening |
| Student club event | Identity and daily visibility | Clean logo, useful pockets, wearable style | Logo size, color match, daily use appeal |
| Staff or faculty gift | Polished daily carry | Neutral color, subtle logo, better lining | Finish, comfort, perceived value |
| Donation project | Reliable basic function | Cost-aware structure, stable packing | Quantity, material, distribution plan |
The strongest projects usually start with use, then build the visual identity around it. If students keep using the backpack after the event, the design has done its job. If the backpack is uncomfortable, too small, too flashy, or weak at the seams, it may disappear quickly even if the first impression looked good.
Who Buys Campus Backpacks?
Campus backpacks are often prepared by schools, universities, education groups, student activity teams, sports programs, campus stores, non-profit organizations, corporate event teams, and scholarship or donation programs. The common goal is simple: create a backpack that fits a defined student group and works for a real purpose.
Different teams focus on different outcomes. A school supply project may focus on quantity, storage, and cost. A university orientation team may care about appearance, deadline, and student usefulness. A campus store may need hangtags, barcode labels, retail packaging, and a finish that feels suitable for resale. A sports team may care about strength, bottle storage, and easy cleaning. A donation program may need efficient packing and practical durability.
The person organizing the project also needs fewer surprises. A backpack order involves artwork approval, sample review, material confirmation, production timing, packing details, and delivery planning. If any of these details are unclear, problems can appear later. A logo may print too large. A laptop pocket may fit only smaller devices. A side pocket may not hold a bottle securely. A carton label may not match the distribution plan.
A useful campus backpack should satisfy both the organizer and the student. The organizer needs stable cost, clear timing, and consistent goods. The student needs comfort, space, and a style that feels natural to carry. A design that only looks good on a table may fail in daily campus life. A design that only focuses on utility may miss the visual identity of the program.
A balanced project should review these five areas:
Student use: what will be carried, how often, and in what setting.
Visual identity: logo size, color, placement, and finish.
Daily comfort: strap width, back panel, load balance, and fit.
Durability: fabric, zipper, seam strength, and bottom wear.
Handling: packing, labeling, carton plan, and delivery schedule.
When these areas are considered together, the backpack becomes more than a giveaway. It becomes a useful item that can continue to carry the program identity through daily movement around campus.
Which Backpack Brand Is The Most Durable?
The most durable backpack is not defined only by a well-known name. Durability comes from construction details: fabric resistance, zipper quality, strap reinforcement, bottom protection, seam control, and how well the compartments manage load. Famous backpack names are often respected because they control these details consistently.
For custom campus backpacks, the better approach is to study what durable backpacks have in common. Strong designs usually place heavier items close to the back, use reliable zippers, reinforce the strap area, protect the bottom, and keep pocket stress under control. They also avoid placing decoration where the fabric bends or stretches too much.
A durable backpack does not always need the heaviest fabric. A medium-weight fabric with strong stitching can perform better than a thick material with weak seams. In student use, many failures appear at the strap seam, zipper curve, bottle pocket edge, and bottom corner. These areas should be checked before increasing fabric weight across the whole bag.
Durability should be matched to the project purpose. A one-day campus event bag does not need the same structure as a daily commuter backpack. A tech program needs laptop protection. A sports program needs stronger webbing and bottom reinforcement. A campus store backpack may need a cleaner finish and better lining because it is judged more like a retail product.
| Durability Factor | Why It Matters | What To Look For |
|---|---|---|
| Outer fabric | Handles rubbing, folding, and daily contact | 600D polyester, stronger polyester, nylon, canvas, or reinforced panels |
| Fabric backing | Helps structure and light water resistance | Even coating, stable hand feel, no cracking |
| Strap seam | Carries repeated load | Reinforced stitch, backing fabric, bar tack |
| Zipper chain | Affects daily opening and closing | Smooth slider, proper chain size, no sharp tension |
| Bottom panel | Receives floor contact and weight pressure | Stronger fabric or reinforced bottom |
| Pocket layout | Controls weight distribution | Heavy items close to back, light items forward |
| Logo finish | Affects long-term appearance | Process matched to fabric and position |
| Lining | Handles books, laptops, and daily friction | Smooth, stable, and properly stitched |
A durable campus backpack should still look good after use. A bag may remain functional but look worn if the print cracks, embroidery puckers, fabric scuffs, or corners fray too quickly. Appearance durability matters because the backpack is seen in classrooms, libraries, dorms, buses, and public spaces.
When Should Brands Start?
Campus backpack planning should start early when the delivery date is tied to orientation, school opening, sports season, retail launch, or a scheduled event. A safe timeline should include design review, material choice, logo testing, sample making, revision, production, inspection, packing, and transport. Starting late often limits choices and increases pressure.
A regular custom backpack sample may need several days after details are confirmed. A simpler structure may move faster, while special fabric, custom pullers, rubber patches, embroidery, multiple pockets, or several revisions require more time. Production timing also depends on quantity, structure, material availability, logo process, packing needs, and season.
Late planning creates several common risks:
The preferred fabric color may not be available.
Logo testing may be rushed.
Sample revision time may be too short.
Accessories may not arrive in time.
Production scheduling may become tight.
Packing labels and carton marks may be prepared too late.
Transport may need faster and more expensive routes.
Inspection time may be squeezed.
A project calendar should work backward from the required arrival date, not forward from the first idea. If the backpacks must be handed out during orientation week, the sample should be approved early enough for production, packing, inspection, and delivery. The deadline should include buffer time for revision and transport.
| Stage | Practical Time Need | What To Confirm |
|---|---|---|
| Use and design review | 1–3 days | Purpose, size, load, logo, quantity |
| Material and structure direction | 1–3 days | Fabric, lining, zipper, strap, pocket layout |
| First sample | Several days depending on complexity | Real size, fabric, logo, structure |
| Sample revision | Several days if needed | Adjusted size, logo, pocket, strap, or material |
| Final approval | 1–2 days after review | Production reference |
| Production | Depends on quantity and structure | Cutting, sewing, logo, assembly |
| Inspection and packing | Depends on order details | Size, stitching, zipper, logo, labels, cartons |
| Delivery | Depends on route | Destination, carton volume, required arrival date |
The earlier the plan starts, the more options remain open. There is more time to compare fabrics, improve logo placement, test a laptop sleeve, adjust strap comfort, and choose a cost-efficient delivery route. Early planning does not only reduce stress; it often improves the final backpack.
How Does Price Change?
Backpack price changes with size, fabric, lining, padding, zipper level, pocket complexity, logo process, quantity, packing, inspection needs, and delivery method. A lower price usually comes from simplifying structure, using standard materials, reducing decoration, and controlling packing. It should not come from weakening the parts that affect daily use most.
The biggest cost drivers are often easy to see: larger size, thicker fabric, more pockets, special logo process, better zipper, padded laptop sleeve, custom labels, and retail packaging. Hidden details also affect cost: seam reinforcement, inner binding, foam thickness, zipper length, cutting complexity, and carton volume.
Cost control should be selective. For daily campus backpacks, it is usually safer to protect straps, zipper, stitching, and back comfort first. Decorative complexity can often be simplified before reducing these practical areas. A backpack that feels uncomfortable or fails early can hurt the project more than a slightly simpler logo or pocket design.
| Cost Factor | Lower-Cost Direction | Higher-Value Direction | Risk If Reduced Too Much |
|---|---|---|---|
| Fabric | Standard polyester | Higher-density polyester, nylon, canvas, RPET | Weak hand feel or fast wear |
| Size | Compact body | Larger daily-use capacity | Too small for folders or laptop |
| Padding | Basic straps and back | Padded straps, padded back, laptop sleeve | Shoulder pressure or weak protection |
| Zipper | Standard chain | Larger chain or smoother slider | Jamming or early failure |
| Pockets | Simple front pocket | Organizer, bottle pocket, hidden pocket | Poor daily usefulness |
| Logo | One simple print | Embroidery, patch, label, reflective detail | Lower perceived value |
| Packing | Basic polybag and carton | Hangtag, barcode, retail label, carton mark | Harder handling or retail display |
| Quantity | Smaller run | Larger production plan | Smaller runs often raise unit cost |
A practical way to compare price is to prepare three versions:
Basic version: standard fabric, simple main compartment, front pocket, clean logo, essential stitching.
Daily-use version: better straps, laptop sleeve, bottle pocket, stronger zipper, reinforced stress areas.
Premium version: upgraded fabric, refined logo, better lining, stronger structure, retail-ready packing.
This makes cost differences easier to understand. Instead of comparing one vague backpack to another, each version has a clear reason. A campus event may choose the basic version. A daily-use student program may choose the middle version. A campus store or premium gift may choose the higher-value version.
Price should always be reviewed with final use in mind. Saving money on a feature students never notice may be smart. Saving money on the strap, zipper, or laptop sleeve may cause problems quickly.
Best Manufacturer Checklist
A strong backpack production partner should understand size planning, fabric selection, logo process, comfort structure, sample review, production control, packing, and delivery timing. The checklist should go beyond whether a backpack can be made. It should show whether the team can turn a campus idea into consistent finished goods.
A useful review starts with communication. A serious production team should ask for reference photos, dimensions, target user group, logo files, quantity, material preference, packing needs, destination, and deadline before giving a reliable cost estimate. A fast number without enough detail may not reflect the real backpack.
The sample stage is also important. A strong sample should show the real size, fabric, logo, strap shape, pocket layout, laptop sleeve, zipper movement, and stitching level. If the sample is only a rough shape, it may not be enough to approve production. The approved sample should become the reference for the final goods.
| Checklist Area | What To Confirm | Why It Matters |
|---|---|---|
| Backpack experience | Similar campus, school, or laptop bag projects | Shows understanding of daily-use structure |
| Size advice | Capacity, dimensions, laptop fit | Prevents bags from being too small or bulky |
| Material options | Fabric, lining, webbing, zipper, foam | Balances cost, feel, and durability |
| Logo methods | Print, embroidery, patch, label, reflective detail | Helps match identity and fabric |
| Sample process | Timing, revision, approval standard | Reduces risk before production |
| Strap and comfort review | Width, padding, angle, back panel | Improves daily use |
| Stitching control | Stress seams, bar tack, bottom corners | Reduces failure in high-pull areas |
| Packing support | Polybag, tag, barcode, carton mark | Supports distribution or retail handling |
| Inspection process | Size, stitching, zipper, logo, cleaning, packing | Protects consistency |
| Delivery planning | Route, carton volume, arrival date | Reduces event timing risk |
Before confirming a campus backpack project, the final checklist should include:
Target user group and purpose.
Backpack size and capacity.
Laptop size if required.
Fabric, lining, zipper, webbing, and foam.
Strap width, padding, and reinforcement.
Back panel structure.
Pocket layout and bottle pocket design.
Logo artwork, size, process, and position.
Sample review and revision notes.
Approved sample reference.
Quantity per color or design.
Packing method, labels, and carton marks.
Inspection focus.
Delivery address and required arrival date.
A good production partner does not simply make the backpack look like a reference photo. The real value is in helping the backpack work: enough space, comfortable carry, reliable materials, stable logo effect, clean packing, and predictable delivery. For campus programs, these details decide whether the backpack becomes a useful daily item or a short-lived event product.