 Skip to content
 Genuine Leather Bags Manufacturer OEM/ODM in Guangdong
Your leather bag program only works when the factory can control material authenticity, hand-feel consistency, and repeatable bulk quality—not just make a nice sample. From full-grain and top-grain leather sourcing to pattern engineering, hardware matching, and QC checkpoints that prevent sample-to-bulk drift, we build leather bags that scale. You’ll get clear options on MOQ, cost drivers, lead time, and branding, plus practical guidance for drops, retail, and corporate gifting. If you need a supplier that treats leather like a system—material, structure, finishing, and packing—this guide is your blueprint.
Built for Repeat Orders, Not One-Off Samples
A leather bag isn’t one material—it’s a chain of decisions that either hold up in the market or create returns. Our role as a genuine leather bag manufacturer is to make that chain stable and easy for you to manage.
(1) We treat leather as a controlled input, not a vague label.
“Genuine leather” is used loosely online. In real procurement, you need clarity: full-grain, top-grain, split leather, suede, or nubuck, plus tanning methods such as vegetable-tanned or chrome-tanned. We help you choose based on your channel: boutique retail wants a natural grain story; corporate gifting often prioritizes uniform look and cost; travel bags need abrasion performance.
(2) We lock a repeatable material system (not just an outer leather).
Bulk consistency depends on the hidden layers: lining density, foam rebound, interlining stiffness, thread size, edge paint hardness, and adhesive selection. If these aren’t specified, two production lines can build the “same” bag with a different feel. We prevent that by documenting a simple, shareable BOM lock:
Outer leather grade and thickness range
Lining type (poly, microfiber, cotton twill) and GSM
Reinforcement (PP board / non-woven / foam) location map
Thread spec, stitch length, needle type
Edge paint or the folded edge method
Hardware plating and salt-spray expectation
This makes reorders far easier because you’re not re-negotiating basics each time.
(3) We engineer for durability where failures really happen.
Leather bags fail in predictable places: handle roots, strap anchors, zipper ends, base corners, and D-ring stitches. A nice sample can hide these issues because it hasn’t lived through real load cycles. We use a stress-zone reinforcement map with clear rules: extra layers, bartack patterns, stitch routing, and seam allowance control in high-tension zones.
(4) We manage “appearance risk” that ruins reviews.
Most negative reviews are not about “leather type.” They’re about visible defects: uneven edge paint, glue marks, crooked logos, misaligned pockets, wrinkling, or color inconsistency across panels. Our QC focuses on what end customers see first:
- Panel color consistency under standard lighting
- Edge finish smoothness (no bubbles, no cracks)
- Hardware scratch prevention and protective packing
- Symmetry and alignment checks (front pocket, logo position, strap length)
(5) We support mixed orders and brand programs.
If you run multiple SKUs (sizes/colors), we can follow clear SKU coding and packing logic to reduce receiving errors. That means fewer warehouse headaches, fewer “wrong color shipped” cases, and easier replenishment.
If you want a fast evaluation, share your target market (retail/wholesale/corporate), product references, and expected order plan. When the project is ready for RFQ alignment, you can reach us at info@jundongfactory.com.


Custom Genuine Leather Bag Types
Here’s how we structure our genuine leather bag range so procurement stays simple.
(1) Core Styles (High Demand, Stable Reorders)
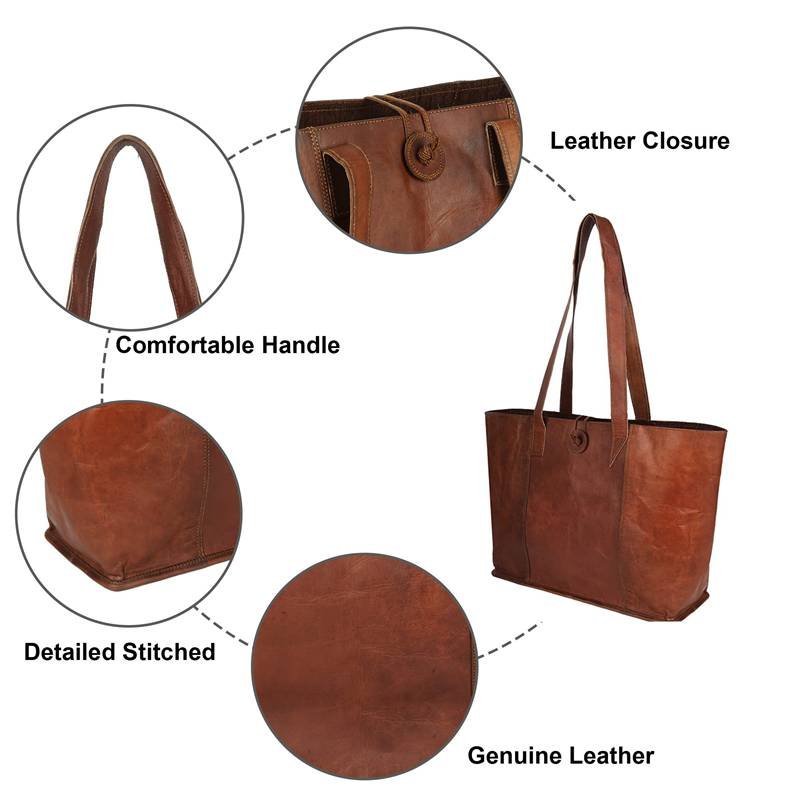
Leather Tote Bags
Best for retail and corporate gifting because the silhouette is clean and branding is easy. Key decisions: handle drop length, base reinforcement, pocket layout, zipper vs open top. Totes often fail at handle roots—we design with reinforcement layers and stitch route control.
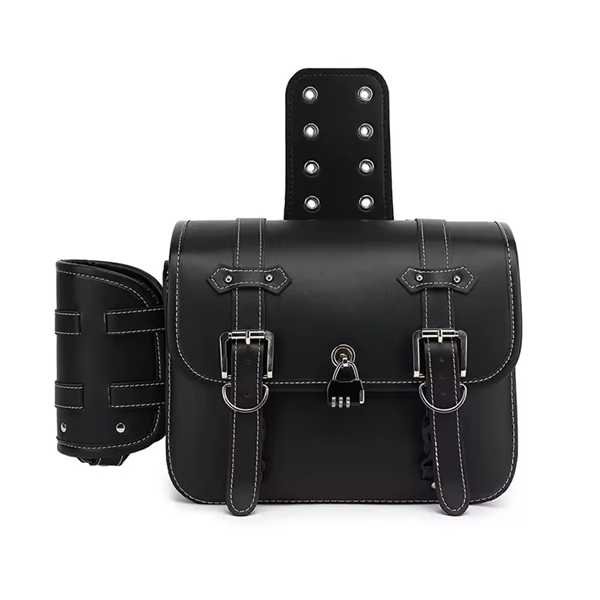
Leather Crossbody & Shoulder Bags
Popular for DTC brands. Key decisions: strap width and softening, D-ring reinforcement, magnetic snap vs zipper, and lining abrasion resistance. Bulk issues often come from inconsistent strap edge finishing or hardware scratches—both are controllable.
Leather Backpacks
Higher complexity but strong perceived value. Key decisions: shoulder strap foam density, back panel breathability layer, laptop sleeve stiffness, zipper path. Backpacks must handle uneven loads; we lock the anchor reinforcement and test the zipper function under load.
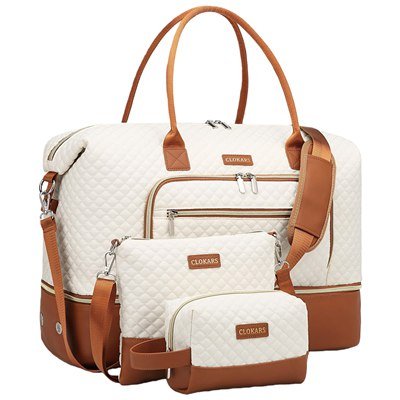
Leather Travel Bags / Duffels
The “premium travel” category requires strong structure: base studs, corner protection, and handle wrap comfort. We focus on seam allowances, binding, and packing method so the bag arrives without deformation.
(2) Supporting Items (Attach to Main Bag Programs)
Leather Wallets / Card Holders
Good for bundling and upsells. Detail control matters: edge paint, stitching spacing, and slot tension. Many returns are due to card slots being too tight/loose; we tune them through sampling.
Leather Pouches / Toiletry Bags
Lower MOQ and easier sampling. Key decisions: zipper spec, corner turning technique, lining wipe-clean behavior.
(3) Materials & Finish Options by Style
Leather bags can look “premium” in different ways. We match finish to style and cost:
- Natural full-grain look for boutique lines
- Uniform top-grain for branded programs with consistent appearance
- Suede/nubuck for seasonal collections
- Two-tone / panel mix when you need design differentiation without complex hardware


What “Genuine Leather” Should Mean in Your PO
Let’s make “genuine leather” actionable.
(1) Quick Definitions That Matter in Procurement
- Full-grain leather: the top surface remains intact. Strong natural character, good aging, premium feel. More variation across hides.
- Top-grain leather: the surface is lightly corrected/sanded, then finished. More uniform appearance, easier bulk consistency.
- Split leather: the inner layer after the top is separated. Often coated/laminated to look uniform. Can be cost-effective but feels different and may age differently.
- Suede/nubuck: texture finish types; they affect stain sensitivity and care requirements.
(2) How We Help You Choose
Retail premium: often prefers full-grain or high-quality top-grain with a natural finish. Customers accept slight variation if the story is clear.
Corporate gifting / uniform programs: usually need top-grain for a consistent look across batches.
High-wear use (travel, daily commute): choose leather and finish that resists surface scratches and is easy to maintain.
(3) What Should Be Written in Specs
When you send an RFQ, include:
Leather type: full-grain / top-grain / split
Tanning: vegetable-tanned / chrome-tanned (or hybrid)
Thickness range (mm) and tolerance
Finish: semi-aniline / pigmented/waxed (if you have a preference)
Color reference (Pantone/physical swatch)
Expected feel: firm/soft, matte/gloss level
This removes ambiguity and speeds up sampling.
(4) Authenticity & Incoming Checks (Simple, Realistic)
We don’t “lab test everything,” but we do practical controls:
Confirm leather supply consistency (same batch rules)
Visual grading: scars, grain uniformity, color tone distribution
Thickness spot checks across hide zones
Small cutting trials to confirm the stretch direction and panel yield
If you need third-party tests for market compliance, we can align on that at the RFQ stage.


Leather Bag Quality: Structure, Lining, Edge Finish
Think of a leather bag like a building: leather is the facade, but the structure is inside.
(1) Lining: The Hidden Wear Surface
Lining takes constant abrasion from keys, cosmetics, chargers, and friction. Common options:
-
Polyester lining: stable, cost-efficient, easy to sew
-
Microfiber or suede-like lining: premium feel, good for luxury cues
-
Cotton twill: classic, but watch shrinkage and colorfastness
We match lining to use: travel and daily carry often need tougher polyester; premium gifting may prefer microfiber.
(2) Reinforcement Map: Where Shape Comes From
Key reinforcement components:
-
PP board or PE board for base and side stability
-
Non-woven for panel support and stitch stability
-
Foam for softness and volume (handle wraps, strap pads)
We document where each reinforcement goes, because “some reinforcement” is not a repeatable instruction. A map avoids the common bulk issue: one batch feels firm, the next feels soft.
(3) Edge Finish: What customers Touch First
Edge finishing defines perceived quality:
Edge paint: clean modern look; must control layers, drying, and sanding to avoid cracking
Folded edge: traditional, durable; needs more labor and tight tolerance
Binding: functional; common in travel/duffel interiors
We select the method based on style, cost, and durability requirements. For high-touch zones (handles, strap edges), we prioritize stability so edges don’t feel sharp or peel.
(4) Thread & Stitch Rules: Prevent Visual Drift
Stitch length and thread size affect appearance. A small change in stitch density can make the bag look cheaper or uneven. We lock:
Thread size and color tolerance
Stitch length for main seams vs reinforcement seams
Needle type for leather thickness range
This reduces skipped stitches and keeps spacing consistent.
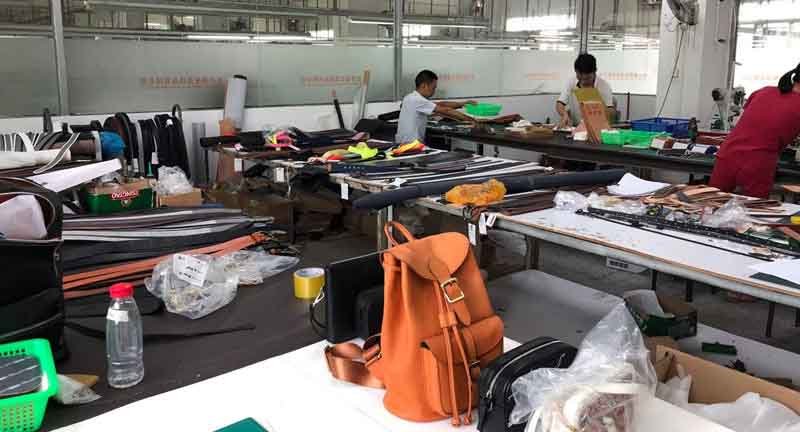
Leather Bag Pattern Engineering & Stress Zones
A leather bag pattern is not just a shape; it’s a manufacturing system that decides yield, look, and durability. Here’s how we make pattern engineering practical and customer-friendly.
(1) Panel breakdown: balance design and manufacturability
Leather is natural. Hides have areas with different stretch and grain character. If a design uses too-large single panels, you’ll either waste material or risk an inconsistent appearance. We optimize panel breakdown to achieve:
stable panel yield (better cost predictability)
better control of symmetry (front or back alignment)
easier reinforcement placement and stitch access
For example, many totes look simple but fail because the handle root reinforcement is too small or incorrectly placed. We define reinforcement as part of the pattern, not a last-minute add-on.
(2) Grain direction and stretch control (why bulk looks different from the sample)
Leather stretches differently in different directions. If grain direction isn’t controlled, bulk panels can behave differently even when the pattern is “the same.” We lock:
grain direction rules for main panels
direction rules for strap and gusset pieces
Cutting layout notes for the cutting team
This reduces the “one side looks softer” issue that brands hate.
(3) Seam allowance and stitch route lock
Leather shows everything. Small seam allowance drift can cause:
- uneven edges
- misaligned pockets
- zipper waves
- poor symmetry
We lock seam allowances and define a stitch route map, especially on:
curves and corners
zipper panels
strap anchor layers
Stitch route lock means operators follow the same route every time, reducing visual drift.
(4) Stress-zone reinforcement map (where leather bags actually fail)
Most field failures are predictable. We build a reinforcement map for:
handle roots (multi-layer build with controlled stitch box)
strap anchors (D-ring base reinforcement and stitch count rules)
zipper ends (end-stop reinforcement to prevent tearing)
base corners (corner patches or double layers)
This is the “invisible quality” that reduces returns and warranty claims.
(5) Pattern-to-sample workflow (fast, structured, fewer rounds)
To shorten sampling cycles, we ask for practical inputs:
use case (daily carry vs travel) and target load
target dimensions and capacity needs
must-keep features (pockets, closures, laptop sleeve)
Then we provide a sampling plan: v1 for shape/appearance, v2 for structure feel, and PP for bulk repeat rules.
Leather Bag Hardware & Zipper Control
Hardware selection is where many “nice samples” fail in bulk. Here’s a controlled way to avoid that.
(1) Plating tone control (gold, black, silver must match)
Even the same “gold” can vary by batch. We manage plating tone by:
confirming a plating reference tone (physical sample)
locking supplier and finish type (polished or matte)
defining acceptable variation under standard lighting
For multi-SKU lines, tone mismatch between the zipper puller and D-rings looks cheap. We aim to match the tone across all visible metal.
(2) Scratch prevention (hardware protection is part of packing)
Scratches usually happen in transit, not in sewing. Prevention requires:
protective film on metal surfaces (when applicable)
separating metal parts from direct leather contact inside the carton
using tissue or foam separators in bulk packing
This is simple, but often skipped. For established brands, scratch claims can become chargebacks.
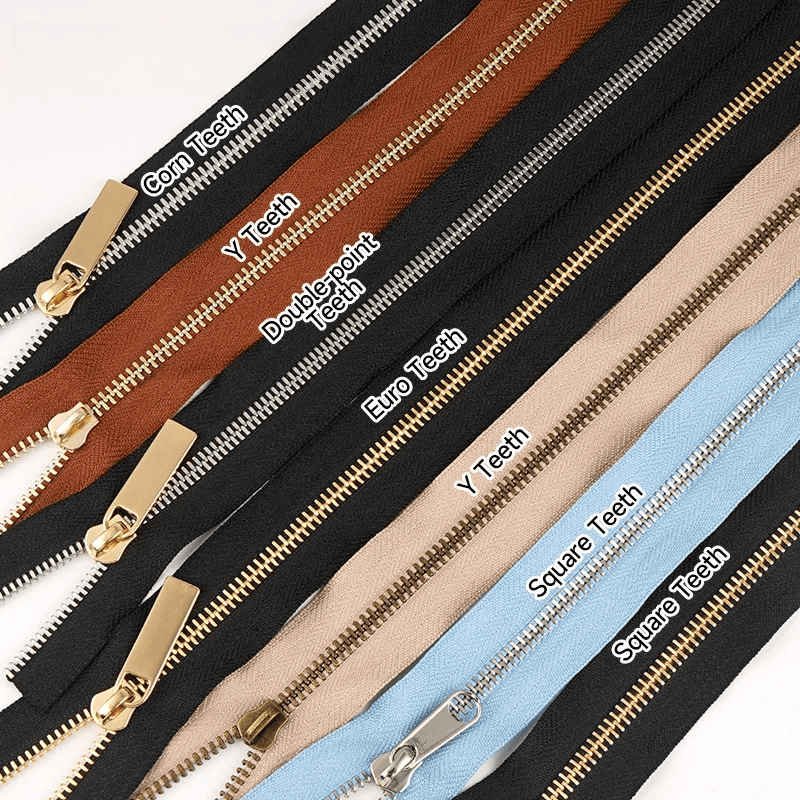
(3) Zipper selection: match the environment and use the cycle
Zippers fail when they’re mismatched for use. We lock:
zipper size or model
slider type and puller shape
tape color match to leather tone
end reinforcement method (zipper ends are tearing zones)
We also recommend functional checks under realistic load, not empty bag checks only.
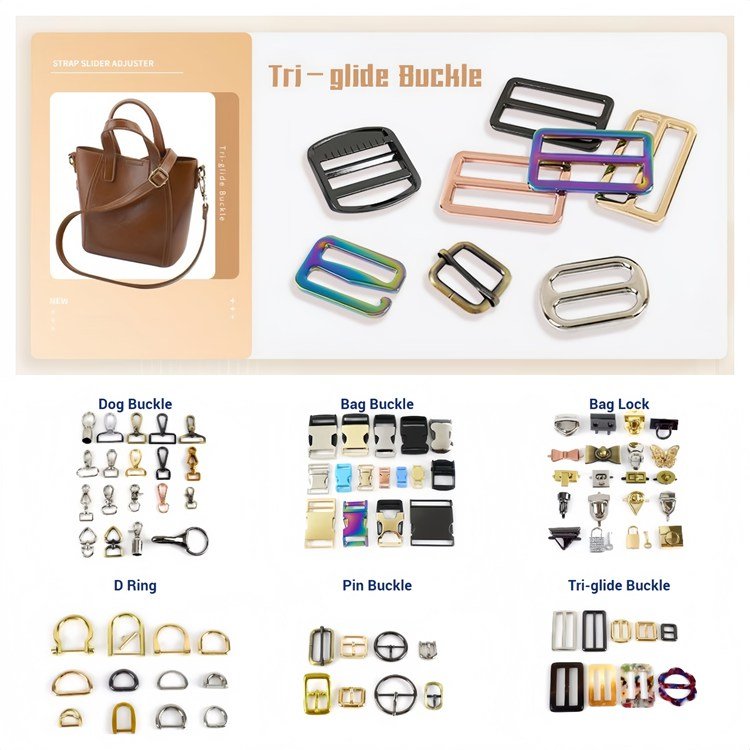
(4) Anchors and fasteners: D-rings, buckles, rivets
Common failure: anchor points loosen or tear. We prevent this by:
- backing plates or reinforcement patches
- stitch box patterns and minimum stitch count
- correct rivet or post length to avoid leather cracking
- edge smoothing to prevent cutting leather fibers
Leather Bag Branding & Durability
Branding is where your product becomes yours. For leather bags, the best branding method depends on leather finish, target market, and durability expectations.
(1) Deboss or Emboss (pressed logo)
Best for premium minimal branding. Works well on many top-grain and some full-grain leathers. Risks:
deboss depth inconsistency if the leather thickness varies
Poor clarity on very soft or heavily textured leather
Controls:
lock leather thickness range
define pressure or time settings in sampling
use placement template and tolerance
(2) Hot stamping (foil)
Strong visibility, popular for gifting and retail. Risks:
foil wear-off with abrasion
poor adhesion on oily or waxed finishes
Controls:
Choose foil type for the leather surface
Run rub or abrasion checks.
avoid high-wear zones (handle area)
(3) Metal plate or logo hardware
Premium and consistent. Risks:
scratchethe s during shipping
leather tearing if plate backing is weak
Controls:
backing reinforcement and screw or rivet rules
protective film and separation packing
(4) Woven label or leather patch
Great for casual brands or internal branding. Risks:
edge lifting
Controls:
stitch spec and edge finishing
(5) Placement lock and “brand CTQ.”
We treat branding as CTQ:
placement template with centerline
tolerance (e.g., ±3 mm)
photo proof with ruler
This prevents the most common bulk issue: logos drifting slightly across batches.
Leather Bag Sampling Roadmap
A good sampling plan saves time and money. Here’s the roadmap that works well for established brands.
(1) v1 Sample — lock appearance and key dimensions
Goal: confirm silhouette, pocket layout, and branding placement.
We recommend you approve:
overall size and proportion
pocket positions and usability
branding location, and method choice
Do not over-optimize materials at v1 if your structure is not confirmed yet.
(2) v2 Sample — lock structure feel and durability elements
Goal: confirm hand-feel, stiffness, strap comfort, and reinforcement.
We validate:
lining and interlining choices
foam density and board thickness
reinforcement map at stress zones
zipper function under load
This is where leather programs become stable.
(3) PP Sample — lock bulk rules and packing governance
PP is the “bulk truth.” Approve:
BOM lock (primary and approved alternates)
hardware plating tone reference
stitch length and edge finish process steps
packing files versions: carton marks, barcode labels, inserts
pack-out matrix for destinations
A PP sample prevents “sample looked fine, bulk drifted later.”
(4) Approval speed levers
Fast programs usually have:
one decision owner and 24–48h SLA
clear “must not change” list
accepted tolerance rules for minor variation
This can save more time than any “rush request.”

Leather Bag QC: Prevent Drift in Bulk
For established brands, QC must be predictable, measurable, and repeatable. Here’s the leather-bag QC system we use and how it protects your program.
(1) Incoming Quality Control (IQC): stop issues before cutting
Leather is a natural material; if you cut the wrong batch, you can’t “fix it later.” IQC focuses on:
Leather grade & batch consistency: confirm the approved leather type and finish match the reference swatch
Color tone distribution: check whether it hides lean, warm, or cool compared to the approved sample
Thickness spot checks: verify the thickness range for stable deboss depth and seam execution
Surface defects grading: scars, heavy wrinkles, coating marks—decide what is acceptable for your channel.
Hardware IQC includes plating tone check, scratch condition check, and zipper model or tape color check.
(2) CTQ list: define what “good” means in bulk
Leather bag programs fail when “good” is subjective. We convert your expectations into CTQ rules:
logo position tolerance (e.g., ±3 mm from centerline)
handle drop length tolerance
strap length or hole spacing rules
edge paint smoothness standard
zipper function requirement under load
CTQ items are easy to measure and easy to train.
(3) Inline inspections: control the real failure points
Inline checks are where you prevent drift. We prioritize:
stress zones: handle roots, strap anchors, D-ring stitches, zipper ends, base corners
appearance zones: edge paint, alignment, symmetry, glue marks, stitching spacing
For each zone, we define a simple pass or fail rule and require photo evidence at checkpoints (first piece, mid-run, pre-pack).
(4) Final inspection and proof pack: make acceptance easy
Final inspection verifies overall appearance, function, and pack-out correctness. For multi-SKU orders, proof pack matters:
carton marks and barcode placement photos
Hardware protection method confirmation
insert or hangtag version confirmation
This reduces warehouse receiving disputes and chargebacks.
(5) What customers should request (simple, high value)
If you want strong supplier control, request:
- CTQ sheet (with tolerances)
- reinforcement map photos
- edge finish process photos (layering or sanding)
- proof pack photos for labels or cartons
This is not “extra work.” It’s a low-cost way to protect your brand.it


Leather Bag Compliance & Claims
Compliance is often misunderstood as “paperwork at the end.” In reality, compliance starts with clarity in your product spec and ends with correct pack-out execution.
(1) Make material statements match the build
The simplest risk: a tag says “genuine leather,” but the bag includes mixed materials that weren’t disclosed (e.g., leather and coated splits and PU trim). For safety and trust, we recommend:
define the main leather type and where it is used (outer panels, handles, trims)
define non-leather materials (lining, reinforcements, accessories)
align hangtags or labels with the build
This is a brand-protection move—reduces customer disputes and negative reviews.
(2) Channel-specific packaging and barcode accuracy
Retail DCs can charge back for small mismatches. Common requirements:
barcode label size and placement
carton marks format and destination codes
polybag rules (if applicable)
inserts and hangtags version control
We manage these through a pack-out matrix that maps destination or channel requirements per SKU.
(3) Version control: the quiet source of most errors
Most compliance errors come from the wrong files used in packing. Our version control approach:
Lock approved files with version numbers
remove old versions from production folders
record approvals in a simple log
Then we verify with photo proofs before cartons are sealed.
(4) Practical risk checklist
Ask your supplier:
- Can you show a pack-out matrix sample?
- Do you version carton marks and inserts?
- Do you provide photo proof of labels and barcodes?
Leather Bag Cost, MOQ & Lead Time
Let’s make cost and timing predictable.
(1) The main cost drivers (what changes the price the most)
Leather grade, thickness, nd finish
Higher grade and thicker leather generally costs more. Uniform finishes can reduce variation but may add processing cost. Also, leather is priced by area; yield matters.
Panel yield and pattern efficiency
A pattern that wastes hide area increases cost. Panel breakdown choices can reduce waste without changing the visible design. This is often the cleanest way to reduce cost without lowering perceived quality.
Edge finishing method
Edge paint requires multiple steps (apply, dry, sand, repeat). Folded edges require more labor and accuracy. Buyers often underestimate how much edge finishing drives labor and lead time.
Hardware complexity
More hardware means more sourcing, more assembly time, more scratch protection needs. Matching plating tone across components also adds control work.
Lining and internal structure
Microfiber lining, thick boards, and foam add cost, but they also increase the perceived premium feel. Cost-cutting here can make a bag feel “cheap,” so it must be done carefully.
(2) MOQ logic for leather bags (what affects it)
MOQ is affected by:
leather procurement minimums by color and finish
custom hardware requirements (molds, plating batches)
branding methods (custom plates)
packaging prints and insert minimums
For mixed orders, MOQ can often be managed by using shared materials (same lining, same hardware tone) across SKUs.
(3) Lead time planning (how to stay on schedule)
A predictable leather bag timeline typically includes:
material confirmation and swatch approval
sampling rounds (v1/v2/PP)
bulk cutting and production
QC, packing, and shipment
To control lead time, freeze decisions early: leather color, hardware tone, and branding method are the most time-sensitive items.
If you want an accurate quote fast, send references, target price band, and channel requirements. We can then propose a “good, better, best” build option set.

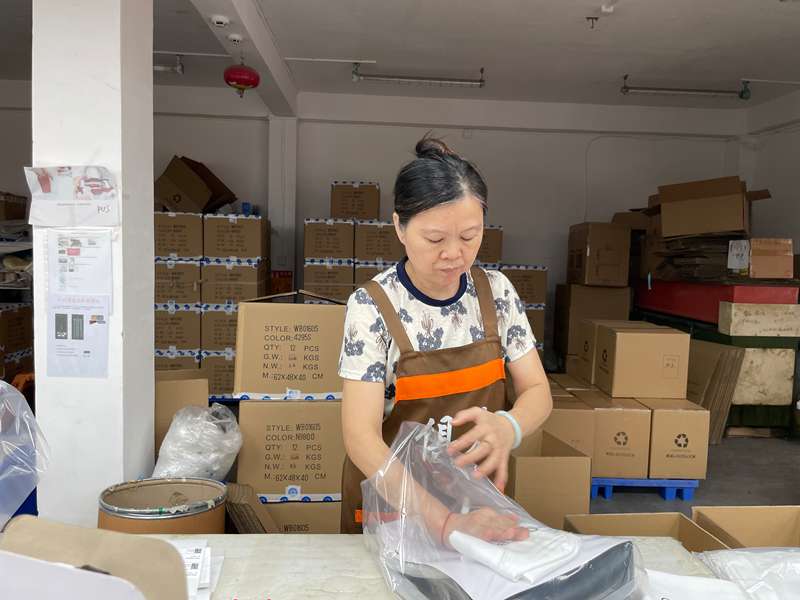
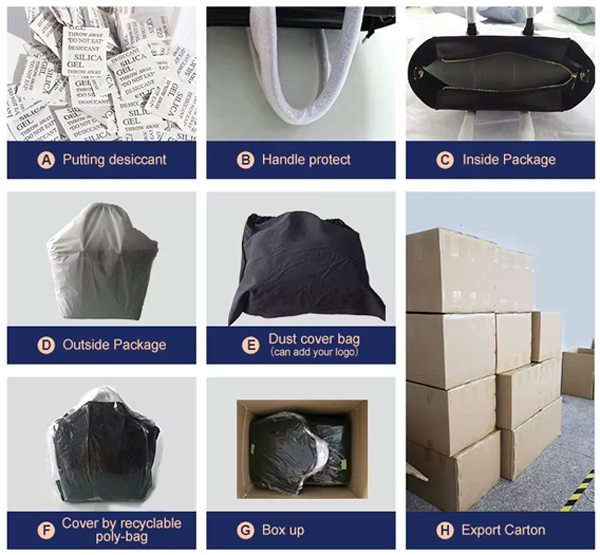
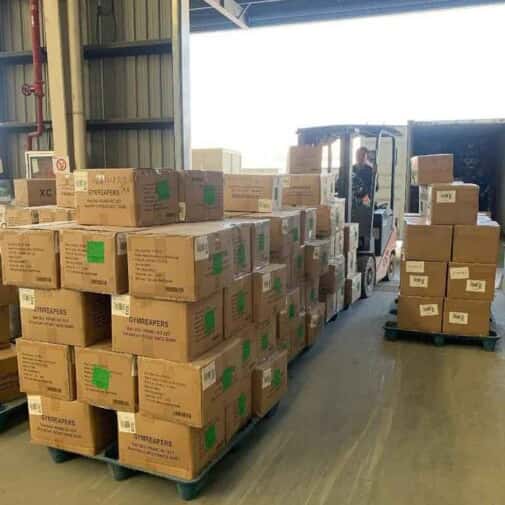
Leather Bag Packaging & Shipping Control
Packaging is a quality system, especially for leather.
(1) Prevent scratches (hardware and leather should not fight in the carton)
Scratches are often caused by metal touching leather during transit. Controls include:
protective film on metal plates or pullers when needed
tissue or foam separators between hardware and leather
individual bag protection (dust bag, tissue wrap) depending on channel
This is simple but must be standardized.
(2) Control shape deformation (leather takes a set)
Leather can crease or flatten under pressure. Shape control includes:
internal stuffing (paper or air bags) with defined fullness
base boards or shape inserts for structured bags
carton sizing to prevent crushing
stacking rules for heavy cartons
For premium retail, shape matters as much as stitching.
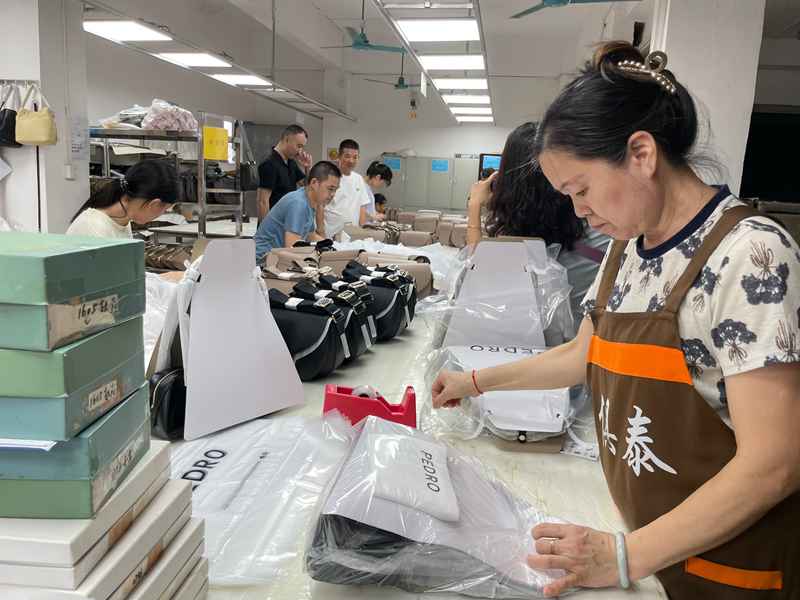
(3) Pack-out matrix and carton marks mean clean receiving
Receiving errors are expensive. We prevent them with:
SKU coding and carton count reconciliation
pack-out matrix by destination or channel
versioned carton mark templates
photo proof before sealing cartons
This is especially important for mixed orders.
(4) Staged shipment (when launch dates are tight)
If you need early launch, staged shipments can work when batches are clean:
freeze core SKUs first
ship clean batch 1
ship variants later
This protects schedule without mixing versions.
A good factory treats packing as the final QC gate. If you have retailer packing manuals, share them early so we build the rules into execution.can
Leather Bag RFQ Checklist
Use the checklist below to get a faster quote and a smoother sampling process.
(A) Product Definition (What You Want to Make)
Bag type: tote, crossbody, backpack, duffel, wallet, or set
Target dimensions (L × W × H) and capacity needs
Use scenario: daily carry, travel, retail, or corporate gifting.
Target load and durability priorities: abrasion resistance, water resistance needs, structure stiffness
Reference photos or links (competitor references are also helpful)
(B) Leather Specification (Avoid “Genuine Leather” Confusion)
Leather grade: full-grain, top-grain, split, suede, or nubuck
Tanning method: vegetable, chrome, or hybrid (if known)
Thickness range (mm) and preferred feel (firm or soft)
Finish preference: semi-aniline, pigmented, or waxed (if applicable)
Color reference: Pantone and physical swatch preference (or closest match)
(C) Construction & Material System (How It Should Feel)
Lining type and feel target: polyester, microfiber, or cotton twill
Structure preference: board, foam, or “please recommend.”
Edge finish: edge paint, folded edge, or binding
Reinforcement priorities for stress zones: handle roots, strap anchors, base corners
(D) Hardware & Branding
Hardware tone: gold, silver, or black; finish style: matte or polished
Zipper needs: top zip, double zip, or preferred model.
Branding method: deboss, foil stamp, metal plate, or patch
Placement expectation and logo files (AI/PDF preferred)
(E) SKU, Packing, and Compliance (Packing Accuracy Matters)
SKU plan: colors, sizes, destination mix
Packing plan requirements by destination or channel
Barcode label rules, carton marks, inserts, and hangtags
Any retailer’s manual or compliance checklist
Ship window, launch date, and staged shipment preference (if urgent)
If email is easier for internal forwarding, you can send the RFQ pack to info@jundongfactory.com with the subject line: Leather Bag RFQ — CTQ, BOM, Timeline.

Make A Sample First?
See your idea come to life before mass production.
At Jundong Factory, we offer free design mockups and custom samples to ensure every detail is perfect — from material and color to logo placement and stitching.
Start your project with confidence today: info@jundongfactory.com.
Decision FAQ for Genuine Leather Bags
What does “genuine leather” mean in bulk production, and how do we avoid material disputes?
The safest way to buy “genuine leather” is to define a specific leather grade + thickness range + usage locations in your PO, then lock a BOM with approved alternates—so bulk cannot drift into “similar-looking” but different-feeling materials.
In real sourcing, “genuine leather” is not a procurement spec; it’s a marketing phrase. Two suppliers can label very different builds as genuine leather: one may use top-grain cowhide for main panels; another may use coated split leather with a similar surface look. The result is buyer risk: customers complain about “not real leather,” reorders feel different, and internal teams argue about what was approved.
To prevent this, treat leather like a controlled input. Your RFQ/PO should state:
- Leather grade: full-grain / top-grain / split / suede / nubuck
- Tanning method if relevant: vegetable/chrome/hybrid
- Thickness range (mm) and tolerance (because thickness affects deboss clarity, seam behavior, and stiffness)
- Finish expectation: semi-aniline / pigmented/waxed (if you have a preference)
- Usage locations: “outer panels + handles are leather; trim is leather/non-leather; lining is polyester/microfiber”
Then lock it into a BOM (Bill of Materials) with two levels: primary and approved alternates. Alternates should be pre-approved materials that match hand-feel and appearance within tolerances. That way, if a leather batch is temporarily unavailable, the supplier doesn’t “substitute quietly” and create a new product under the same SKU.
Finally, add an incoming check rule: verify the leather batch against the approved swatch before cutting. Once leather is cut, disputes become expensive. When the material definition is clear, your quote becomes accurate, your sampling is faster, and your bulk shipments match your product photos—exactly what established brands need.
Full-grain vs top-grain vs split leather: which is best for my brand program?
Choose full-grain when your customers value natural character and patina, choose top-grain when you need the most stable bulk consistency, and consider split leather only when your price band and finish expectations are aligned—and written clearly in the spec.
This decision is not about “which is objectively best.” It’s about channel fit and reorder stability.
Full-grain leather keeps the top surface intact. It often delivers the strongest premium cues: visible grain character and a natural aging story. The tradeoff is higher natural variation across hides. If your brand can communicate that a slight variation is authentic, full-grain can be a powerful differentiator—especially for boutique retail or premium DTC.
Top-grain leather is lightly corrected and finished. It is often the best choice for established brands that need consistent look across multiple batches and warehouses. Because the surface is more uniform, deboss clarity and color matching are easier to control. Many “quiet luxury” lines choose top-grain for this reason.
Split leather (often coated) can be cost-effective and visually uniform, but hand-feel and long-term aging depend on the coating system. If you use split leather, you should be honest with product positioning and lock the coating/finish expectations tightly to avoid “feels plasticky” complaints.
Procurement tip: align this choice with your branding method. Deboss works well on many top-grain leathers; foil stamping may fail on oily/waxed finishes; suede needs different care and packaging.
If you want a fast recommendation, tell us your channel (retail, corporate gifting, DTC), target price band, and whether you prioritize “natural character” or “uniform look.” We’ll propose the safest option set with a spec template you can copy into the PO.
What MOQ should I expect for custom genuine leather bags, and how can I reduce it safely?
MOQ is usually driven by leather color/finish batch limits, custom hardware batches, and printed packaging minimums—so the best way to reduce MOQ is to share a material system across SKUs and start with a pilot lineup (2–3 core SKUs) before expanding colors and hardware.
MOQ discussions often go wrong because buyers ask for low MOQ while requesting too many “uniques”: multiple colors, custom metal plates, special lining prints, and retailer-specific packing files. Each unique component has its own minimum and lead time.
Here’s what typically increases MOQ:
- Custom leather color/finish (batch purchasing)
- Multiple leather types in one order
- Custom hardware molds or unique plating tone runs
- Printed hangtags/inserts (printing MOQs)
- Too many SKUs with small quantities each
Here’s how to reduce MOQ without lowering perceived quality:
- Start with shared components: one lining, one hardware tone, one edge method across all SKUs.
- Limit colorways in the first drop. Expand colors after the first reorder proves market traction.
- Use a “hero SKU” approach: one flagship bag + one accessory (wallet/pouch) that uses the same leather and hardware.
- Consider branding that doesn’t require custom metal tooling at the start (e.g., deboss) if you’re testing a market.
- Use a pilot order sized to reveal defects: not too small to hide problems, not too big to lock risk.
If you tell us your channel and order structure, we can propose a MOQ strategy that balances risk and speed. The goal is not “lowest MOQ,” but lowest total risk for your brand program.
How long does leather bag sampling and bulk production take, and what controls lead time?
A reliable leather bag timeline is controlled by freezing leather color/finish, hardware tone, and branding method early; staged sampling (v1→v2→PP) prevents resets and keeps bulk on schedule.
Leather timelines slip for predictable reasons: late material changes, unclear approvals, and packaging files arriving too late. A staged plan solves most of it.
Typical steps:
- RFQ alignment + swatch matching (leather + hardware tone)
- v1 sample (appearance and dimensions)
- v2 sample (structure feel and reinforcement)
- PP sample (bulk rules + packing versions)
- Bulk production + QC + packing + shipment
The three lead-time “gate items” are:
- Leather color/finish: affects sourcing and matching
- Hardware tone: plating batch and matching across components
- Branding method: tooling, settings, durability checks
Customer actions that speed up the timeline:
- one decision owner and 24–48h review cycles
- “must-not-change list” early (size, leather tone, logo method)
- accepting reasonable tolerances (minor leather variation can be normal for full-grain)
Supplier actions that protect timeline:
- version control for packing files
- Proof pack photos before sealing cartons
- CTQ checkpoints to avoid rework late in production
If your launch date is tight, staged shipment is a practical option: ship core SKUs first, variants later—only if file versions and batch rules are stable.
How do you prevent sample-to-bulk deviation for leather bags?
Preventing deviation requires three locked tools: a CTQ sheet with tolerances, a stress-zone reinforcement map, and a BOM lock (primary + approved alternates)—plus photo evidence at key checkpoints.
“Sample looks great, bulk looks different” happens when the spec is descriptive but not measurable. Leather amplifies small process drift: stitch spacing changes, edge paint thickness varies, and hardware tone mismatches become obvious.
Here’s the practical control system:
- CTQ sheet: converts expectations into measurable items: logo placement tolerance, handle drop tolerance, stitch length, edge finish standard, zipper function.
- Reinforcement map: defines how handle roots, strap anchors, zipper ends, and base corners are built—layers, stitch pattern, minimum stitch count.
- BOM lock: controls leather grade/finish and key internal materials (lining GSM, foam density, board thickness) so “feel” stays consistent. Approved alternates prevent last-minute substitutions.
Then you require evidence:
- first-piece photos with ruler for logo placement
- reinforcement close-ups at handle roots and anchors
- edge finishing process photos (layering + sanding)
- proof pack photos showing hardware protection and correct labels
This system protects both function and premium perception. It also makes supplier evaluation easy: if a factory refuses CTQ discipline, you should expect drift.
What QC checkpoints matter most for genuine leather bags?
The most effective QC for leather bags is not “100% final inspection,” but IQC + inline CTQ + proof pack—because leather issues are irreversible once cut and packed.
Leather programs need QC that targets the highest leverage points:
IQC (incoming):
- leather batch match to approved swatch
- thickness checks
- defect grading for your channel
- hardware tone and scratch checks
Inline CTQ:
- stress zones: handle roots, strap anchors, zipper ends, base corners
- appearance zones: edge finish smoothness, alignment, symmetry, glue marks, stitch spacing
Final + proof pack:
- function checks (zipper, straps under load)
- label/barcode accuracy
- carton marks version correctness
- hardware protection method confirmation
A customer-friendly QC pack should include: CTQ sheet, photos of reinforcements, edge finish process record, and proof pack photo grid. This is the difference between “trust me” and “audit me.”
Which branding method is safest on leather: deboss, foil stamp, or metal plate?
Deboss is usually the safest long-term option for premium leather, foil stamp is best for high visibility but needs abrasion validation, and metal plates look premium but require scratch-proof packing and reinforced backing.
Branding is a durability decision, not just aesthetics.
- Deboss/emboss: stable and premium, but depth can drift if leather thickness varies. Control it by locking thickness range and using a placement template.
- Foil hot stamp: strong visibility, but may wear on high-friction zones or fail on oily/waxed finishes. Control it with rub checks and avoid high-touch areas.
- Metal plate: consistent and premium, but scratches easily in shipping. Control it with protective film, separators, and reinforcement under the plate to prevent tearing.
If your channel is corporate gifting, foil often converts well. If your channel is premium retail, deboss plus clean edge finishing often looks most “quiet luxury.”
How do you prevent hardware scratches and plating mismatch in bulk?
Prevent scratches and tone mismatch by locking a plating reference, keeping hardware from touching leather in cartons, and verifying protection with proof pack photos before sealing.
Tone mismatch happens when suppliers source components from different plating batches or do not control the finish level (matte vs polished). Scratches happen when metal contacts leather during transit. Controls include:
- one approved plating reference sample
- unified finish level across visible hardware
- protective film where applicable
- foam/tissue separators in packing
- proof pack photo grid (close-ups of protected hardware)
For established brands, this is not optional. It directly affects reviews and chargebacks.
What packaging standards protect leather bags during shipping and reduce chargebacks?
The highest-impact packaging standards are hardware isolation, shape stuffing rules, and a pack-out matrix with versioned carton marks—because most “damage” is shipping friction, not manufacturing defects.
Key rules:
- hardware isolation: film + separators
- shape protection: stuffing and carton sizing to prevent crushing
- version control: correct labels/carton marks by destination
- mixed order accuracy: SKU coding + reconciliation + proof pack photos
If you have retailer manuals, integrate them early into the pack-out matrix.
What information should I send to get an accurate quote from a genuine leather bag manufacturer?
To get an accurate quote, send a structured RFQ with leather grade/finish, hardware tone, edge method, SKU structure, and packing requirements—because these five items decide most of the cost and lead time.
The fastest quotes come from clear inputs, not repeated messaging. At minimum, include:
- bag type + dimensions + reference photos
- leather grade + thickness range + color reference
- branding method + placement expectation
- hardware tone + zipper needs
- edge finish method (edge paint/fold/bind)
- SKUs and estimated quantities
- destination/channel pack-out rules (barcodes, carton marks, inserts)
- target ship window
With these, you can expect a response that includes Good/Better/Best options, CTQ sheet, and a staged sampling plan.
How do you control leather color consistency across batches and reorders?
We control leather color consistency by locking a physical swatch standard, applying batch discipline (no mixing within a SKU), and using a reorder spec version + BOM lock so future replenishment matches your approved look.
Leather color control is different from fabric dye lots. Hides naturally vary, and finishes can shift tone under different lighting. Problems happen when a brand approves a sample under one lighting condition, and bulk arrives slightly warmer or cooler, or when a reorder mixes batches and creates uneven tone within the same carton. The solution is a controlled system, not a promise.
Here’s how we manage it in a customer-auditable way:
(1) Lock a physical swatch as the “truth.”
Pantone helps for direction, but a physical leather swatch is the real control standard. We lock:
- an approved swatch with reference code
- the finish type (semi-aniline, pigmented, waxed)
- the acceptable variation range (what is “within tolerance”)
(2) Batch discipline: avoid mixing inside a SKU
Color inconsistency is most visible when one bag is cut from a different batch than another bag in the same SKU color. We control by:
cutting each SKU color from a consistent batch range
avoiding batch mixing inside one color run
labeling batches clearly for traceability
This helps your warehouse: fewer returns caused by “same SKU, different tone.”
(3) Finish consistency: control what actually changes tone
Tone shifts often come from surface finish variation: topcoat thickness, wax level, or correction layer. That’s why the spec must include:
- finish type and touch feel
- gloss level (matte vs semi-gloss)
- edge paint color match rules (edges can look “off” even if panels match)
(4) Reorder versioning: stop “we used the old file” issues
For reorders, we use:
spec version (v1/v2/v3)
BOM lock (primary + approved alternates)
batch notes from the last approved bulk
So you can replenish without re-explaining your standards.
How do you handle order adjustments (quantity, color mix, packaging changes) without breaking the schedule?
We handle order adjustments by setting decision cut-off points, separating changes into safe vs risky, and using a change log + revised pack-out matrix so you can adjust without collapsing lead time.
Established brands often need changes: reorder quantities shift after sales forecasts, colors change based on campaign feedback, or packaging must match a retailer’s manual. The problem is not the change—it’s changing too late and changing the wrong thing.
We manage adjustments with three controls:
(1) Decision cut-off points
We divide production into phases and define what can change:
Before material purchase: wide flexibility
After leather and hardware purchase: limited flexibility
After cutting: very limited flexibility
After packing files, locked: changes require versioning and proof
Cut-off points protect schedule and cost accuracy.
(2) Safe vs risky changes
Safer changes:
- quantity increases within capacity and material availability
- carton marks text updates early
- barcode placement tweaks before packing starts
Risky changes:
- changing leather color/finish after purchase
- changing hardware tone after plating batch starts
- changing branding method after sampling approval
- adding new SKUs late (new patterns, new BOM)
(3) Change log and pack-out matrix update
Every approved change should update:
- PO revision note
- pack-out matrix version (destination/channel)
- carton mark files version
- proof pack photos for the new version
Everything You Need to Know Before Customizing Your Bags
Genuine leather bag sourcing decisions are rarely based on appearance alone. For procurement teams, a reliable evaluation depends on clear answers around MOQ versus bulk pricing, lead time, leather grade and thickness, hardware specifications, edge finishing standards, structure and lining feasibility, packing logic, and repeat-order consistency. This FAQ section is designed to address these operational questions upfront, helping you assess supplier fit quickly while reducing unnecessary internal back-and-forth.
We recommend structuring FAQs around real procurement triggers: what information is required to start sampling, how to prevent sample-to-bulk drift in leather shade, hand-feel, grain, and edge paint, how to align reinforcement architecture with real load conditions, how to manage multi-SKU color programs across different hide lots, and which QC checkpoints protect long-term durability and repeatability. When written clearly, these FAQs also support long-tail search intent, such as “genuine leather bag MOQ,” “leather tote bag manufacturer,” “OEM leather handbag supplier,” or “private label leather bags wholesale.”
For a quick evaluation, you can share your bag type, target dimensions, leather preference (full-grain/top-grain/split), hardware tone, and packing requirements by email. Our team will review your inputs and provide structure recommendations, material system options (leather, lining, reinforcement, and edge finish), and a realistic development route to support your genuine leather bag program from sampling to repeat production.
