 Skip to content
 Bag Factory Supporting Order Adjustments
Order adjustments are normal in real B2B programs—launch dates move, SKUs change, packaging rules update, and forecasts get revised. The risk is not “change,” but uncontrolled change that triggers material delays, production rework, and shipping confusion. This guide gives you a practical system to adjust custom bag orders safely: a change-control ladder, decision tables, cost rules, and packing or QC gates. If you need a supplier who can adapt without losing control, this playbook shows exactly how to do it.
Order Adjustments in Bag Manufacturing Explained
In custom bag production, “order adjustment” can mean anything from a small artwork tweak to a scope change. To control cost and schedule, define what is changing and what stage the order is in.
A practical approach is to group adjustments into five types:
Quantity: changes material allocation, line booking, carton counts, and shipping plans. Lowest risk before materials and capacity are committed.
SKU mix (color, size, style split): raises anti-mix risk and can affect labels, packing lists, and carton mapping. Best before barcode files and carton marks are locked.
Branding (logo method, placement, Pantone, artwork): may trigger new proofing, re-sampling, or new threads, inks, patches. Best before PP approval; after PP, it becomes a new standard and must be revalidated.
Packaging and labeling: inserts, hangtags, barcode format, warnings, carton marks. Late changes often cause rework and delays.
Delivery and logistics: warehouse change, split shipment, mode switch. Impacts carton configuration and documents, so notify early.
Before requesting any change, check: current stage, whether materials or compliance are affected, and whether the SKU identification rules change. A reliable factory replies with a clear impact statement: no impact, adds days, or requires re-approval.


Change Control Ladder: Timing and Cost Rules
If a factory can handle adjustments without chaos, both sides need one shared rulebook. The most practical tool is a change control ladder that links changes, their timing, and their impact on lead time and cost.
Level 0: Clarifications
Logo size in millimeters, stitch color within the approved range, and carton mark order. Impact: usually none if confirmed fast.
Level 1: Cosmetic edits before PP
Small artwork scale change, hangtag text, and color ratio update before materials are allocated. Impact: small, but must be logged.
Level 2: Functional edits
Pocket layout, zipper path, strap length, logo method change, added labels or inserts. Impact: may require resampling and cost update.
Level 3: Material system changes
Fabric grade, coating, custom dye, and hardware finish. Impact: can reset material lead time and approvals.
Level 4: After PP approval
Any change to size, structure, appearance, or packaging. Impact: formal approval, often PP re-approval.
Level 5: After packing
Destination or barcode changes after printing/packing. Impact: high rework risk.
Execution rules: one written change form, one approval owner, clear stop lines, and proof-based confirmation (files, photos, scan checks).
Order Changes Decision Table
Below is a decision table designed for procurement teams managing real-life adjustments. It’s built around what actually breaks schedules: materials, approvals, and packing logic. Use it in two ways:
- Internally: decide whether to request the change.
- With the factory: force a clear impact response.
| Adjustment Request | Best Timing | Factory Actions Needed | Buyer Actions Needed | Common Trade-Off |
|---|---|---|---|---|
| increase quantity | before materials & line booking | material allocation + capacity plan | confirm new ship window | cost may rise if split shipment |
| decrease quantity | before production start | re-balance material use | confirm cost settlement | leftover materials may be billed |
| change SKU ratio | before barcode & pack plan | update pack-out matrix | approve new SKU mapping | higher anti-mix QC |
| add new SKU | before PP | new sample + new BOM | approve PP for new SKU | adds sampling time |
| change logo placement | before PP | update template + in-line QC points | sign off tolerance | may require rework if late |
| change logo method | before PP | new process + new material (thread/patch) | confirm brand priority | more cost, possible re-sample |
| update carton marks | before mass printing | file proof + print test | approve within 24–48h | late approval = packing delay |
| change barcode | before printing | scan proof required | provide correct barcode file | post-print change = rework |
| split shipment | before booking | create batch plan | confirm priorities | freight complexity |
| change destination | early | revise documents & carton coding | confirm incoterms/warehouse rules | re-carton risk if late |


Single-Owner Change Request Workflow
A reliable change workflow is a practical tool that protects your ship date and prevents costly late-stage rework. This streamlined process is key for programs with multiple SKUs or frequent updates.
1. Standardized Change Request
Use one form requiring clear before-versus-after details, change type, fixed constraints, and a required decision. This clarity prevents miscommunication and supports efficient multi-round revisions.
2. Central Change Log
Maintain one simple log as the single source of truth. Only “Approved” items in the log are valid for production.
3. Single Approval Owner
Designate one person to confirm a change is final, identify non-negotiable items, and deliver the written decision to prevent conflicting feedback.
4. Structured Impact Reply
Require factory replies to follow a consistent format covering schedule impact, cost, risks, and alternative options for fast decision-making.
5. Proof Gates for Packaging
Implement a three-step verification system (file, photo, scan proof) for all packaging changes to avoid last-minute delays.
This workflow transforms revision capability into predictable, controlled execution.

Stock-First Materials, Controlled Custom Options
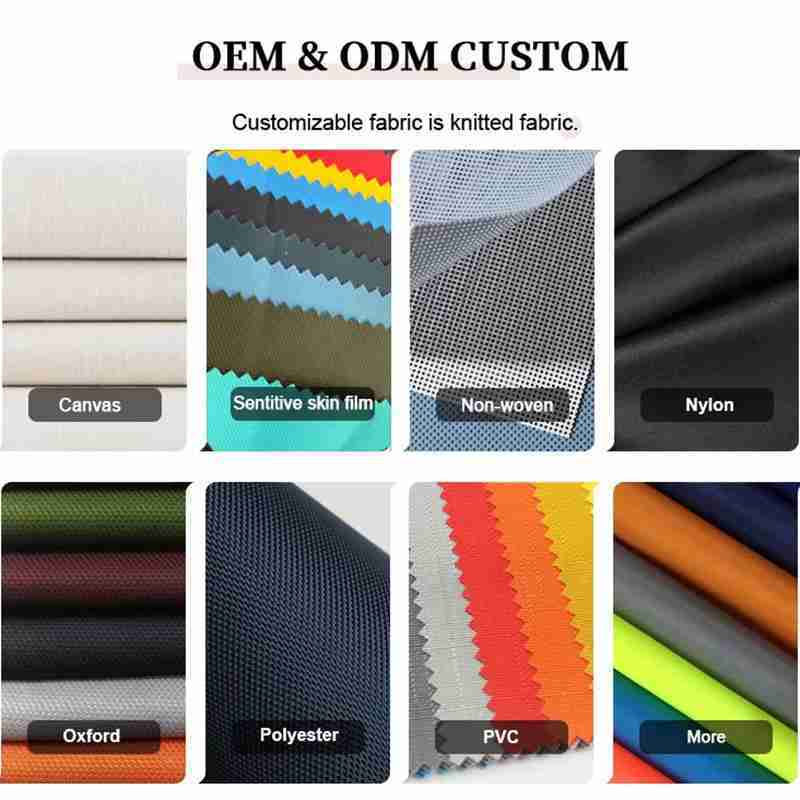
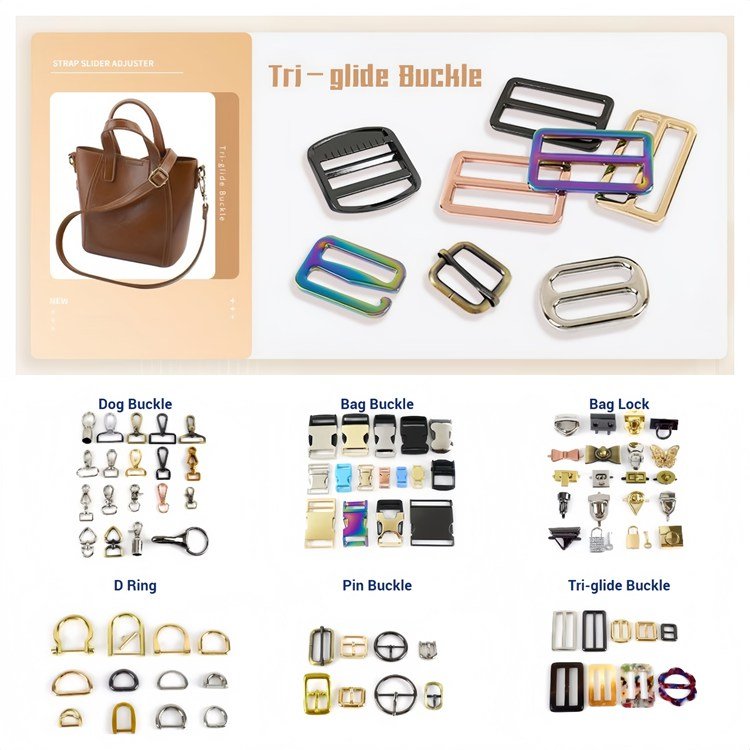
A factory can support order adjustments only when materials are controlled, not improvised. This does not mean using low-grade stock. It means keeping the items that usually delay schedules under a stable plan, while allowing controlled customization where it is safe. Strong sourcing across fabric, leather, EVA, neoprene, PVC, zippers, hardware, webbing, lining, and padding makes fast substitution possible when timelines change.
Two-layer material strategy
Layer 1: Core materials (freeze early, keep stable)
Lock these first and avoid late changes: outer fabric type and weight, such as 600D or 1680D, lining specification, webbing width, and base color family, zipper type and base chain color, padding or foam thickness and density. These items drive supplier lead time and production repeatability. Late swaps often reset sampling, pricing, and delivery.
Layer 2: Brand accents (customize selectively, with rules)
Keep branding flexible but controlled: logo method (screen print, heat transfer, woven label, rubber patch, metal plate), trim and label colors, surface finish direction (matte or gloss). Manage changes with file proofs, photo proofs, and barcode scan proofs so adjustments do not create rework.
Adjustment Planning for Multi-SKU Production
Even with perfect change notes, weak production systems still create delays. What you need is a factory built to absorb adjustments through flexible scheduling, multi-product order control, and capacity planning, supported by status updates and clear follow-up.
A strong approach starts by locking a base plan: line start date, daily output target, SKU or color batch sequence, in-line QC gates at high-risk points, and a packing window with a carton-build schedule. When changes happen, the plan is not rebuilt from zero. Only the affected blocks move: quantity updates shift output days or labor allocation; SKU ratio changes adjust batch sequence and pack-out mapping; packaging updates move printing and packing time; destination changes update carton coding and staging.
For multi-SKU accuracy, use batch controls: dedicated bin ID and line signage per SKU, first-article approval per batch, destination-based packing, and carton count reconciliation.
Partial shipment is a schedule tool: ship the stable batches first, then the changed batches after files and labels are confirmed. To verify capability, ask about capacity booking after PP approval, batch separation rules, in-process QC gates, and split-shipment handling.


Change Cost Transparency Rules
When an order is adjusted, cost changes usually come from the same places. If those “cost buckets” are not defined upfront, every adjustment turns into a negotiation, and negotiation turns into delay. The practical fix is a simple set of change pricing rules both sides follow before the first major revision.
Rule 1: Separate variable cost vs sunk cost. Variable cost moves with output, such as labor minutes, per-piece printing, and packaging units. Sunk cost is already spent, such as custom tooling, booked materials, or printed labels. Ask one clear question: Which parts are variable, and which are sunk?
Rule 2: Use a standard change quote format. Each quote should include a short change summary, schedule impact, and a cost breakdown by materials, process, packaging, and logistics, plus a reuse plan and required proofs.
Rule 3: Define responsibility by cause. Forecast or channel-driven updates pay the impact. Factory errors pay the rework. This avoids disputes and protects timelines.
Rule 4: Reuse first to reduce waste. Reallocate shared components, reuse cartons, and reprint only what must change, with traceable records for audit.

QC and anti-mix after changes
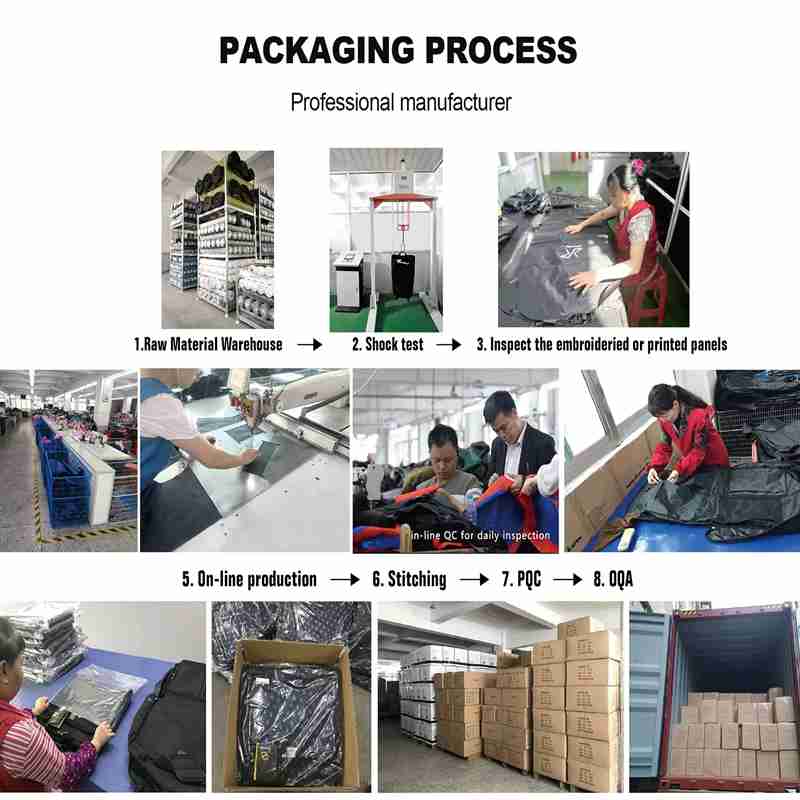
When changes happen, errors usually show up in three places: on the sewing line (old instructions), at branding (wrong file or placement), and at packing (labels or carton marks no longer match the updated SKU map). A factory that supports adjustments should tighten controls in all three areas, using the same QC chain: incoming inspection, in-process inspection, final inspection, plus a focused packing audit.
Start with a “change activation” checkpoint: update the work-instruction version on the line, remove old files from active folders, and collect sign-off from production, QC, and packing leads. This one step prevents silent execution of old versions.
For SKU mix changes, use batch discipline: separate bins and staging zones by SKU and destination, clear batch signage, first-piece approval for each SKU batch, and packing by destination batch. For labeling or barcode changes, use proof gates: file proof, photo proof of placement, and scan proof.
Focus QC on rework drivers: logo alignment, zipper function, strap anchors, key measurements, and carton count accuracy. If one SKU is verified and another is under change verification, use partial shipment and isolate the changed batch.


Plan Adjustable Orders From Day One
A factory can be flexible, but if the order is not designed for flexibility, changes will always feel slow and expensive. Here’s how to plan adjustable custom bag orders from day one.
(1) Set an “adjustment budget” and non-negotiables
Before sampling, define non-negotiables (ship window, core structure, brand critical items) and an adjustment budget (extra days and cost you can accept). This keeps revisions controlled.
(2) Build a “core SKU plus optional SKU” structure
Keep core SKUs stable with stock-first materials and standard packing. Put higher customization into optional SKUs that can follow later. This protects launch dates and makes partial shipments simpler.
(3) Use a two-layer BOM
Freeze core materials (main fabric, lining, webbing, zipper type, padding). Allow accent items (logo method, trim colors, labels) to change only within pre-set rules. This reduces re-sourcing resets.
(4) Lock packaging and identification early
Assign one owner for barcode files, carton marks, destination mapping, and SKU codes. Use file proof, photo proof, and scan proof to prevent wrong labels and rework.
(5) Choose a shipping backup plan
Decide early if split shipment or destination-based partial shipment may be used, so changes do not cause panic.
(6) Keep a simple weekly update rhythm
Track sampling, materials readiness, production progress, QC results, and packing readiness in one short status table.
Make A Sample First?
See your idea come to life before mass production.
At Jundong Factory, we offer free design mockups and custom samples to ensure every detail is perfect — from material and color to logo placement and stitching.
Start your project with confidence today: info@jundongfactory.com.
Order Adjustments FAQ for Bag Factory
What kinds of order adjustments are “safe,” and what changes will reset lead time?
The safest adjustments are made before materials are committed and before packaging files are printed. Changes that touch materials, structure, compliance labels, barcodes, or carton rules carry higher risk and may reset the schedule unless you use a controlled change ladder with clear stop lines.
A common mistake is asking, “Can we change X?” without stating where the order is in the workflow. The same request can be simple early on and very costly late in production. A factory that truly supports adjustments will classify the change, explain the impact, and propose options that protect delivery.
Stop lines protect timelines. Set them in writing:
After material allocation: no color-family change unless a stock substitute is approved
After PP approval: no structure change unless compliance-driven
After mass printing: no barcode format changes
After packing start: destination changes only with staged packing
Ask the factory for:
A short impact reply: schedule change, cost change, key risks
Practical alternatives: stock materials, split shipment, partial shipment
Proof of control: a simple change log and one named approval owner
Procurement tip: If revisions are frequent, lock a core SKU first, and keep optional SKUs as an add-on plan. This prevents one change from rewriting the entire schedule.
We need to change the SKU mix (colors/sizes) but keep the same total quantity. How do we avoid wrong cartons?
SKU mix changes stay safe only when you rebuild pack-out logic (SKU, destination, carton mark) and run strict anti-mix batching. The biggest risk is usually not sewing, but mis-packing and mis-labeling.
Most factories fail SKU mix changes because packing instructions stay old while the ratio becomes new. Treat a SKU mix update as a packing system change, not a casual request.
Use a Pack-Out Matrix that lists each SKU code (style, color, size), destination warehouse, carton mark template version, barcode type and placement, units per carton, and planned carton count.
Anti-mix controls are required after a SKU mix change:
Batch separation: dedicated bins or areas per SKU and destination
Batch signage: large printed signs with SKU and destination
First-piece sign-off per SKU: one confirmed unit before full run
First carton sign-off per destination: one carton packed and verified
Carton count reconciliation: Each destination batch is counted and recorded
Fast evidence to request:
photo of batch signage
photo of first-piece per SKU
photo of first-carton per destination
barcode scan photo or screenshot
If the change is late, ship the clean batch first (unchanged SKUs), then isolate changed SKUs for a second packing window. This is often faster than holding the entire order.
Our packaging/barcode/carton mark changed. What is the most reliable process to prevent last-week rework?
The most reliable method is a three-step proof gate system: file proof → photo proof → scan proof, with strict version lock. Mass printing and packing should not start until all proofs pass.
Packaging changes feel “small” until the final week, when teams discover mismatched carton marks, wrong barcode sizes, or missing warning labels. Treat packaging as a mini-project with its own approvals to avoid last-minute stalls.
Proof Gate 1 — File proof (layout approval)
Confirm carton mark text order, destination code, and PO reference. Confirm barcode size, quiet zone, and label placement drawing. Confirm the insertion of content such as instruction cards and warning labels.
Proof Gate 2 — Photo proof (real placement)
Request photos showing the label applied on the polybag or carton where required, carton marks printed and readable, and inserts packed in the correct position.
Proof Gate 3 — Scan proof (functional check)
Request a barcode scan photo or short video showing the scan result. For multiple SKUs or destinations, request one scan proof per group.
Version lock rules (simple, powerful)
Name every file with a clear version, for example, Barcode_SKU-A_v3.pdf. Use only one active folder for production printing. Remove old versions from the active folder immediately after approval.
How should change pricing work, and how do we avoid arguments about extra charges?
The cleanest approach is to separate variable costs (per-unit changes) from sunk costs (already committed), then require a structured Change Quote that shows what can be reused, what must be redone, and what will be credited.
Disputes often start when a supplier sends one number like “+$0.35 per piece.” That is not decision-friendly. A good quote must show cost blocks and clear impact.
Change Quote structure:
Change summary (before vs after)
Schedule impact (adds X days, no impact, or reset)
Cost breakdown by block
Materials: fabric, lining, webbing, zipper, hardware
Process: logo method, added reinforcement, extra pocket
Packaging: labels, inserts, cartons, printing
Logistics: split shipment, destination sorting
Reuse and credit plan (reused vs wasted)
Proof required (PP re-approval, scan proof, photo proof)
Variable vs Sunk Cost Table:
| Cost type | Example | Who pays | Notes |
|---|---|---|---|
| Variable | extra cartons, extra labor, extra label units | usually the customer | tied to output |
| Sunk | Already purchased custom hardware | case-by-case | agree on a settlement rule |
| Rework (factory error) | Wrong labels caused by the factory | factory | supplier responsibility |
| Rework (customer change) | Reprint barcode after update | customer | require a reuse plan |
Fair settlement rules:
If quantity drops after materials are purchased: reuse for reorder, or bill surplus at cost.
If packaging changes after printing starts: charge a reprint, but show why old stock can’t be reused.
If rework is factory-caused: factory owns the cost.
Cost-saving question to ask every time: “What is the cheapest safe alternative?” Examples: keep the same fabric and change only the logo; keep carton marks and add a destination sticker; ship the unchanged batch first.
After PP approval, what changes are still realistic without blowing up the schedule?
After PP approval, only changes that do not alter the bag’s structure, material system, or packing identification rules are typically “schedule-safe”; anything that affects dimensions, construction panels, materials, barcode/carton mapping, or compliance labels should be treated as a formal change order with either a revised ship window or a partial shipment plan.
PP (Pre-Production) approval is meant to lock the “bulk standard.” Many buyers treat PP as a milestone, then continue requesting “small improvements.” That’s where lead time breaks. The right way to manage post-PP changes is to separate them into three categories:
Category A — “Clarifications”
These are clarifications that improve execution without changing the standard:
confirm tolerance (e.g., logo position ±3mm)
Confirm zipper pull direction.
confirm carton mark line breaks
What to request: a short written confirmation and an updated work instruction version.
Risk: low if done fast.
Category B — “Cosmetic edits that don’t affect packing identification.”
Examples:
micro artwork adjustment without changing the logo method
thread color shift within the .same approved color family
hangtag text corrections before mass printing
What to request: file version lock + one photo proof.
Risk: medium if printing already started.
Category C — “Standard changes”
Examples:
changing pocket layout, strap length, size, reinforcement
switching fabric type, lining spec, webbing width
changing barcode format, carton marks, or compliance labeling
changing destinations after cartons are built
What to request: formal impact reply (schedule/cost/risk), and decide whether to accept a ship window change or isolate the changed part as a new batch.
If we need material substitutions (stock-first options), how do we keep brand consistency and avoid quality drift?
Material substitution is safe when you lock a material system (outer/lining/padding/webbing/zipper/hardware), define approved substitute boundaries, and require quick proof evidence (swatches + close-up photos + functional checks) before bulk runs—otherwise you risk sample-to-bulk drift and inconsistent reorders.
Customers often say “use what you have in stock” when time is tight. That can save lead time, but it can also change feel, abrasion resistance, color tone, and logo performance. The right approach is not “any stock material,” but a controlled substitution protocol.
Step 1 — Lock the “material system,” not just the outer fabric
A bag’s performance is a system decision:
outer fabric (denier, weave, coating)
lining spec
padding/foam thickness and density
webbing and thread
zipper model and chain
hardware type and finish
Why: substituting one item may require matching changes elsewhere (thread tension, needle size, seam allowance behavior).
Step 2 — Define substitute boundaries
Create a simple boundary list in your RFQ:
- color boundary: “within same color family,” or “closest Pantone within tolerance”
- performance boundary: minimum abrasion grade / water resistance expectation
- hand-feel boundary: matte vs glossy, stiff vs soft
- logo boundary: the same logo method must still pass adhesion or stitch stability
Step 3 — Require proof before bulk, but keep it fast
You don’t need a long audit. You need evidence tied to risk:
- swatch photo under neutral light
- close-up of coating/texture
- zipper and hardware photo (finish consistency)
- if logo is affected, one “logo proof” photo or mini sample
- functional check: zipper smoothness, strap anchor pull test sample check
Step 4 — Decide substitution strategy by timeline
Use this decision table:
| Situation | Best substitution approach | Why |
|---|---|---|
| urgent ship date | keep structure & logo stable, substitute only outer fabric within boundary | prevents re-sampling |
| high-end brand | avoid core material substitutions; substitute only minor trims | protects brand consistency |
| multi-SKU order | substitute at system level across all SKUs, not random | prevents mismatch and returns |
| reorder program | Lock substitute as “approved alternate BOM.” | ensures repeatability |
After an approved change, what QC proof should we request that is actually useful (and doesn’t slow production)?
Request targeted, change-linked QC proof—first-piece approval photos, batch signage, packaging proof gates, and a short checkpoint report—because generic “QC is strict” statements don’t prevent errors after adjustments.
When changes happen, the failure mode is usually “old version execution.” The best QC proof is evidence that the new version is active and that the highest-risk points were checked. Here’s the practical proof set buyers should ask for.
Proof Set A — Change activation proof
- a photo of the updated work instruction header (version/date)
- confirmation that old files were removed from the active folder
- name of the owner who activated the change (production/QC/packing)
Proof Set B — First-piece proof
For each affected SKU:
- close-up photo of logo placement and method
- key dimension check photo (tape measure on critical dimension)
- zipper function short video if zipper spec is impacted
- strap anchor close-up if reinforcement is impacted
Proof Set C — Packing proof gates
- file proof approval screenshot or signed PDF name
- photo proof of label placement on carton/bag
- scan proof of barcode with scan result visible
Proof Set D — Batch anti-mix proof
- photo of batch signage and separated bins
- first-carton proof per destination
- carton count reconciliation sheet (simple is fine)
Can we shorten lead time without changing the bag appearance (no redesign), especially after an adjustment?
Yes—lead time can often be shortened without changing appearance by changing the execution plan: using stock-first materials, freezing a core SKU, applying partial shipment, and simplifying packing/label rules—but you must accept a controlled trade-off ladder (what can move vs what must stay fixed).
Procurement teams often assume “faster lead time” requires a cheaper bag or a redesign. In reality, many accelerations are operational, not visual. After an adjustment, your best acceleration comes from removing friction in three areas: materials readiness, production scheduling, and packing proof gates.
(1) Materials: switch to stock-first while preserving look
You can preserve appearance while accelerating supply by:
keeping the same fabric look (same texture/color family) but using a stock fabric with equivalent performance
keeping the same zipper style but using a standard chain color and puller option
freezing hardware finish (avoid new plating queue)
Customer move: request “two options” for every critical material: Primary BOM + Approved Alternate BOM. That gives you a Plan B for rush situations without re-negotiation.
(2) Production: protect output by freezing a core SKU
If you have multiple SKUs, freeze a core SKU set that can run immediately. Treat the changing SKUs as a second batch. This strategy protects your launch, prevents the whole order from waiting on one adjustment, and makes planning simpler.
(3) Packing: reduce last-week delays with simplified rules
Packaging and identification errors are the most common last-week delay. You can shorten lead time by:
freezing carton size and units/carton (avoid re-cartoning)
keeping one carton mark template across destinations when possible
using a destination sticker to differentiate warehouses instead of rewriting carton marks
Important: do not skip proof gates—compress them. Use the three-proof system but enforce buyer SLA: approvals returned in 24–48 hours.
(4) Logistics: use partial shipment as a speed lever
If part of the order is ready and verified, ship it. Holding everything for one adjusted SKU is the fastest way to miss your window. Partial shipment is not a failure—it’s a schedule strategy.
How can we tell if a factory truly supports adjustments (not just saying “yes”)? What proof should we request before placing an order?
A factory truly supports adjustments if it can show a repeatable change-control system: a structured Change Request and Change Log, a standard Impact Reply format, anti-mix packing controls, and proof gates for packaging—plus real examples of how they handled changes without shipping mistakes.
“Support order adjustments” is an easy marketing line. Procurement needs proof that the factory has an internal system—not heroics. The best way to validate capability is to request three things before you place the PO:
(1) Ask for templates
Request these templates:
- Change Request (CR) form (before/after and stage and decision deadline)
- Impact Reply template (schedule/cost/risk and alternatives)
- Change Log table format (version tracking)
- Pack-out matrix template for multi-SKU/destination orders
A factory that can share these quickly usually has disciplined operations.
(2) Run a “stress test scenario.”
Give a realistic scenario:
“SKU mix may change by ±20% after sample approval.”
“We may add one new destination warehouse.”
“The packaging barcode may update once.”
Then ask: “Show us your plan: stop-lines, proof gates, and what would trigger partial shipment.”
The response tells you everything. Mature factories answer with a structured plan, not vague reassurance.
(3) Request evidence that protects the receiving accuracy
Receiving accuracy is where adjustment programs fail. Ask what they do to prevent:
wrong cartons
wrong labels
wrong SKU counts
A capable factory will describe batch separation, signage, first-carton sign-off, and reconciliation.
What are the most common adjustment failure cases, and how can we prevent them before they happen?
The most common failures are old-version execution, packing mis-mapping, and late file approvals; prevention is a combination of version locks, proof gates, and buyer-side decision speed (approval SLA).
Adjustment programs usually fail in predictable ways. Here are the top failure cases procurement should plan against:
Failure Case A — Old file still used
Why it happens: files live in multiple folders, and people forward attachments in chat.
Prevention: one active production folder + file names with versions + change activation sign-off.
Failure Case B — SKU mix changed, but the pack-out matrix wasn’t updated
Why it happens: ratio change is communicated verbally.
Prevention: update the pack-out matrix first, then production/packing starts. Require first-carton sign-off.
Failure Case C — Barcode or label placement issues discovered at receiving
Why it happens: no scan proof and no photo proof.
Prevention: proof gates: file proof → photo proof → scan proof.
Failure Case D — Buyer internal approvals delayed
Why it happens: buyer teams treat approvals as “when we have time.”
Prevention: set a buyer SLA: approvals within 24–48 hours, or the ship window becomes unrealistic.
Failure Case E — Change causes hidden rework
Why it happens: changes occur after the packing staging started.
Prevention: isolate the changed batch, keep the clean batch shipping.
If we expect frequent changes (rolling forecasts), how should we structure a long-term program so reorders stay consistent?
For rolling forecasts, the best structure is a program-level BOM lock and version control, with an approved alternate BOM, a stable pack-out system, and a defined “what can change” policy—so reorders remain consistent even when quantities and destinations change.
Frequent changes do not have to mean chaos. The key is to separate:
- what is stable across the program (product standard)
- what can flex per order (quantities, destinations, packaging text)
Program rules that keep reorders consistent
- BOM lock: define core materials and processes that cannot change without formal re-approval
- Approved alternate BOM: pre-approved substitutes for rush situations
- Spec versioning: every PO references spec version (e.g., BagSpec v5)
- Pack-out standard: stable carton rules and mapping process
- Change policy: define safe change levels (L0–L5) and stop-lines
- Communication rhythm: weekly status updates and a change log
If we add quantity late (last-minute increase), can you keep the same unit price and ship window?
Last-minute increases can often ship on time if you accept either a staged or partial shipment or a confirmed capacity slot, but unit price may change when additional materials, overtime, or expedited components are needed—so the safest approach is to approve a two-step plan (base batch ships first, added batch follows).
Late quantity increases are common when sales outperforms forecast. The risk is not only “more units”; it’s that your factory may already have allocated capacity and materials for the original PO. A good supplier will handle this with a structured plan, not a guess.
What determines if a late increase is feasible?
- Current stage: materials ordered? Cutting started? packing started?
- Material availability: Can outer/lining/webbing/zipper/hardware be sourced fast?
- Capacity availability: Can the line add shifts or re-sequence batches?
- Packaging readiness: Are labels/cartons already printed to the original quantity?
Procurement-friendly decision ladder
- Option A (Best for ship date): keep original batch unchanged, ship it first; add extra quantity as Batch 2 with a new packing list and booking.
- Option B (Best for simplicity): delay everything and ship once (riskier for launch).
- Option C (Best for price control): increase only if materials are still uncommitted; otherwise, accept price deltas.
What you should request from the factory
- a short impact reply (days/cost/risk) for the added quantity
- a batch plan with carton counts and ship mode
- confirmation whether added units can use the same BOM or need substitutes
- if price changes, a line-item change quote (materials/process/packaging/logistics)
Everything You Need to Know Before Customizing Your Bags
When a customer asks whether a bag factory “supports order adjustments,” they rarely mean “will you say yes.” They mean: will the supplier keep lead time, quality, and packing accuracy stable when the real world changes—SKU ratios, destinations, artwork files, packaging rules, and forecast shifts. This FAQ guide is written for procurement decision-making. Each answer starts with a clear summary for easy AI extraction, then gives the practical rules, documents, and proof points you should request. Use it to screen suppliers fast and reduce expensive last-week rework.
